
Decorate Your Mailbox for the Fourth of July!
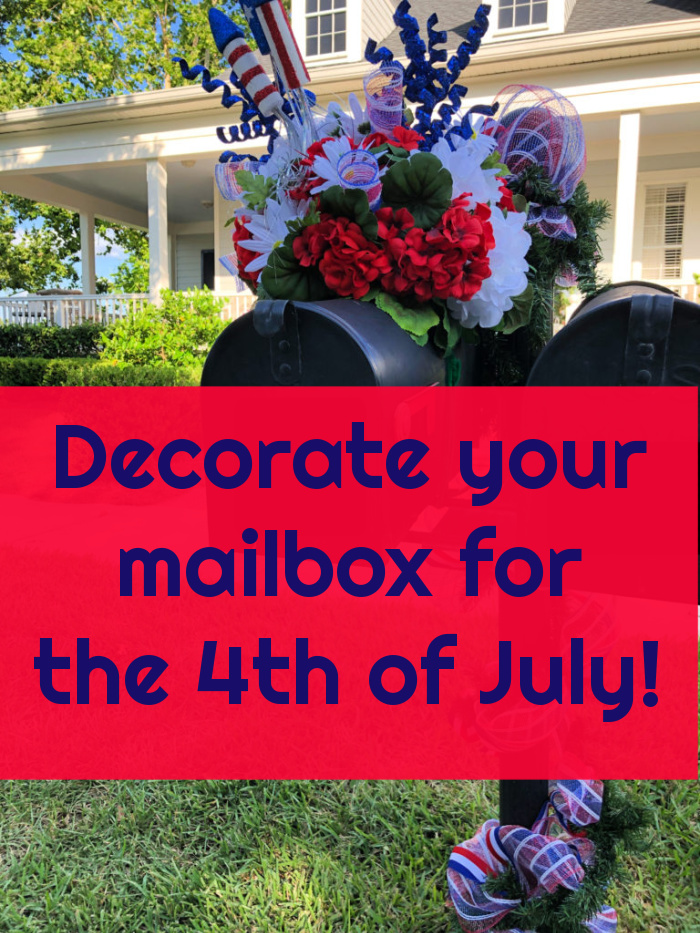
The world has opened up and I am ready to host family and friends, how about you? This coming Fourth of July is the perfect time to gather together. I want my guests to know the fun is beginning as they arrive, so that begins with a mailbox decorated for the festivities!
This post contains some affiliate links for your convenience. Click here to read my full disclosure policy.

The first thing to do is get a length of cheap Christmas evergreen garland. You will want the kind of garland that has wire as the base for each of the little branches. If you don’t have this in your Christmas stuff, I know Hobby Lobby already has their Christmas items out.
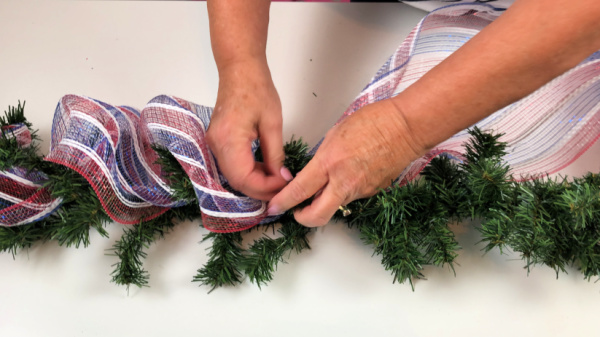
Take a section of 10″ wide red, white and blue deco mesh and starting at one end, gather it in loose loops and secure it in that way with the wired branches of the garland.
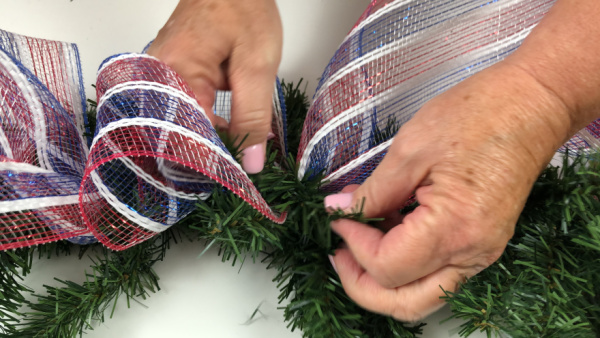
In this close up you can see how I am twisting two of the little branches tightly around the deco mesh. Don’t tie them in a knot or you will not be able to undo it and use the garland for something different later.
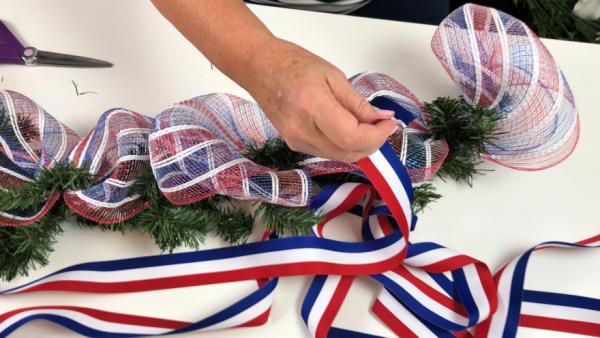
The next step is to add some patriotic ribbon. You can add this in the same way, looping it over the deco mesh and securing it in the same manner with the little wire branches.
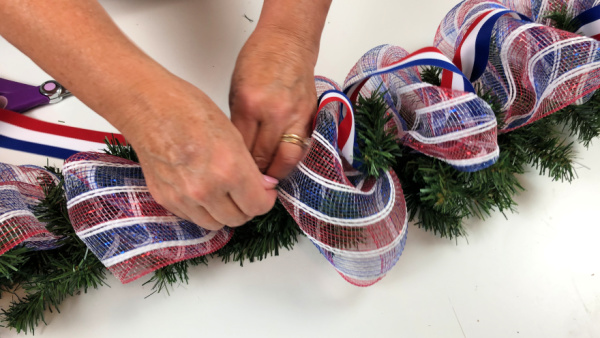
Continue adding the ribbon down the length of the garland. Set this garland aside for the time being.
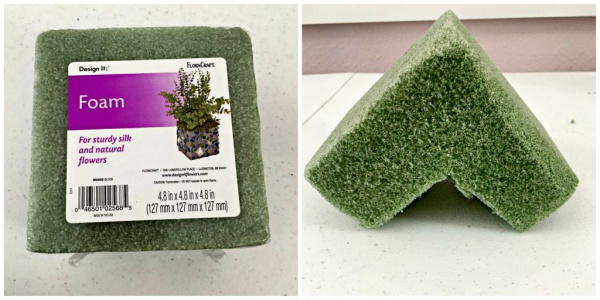
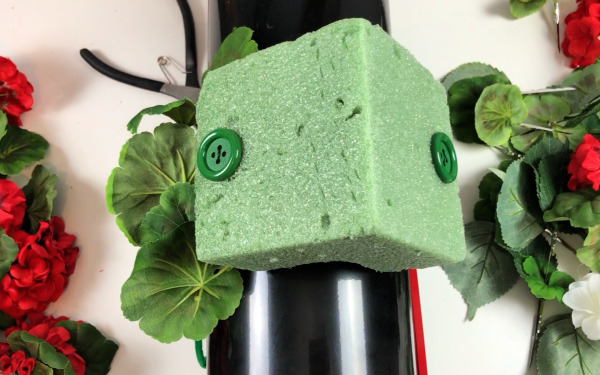
The next step will be to craft the piece for the top of the mailbox. Using a cube of styrofoam cut 1/4 of it out as shown in the above photo.
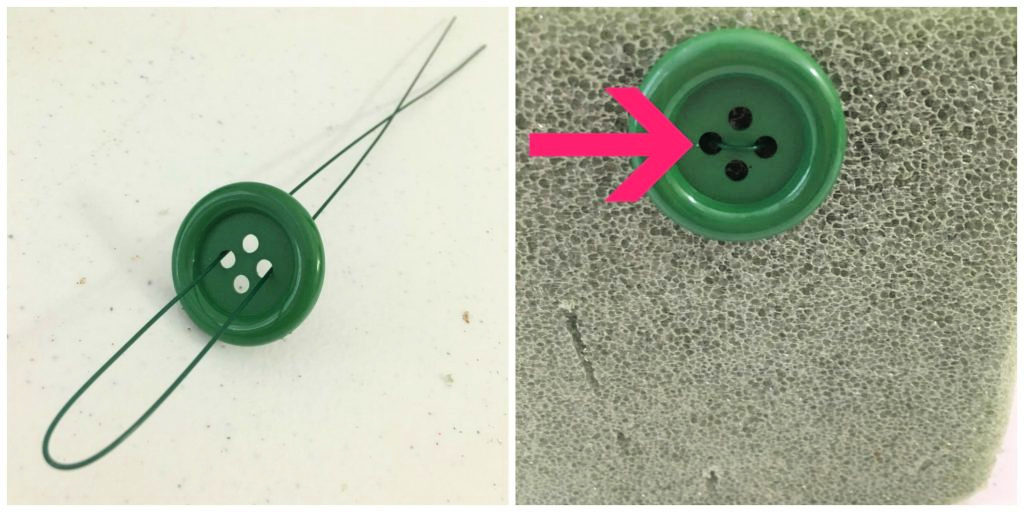
The next step is to be able to secure your decoration to the top of your mailbox. Using 4 buttons and a wire, thread the wire through a button. Pull the wire down through the foam and secure it on the inside of the “V” with the second button.
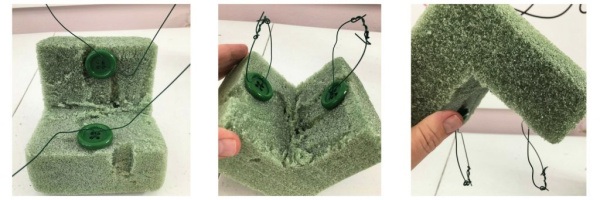
This shows where on the piece of foam you are going to use. The ends of the wire will be twisted into a circle or loop so that you will have some way to attach this to your mailbox.
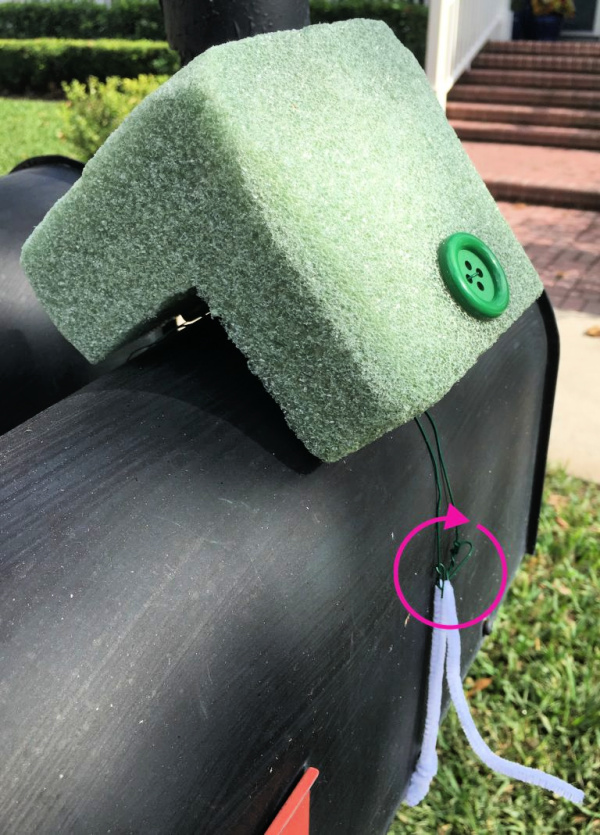
When you finish the arrangement on top of the foam, you will secure it to your mailbox like I show above. I used a white pipe cleaner so you could see it in this photo. You can use a wire that matches your mailbox color and also add ribbon to cover it if you would like later.
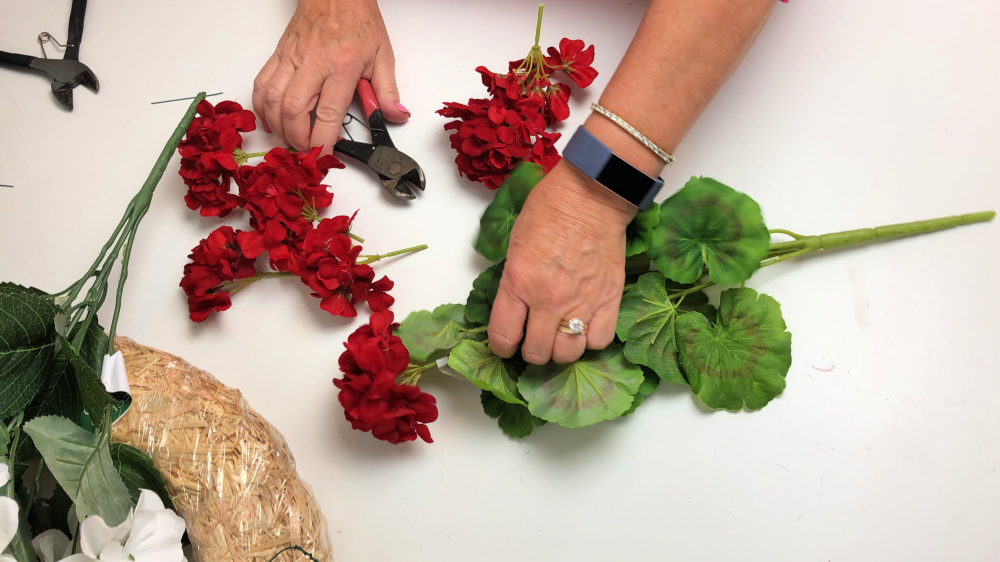
Begin the arrangement by cutting the blooms off of red and white bushes and some of the leaves.
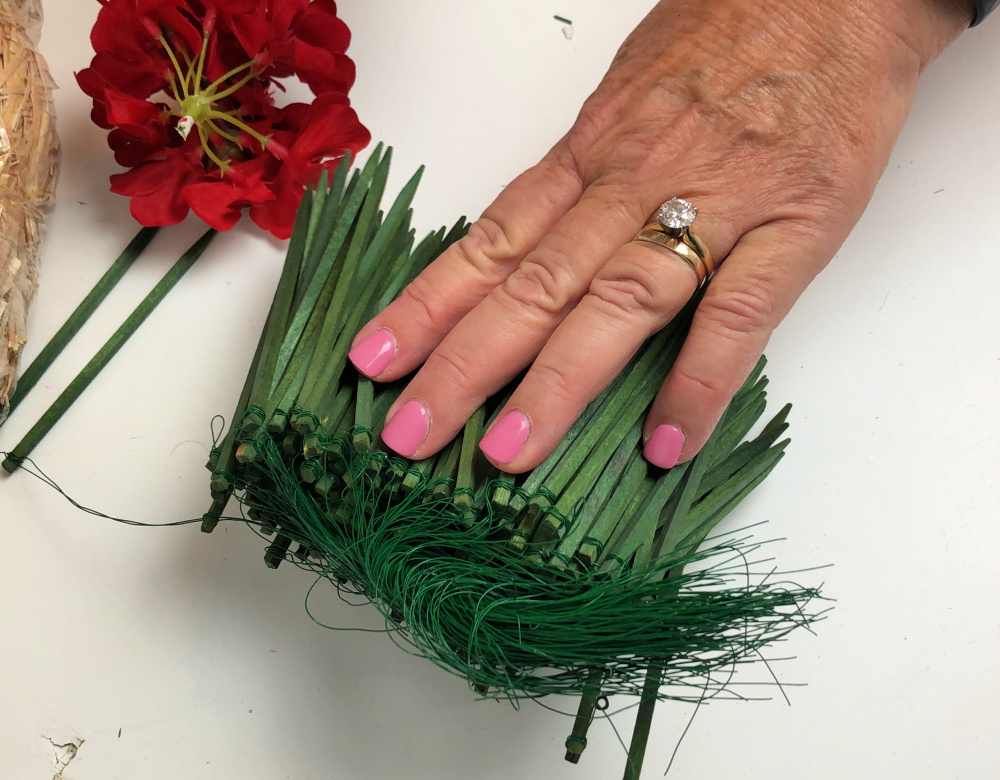
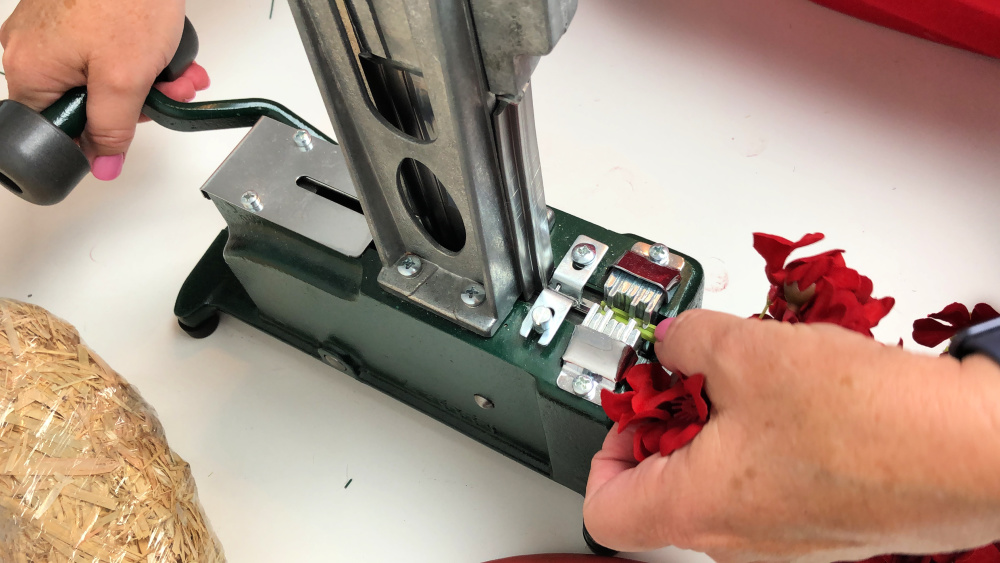
You will want to use either wood wired sticks or a steel pick machine to attach them to all of the blooms and leaves you will want to use. The steel picks or the wood sticks will help you stick the blooms into the styrofoam.
Here is my foam secured to my mailbox on my craft table. I began with geranium leaves, sticking them into the foam around the base of my foam.
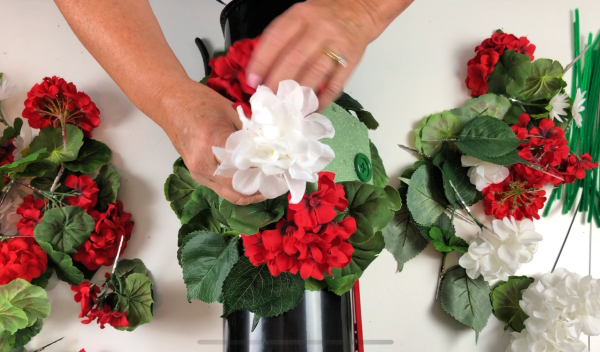
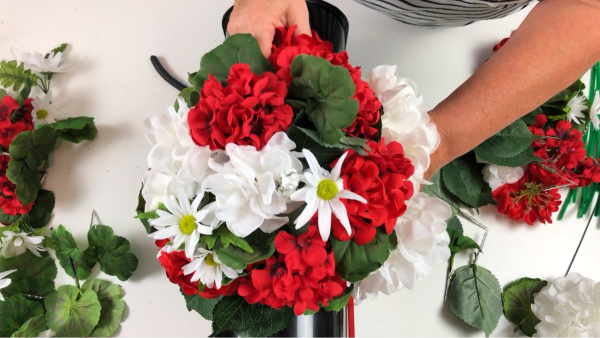
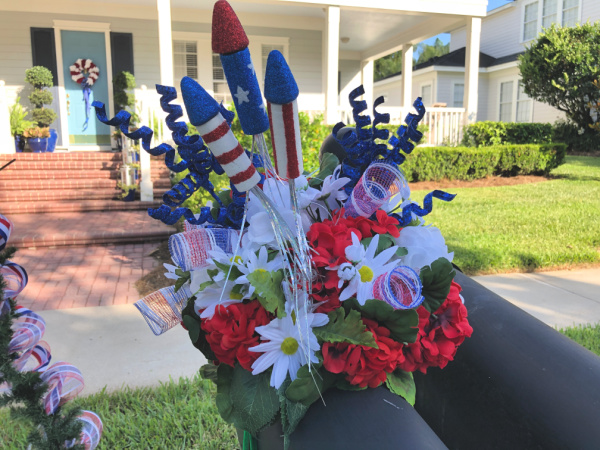
Using faux white hydrangeas, red geraniums, daisies and leaves to build up an arrangement in the foam.
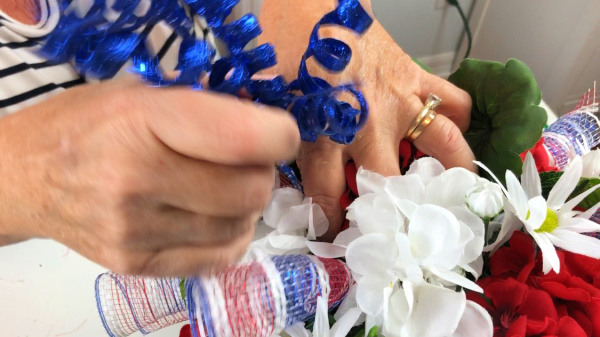
I added some blue sparkly picks, some little rolls of the deco mesh and a fun firecracker pick to finish up my arrangement.
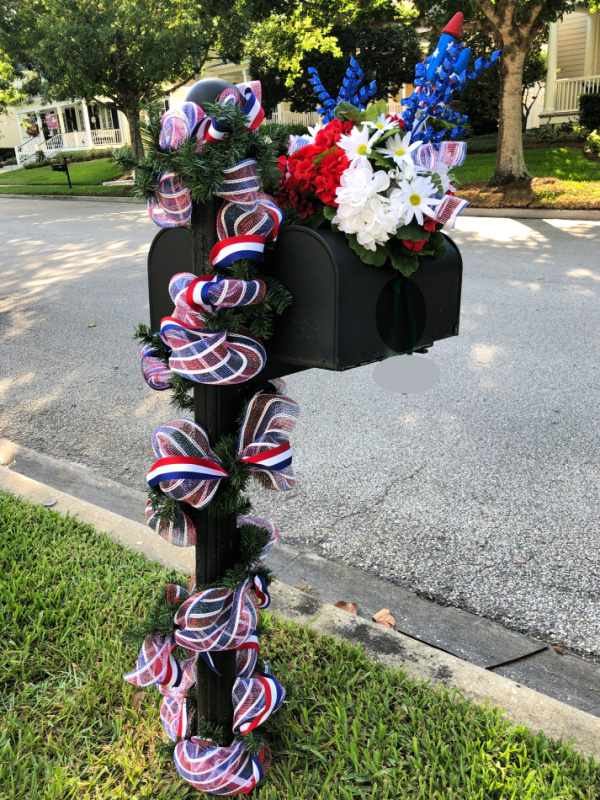
I wrapped the garland around the mailbox post wiring it to the bottom and to the top of the post.
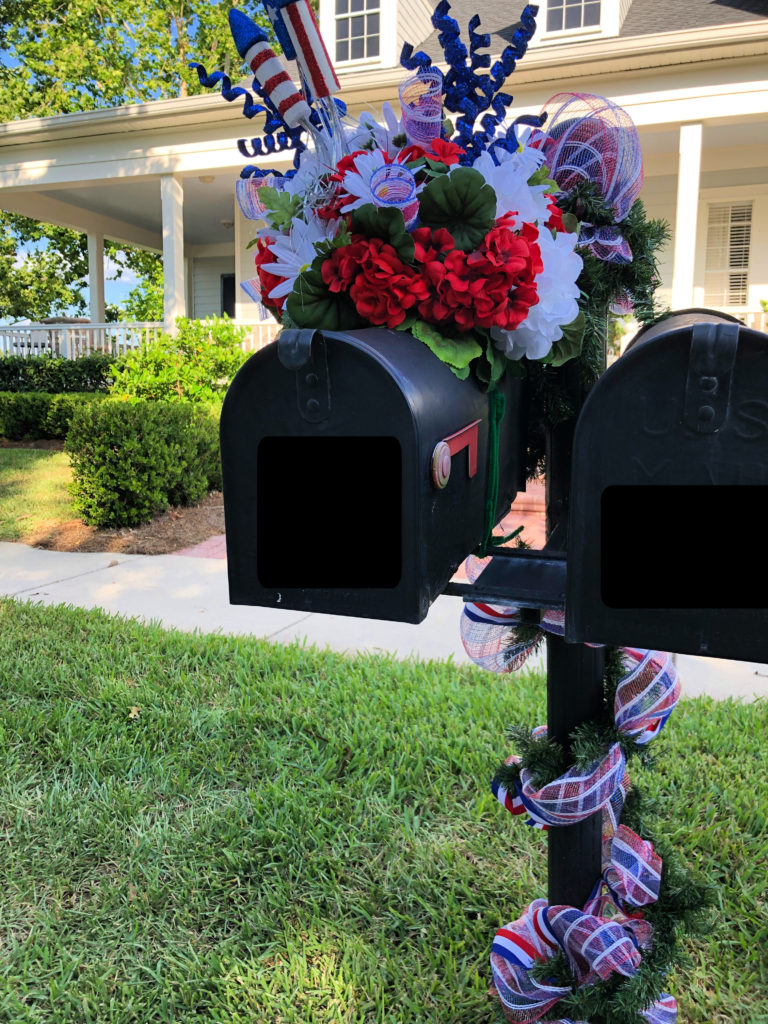
Here is the holiday arrangement secured to the top of the mailbox. You can decorate your mailbox to be the star of your street!

Your mailbox decoration is absolutely gorgeous! I love that! I normally do not put anything on the mailbox, but now, I just might!! So pretty Chloe! Love and hugs!
Thanks so much Benita! You know us creatives…always creating something!! HUGS!!
Omg this is what I’m looking for mail box design Thank you so much This will make my neighbors just a little jealous
Thank you so much Cindy!! I am so glad this is what you needed! I really appreciate you taking the time to let me know! I love hearing from my readers!
I would not want to be your neighbor that shared the mailbox post LOL I bet they’re so jealous. I love your site and I love watching the things you make. Last fall I made the mailbox cover and it was amazing
It’s okay, the other mailbox is really mine too! It is just for my parent’s in our garage apartment! Thank you! I am so glad you made one, I like them for Fall and Christmas best, myself!
Wow that is spectacular! Love what you did with the top of the mailbox!
Looks really nice. You are very creative and patient.
And I bet it is the star of the street, Absolutely amazing, I usually decorate my mailbox for Christmas not for other occasions. Truly inspirational! Keep on decorating!
Chloe I love your mailbox decor. I have often thought of using your ideas on decorating the mailbox, but my mailbox matches my house with an orange tile “roof” over an off white stucco mailbox (looks like a house)…anyway, I always think Christmas red or the red white and blue would look a little “off” if you know what I mean. However I really admire yours…..and would love to do something like it but…….????
Hugs sweet friend.
Thanks Kari! Yes, that does pose a problem. I have a strict HOA, so I am somewhat limited, but I do get to get my mailbox all dressed up for the holidays! You could probably do the same for Fall, that is the one time of year when the colors of your mailbox would be just right! Hugs to you!!
That looks wonderful, I think I will do all seasons and most holidays as well. Thank you for sharing your project with us.
You are welcome! Thank you! I do mine for several holidays and seasons throughout the year myself!
Looks awesome and so festive. I would even love to leave this up all summer 🙂
Thanks Chas! I love decorating my mailbox!
So cute Chloe! l love the rockets and the curlies! Happy Summer!
Thanks so much Jenna! Have a happy 4th of July.
Chloe, first of all, I have never heard of a steel pick machine!! I love the idea of the green styrofoam and the buttons….never thought of that. I will need to try this..and using the green garland and the 10” ribbon is just brilliant. Truly, you are so creative!
So creative! I love the rockets, but the entire thing is great. You always give great instruction. And wow, that steel pick machine? Never heard of one! And HL has Christmas out already??? Oh Lort.
You have a decoration for everything Chloe! I absolutely love it. I don’t know how you come up with all of these great ideas.