

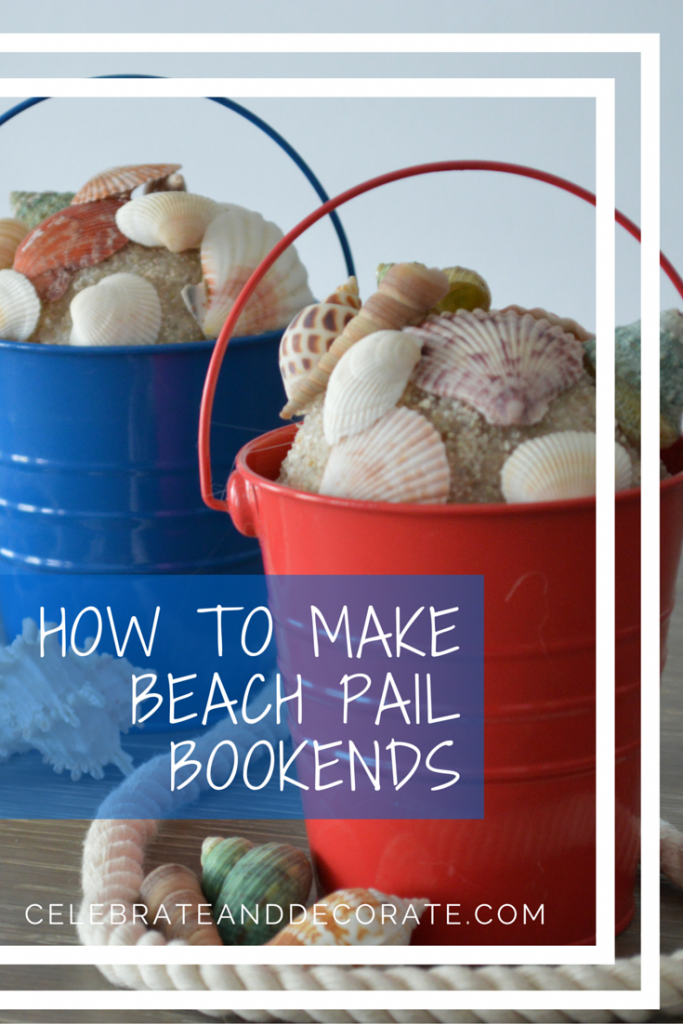
How To Make Beach Pail Bookends
I was so lucky when my daughter came back from being in Europe with the military I got to have she and my granddaughters stay with me for a marvelous nine weeks! I couldn’t wait, to have them stay with us. I really wanted everything to be perfect for their lengthy visit. Those sweet little girls needed to have a room that was welcoming and decorated to the nines.
This post contains some affiliate links for your convenience. Click here to read my full disclosure policy.
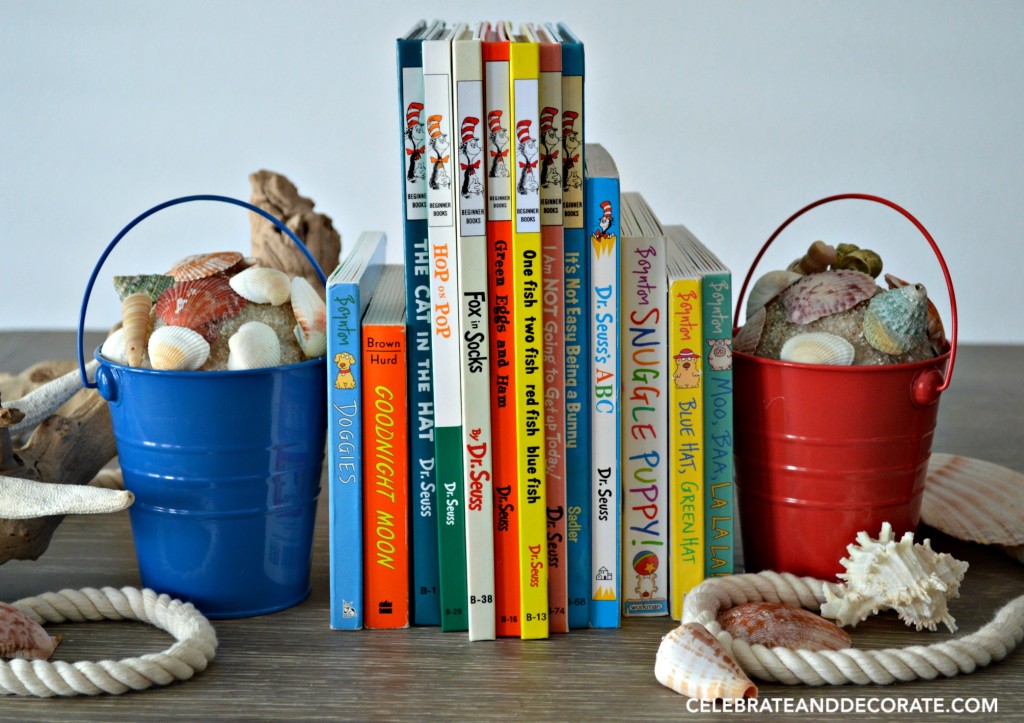
Our new home is a low country coastal style home and I wanted to keep some of that style carrying through on the interior. Of course I didn’t want it to look like a seafood restaurant! One of the things I love about decorating children’s rooms is that they can be a little more themed and a little more fun. I found this great bookshelf online and wanted to add a little library for bedtime stories for the girls. Bookends were needed!
I love these adorable little pails that looks like they were just carried home from the beach, full of sand and seashells. The best part is that I only had to spend $5 to make both of them. Truth be told, I did have the sand and the shells, but it probably wouldn’t cost too much more than that if you needed to buy those items. If you are headed to the beach this summer, this is a great craft to do with those shells you bring home!
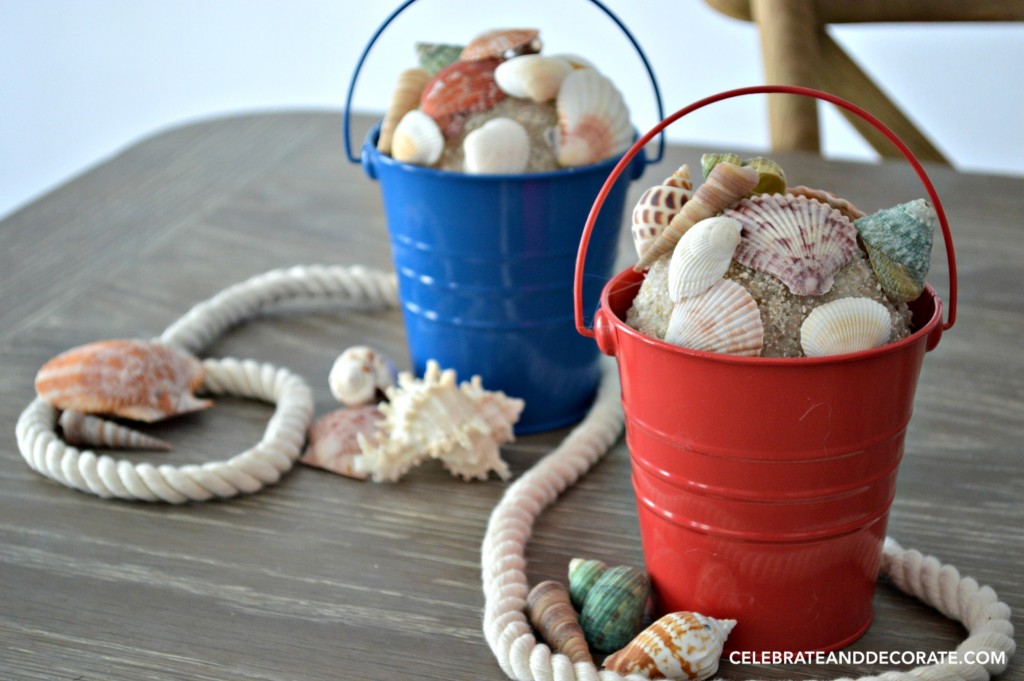
You can see a little more detail in the photo above. Not to worry, that sand and those shells aren’t going anywhere, even if they get knocked over. So, how did I do it?
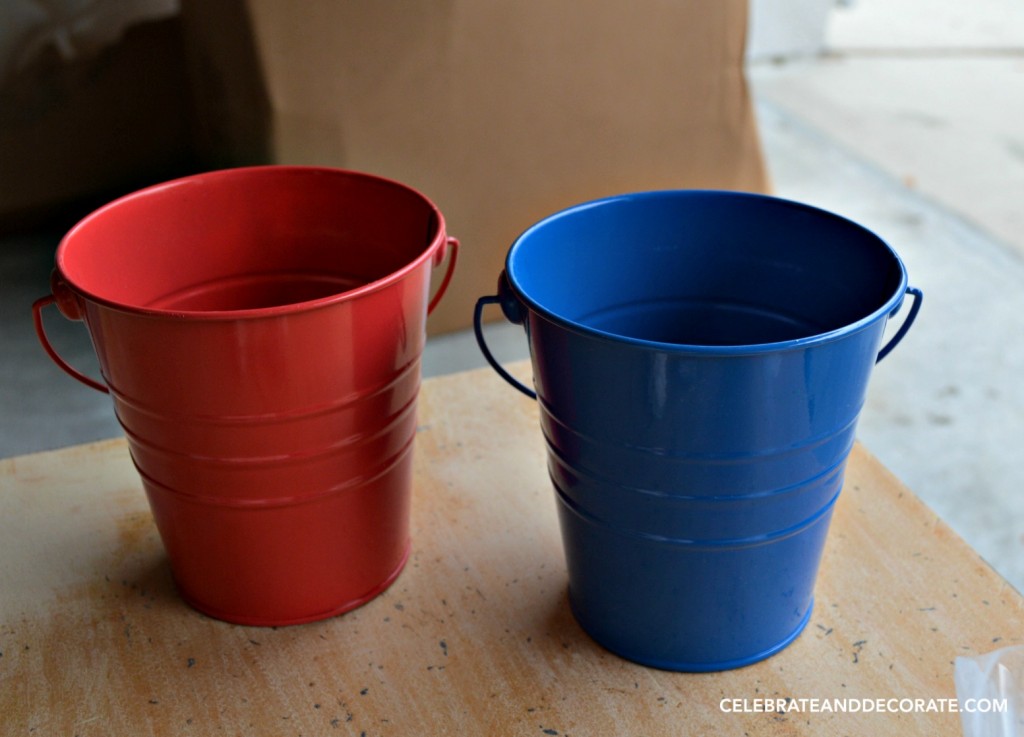
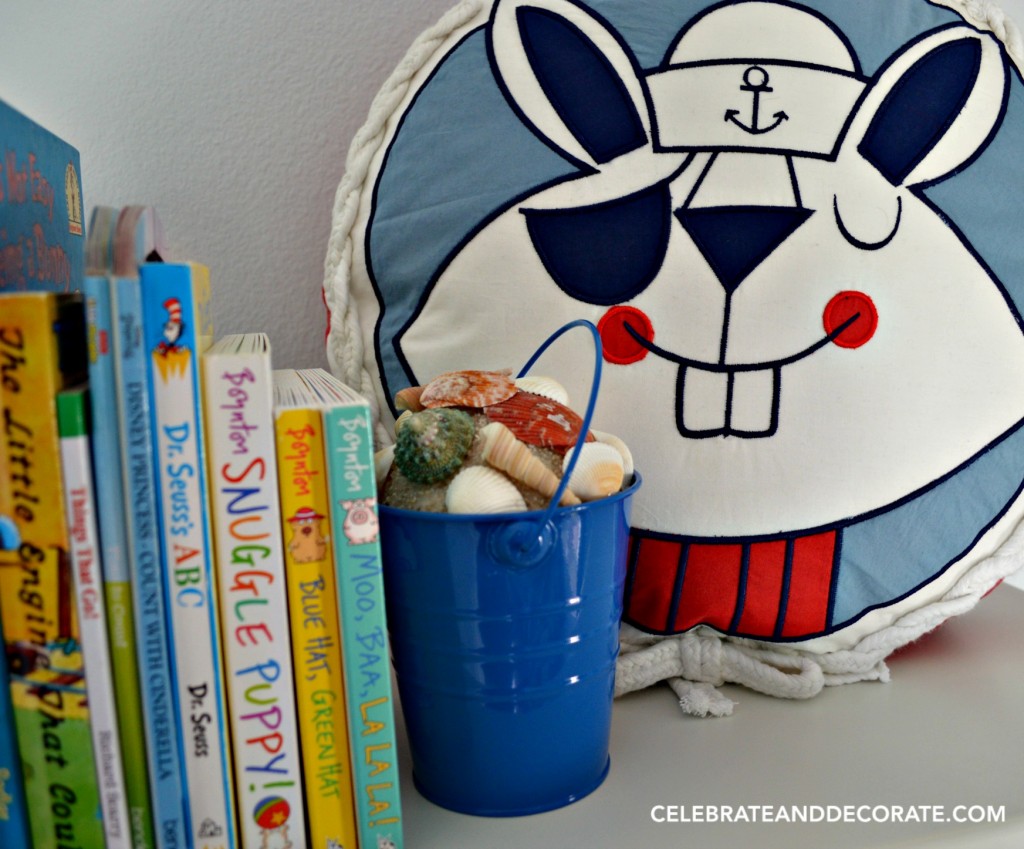
I began with a pair of those cute little pails that you can almost always find in the dollar spot at Target or your local Dollar Tree. I am decorating the nursery with a nautical theme, so red and blue were perfect.
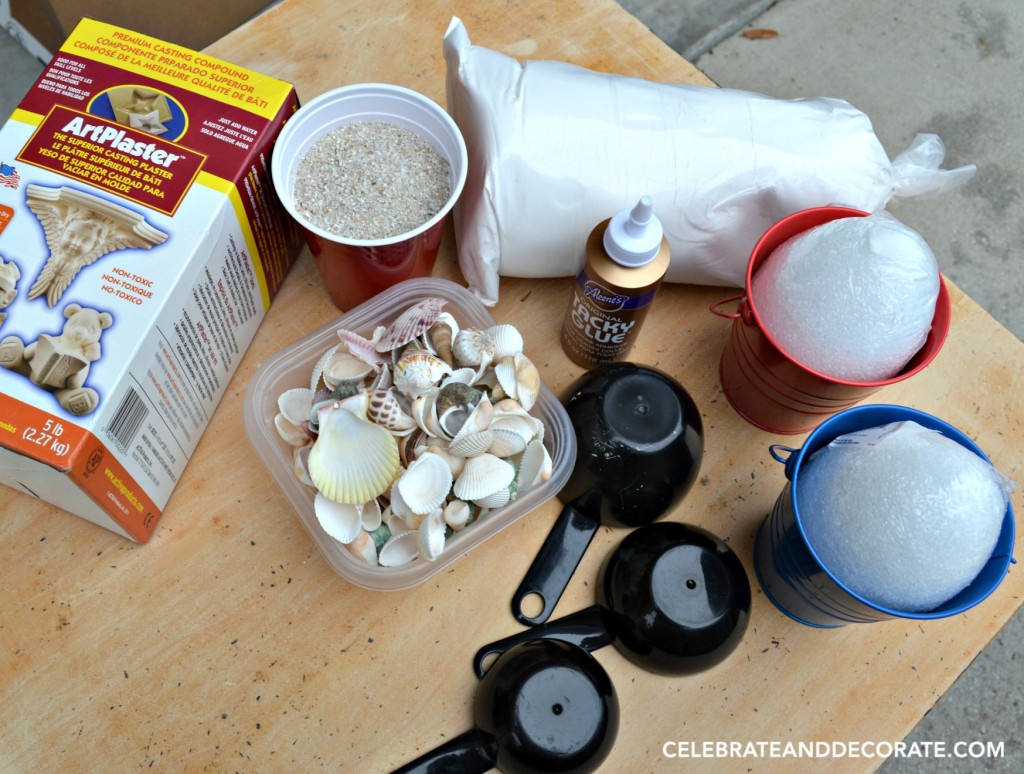
Materials List:
Two small pails
Art Plaster
Styrofoam Eggs (balls could be used)
Craft Glue
Sand
Seashells
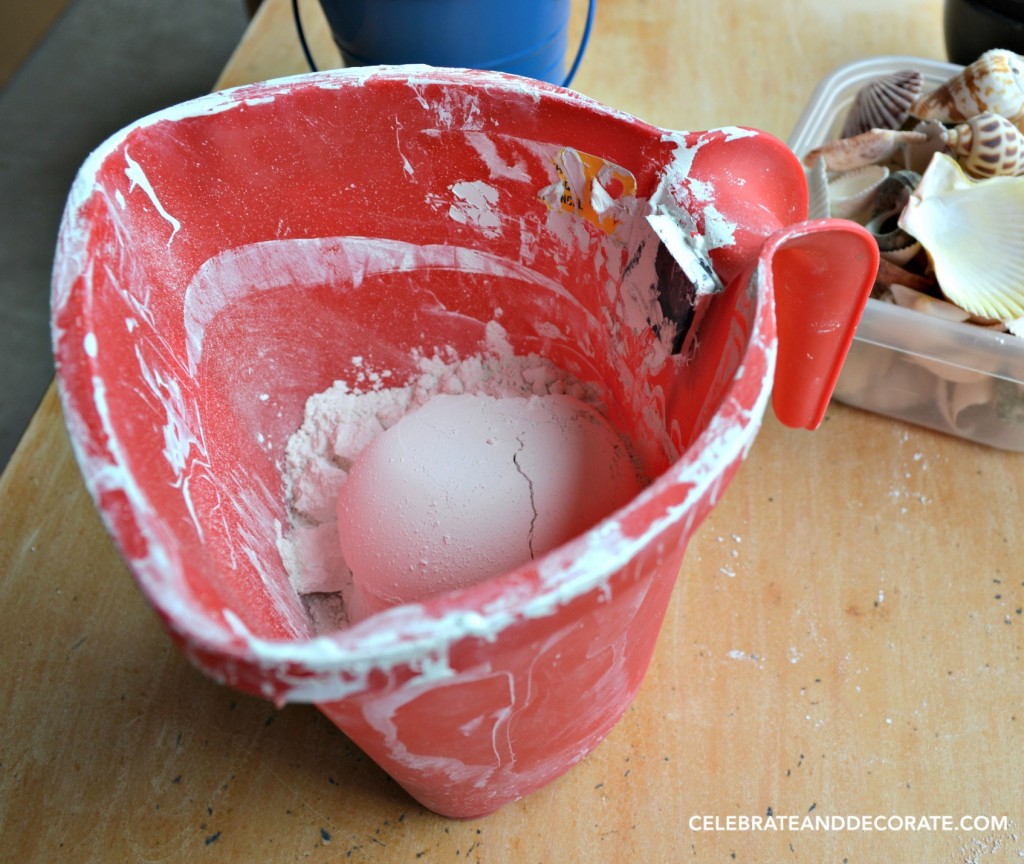
I mixed up the Art Plaster per the instructions on the box. I didn’t use more than 1/4 to 1/3 of the box. It is a great product that you can also shape and use with molds should you choose.
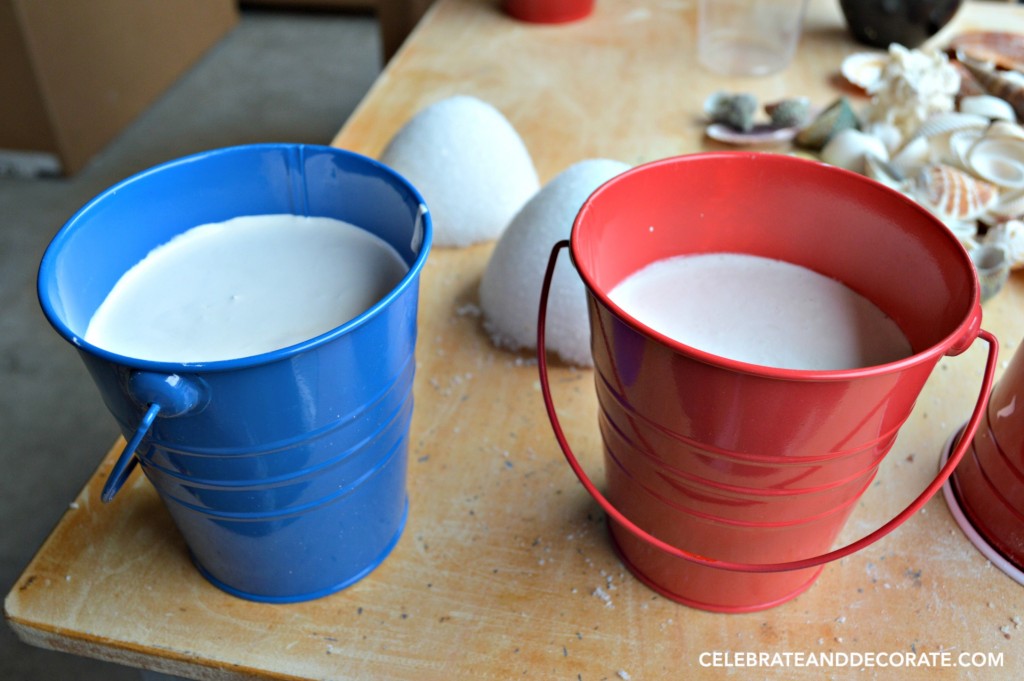
I filled each pail about 2/3 full with the plaster. For the product I used, it was 2 cups of dry plaster to 1 cup of water for each pail.
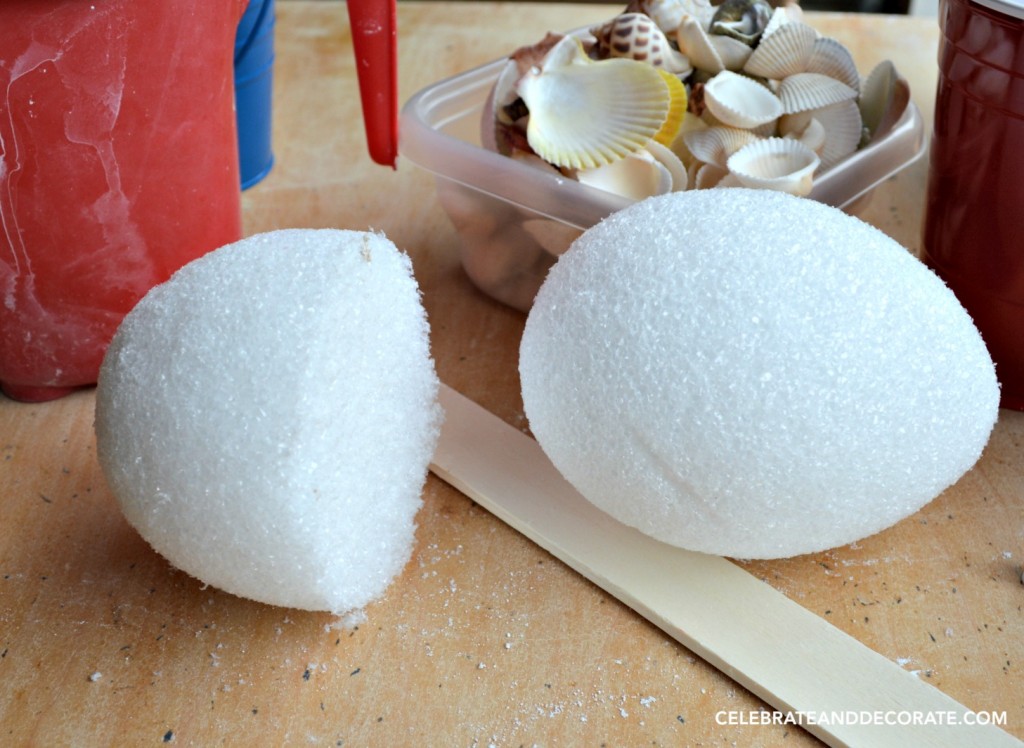
I took a pail to JoAnn’s with me and found that all of the styrofoam balls were too large or too small for what I wanted, so a pair of styrofoam eggs did the trick. I cut them in half and used the more rounded end to top each of my pails.

Each piece of styrofoam was coated with a thick layer of craft glue, and quite a bit got on my fingers, too.

I rolled the glue-coated styrofoam in the sand. My sand was a little gravel-like, which may have helped it to adhere better than really fine sand would. I didn’t coat the bottom (flat) side of the styrofoam as I want it to stick securely to the plaster.
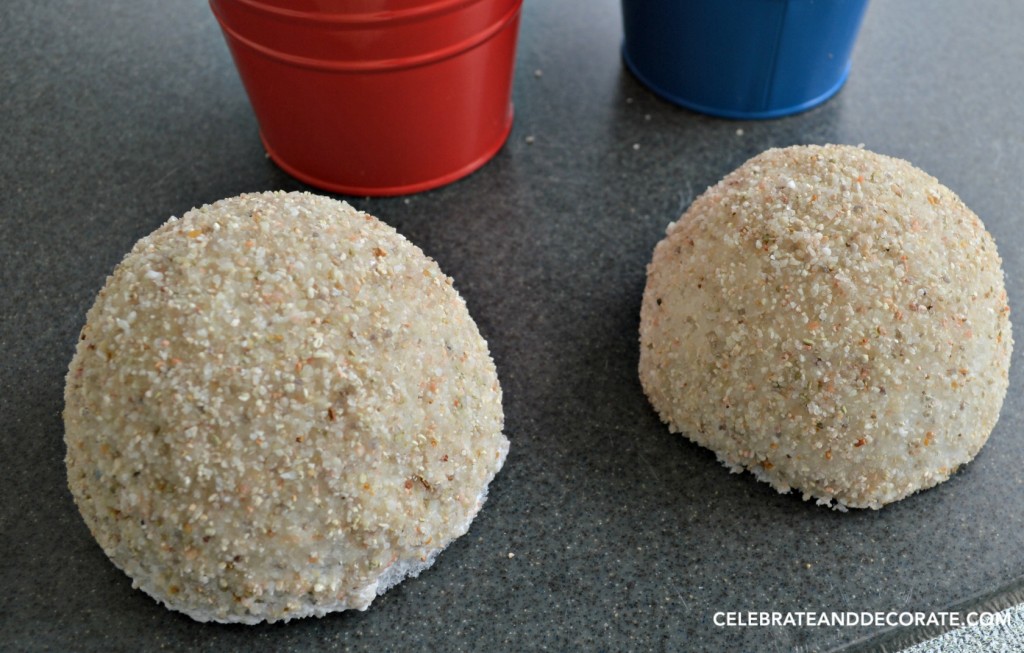
Here are my little sandy “snowballs”. They turned out perfect the first time!
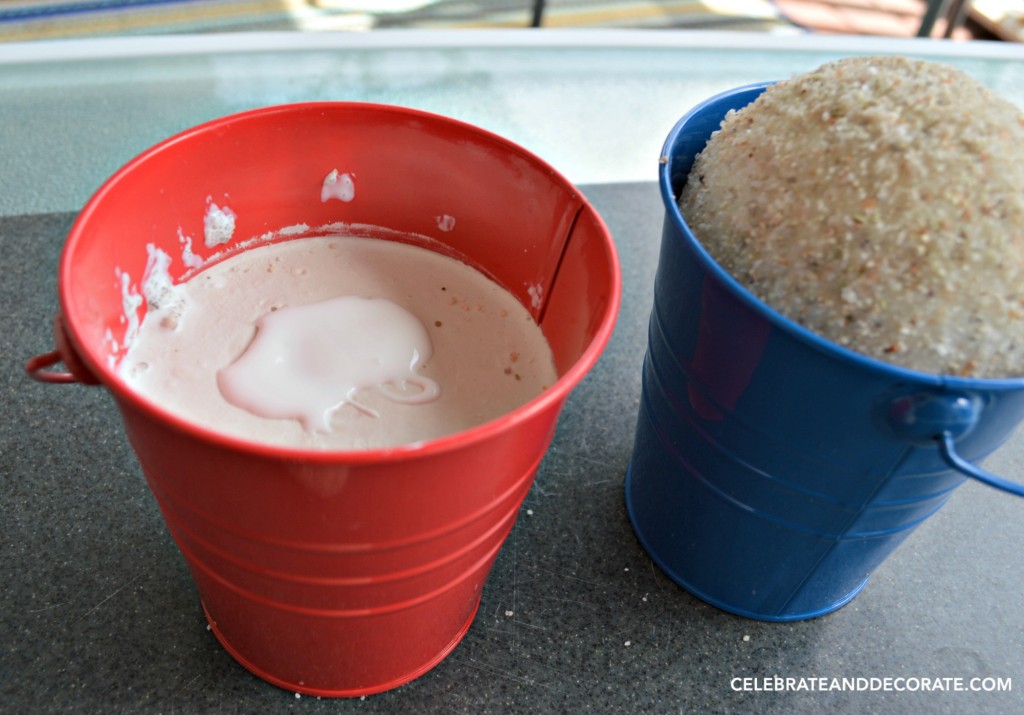
I added a generous amount of craft glue to the hardened plaster and set my sand firmly on top.
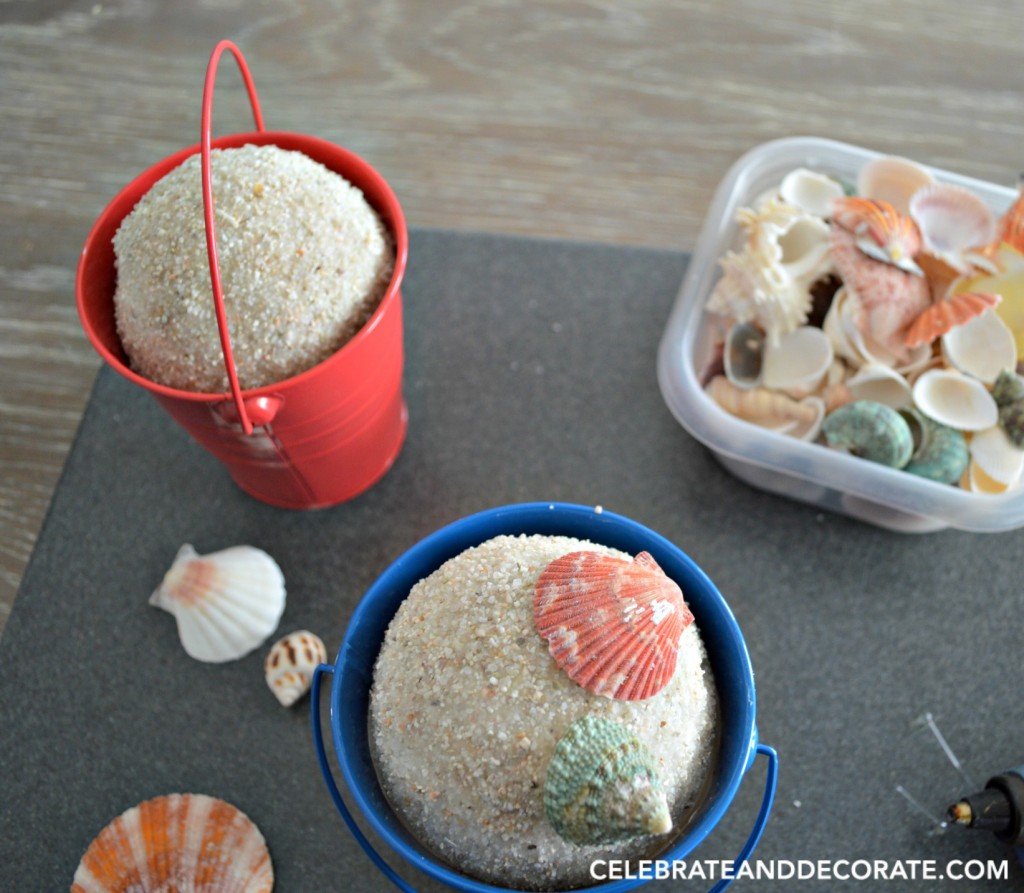
Now time for the fun part! I sorted through my shells and began to glue them with hot glue to the little sand “snowballs”.
I wanted the buckets to look like a pail of sand with some shells on it, so I didn’t put the shells so thick that you couldn’t still see the sand.
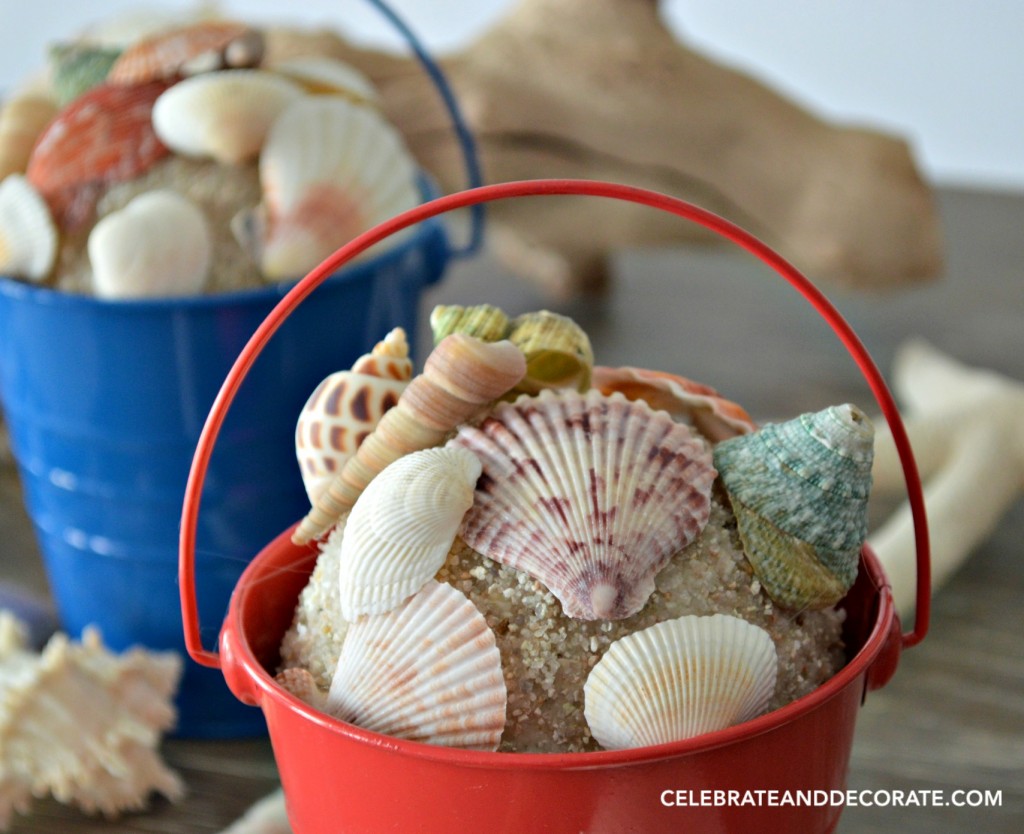
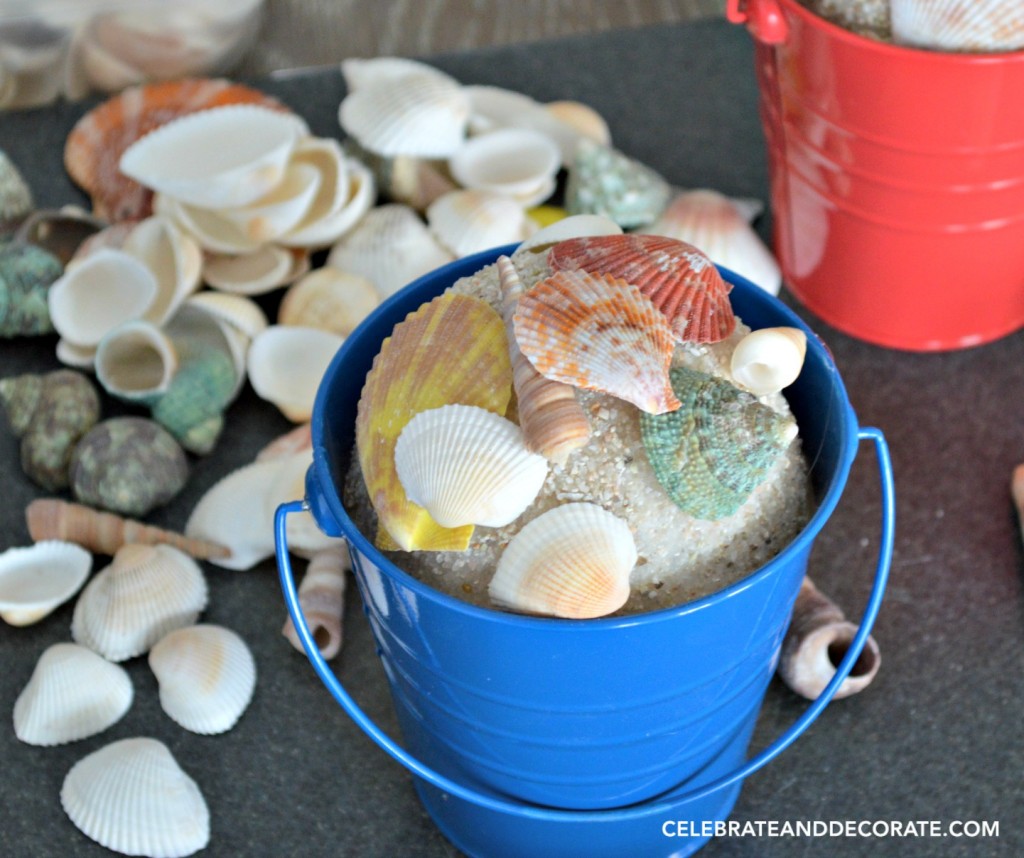
Here is a closeup showing the ratio of shells to sand a little better (along with some of the glue strings I hadn’t cleaned off yet).
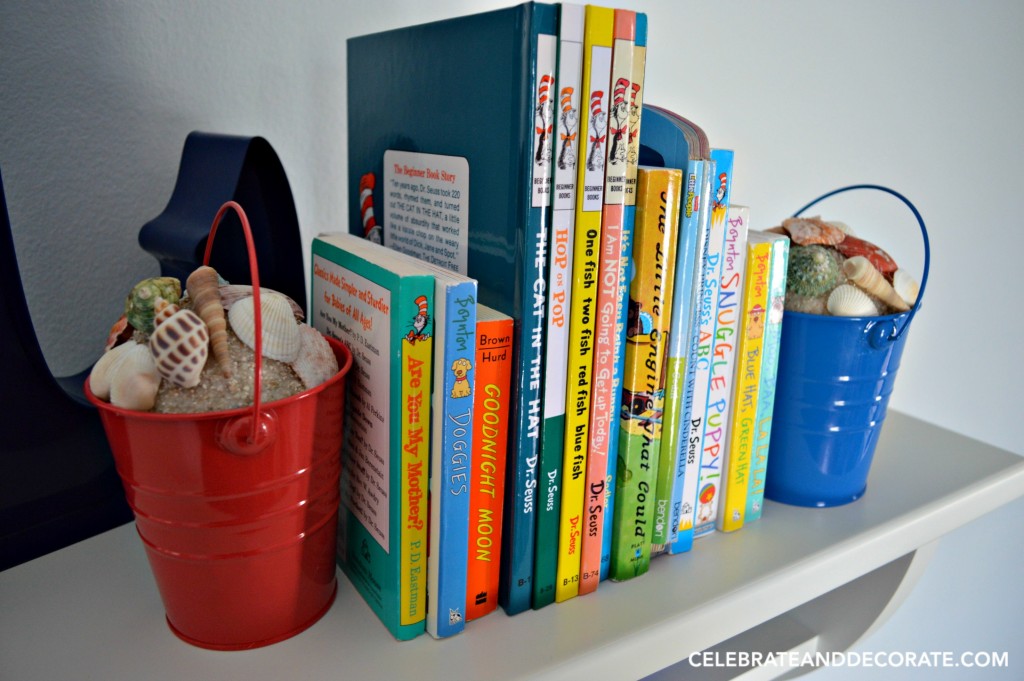
Here are the pails up on the shelf holding those books. These pails are heavy enough to hold these children’s books upright with no trouble.
I couldn’t be happier with how these turned out. The entire nursery came together exactly as I had imagined. Isn’t it great when a room in your mind becomes a room in real life? Times have changed, these little babies aren’t little babies any longer, but I will always be proud of how this sweet little nursery turned out. You can see the rest of the details at Decorating a Nautical Nursery.


I love these! What a fun idea. I’m sure your granddaughters will love them. I may have to copy your idea whenever I have a home on the beach 🙂 Great idea to glue the shells that way you don’t have to worry about your granddaughters playing in the sand and shells. I noticed you have some of the Sandra Boynton books. My kids loved her books!
Thank you Dawn! It took me several days to figure out what I would use for bookends, I am so happy with these. Oh, I even love Sandra Boynton books!
Adorbs!
Thanks Tim! I can’t wait to share the whole room with you. You can go a little over the top with a theme in a kid’s room, and this one was so much fun to put together!
This is so cute Chloe and I love the step by step photos. My wheels are turning now for all kinds of beach theme crafts. Thanks for sharing!
Thanks Sandra!
Love the nautical look! These can be re-used as centerpieces for a summer party!
I hadn’t thought of that, but I love that idea, Melanie! Great idea!
Love the look and that there’s no risk of sand dumping everywhere. Very clever, lady!
Thanks Danielle, you are right, no spills, but these are still up on a high shelf, out of reach!
how adorable Chloe, love these! You are going to be busy busy! I’m sorry I’ve missed your party lately, the new time is throwing me off, I’ll try to remember tonight!
Thanks for stopping by Jenna! I sent you a direct email about the party! I hope you join us again soon! You are right about the busy, busy part, those two little girls are very busy!
This is so clever and affordable that it could work for my 4H group! Thank you so much for sharing! – Jerusha (ThePositiveYear.com)
Oh, Jerusha, I never thought of what a great project this would be for 4H’ers or Girl Scouts! Great idea!
Oh, these are super cute! I’m not so great at crafty-type things, but I think I can handle this. 🙂
I’m not the best crafter either, but I am confident you can do this one!
What a totally fun idea!! Thanks for sharing on the Pleasures of the NW’s DIY party!
Thanks Helen!
Cute project, so clever to get the sand in the pail! Thanks for linking up to Waste Not Wednesday.
Thank you Toni!
Wow Chloe is beautiful I have a show box full shell I collect them I go beach lol I put some as a pic frame inside to bathroom and around candle hehe
What a fun idea Chloe, and so very summery! Thank you so much for sharing friend.
Such a cute idea Chloe, couldn’t be any cuter!!
Thanks so much Jenna!
This is the cutest idea, Chloe! I absolutely love it.
Thanks Kim! If you used some vintage pails, they would be just right for your neck of the woods!
These are so cute Chloe! Such a fun idea! I’m excited to share your post with my followers in my Sunday round up From My Neck of the Woods! Have fun at Haven! I’ll miss seeing you!!!
Thank you so much Kristin! I will have to come up with some “northwoods” themed bookends!