
How to Dress Up a Store Bought Wreath
How to Dress Up a Store Bought Wreath
Wreaths are on on sale, buy one now and turn it into a stunning decoration for your front door! 

Have you ever wanted to learn how to decorate a wreath in a custom way to fit with your home or your holiday decorations? I have been at my daughter’s home in Maryland for the past couple of months, so I haven’t had all of my regular supplies for crafting. Instead of making a wreath from scratch, I decided to dress up a store bought wreath. post contains some affiliate links for your convenience.
If you click on any of the links in this post, I may get a small commission that will in no way affect the price of anything you might purchase. Click here to read my full disclosure policy.
 I am so happy to be joining a group of amazing bloggers, all organized by Amber, from Follow the Yellow Brick Home. If you are joining me from White Arrows Home, welcome! Kristin is a dear friend who has the most amazing northwoods home, doesn’t she?
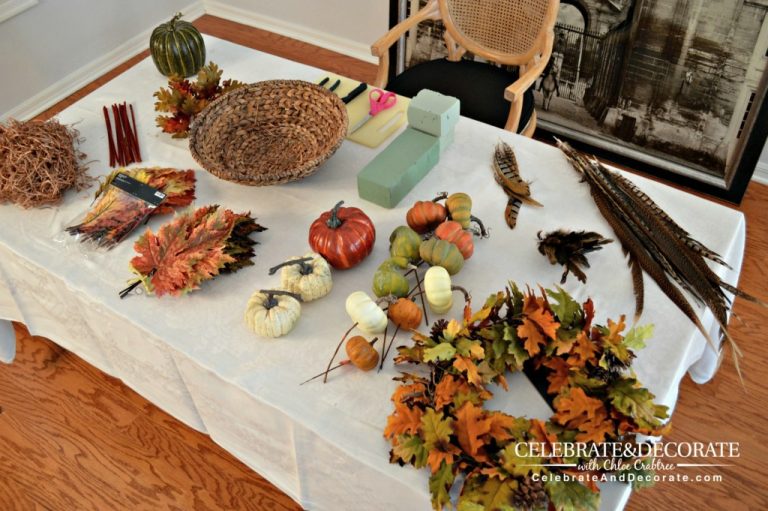
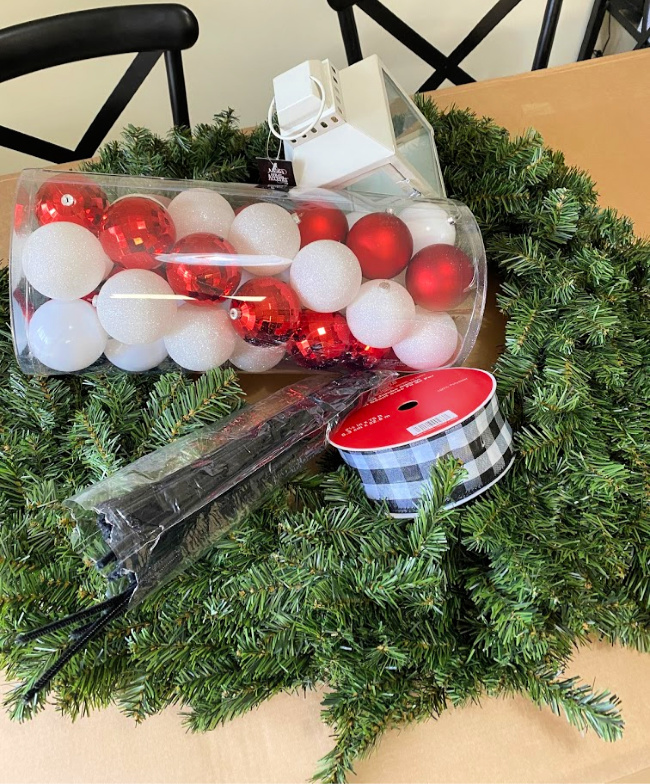 A few supplies, all picked up on sale will help change a simple wreath to one with a custom and luxury look for your holiday front door. Get ready to change up your Thanksgiving decor for Christmas with this inspiring idea.
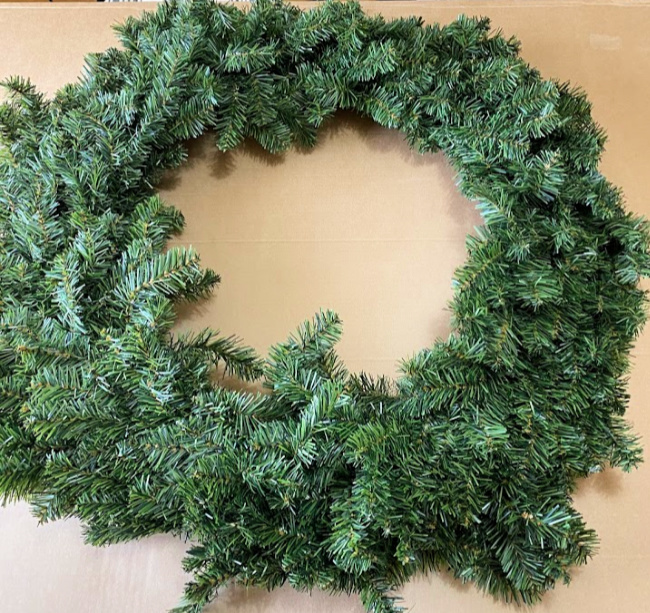
This is the time of year to snatch up one of these plain wreaths on sale! I picked this one up at A. C. Moore in Maryland, but any of the craft stores will have these for sale at great prices right now. It doesn’t matter what size wreath you buy. You might buy one with lights or some decoration already on it. For my purposes I wanted a plain wreath. This one was 75% off! 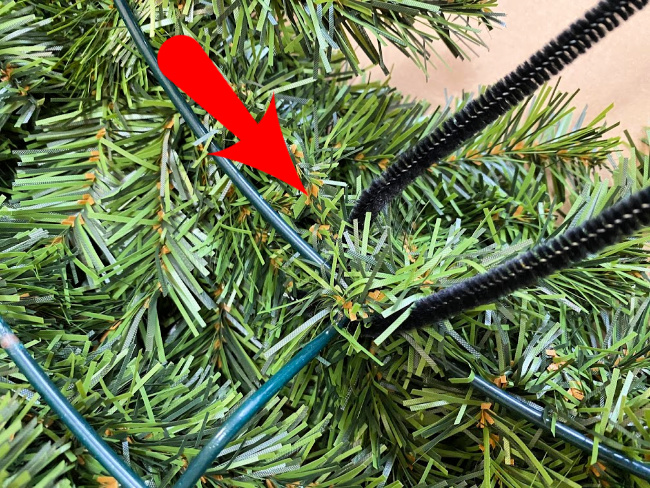 Using a pipe cleaner, I threaded it around the frame of the wreath as you can see on the backside here.
 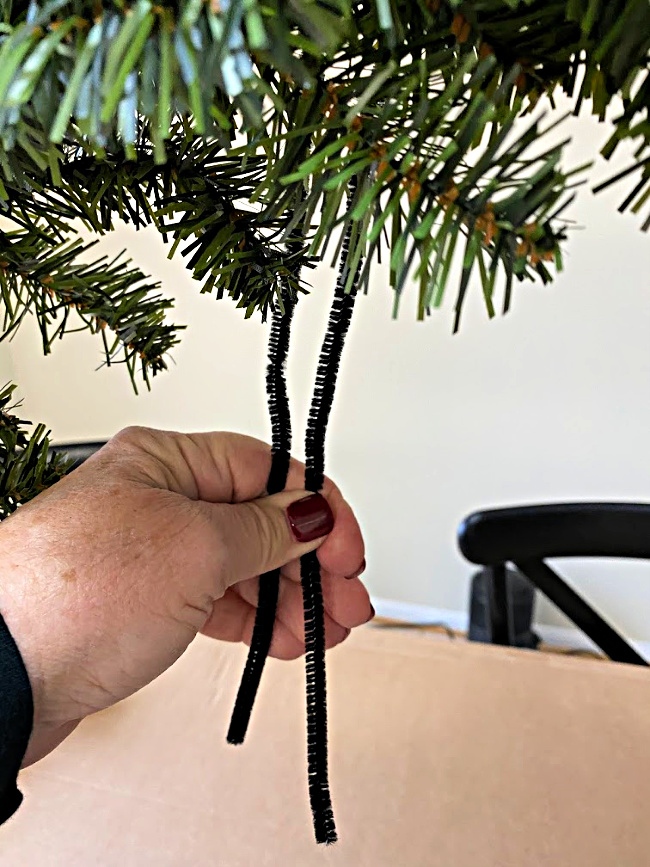 Pull the pipe cleaners down into the middle of the wreath. At this point you could attach anything to hang in the middle of your wreath. Think about a cute Christmas sign, oversized jingle bells or a special oversized ornament.
 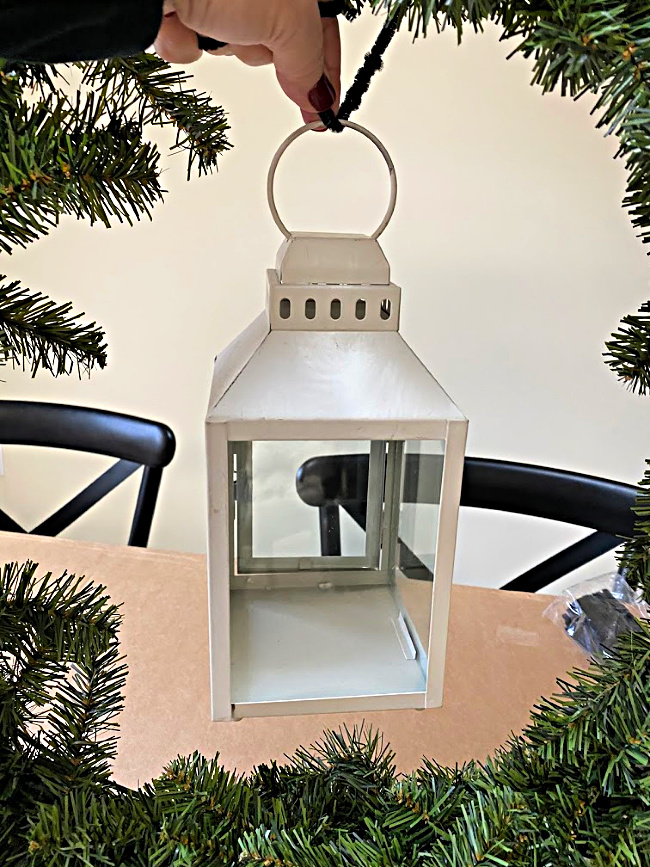 I spotted these little lanterns on sale for $2.99 and decided I would hang this in the center of my wreath. It will get a faux candle tucked inside later.
 Simply lay the wreath down on a flat surface to complete dressing up your wreath.
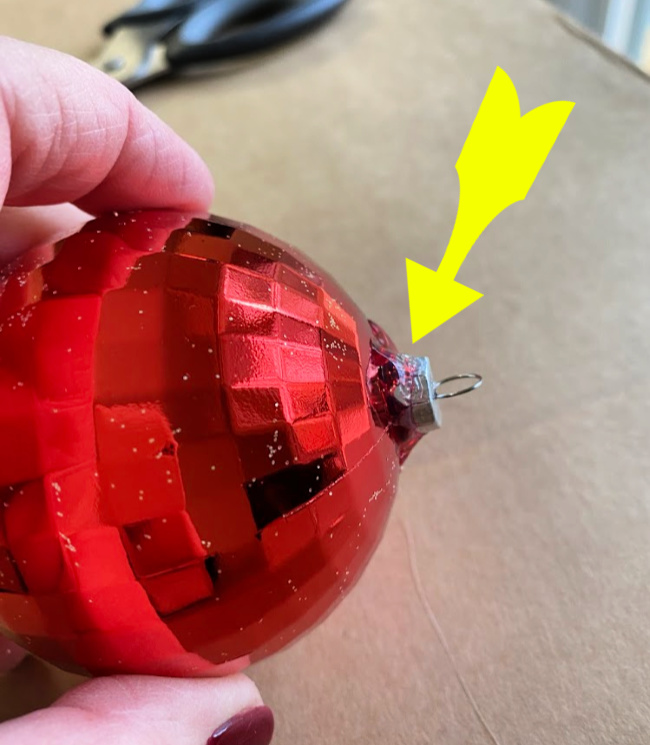 You might think it is easy to skip this step, but save yourself the aggravation and take the time to do this! You may add shatterproof ornaments to your wreath. Apply hot glue to the top so it will not pop off when attaching it to the wreath.
 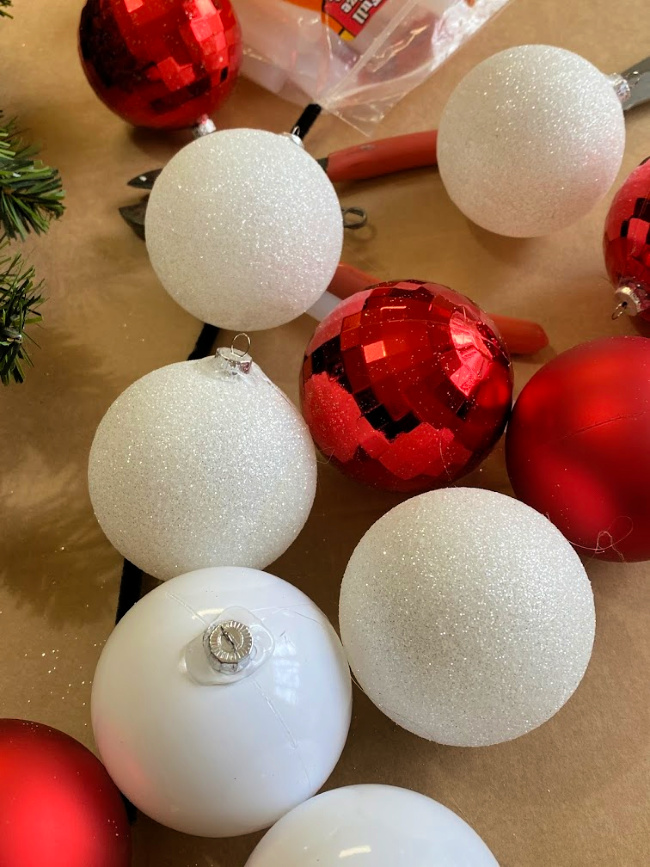 Fifteen red and white ornaments were prepared for my wreath. You could add as many or as few as you would like. I like to use all shatterproof ornaments on wreaths. No one wants broken glass by their front door.
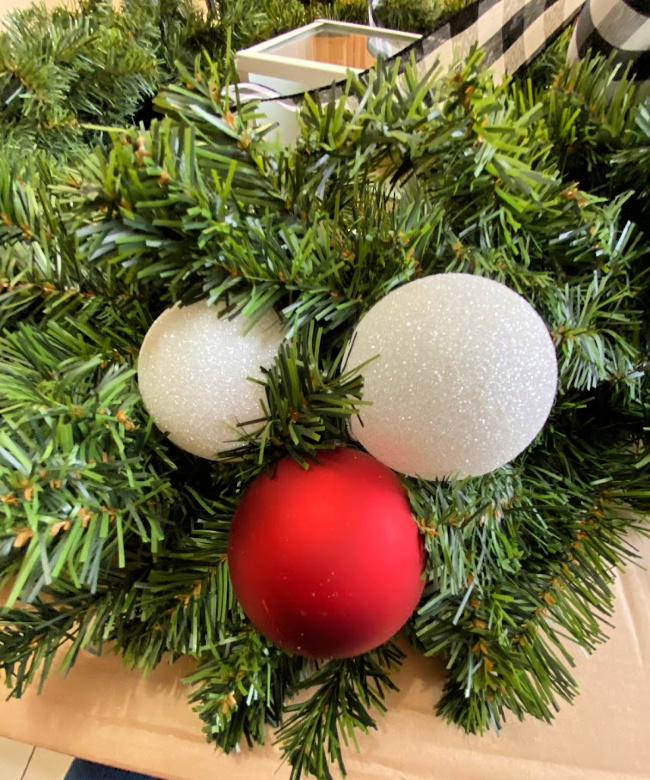
Pick out three ornaments and use a pipe cleaner to gather them into a little cluster. I made five of these to scatter about my wreath. You can use as many or as few of these as you would like. 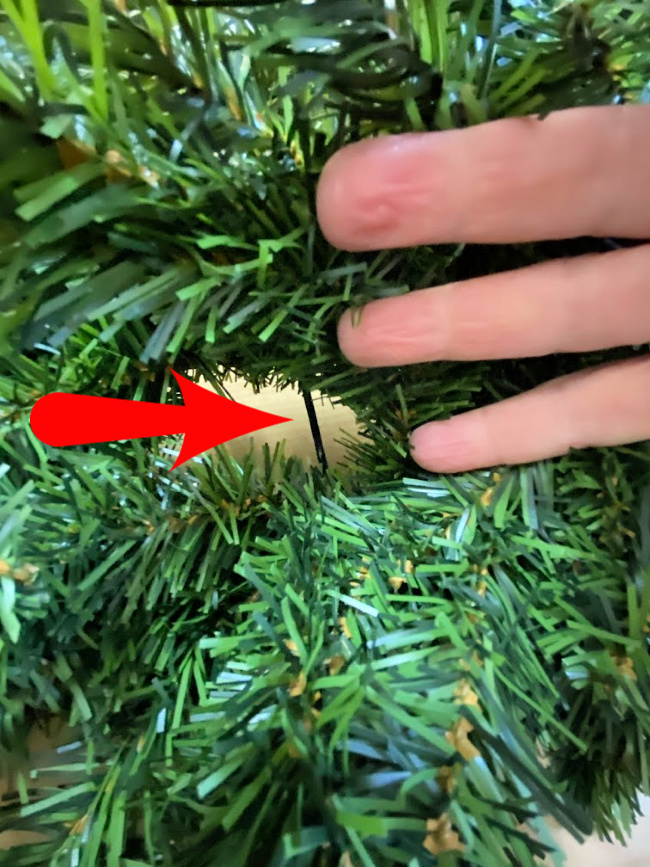 Work your fingers through the wreath and expose a piece of the wire frame as shown above.
Pull the pipe cleaners through the greenery and wrap each end on a different side of the wire frame. Twist the two end of pipe cleaners together to secure each cluster of ornaments.
 After securing an ornament cluster, pull a little green stem between the ornaments to hide the wires.
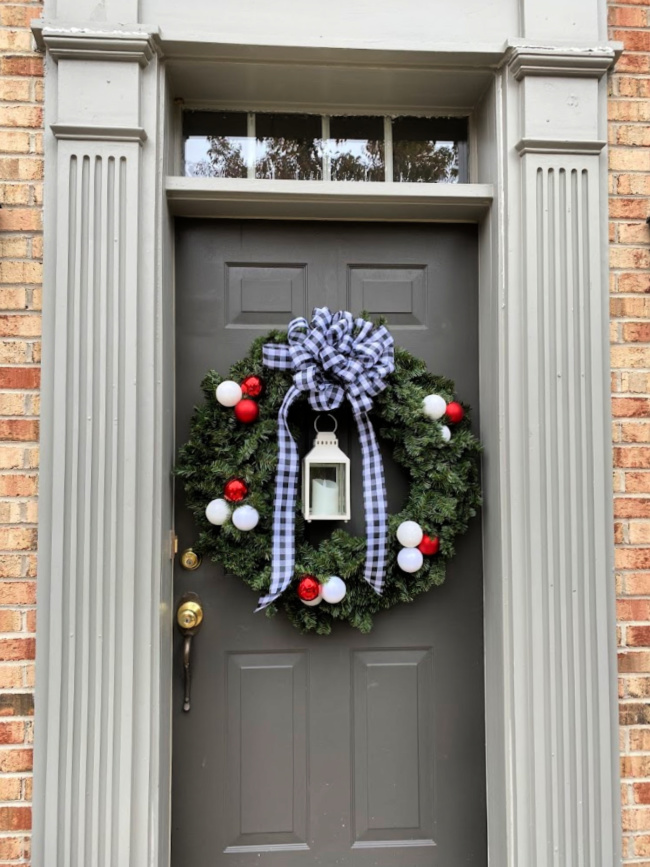
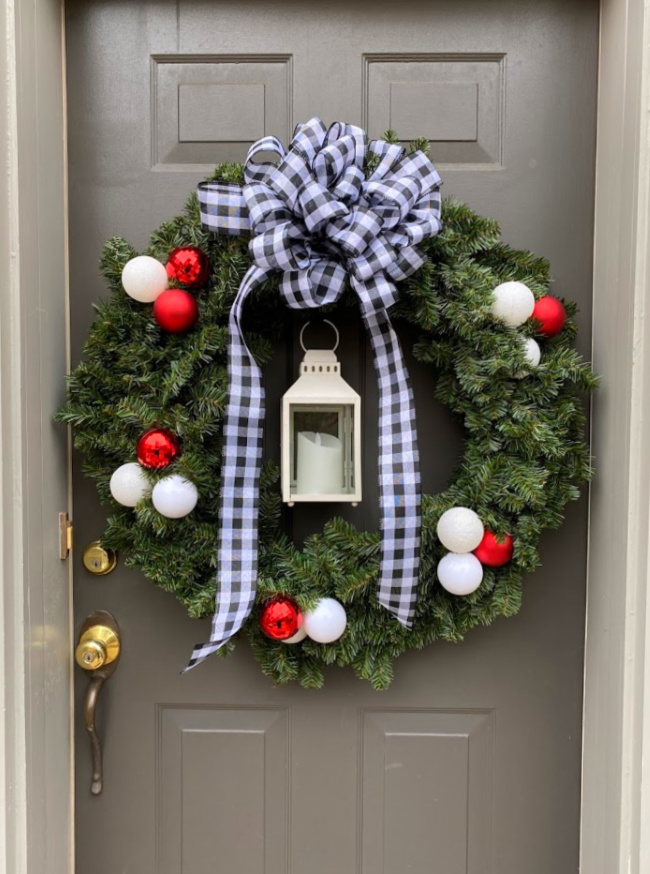 Tie a big bow for your wreath or use a Pro Bow to make your bow to add to the top of your wreath. I found a battery-operated candle with a timer to add to my lantern. To keep the lantern from swinging around when the door opens and closes I used a bit of Fun-Tak. A little bit of the Fun-Ta will also keep the candle centered in the lantern.
  Welcome guests by dressing up a store bought wreath. You can do whatever you want with your wreath, but this should get your creative juices flowing!
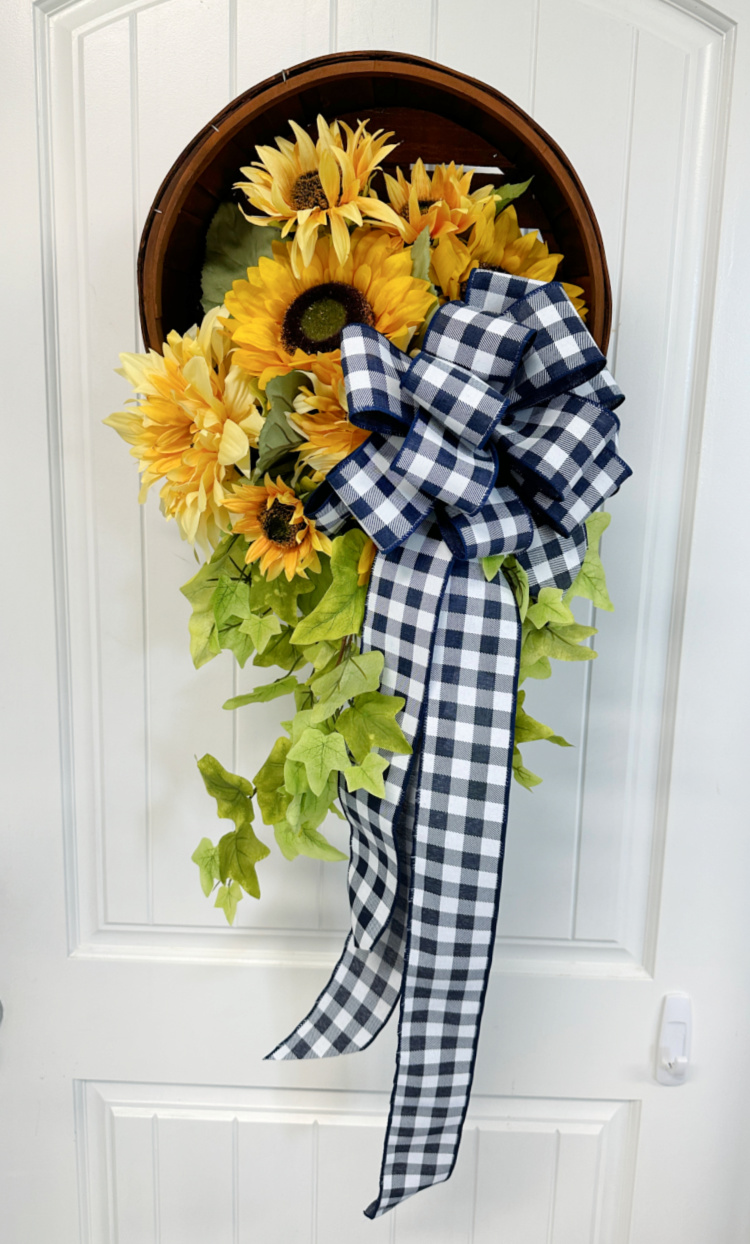
If you want to try something a little more creative, check back tomorrow to see how I made this “snowflake” inspired wreath! If you are going in order, head on over to Have a Daily Cup of Mrts. Olson!
Head on over to see how all of these bloggers have dressed their front doors:


Beautiful wreath, Chloe! I need to use your pipe cleaner tip for adding things to wreaths. I use floral wire and it can be tricky to manipulate. I also like your hot glue tip for keeping the tops on Christmas balls. Looking forward to seeing your snowflake wreath tomorrow.
I’ll be back tomorrow for that fabulous snowflake wreath! Love the pipe cleaner tip. May your days be merry and bright!
Chloe,
You never disappoint and you have the best tutorials. Love this wreath especially the lantern hanging.
Pinned
Cindy
This is such a festive wreath, Chloe, I love it! I love this step by step guide on how to put everything together and all the holiday accents you’ve added too. I’m definitely going to be using your pipe cleaner tip – that is super clever – and totally doable! Can’t wait to see more of your holiday home this year. Hugs, CoCo PS: The picture of you and Kristin is SO good!
Great tips, Chloe! I love how you used the lantern and your pretty snowflake wreath, too! Happy to be joining you twice this week! Blessings, Cecilia @My Thrift Store Addiction
Hi, Chloe…love your tips. I had the pleasure of working on so many LARGE homes in our area for Christmas—and grouping ornaments in threes was a wonderful way to add power to large trees and outdoor arrangements and doors. So many people think more small things will fill up a large space, when actually a few LARGE ones in scale with their surroundings is far more powerful/interesting and can be seen from the street.
Hugs, love all your blog posts, just been not too active lately!
Chloe, your wreath looks so happy and festive. And girl, that hot glue tip is worth it. Those little things popping out of the ornament can easily turn me into the Grinch! Love you snowflake wreath too. Looking forward to seeing how you made that.
I love the addition of the lantern. What a bright idea.
This is very pretty, Chloe! Thanks for the pipe cleaner hint!
Beautiful transformation of a store bought wreath! Love how it turned out and I am taking notes on your tips. Great idea to hot glue the ornament…something I wouldn’t think of until they all started falling off! So wonderful to hop with you again!
Cheers!
Shelley
great ideas for the wreath, Chloe, love that lantern and full and fluffy bow!
Chloe, you are always the queen of wreath making! Your wreaths are always beautiful and so is this one. Merry Christmas!!’
Chloe, those are great tips for making a wreath. Using them will save a lot of grief 🙂
I’m heading over to see the the snowflake wreath!
take care and Merry Christmas
Thanks so much Rachelle!
Your wreath looks awesome Chloe! I love how you showed the step by step. In the post I have glued bulbs on and now I see why I didn’t get the look I wanted, I needed to actually wire the bulbs in. Great idea to use the pipe cleaners. Your wreath is simple and stylish and it looks great on that door!
Thank you so much for joining the hop. Merry Christmas!
Thanks so much Amber, I really like how the bulbs snuggle into the greens. Using the pipe cleaners also lets you remove them later to re-style the wreath to something different next year?
Great tutorial Chloe! Your wreath is so pretty and what a great way to tailor the wreath to coordinate with your home. I see now pipe cleaners are the secret. Brilliant! Happy Christmas!
Thanks so much Michelle! I love that it lights up every night all on its own!
Chloe! Your wreath is so pretty! Loved seeing the step by step how to! I learned some great tricks to use! I love the clusters of ornaments and the beautiful bow!! I love the bow’s long tails!
Thanks so much Kristin! I love to take a plain wreath and get creative with it! Do you hand tie bows? If not, I will teach you at Haven!
Your wreath definitely says a “welcome Christmas”. I love the bow, balls, and lantern you added!
hugs,
Jann
Thanks so much Jann!
This wreath is positively stunning! Thank you for sharing the how-to.