
How to Make a Fall Arrangement
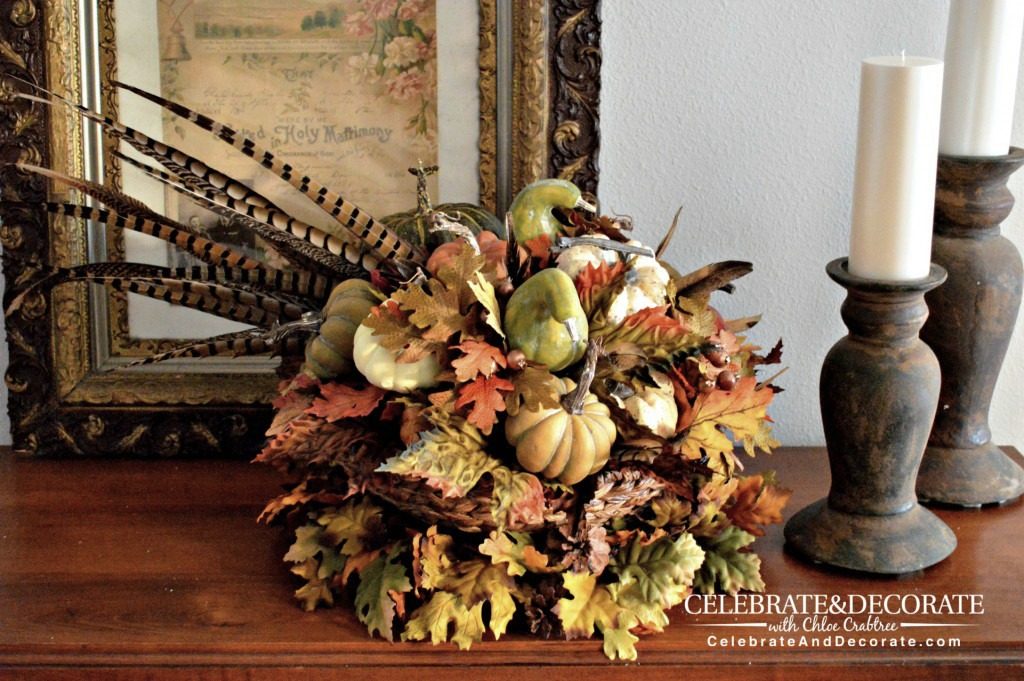
I quickly “threw together” this pretty arrangement for a Fall tablescape. I received so many compliments on it and I know a lot of folks find taking on an arrangement like this to be daunting. I wanted to take it step by step to show how to could make a Fall Arrangement like this, too. This is such a beautiful statement of the season you could bring out in September and keep on display in your home through Thanksgiving. Please stay tuned to the end of the post for even more great Fall DIY projects to deck your home in the spirit of Fall!
This post contains some affiliate links for your convenience. Should you make a purchase I will receive a small commission. Click here to read my full disclosure policy.
I’m sure those of you who have a traditional home have a place where this beautiful arrangement would fit perfectly. It looks lovely on a sideboard or a console table.
For those of you find it easier to follow along with a video, I have a full video tutorial at the end of this post – so scroll down if you would prefer to see the video!
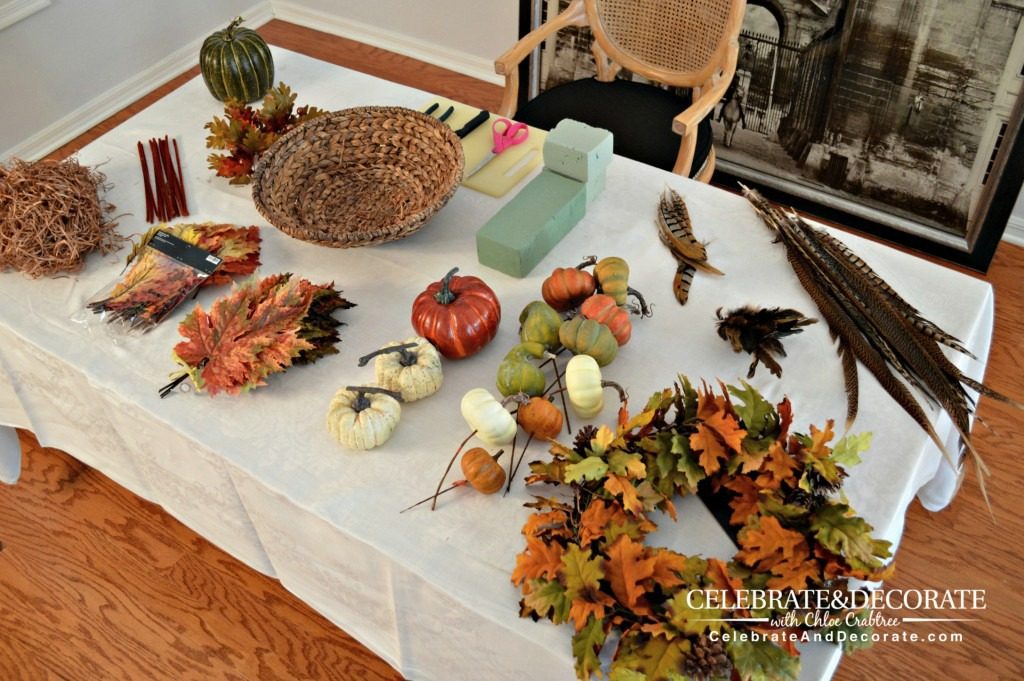
The supplies…
I began by gathering all of my supplies so that would be all ready to go when I began the arrangement:
- Brown paper shred
- Basket (something I already had)
- 2 pieces of floral foam for dried/artificial flowers
- 1 green artificial pumpkin (about 6”)
- 2 white artificial pumpkins (about 3”)
- 1 orange artificial pumpkin (about 4”)
- Brown chenille stems
- 1 large (approx. 36 leaves) package of small Fall leaves
- 1 bundle of 6 large Fall leaves
- 10 small pumpkins and gourds on picks
- 3 Fall leaf picks with acorns
- 11 large pheasant feathers
- 6 small pheasant feathers
- 2 small feather picks (optional) (something I already owned)
- 1 fall wreath of oak and maple leaves (optional)
The steps…
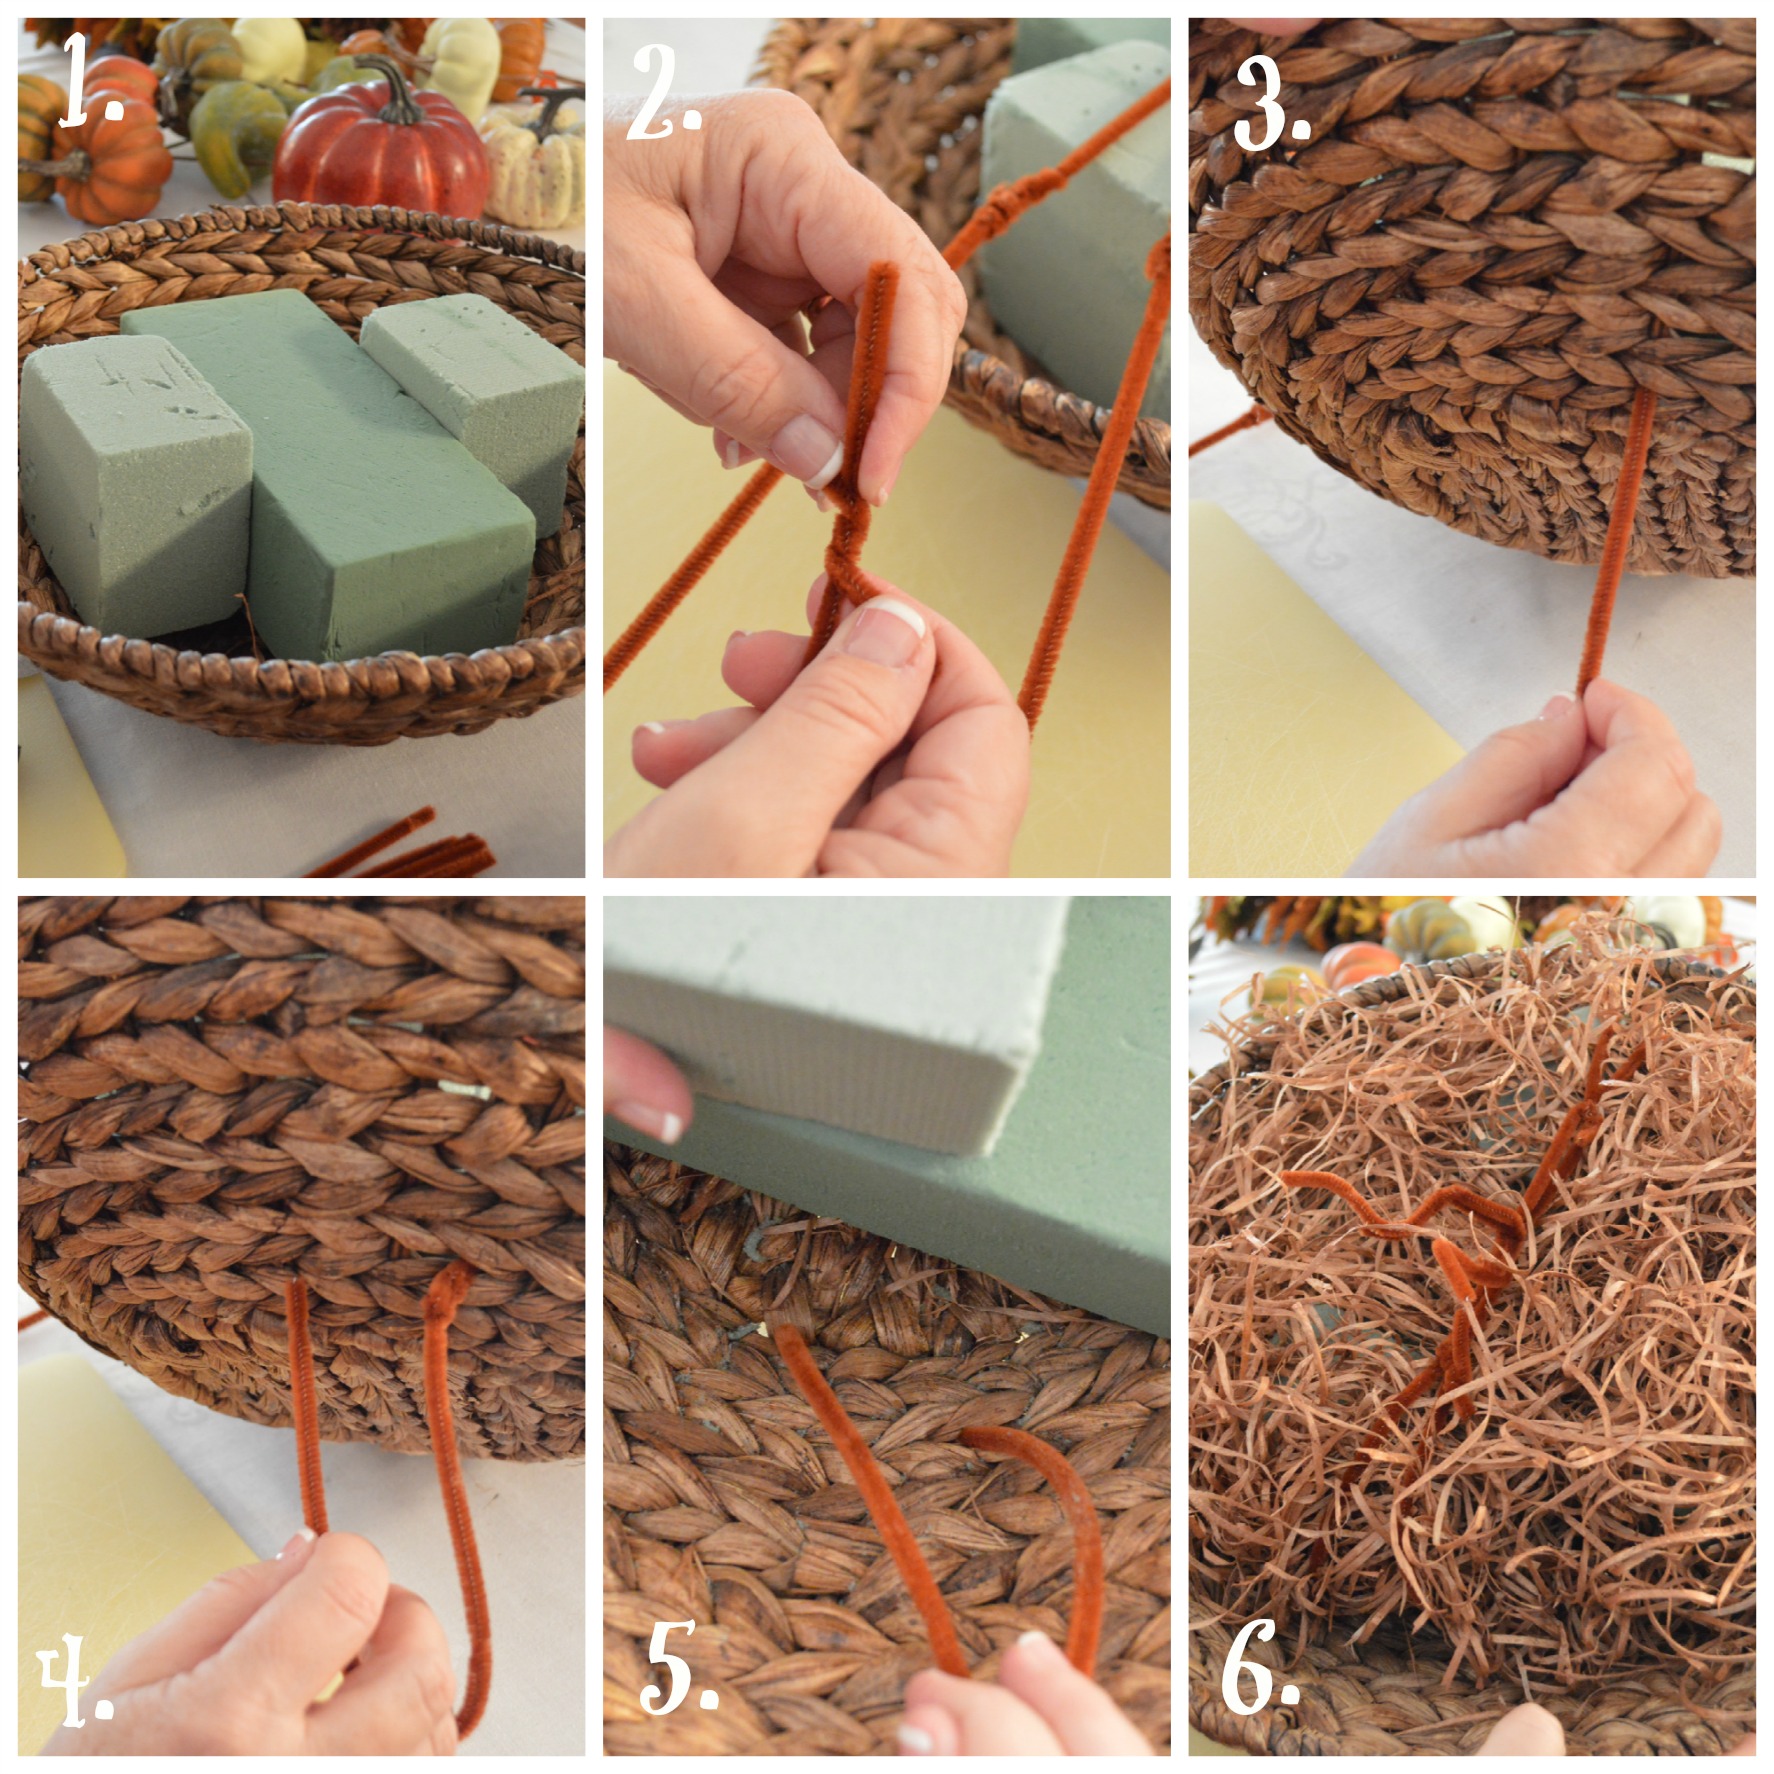
1. Cut one of the pieces of floral foam in half and put a full piece in the middle of the basket and one half on each side of it.
2. To secure the foam in the basket I used the brown chenille stems. I wired two of them together (2x).
3. Thread one end through the weave on the underside of the basket.
4. Thread the other end through the weave an inch or so from the first one.
5. Pull both ends of the stems through the inside of the basket.
6. Then placed the brown paper shred over the top of the foam (you can also use Spanish moss). I pulled the chenille stems over the top of the raffia (this keeps the stems from cutting into your foam) and secured them to one another to hold the foam in the basket.
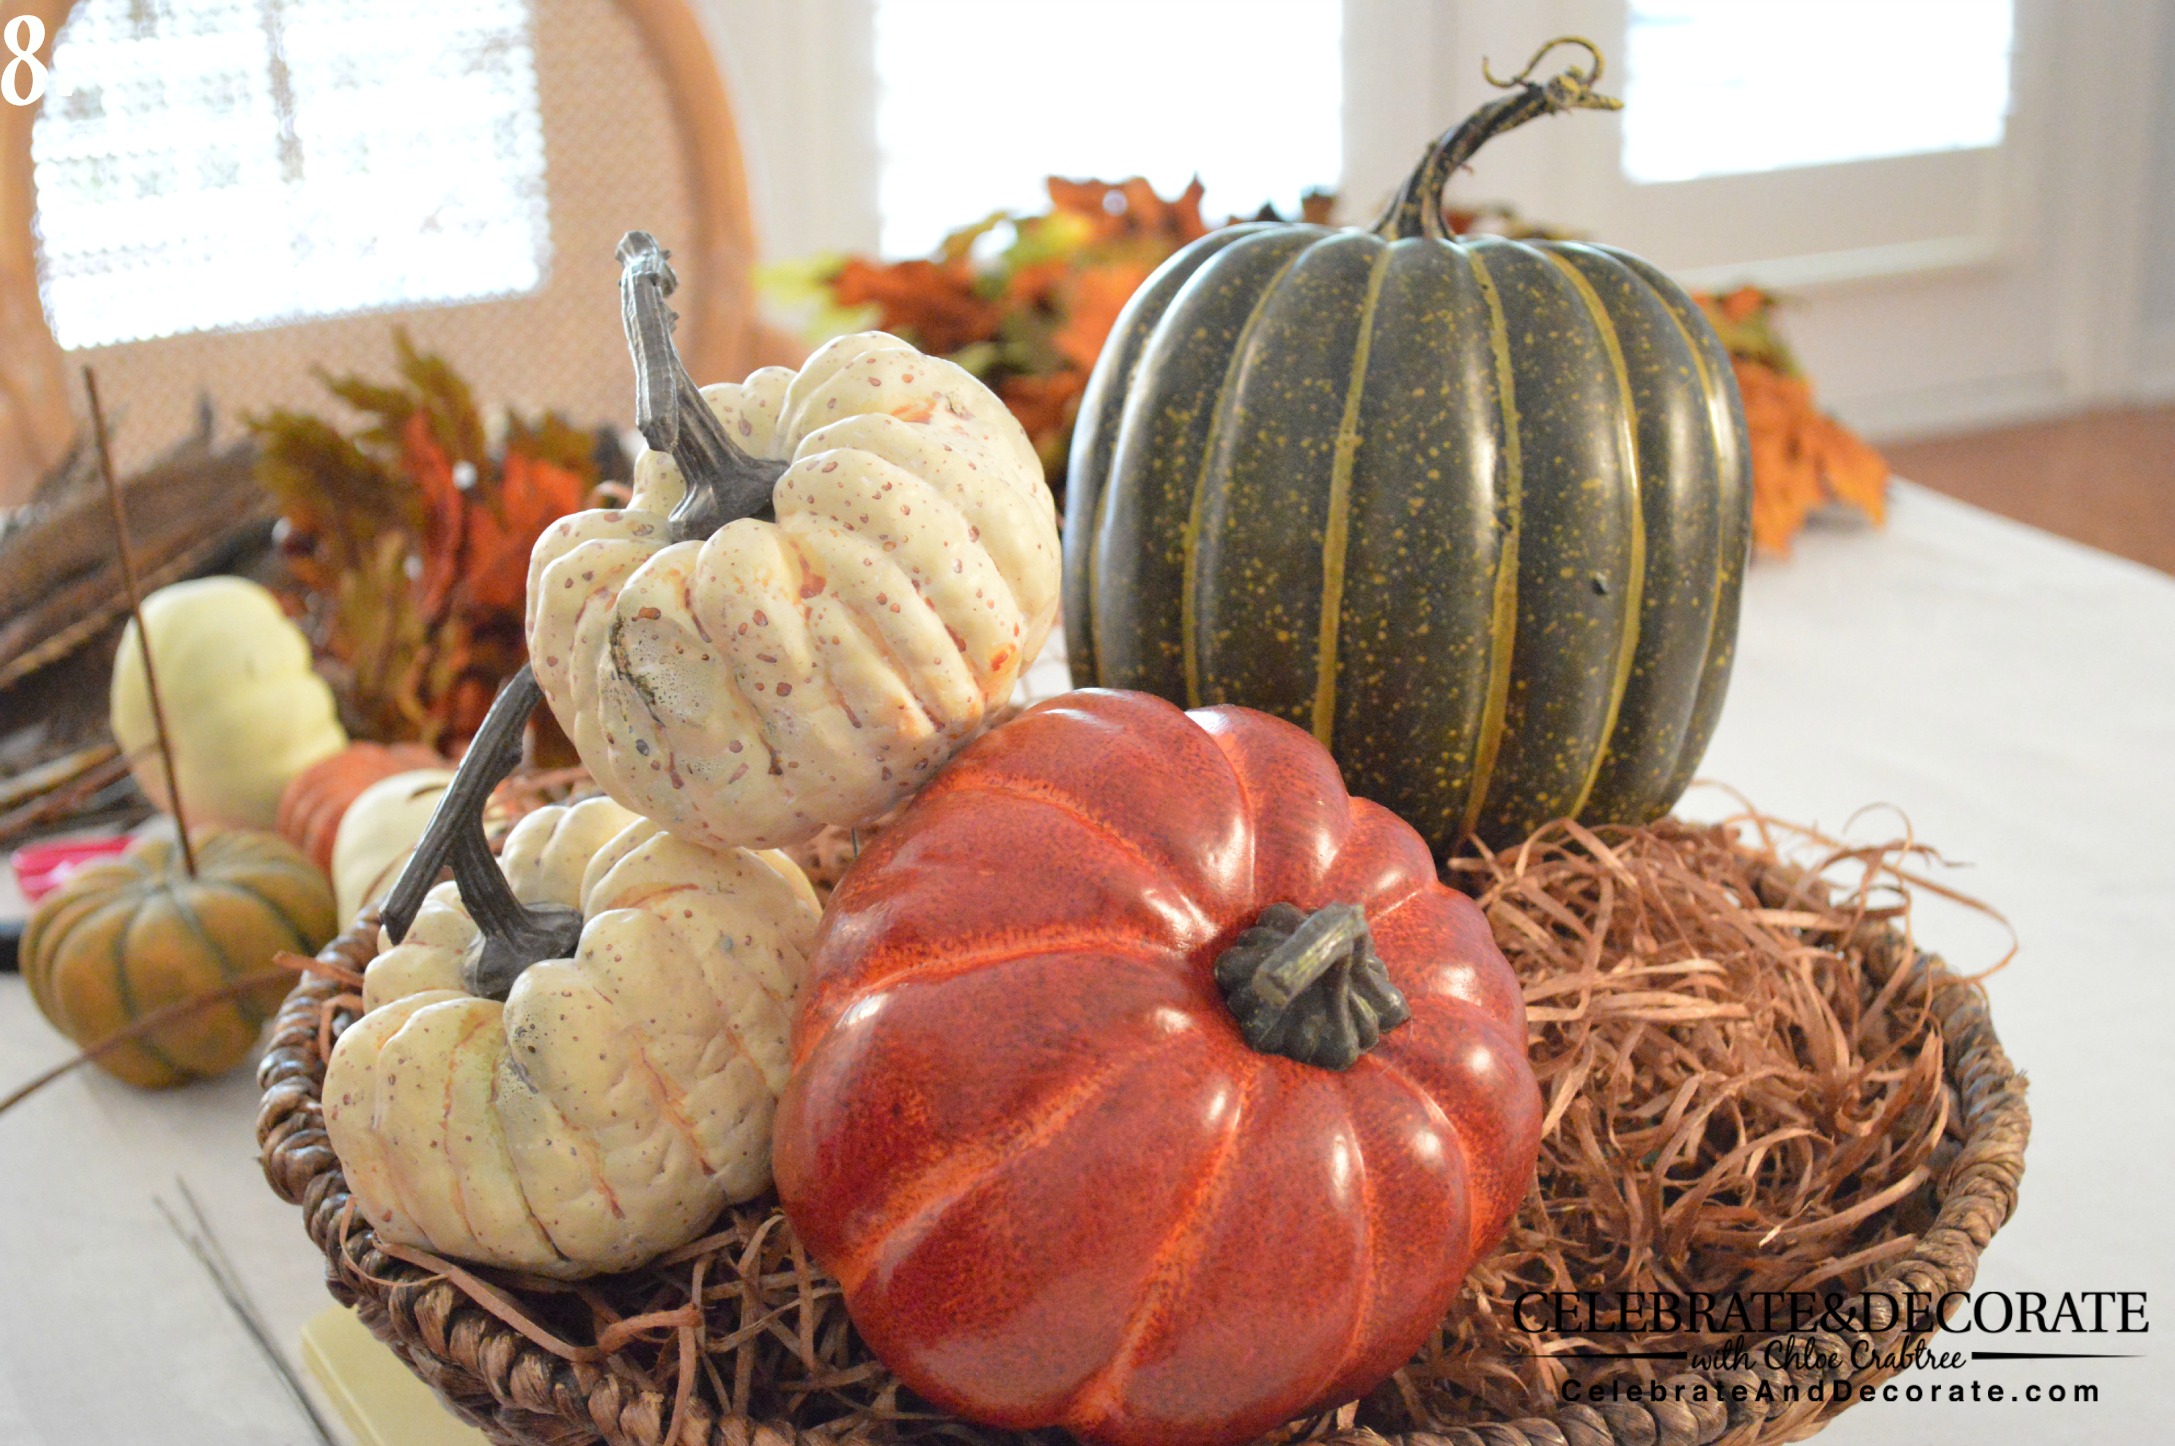
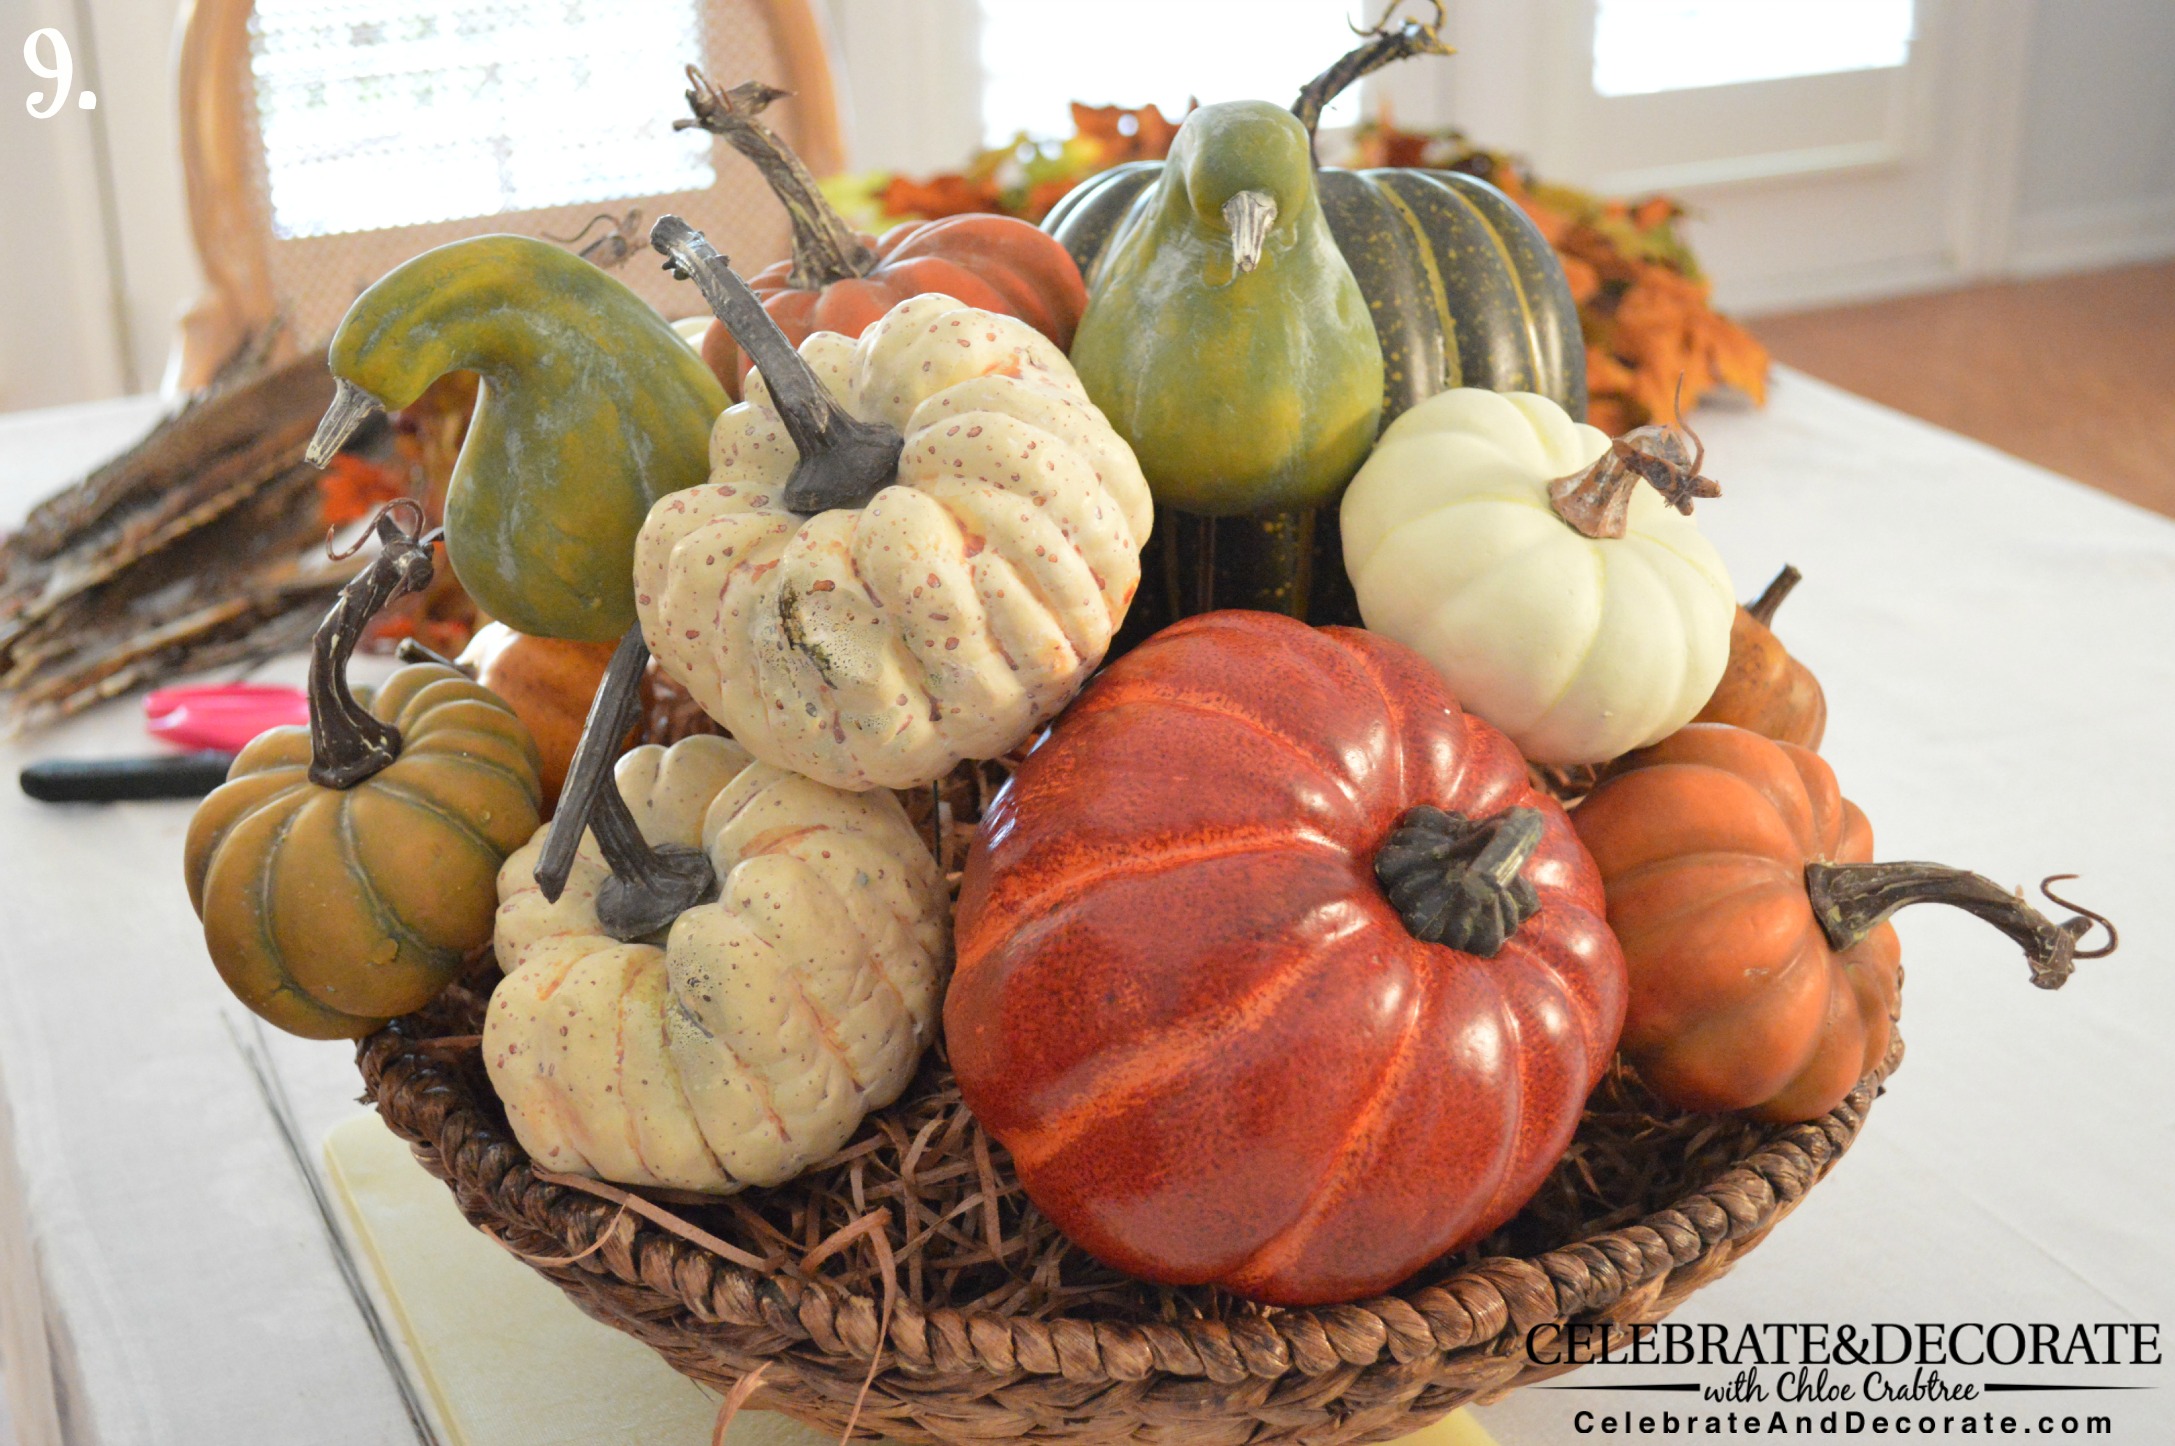
7. Taking your large pumpkins, use a wooden skewer or stiff wire and pierce it into the pumpkin and stick them down into the floral foam. Use the larger pumpkin toward what will be the back side of your arrangement.

8. Add the other larger pumpkins in the same manner, but add them to what will be the front of your arrangement.
9. Now add the pumpkins and gourds you have that are on picks already. You will add these evenly around the basket leaving them a little higher in the middle than you do on the sides.
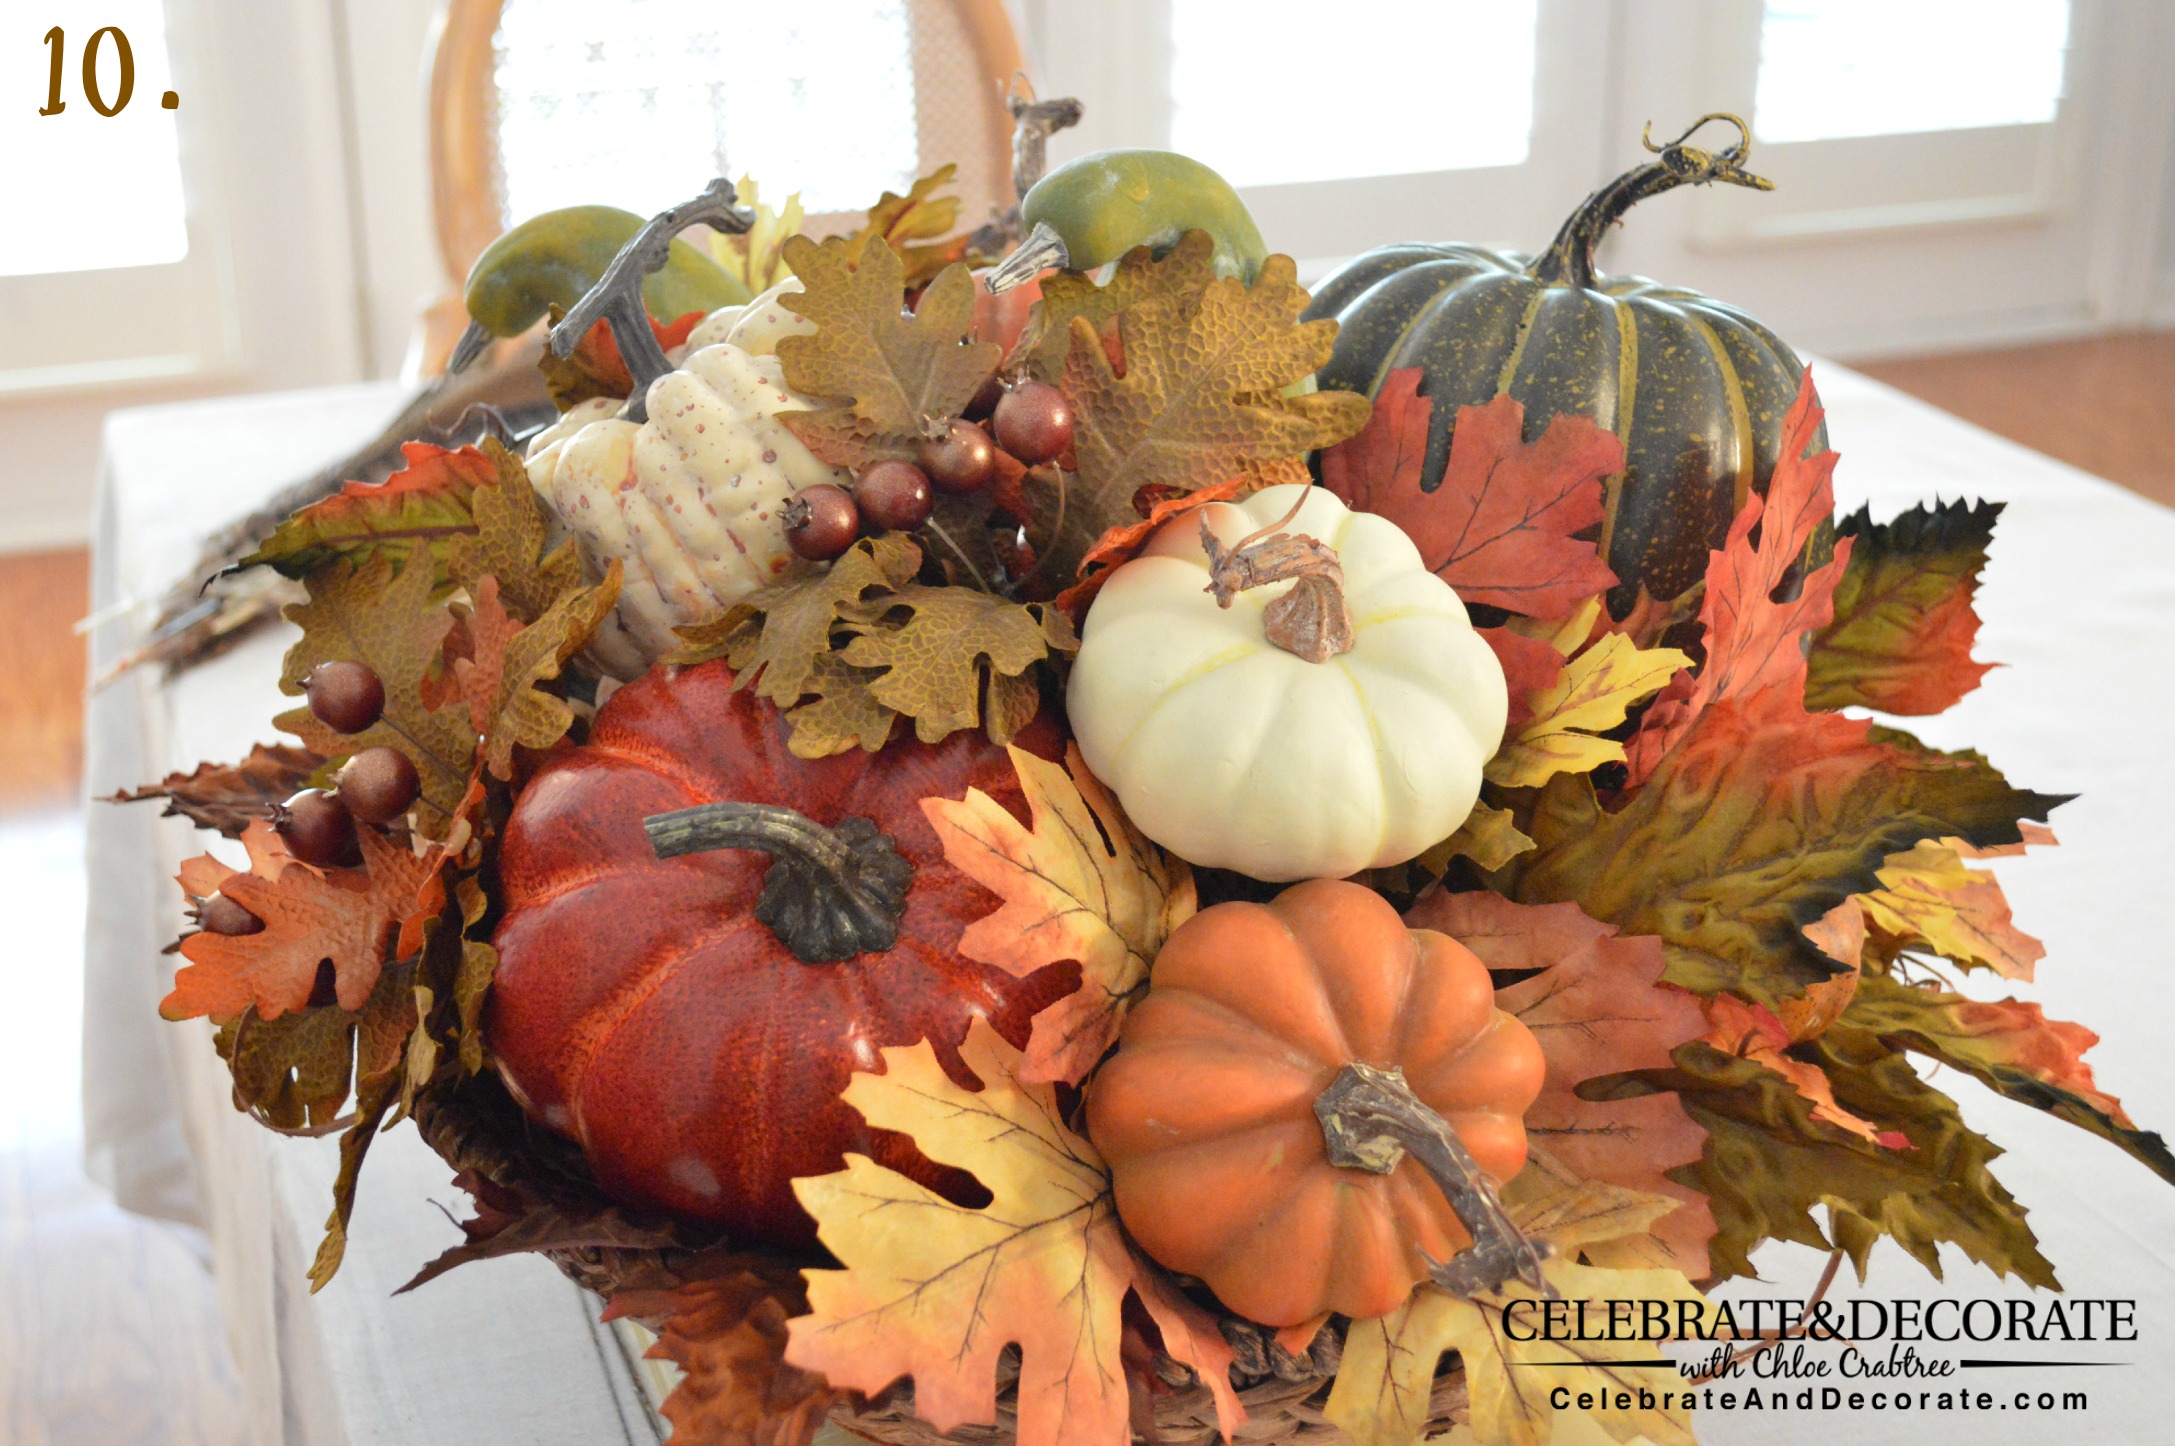
10. Next you will begin to add your leaves. I began with the three oak leaf and acorn clusters and added them toward the front and sides of my arrangement and then took the largest of the leaves and stuck them into the foam all around the top edge of the basket. Lastly, use your smaller leaves. These will likely be too short to anchor into the foam, so you can just tuck them in between the gourds and pumpkins or you can use floral tape to secure them to a wire so they may be anchored in the foam.
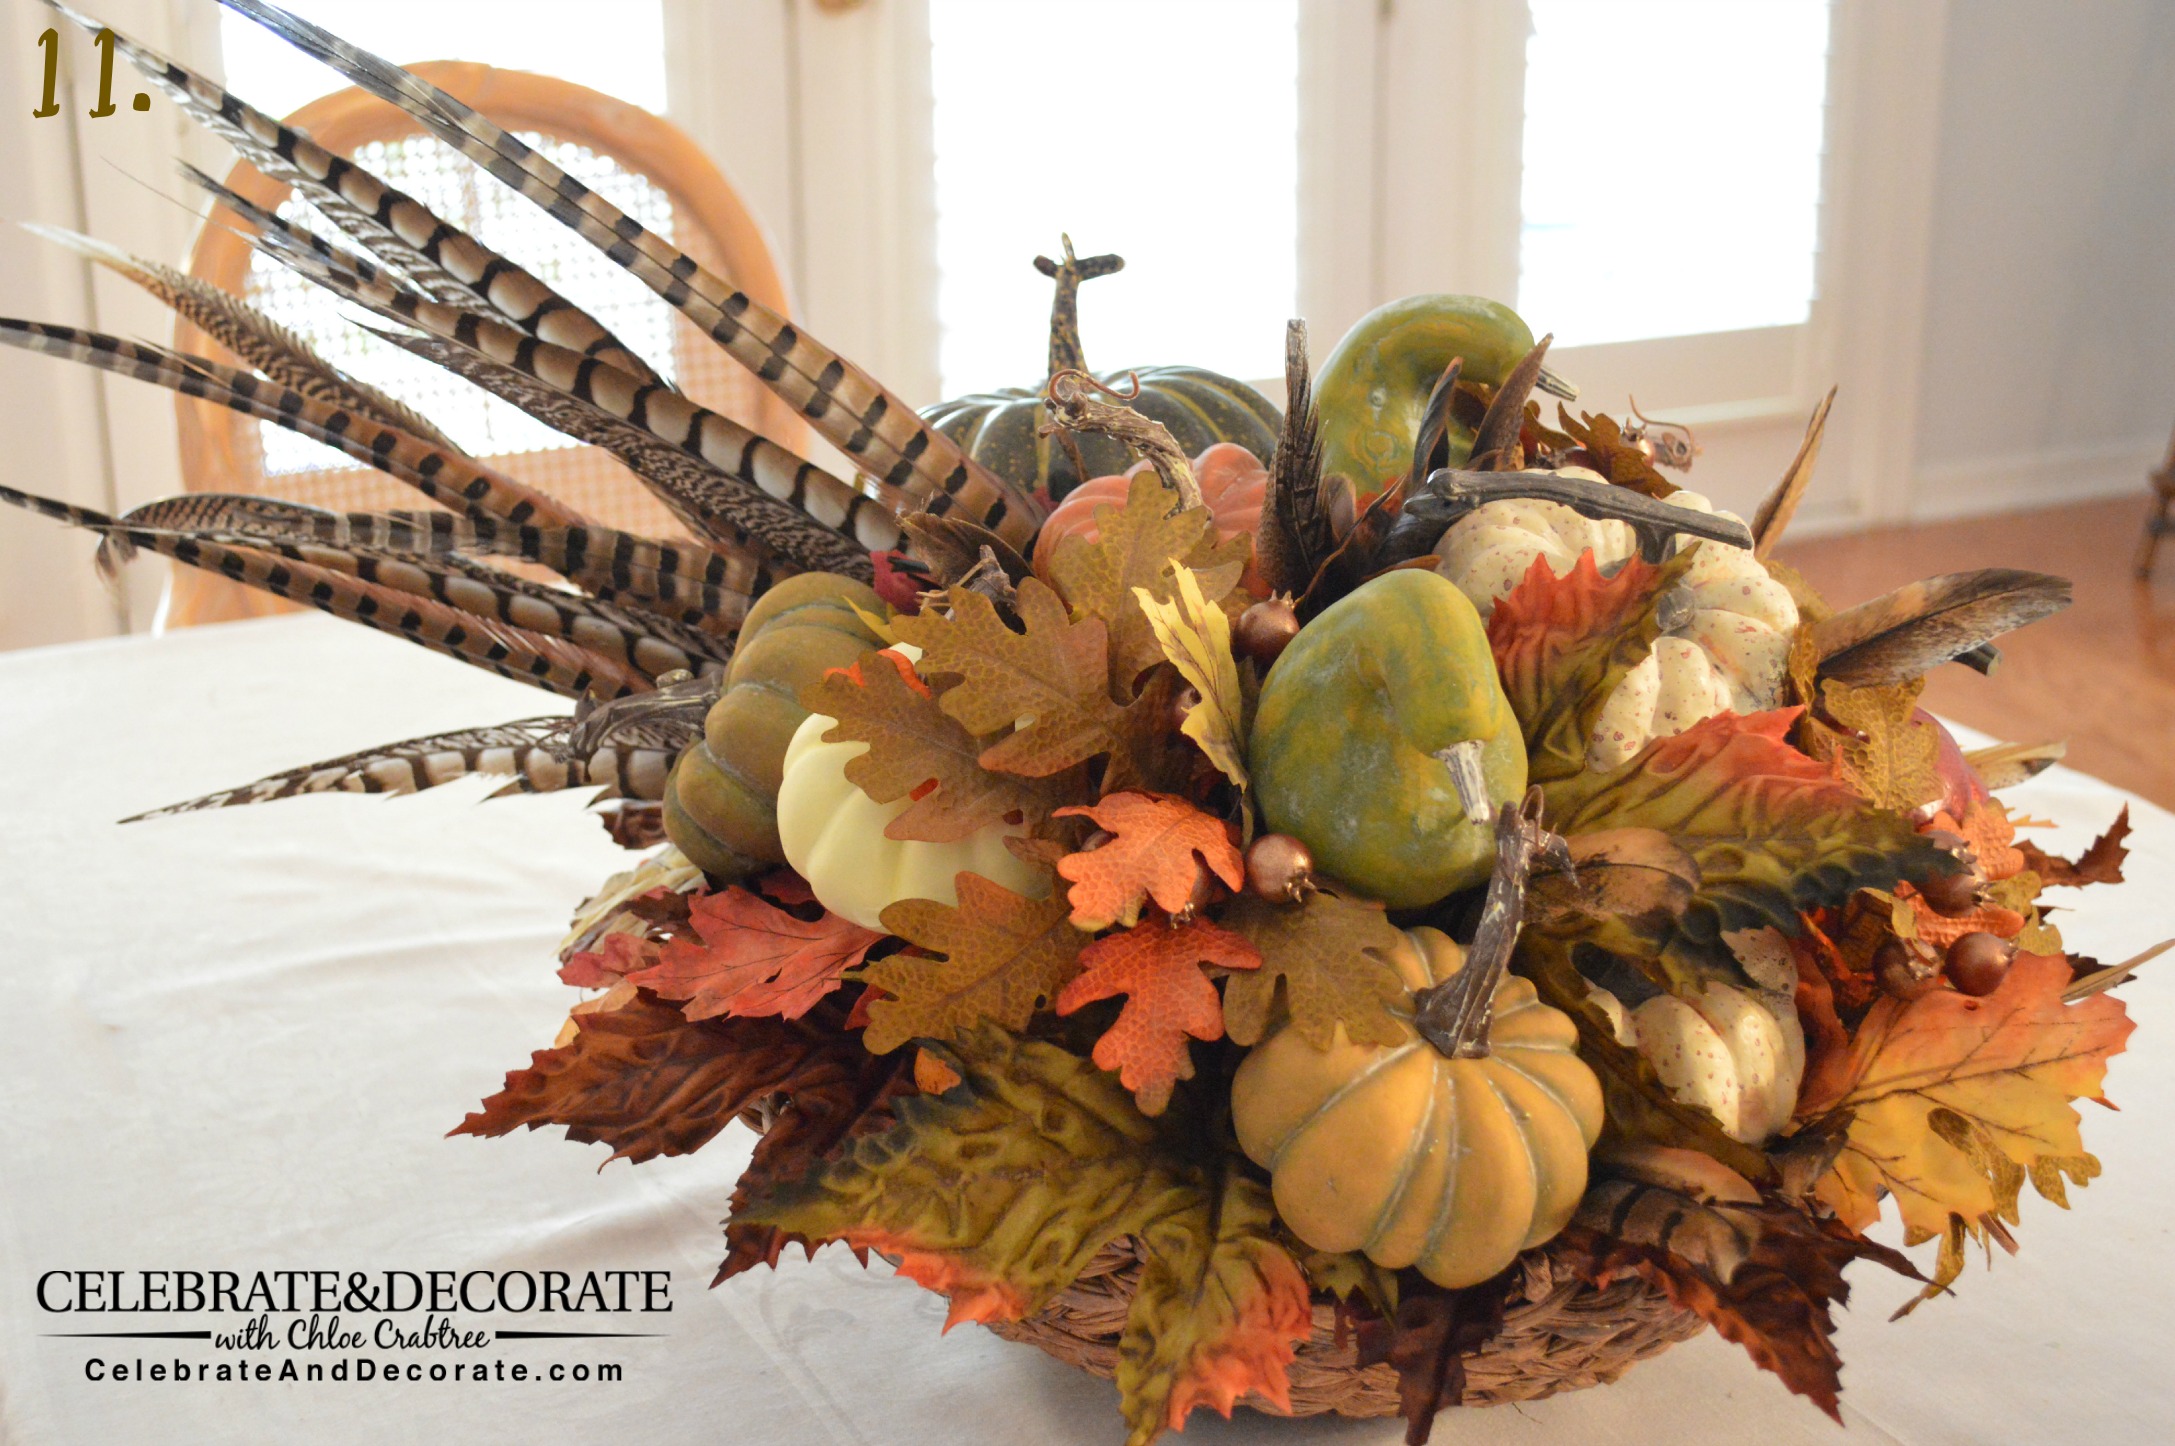
11. Finally you will add your feathers. Stick the smaller feathers in between your gourds and pumpkins randomly in the front and top side of your arrangement. Take your longer pheasant feathers and stick them into the foam at an angle right in front of the larger pumpkin. Your arrangement is finished! Sit back and admire your beautiful work!
To finish off my arrangement and give it a little extra height I set it on top of a grapevine wreath that was trimmed with Fall leaves.
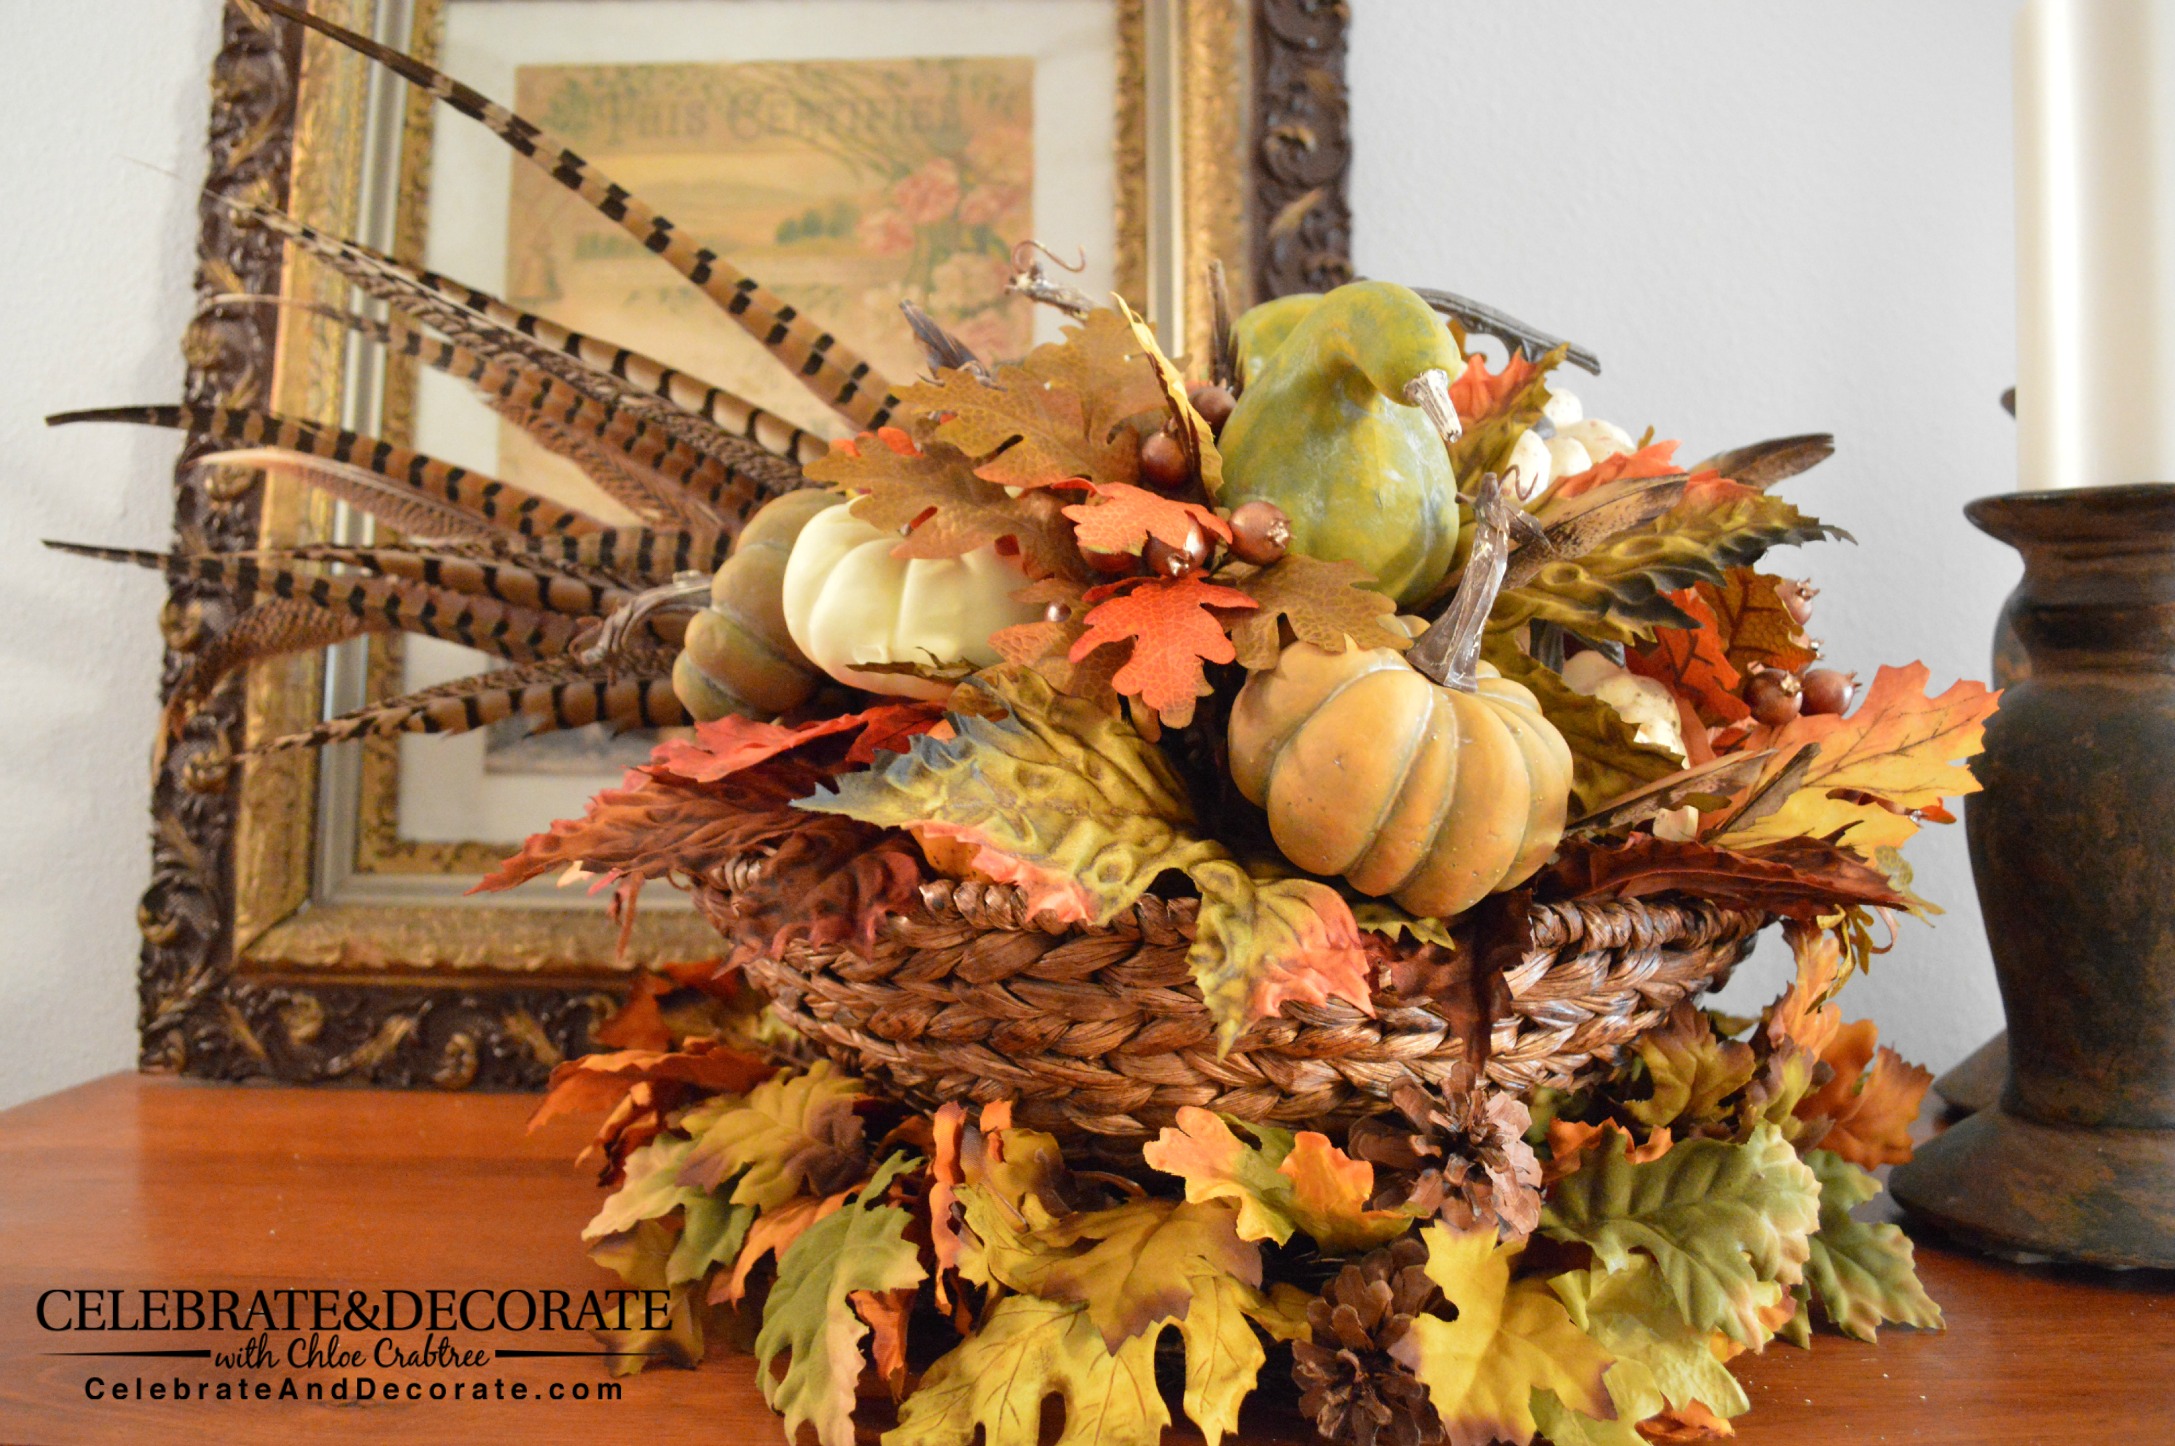
I like the contrast of the leaves, then the woven basket and then the leaves and pumpkins and gourds tucked into the top of the basket.

I hope I provided all the detail you need to recreate this arrangement yourself.
I would love to see pictures of your own Fall creations, please share them!
What a gorgeous fall arrangement – pinned!
Thank you for your kind compliment and for pinning!
Oh my goodness Chloe, what a stunning display! I just love how the leaves filled in the stack! Gorgeous!
Thank you, Donna, it is so easy to just tuck those leaves in!
What a beautiful arrangement!
Thank you Pamela!
This is so great!
Thank you Lindsay!
Beautiful arrangement and thanks so much for the video. I would love to be able to pull off a craft like this.
Thanks Sandra, I think you could pull this off! Of course, I would like to pull off those beautiful cakes you make!
You make it look so easy!! I love it, thank you for sharing!!
Oh, thank you Cheryl, I tried to make it easy for folks to copy each step!
Hi, Chloe
What a great and beautiful arrangement. I love this idea and how perfect for a tablescape for Thanksgiving as well. I am still making my rounds from the Home for Fall tour, sorry its taking me this long to stop by. I enjoyed your post very much.
Thank you Vanessa, this could easily be arranged all around for a centerpiece.
Beautiful! And – speaking of beautiful – why don’t we get to see your lovely face during the video? I love the step-by-step instructions but missed your smiling, gorgeous face! 😀
Beautiful! I love the paper shreds vs. moss which drives me nuts since it’s so messy! The feathers really add to this – great tutorial!
Chloe, this is a gorgeous arrangement!
Great tutorial Chloe, gorgeous!
I can always use tips on arrangements. Thanks for the great tutorial
Thank you so much Trisha!
Love this. Putting this aside to make next month!!!
Chloe, you always give the best instructions. Very nice arrangement. If someone doesn’t have shreds or the color needed, you can make them with colored paper and a shredder. I told that to someone who couldn’t find green shreds, had a shredder, and sounded last minute desperate. Then she said “Does it make crinkles ?”LOL