
How to Make a Snowflake Wreath!
Creating a snowflake wreath from faux evergreens is the perfect way to bring a touch of winter magic into your home. This simple yet stunning DIY project combines the beauty of evergreen branches with the elegance of a snowflake shape, making it a festive addition to your seasonal décor. Whether you’re hanging it on your front door or using it as a centerpiece, this wreath will add a charming, wintry feel to any space. In this post, I’ll walk you through each step to craft your own snowflake wreath that will last all season long!
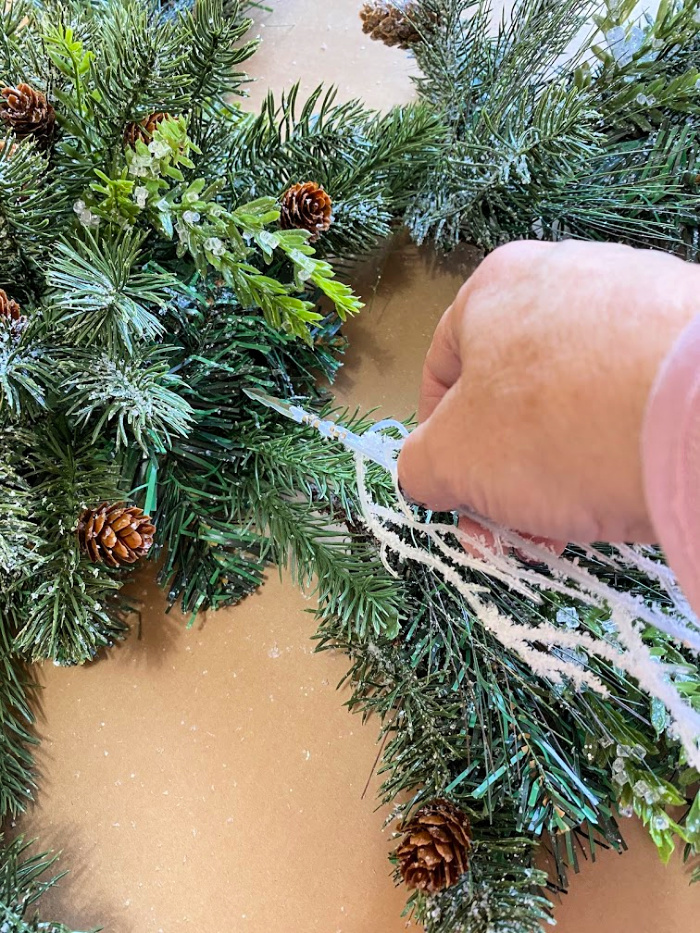
I began with an eight inch styrofoam round and six identical branches all purchased at Michael’s. To secure the branches into the foam well, I used my Steelpix machine. This added a steel pick with barbs on it to each branch to make sure it holds securely in the foam. In lieu of a Steelpix machine, you can use wood wired sticks.
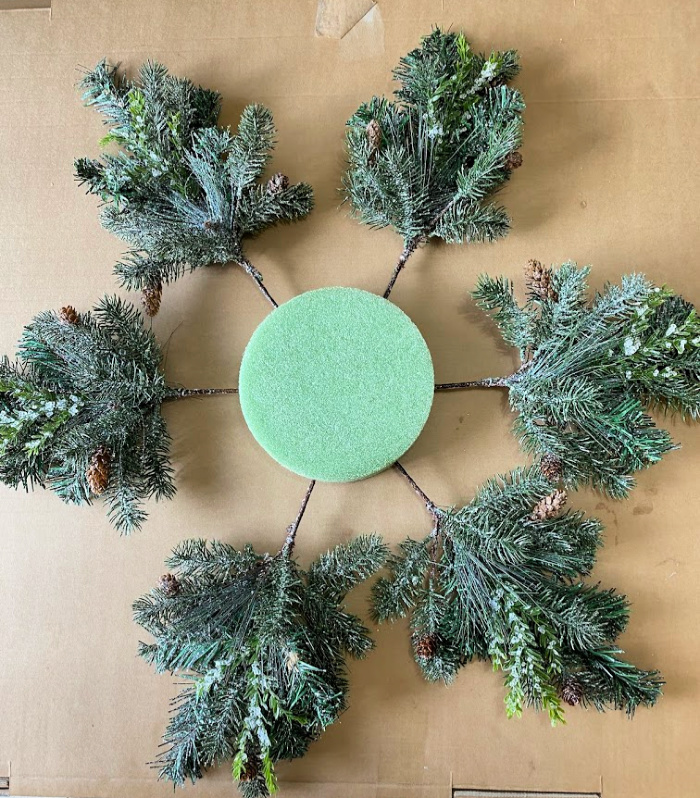
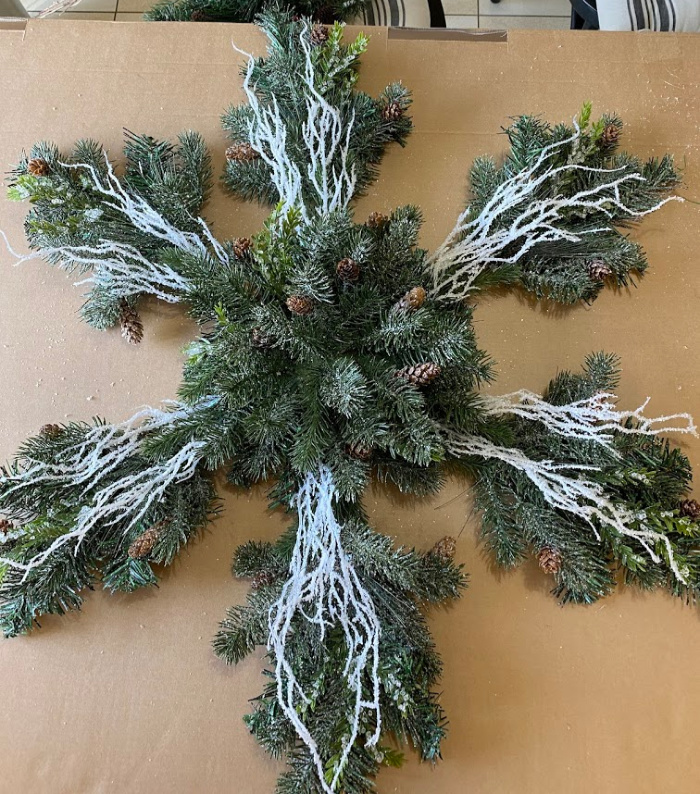
These were the stems I used for my six points of the snowflake. I bought four extra ones and cut them apart to fill in the additional space in the middle of the wreath.
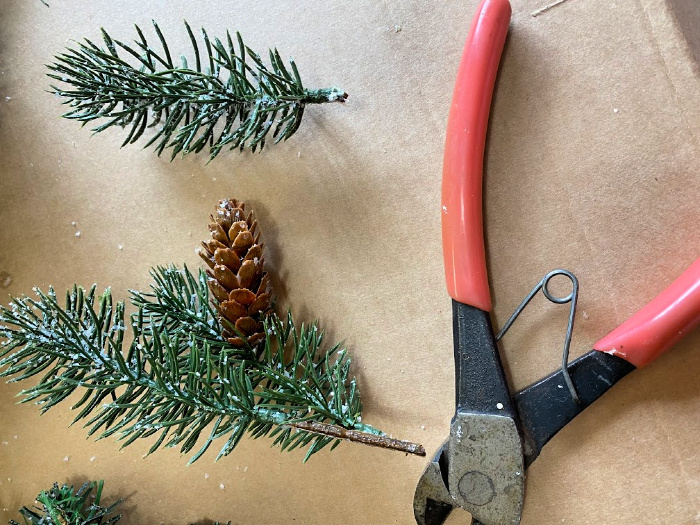
Cut the pieces off of each branch with wire cutters into small pieces. Add a steel pick or a wood wired stick to each of the smaller pieces.
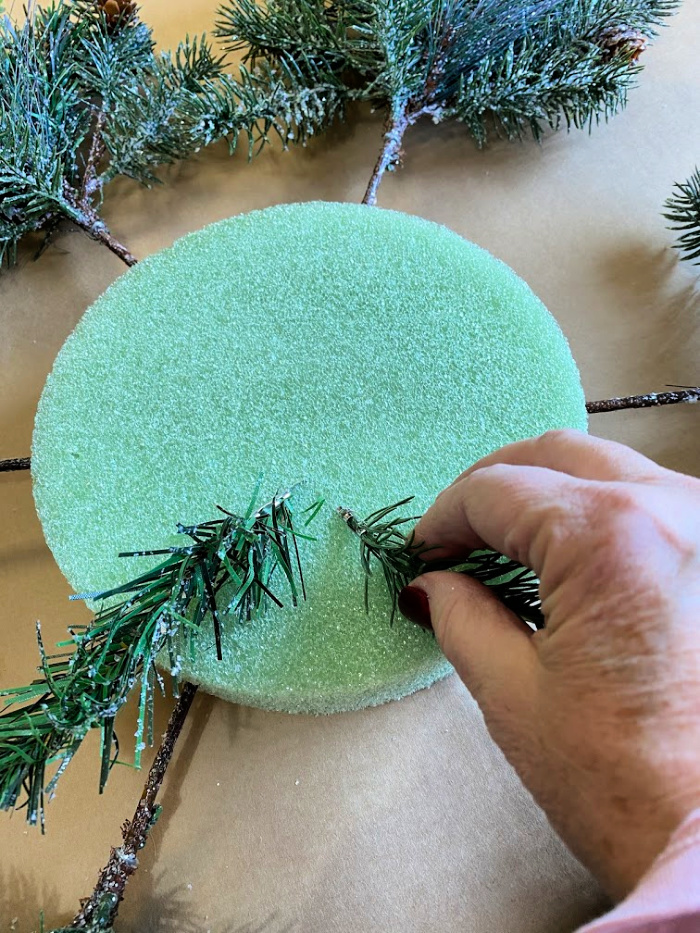
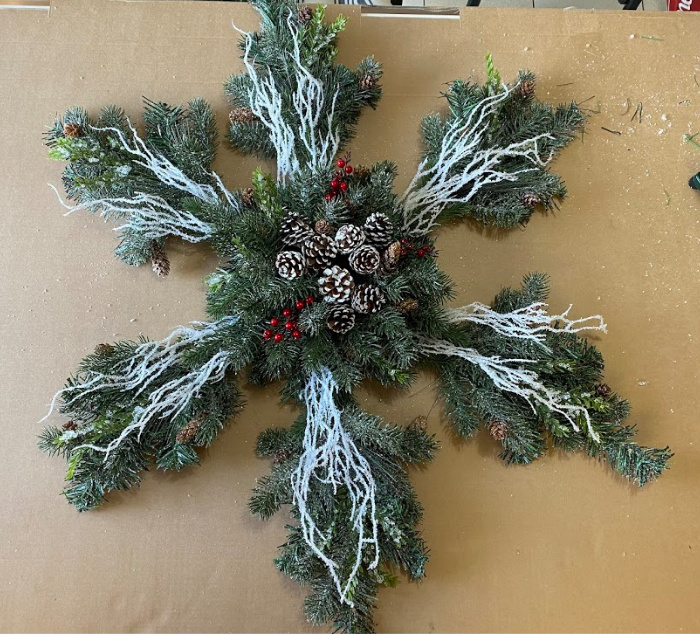
Simply fill in the space in the center with the greens you cut from the extra branches. You can leave a little space for pine cones and berries.
This post contains some affiliate links for your convenience. Click here to read my full disclosure policy.
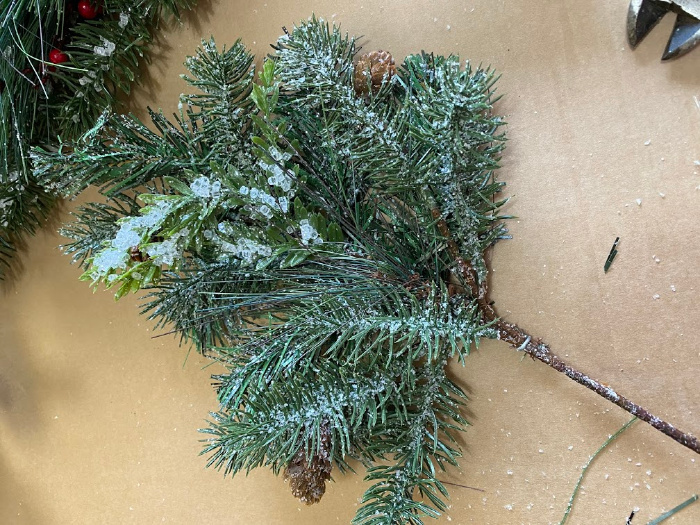
Unable to find the white branches I was looking for, I picked up some of these snowy picks to use.
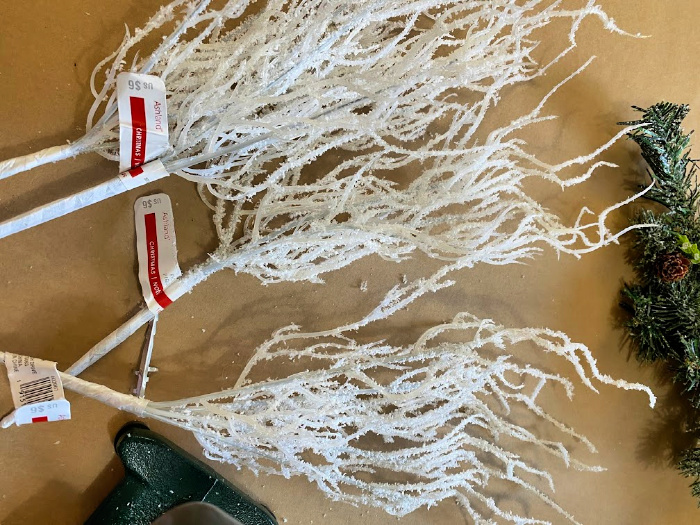
Two of the pieces of snow branches were added to each point of the snowflake.
These branches along with the icy greenery give a feeling of snow to the wreath.
Finish off the center of the snowflake with pinecones and berries.
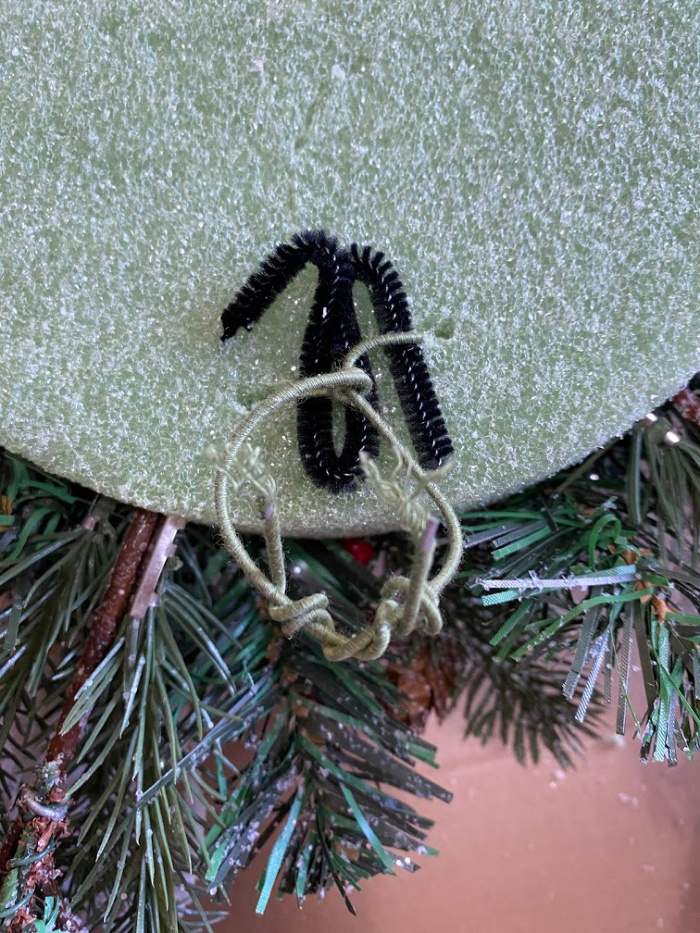
This is the mechanics for how I made my hanger for my wreath, for more details on how I make these, you can check out detailed instructions and photos, check out this post: Catalog Knock Off Door Swag.
Here is my finished snowflake wreath on my daughter’s front door! Ready to greet holiday guests!

Another version of the wreath I made displayed on my blue front door. Just a little difference in the branches and berries. I used the same greenery for this one.

Supplies to make your own snowflake wreath:
White branches
Long branches of evergreens
Snowy greenery
Faux white cedar stems
Small pinecones
To wrap up your winter decorating, a snowflake wreath made from faux evergreens is just one of many ways to embrace the season’s beauty. Whether you prefer traditional holiday decorations or enjoy mixing things up with unique DIY projects, adding personal touches like this wreath can create a warm, inviting atmosphere in your home. Pair it with twinkling lights, cozy blankets, and other winter decor to complete the look. Now that you’ve learned how to make your own snowflake wreath, you’re ready to bring a little extra holiday charm into every corner of your space! Happy crafting!
Beautiful wreath, Chloe! It looks wonderful on your door.
Thank you so much Paula!
Mine tend to twirl around because of the weight, even glued. How do you keep them from moving?
Do they twirl when on the door? If that is when you have them on the door, add another Command hook (or two) where the “arms” of the snowflake are and attach some coated wires to make loops on those “arms”. Then secure them with the Command hooks on each side. That should do the trick!
Adorable Chloe, such a clever idea!!
Thanks so much Jenna!
That is such a cute wreath! I love snowflakes. Pinned.
I love that it is a little different than the usual wreath and so pretty.
Amalia
xo
Thank you so much Amalia! I thought it was a refreshing take!
Love this wreath, Chloe! What a unique idea! Great tutorial too. Pinned.
Thanks so much Rebecca!!
I love this unique shape! Just lovely.
Pinned.
Thank you so much Libbie!
Thank you so very much!!!
Thanks for sharing this great tutorial. I love it’s shape. So unique yet so elegant.
Thank you so much, I really enjoyed having this one on my door!
This is such a unique shape. I was quite hesitant in the beginning. I could not visualize where you were going. But, I’m thrilled with the outcome. And because here in Portland, Oregon I have almost all parts blowing around my yard, I’ll try first with the real things. I’m excited to try your idea. Thank you, Chloe!!
I was going to try to do this wreath with the extra branches from my silver tip tree and real pine cones.. I might need a bigger styrofoam to hold it, how did your turn out?
Do you think I could make this with the leftover branches from the silver tip tree we just got, it is a live tree. I was thinking I might need a bigger styrofoam round.. I was going to use red berries from a neighbors plant and a couple pine cones from my daughters yard..
Donna, I do think you could put this together from the leftover branches of your tree. Just trim the pieces down to similar sizes and you will be all set!