How to Make Tissue Paper Pom Poms
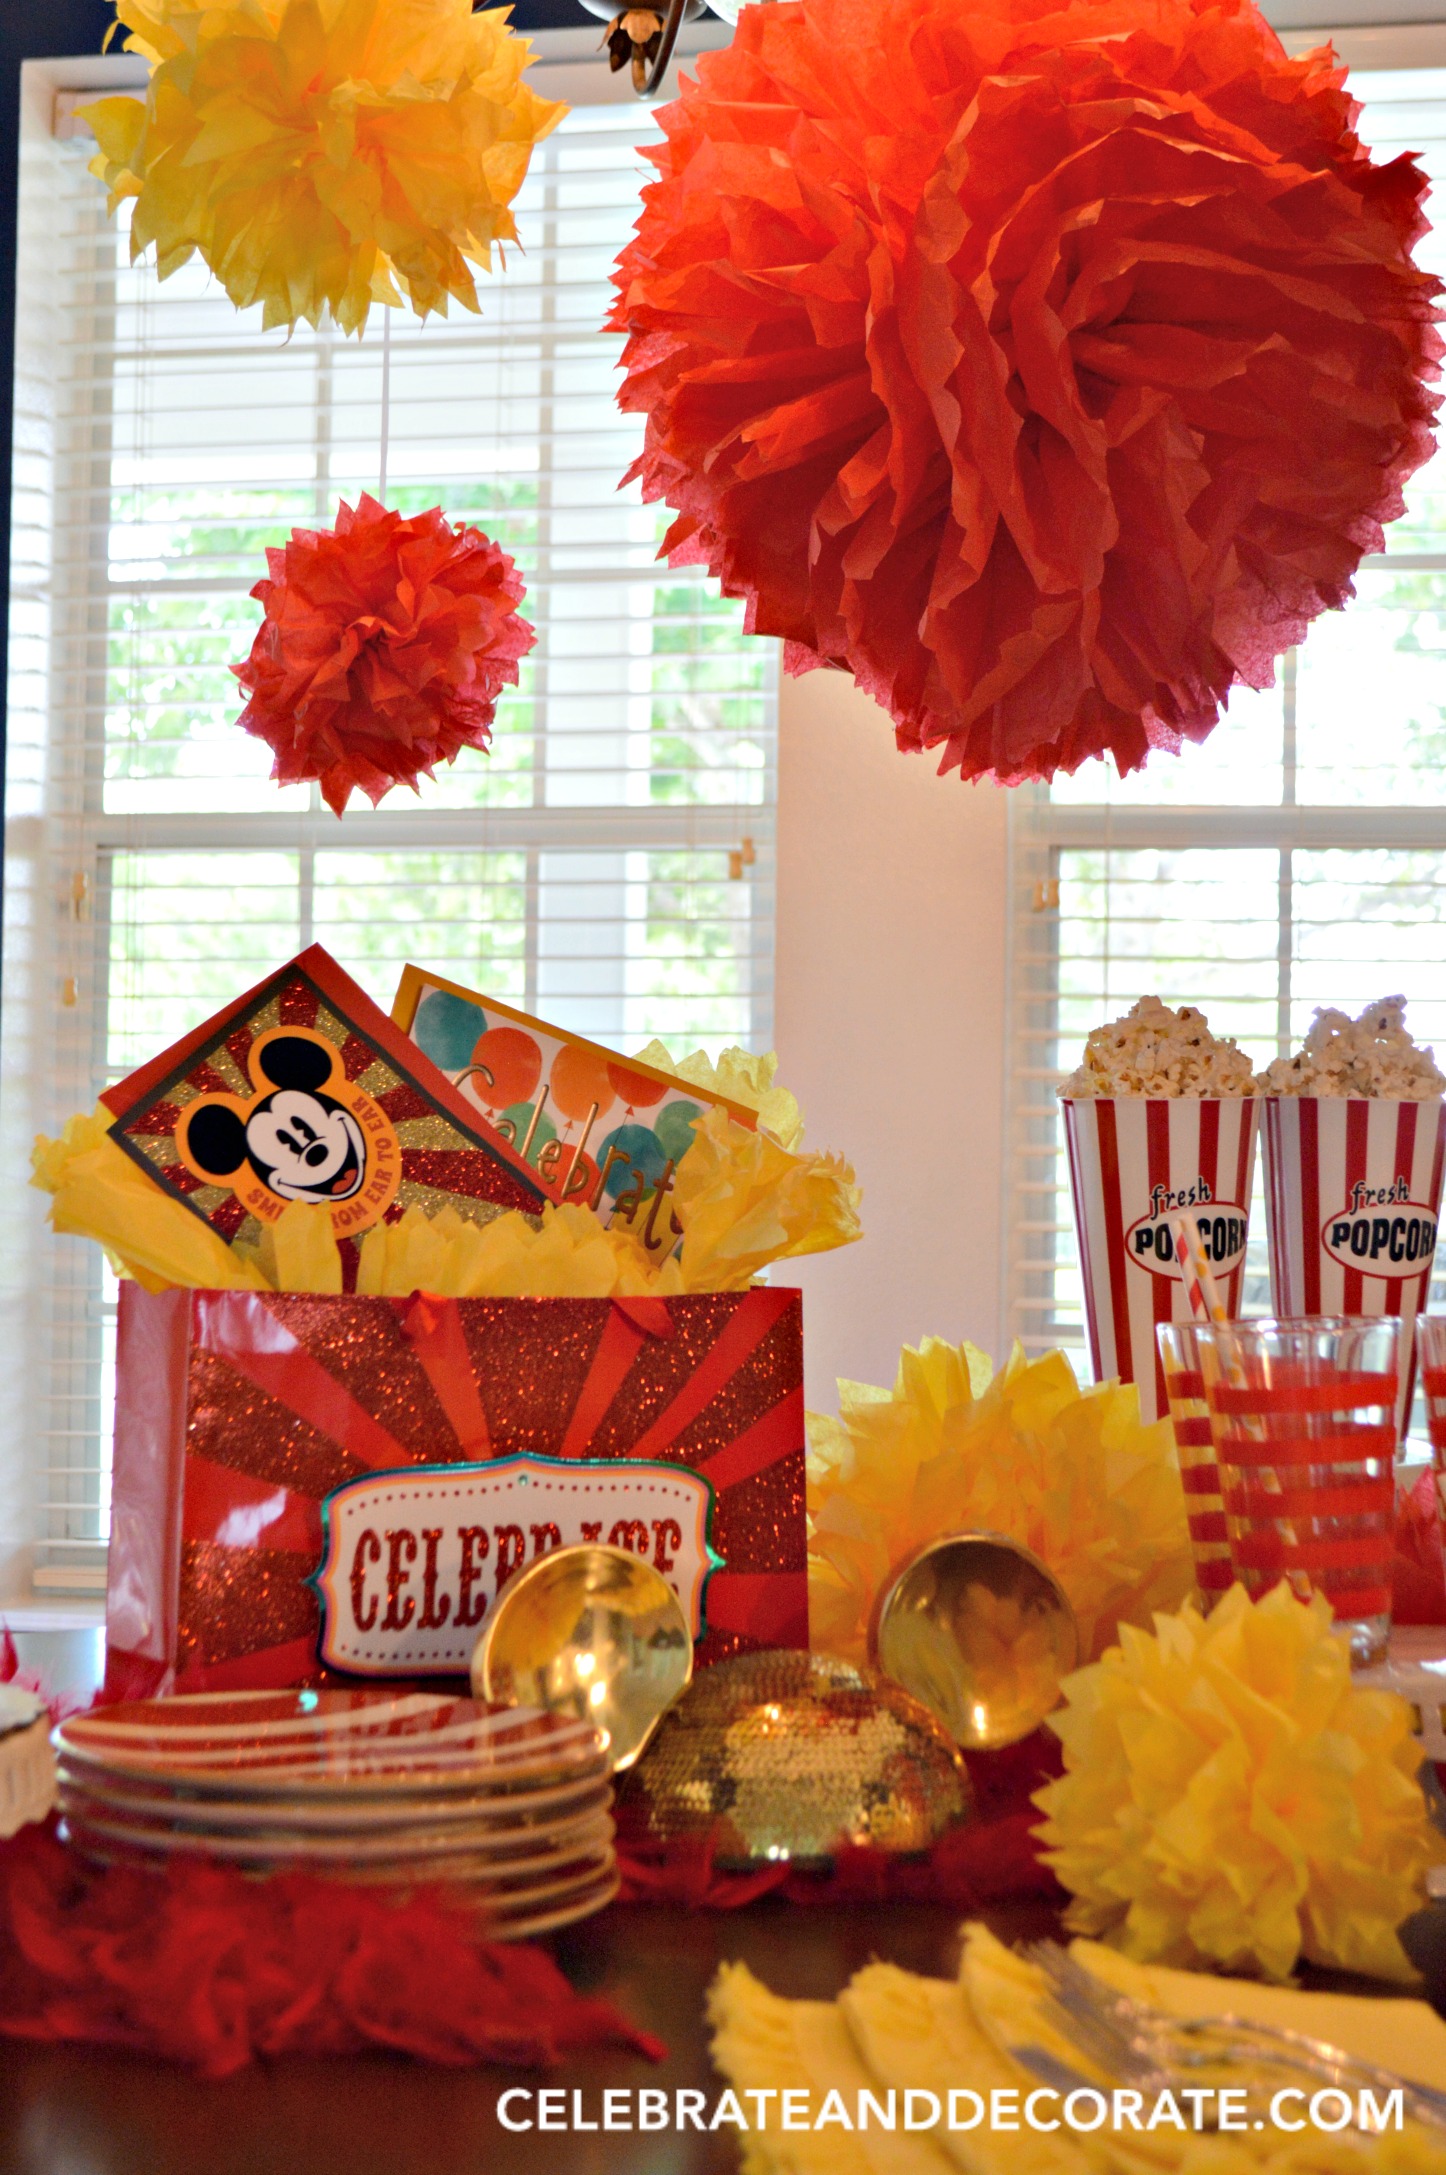
Tissue paper pom poms are such an easy way to add a festive look to a party or celebration, and are such an inexpensive way to add in a pop of color to your party! I was gathering friends for a little party for my sister’s birthday and wanted to make sure everything looked fun.


So how did I make those fun pom poms? Here you go…step by step.
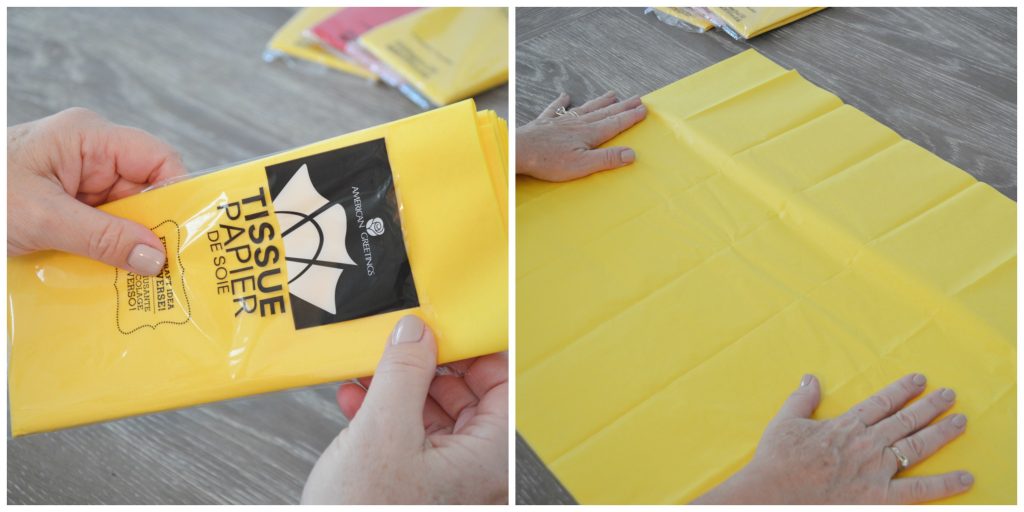
Step 1
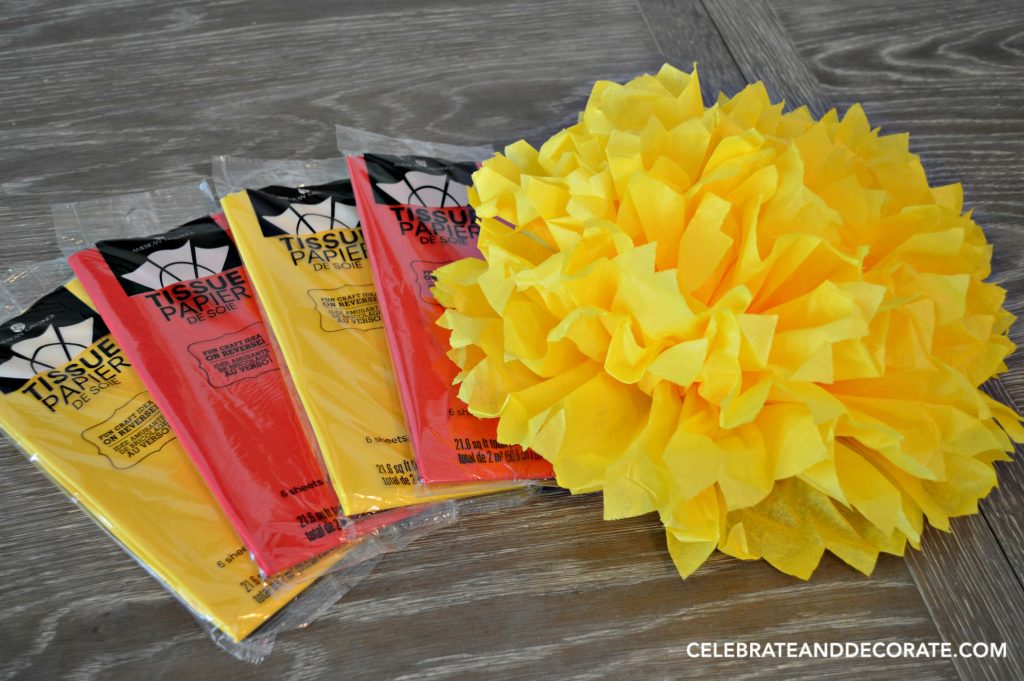
Open up your package of tissue and smooth it out as much as you can.
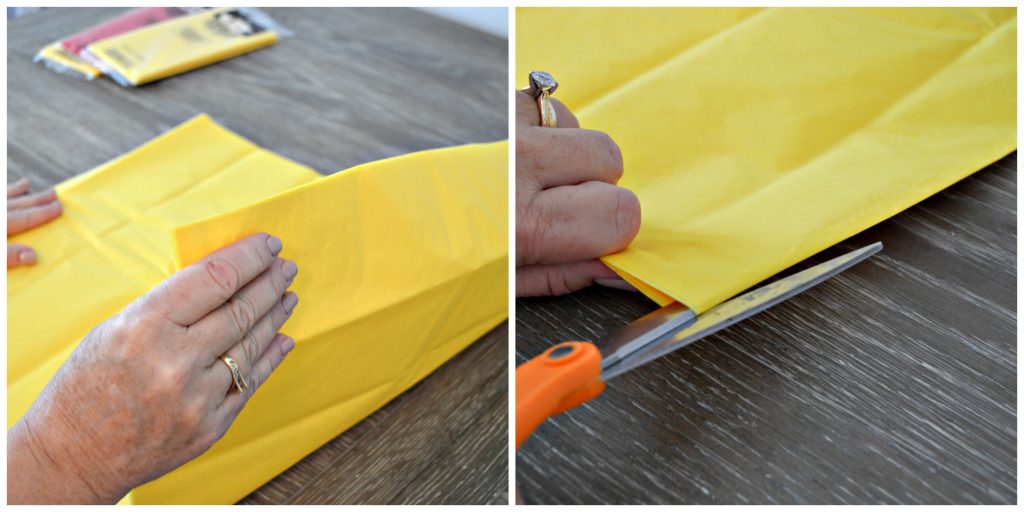
Step 2
Fold over the entire stack of tissue paper and cut the whole stack in half.
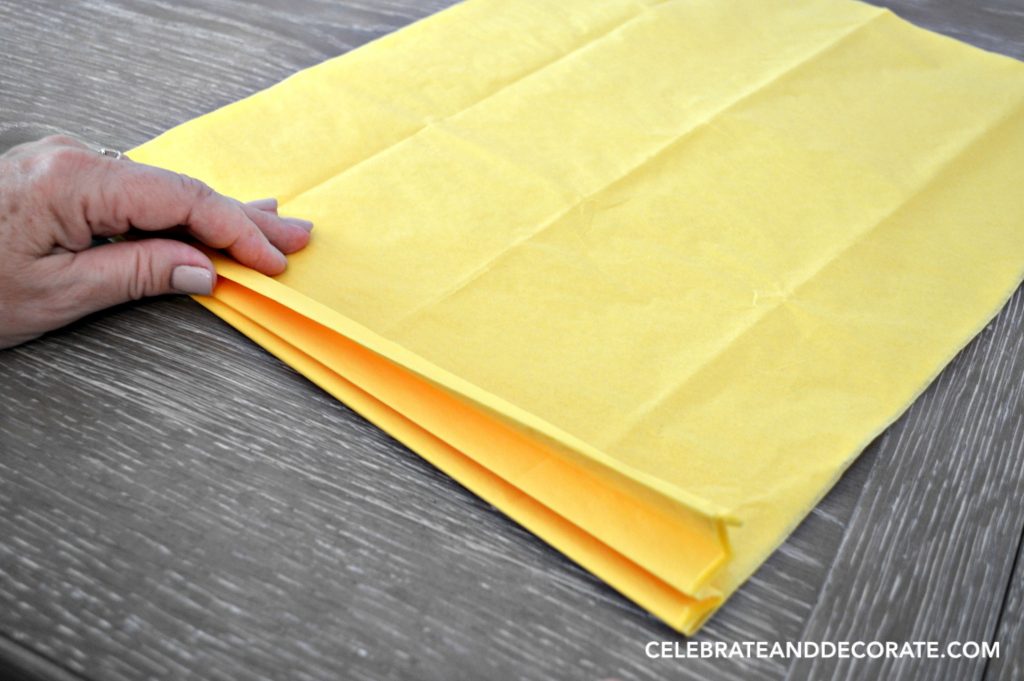
Step 3
You will make one medium size pom pom with one of the halves of the tissue paper. Make sure your tissue is all lined up as neatly as possible with the edges together. You will begin folding it in an accordion pattern.
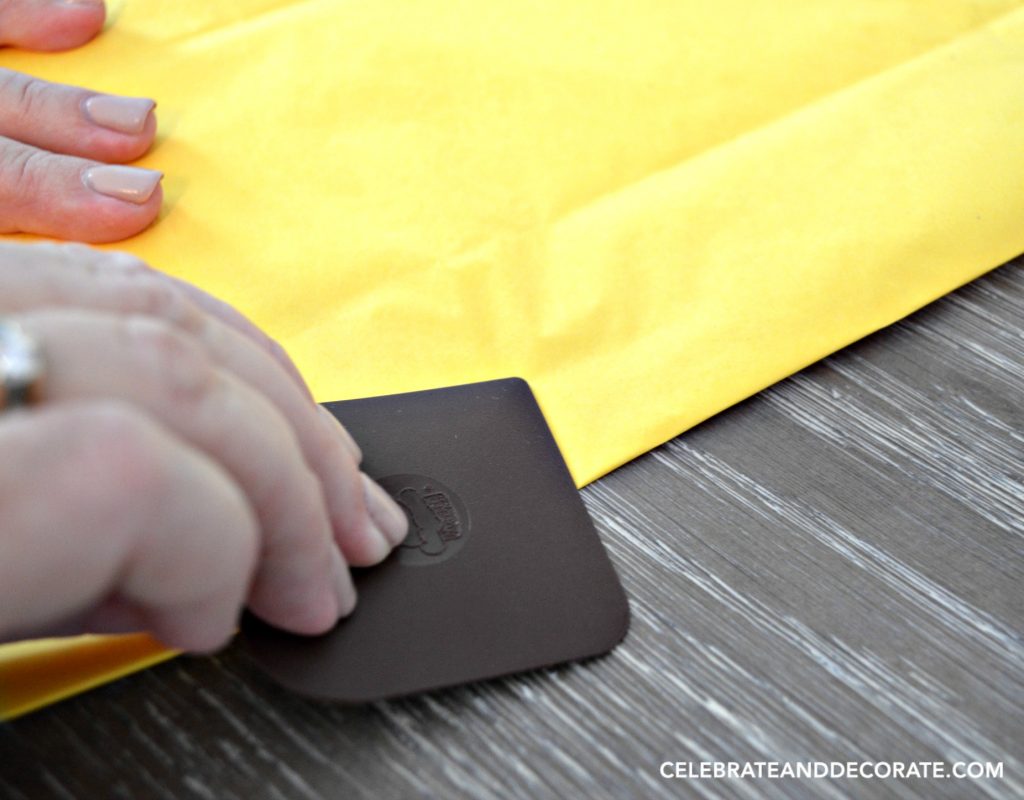
TIP (use an embossing tool or a pot scraper like I did to make sure your folds are crisp)
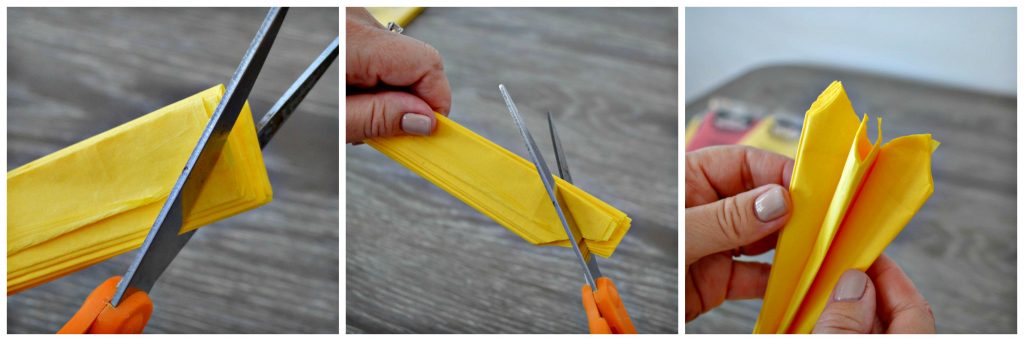
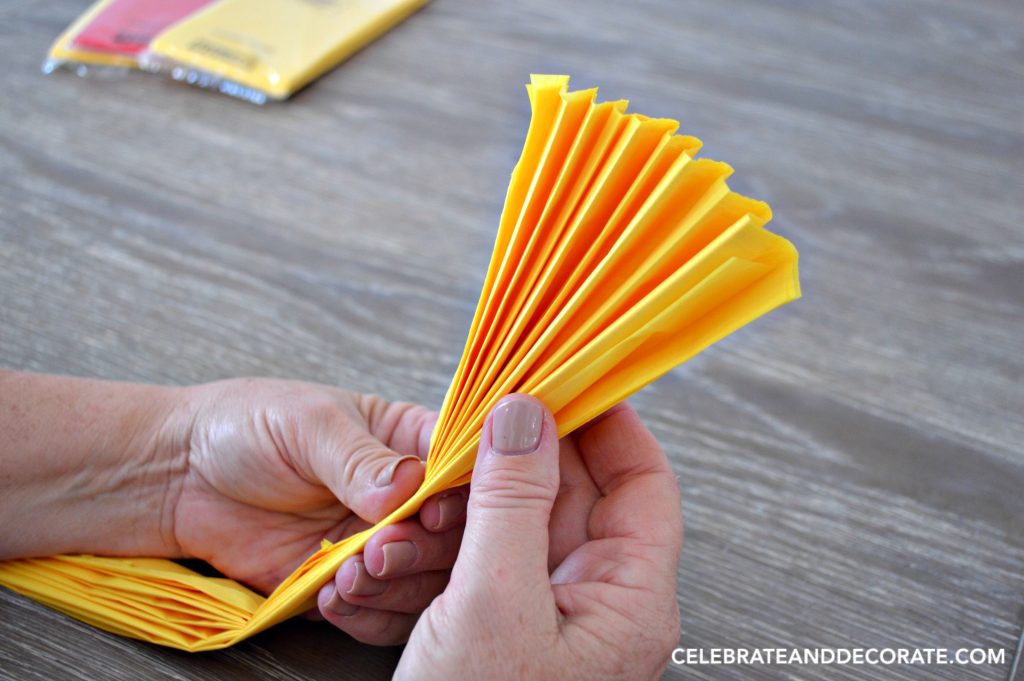
Step 4 Take each end of the accordion stack and cut it into a point. (alternately you can cut a curved end to make it more floral-like)
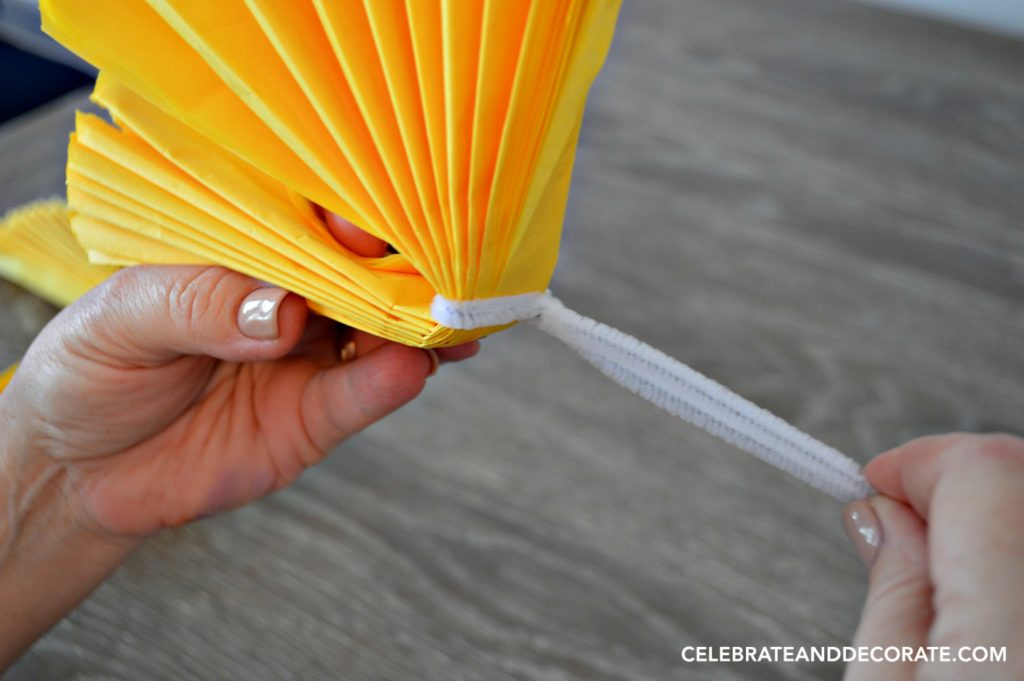
Step 5 Use a chenille stem or a piece of floral wire to wrap around the middle of the accordion-folded.
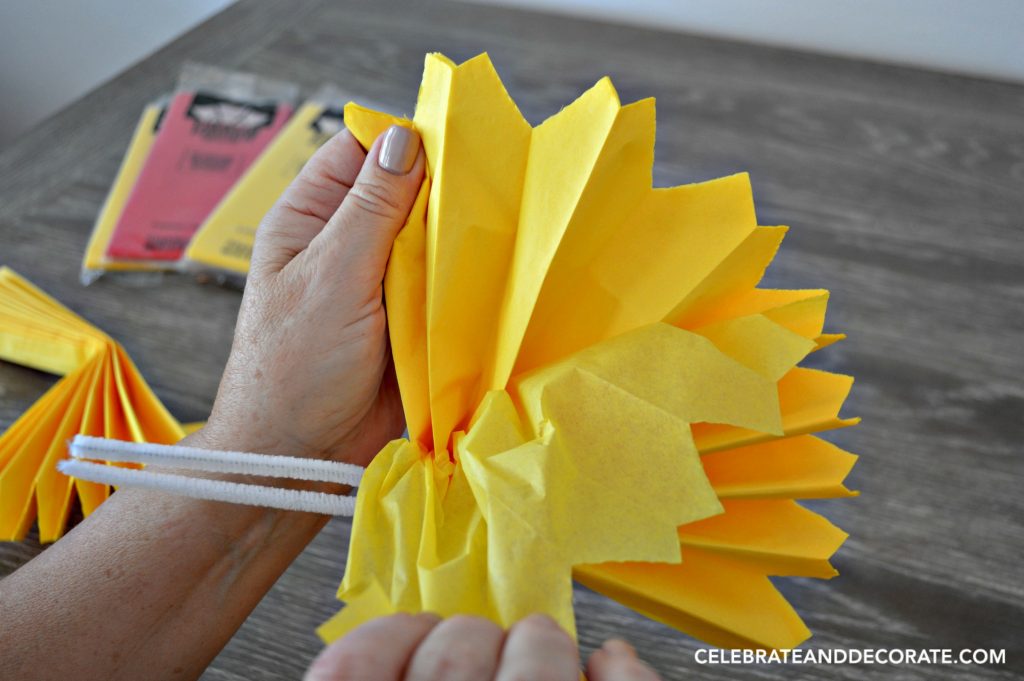
Step 6 Carefully begin to start separating the layers of tissue paper. Be gentle, it is tissue paper and it can tear. Keep going until you have gracefully unfolded all of the layers. Fluff it out and there you have it!
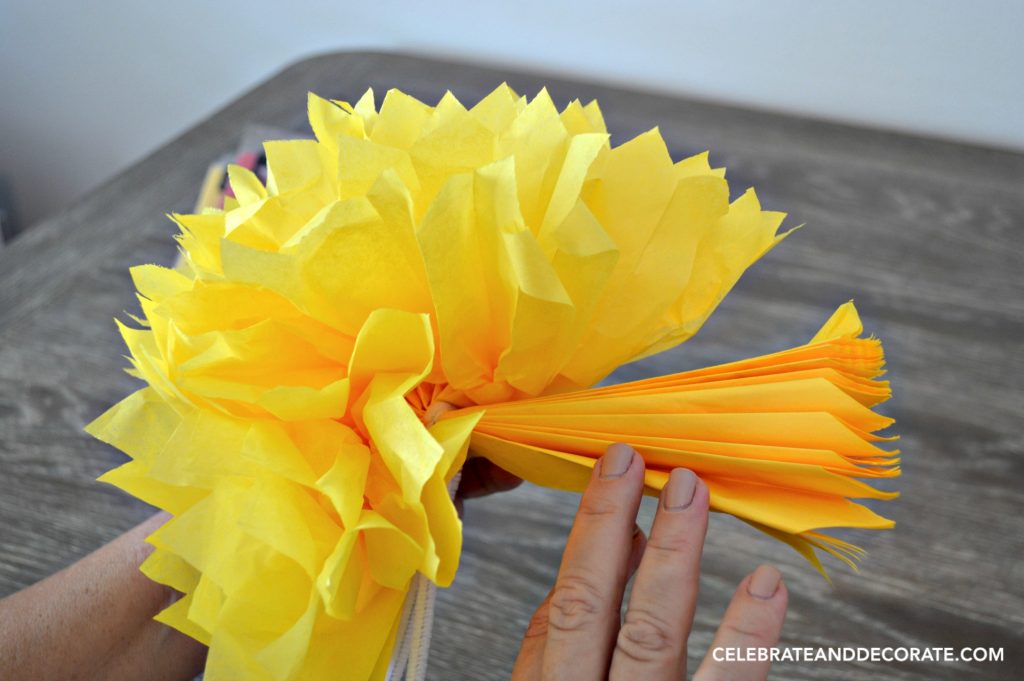
Step 10. Congratulations! You have made a festive tissue paper pom pom! Set them on your party table, or hang them from the ceiling or a light fixture and start the party! You can also make a really big one like I did by not cutting the paper in half and using a whole package for one pom pom. I think if you use the measurements I gave you, they are perfect for sitting on a tabletop, but to be fluffy enough to be round, I like to put two of them together for hanging.
Chloe, thanks so much for sharing these wonderful detailed instructions. I have seen these flowers before and have always wanted to know how to make these. Now, I’m going to try my hand at making the flowers. Thanks so much! I hope that you have a wonderful day!!!
Thank you Shannon, aren’t they fun?
Hi….Love the Pom Pom tutorial. I was wondering what size tissue paper you used for these Pom Poms?
Thanks Maggie, I didn’t measure, but they were standard packages of standard sizes of tissue paper. I will get the measurements and share them with you by email!
Gorgeous post!
Great going Chloe and congrats on another shop. This is such a bright and festive post!
Thanks Sandra, it has been a dry year for shops, amazing I got two in two weeks!
Boy does this ever bring back memories. My sister got married in 1976 and we spent hours and hours folding tissues and creating hundreds of pom-poms for decorating the “Just Married” car and reception hall!! I like how yours look using tissue paper instead!! Very festive!
In highschool I remember making hundreds out of kleenex tissue for our float in the parade! We had to cover an entire flat bed truck. And whatever creative thing we made…I can’t recall that -too long ago. But I have totally forgotten how spectacular they can be and using tissue paper, especially from the dollar store can make for an inexpensive pop of color and fun! Love it
I haven’t made these since I was a kid! Thank you for reminding me of these, I am going to have to add some to my next family get together!!! Thank you for sharing at TaDa Thursday!!!
What a fun project! I love the beautiful bright colours that you have used! They sure add a nice touch to any celebration! Thank you so much for sharing your project over at Waste Not Wednesday! Look forward to see what you have been up to this week!
Thank you, those pom poms are the quickest way to add pops of colors!
Great looking tissue flowers! You’ve inspired us to make some for our next party!
Thanks Heidi, they are so easy and add so much fun!
These are super cute! Thanks for sharing at Merry Monday. 🙂
These are very pretty and full. No skimpiness anywhere. They of course make great pompoms that can really add a festive air to a room or party.
Thanks Mary, I think it is such an inexpensive way to add fun color!