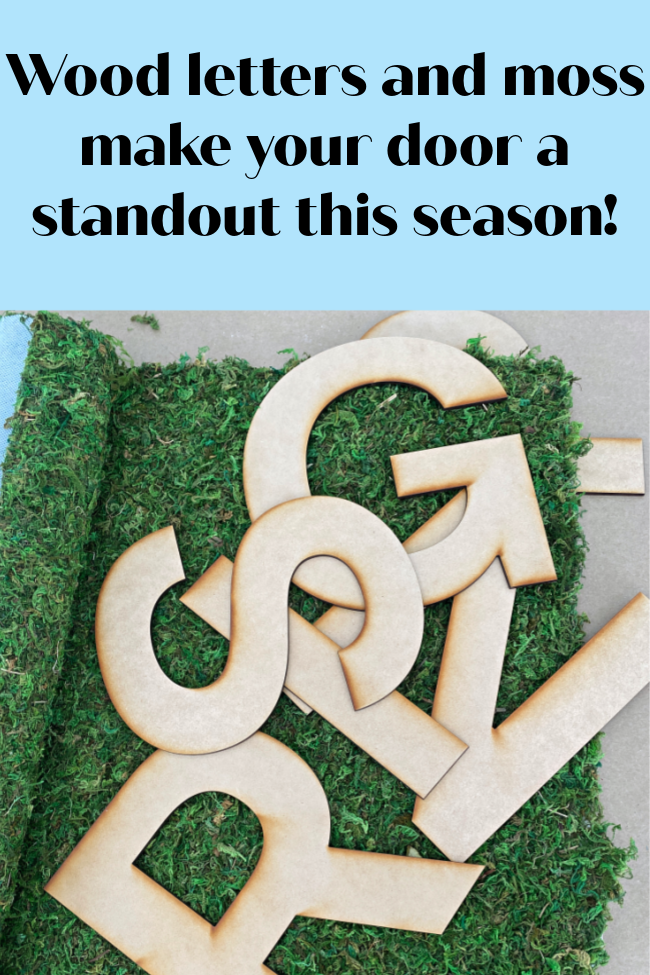
Decorate your front door for springtime with this fun and colorful DIY!
I am always looking for something new for my front door for each season or holiday. Sometimes you want something other than a traditional wreath. So, what says SPRING, better than S-P-R-I-N-G? There are lots of ways to do that, adding letters to a wreath or a straw hat, but I decided to just go with the letters and make them “springy”. So how to add “spring” to the letters? Read on!
I choose every product I use or feature. I may earn an affiliate commission if you buy from one of the product links, at no extra cost to you. This income supports this site. See the full disclosure.
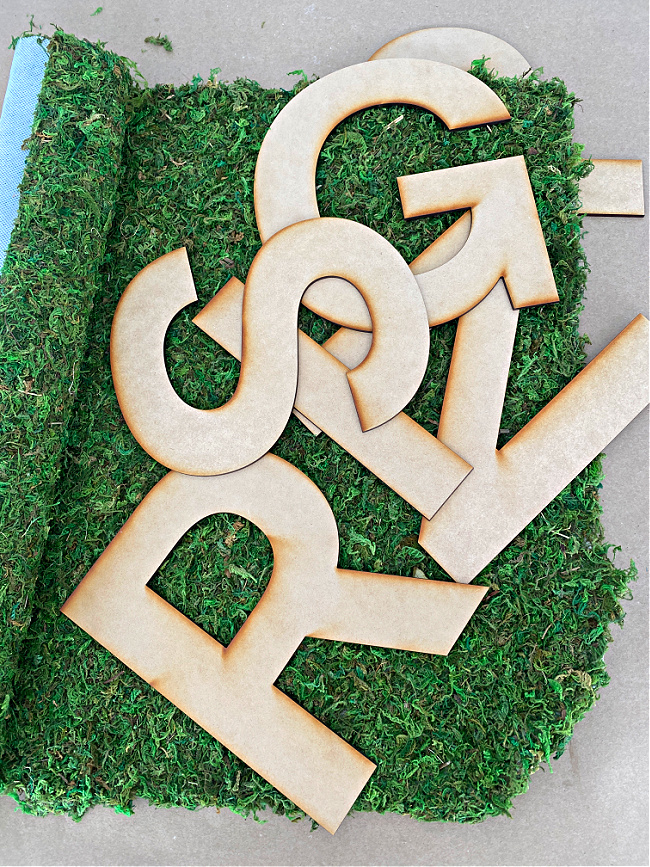
Get yourself some wooden letters and some sheets of moss and start creating! At the bottom of this post you can find links to the where I got my supplies for this project.
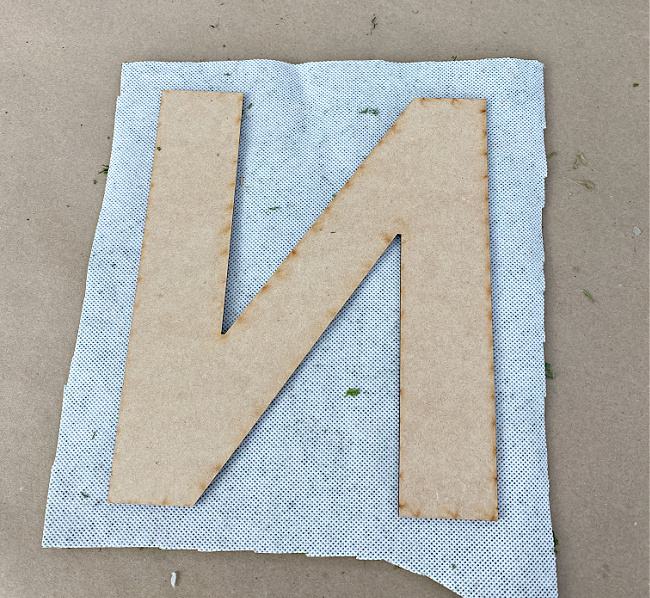
Lay your letter down on the back side of the moss, and lay the letter down backwards. That is really important, because after you attach the moss to the letter and turn it over, you want the letter to be the correct direction. This is not quite so important with the “S”, “N” and “I”, but will be very important with the “P”, “R” and “G”.

Apply a generous amount of hot glue to the FRONT of a letter as shown above.
Press the letter down firmly to the backside of the moss sheet.
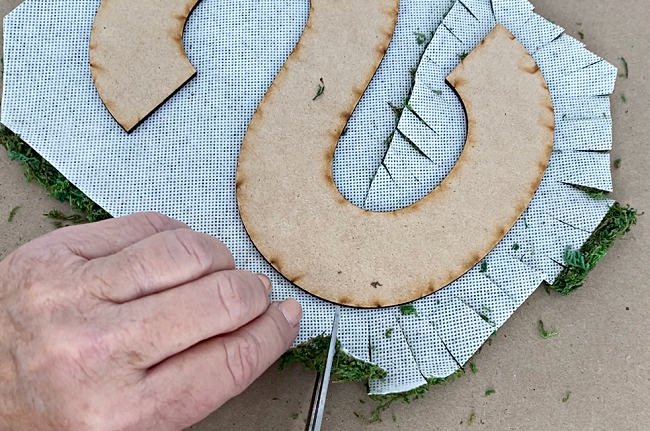
Using some utilitarian scissors, clip small cuts every half inch or so around your letter as shown above.
Complete the cuts all the way around your letter.

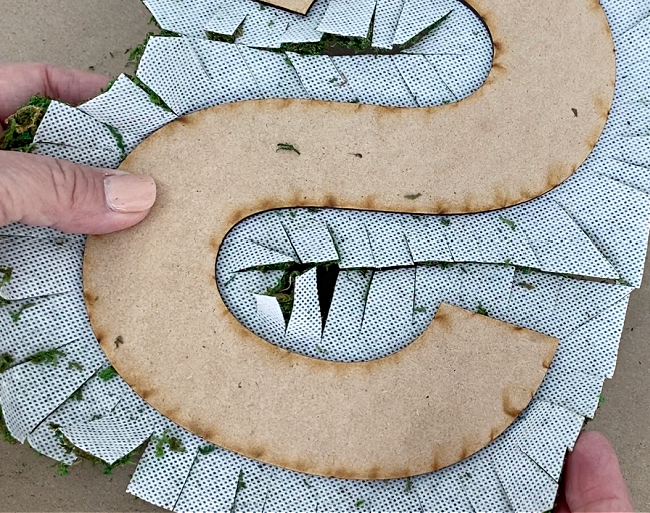
Using your glue gun, fold over the cut tabs and glue them to the back of the letter.
When you have glued ALL of the tabs down you can turn your letter over and it should look like this!

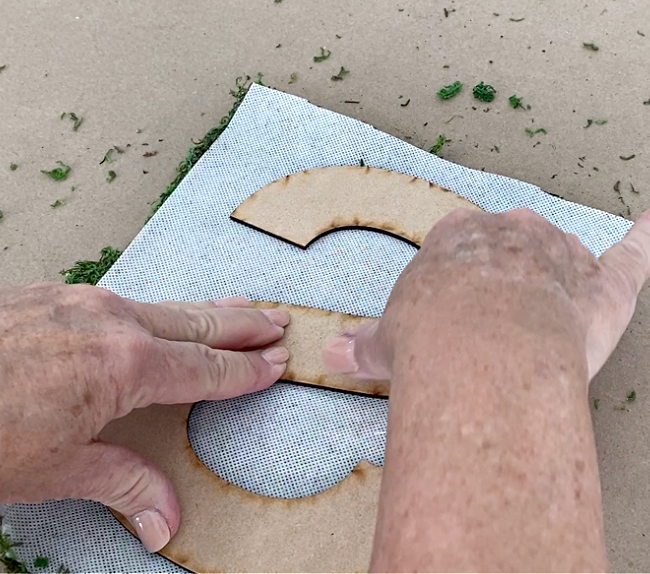
For letters like the “P” and “R”, you will have a little challenge. When you have an area that is completely surrounded like shown above, you will need a sharp pair of scissors or knife to cut a hole.

After you have cut a hole, cut slits like you have done around the edges of your letter. (See above)
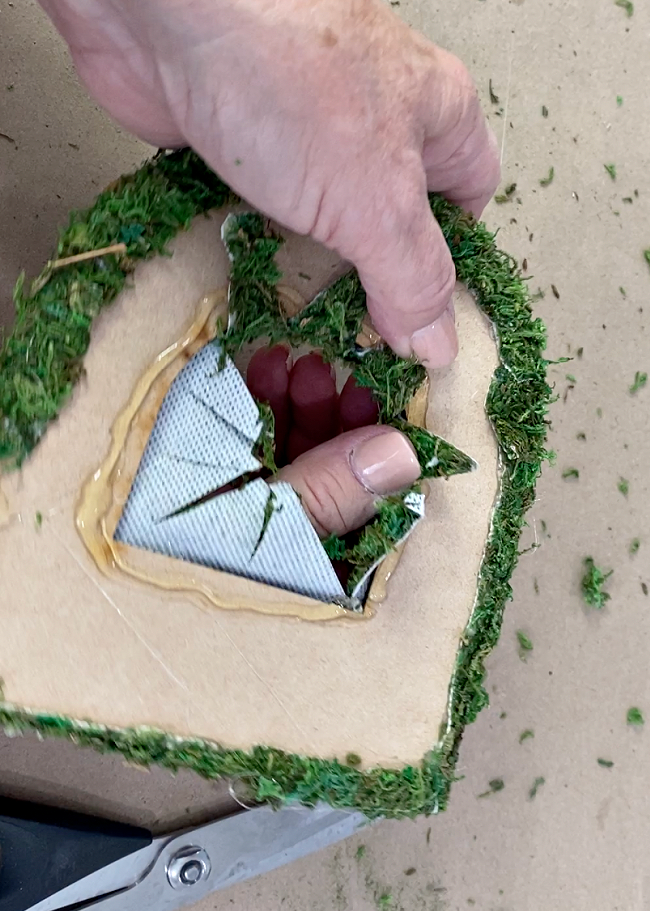
Then simply glue down the tabs you have cut in that hole.
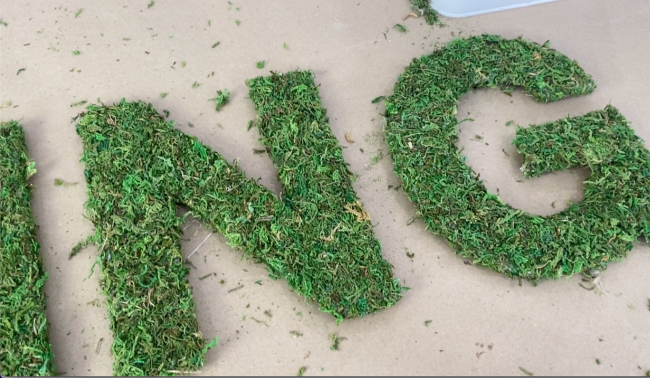
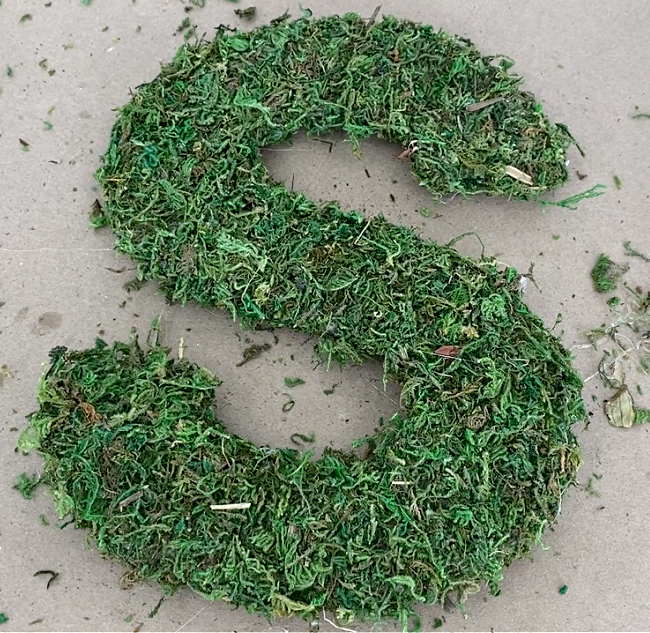
Before you know it, you will have all of your letters covered with moss!

My tip for keeping the moss from shedding quite so much is to use some hairspray to give it a thick
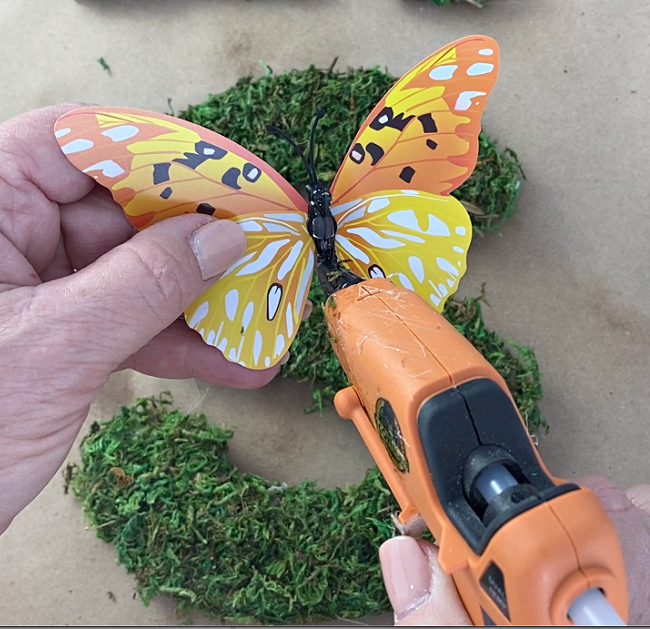
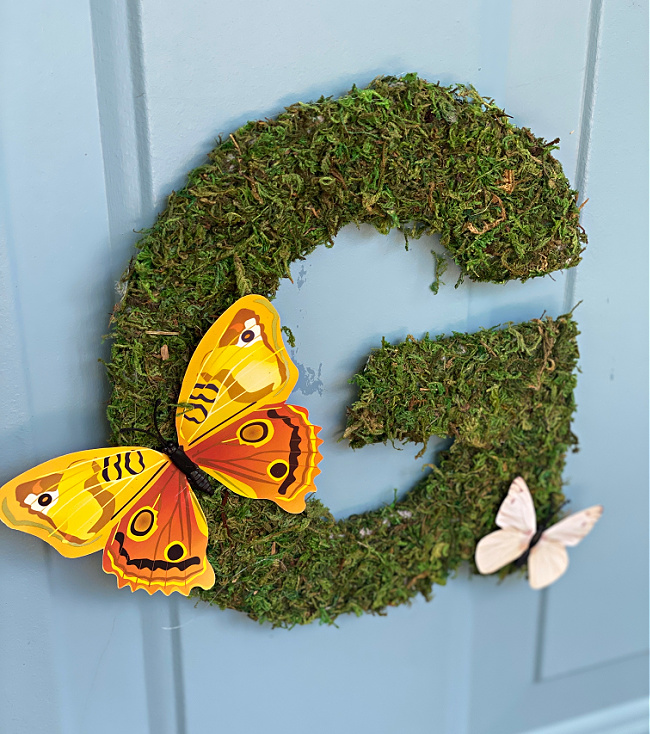
I bought 84 of these plastic butterflies for just $9.99! I am going to be sharing lots of butterfly crafts this season! I picked out one or two to add to each of my moss covered letters.

I didn’t want to put too many butterflies on each letter so that it would make it difficult to see and identify the letters.

I used Command Picture Hanging Strips to attach the letters to my front door!
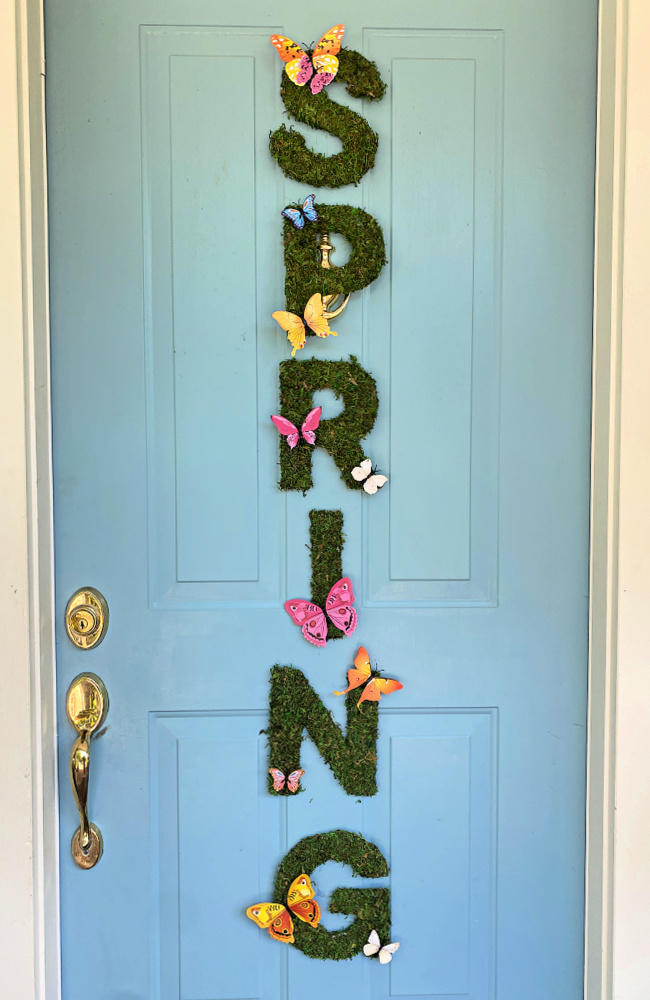
There is no doubt what season it is at my front door! Happy Spring! I hope springtime weather is heading to you in your neck of the woods!
Oh Chloe, this is beyond cute! How clever you are, what an original idea!
Thanks so much Jenna!
Your door looks so springy! So creative and fun.
Beautiful SPRING sign! Love your little butterflies! Thanks for sharing it! #HomeMattersParty
Mel
Home Matters Party
Happiness Is Homemade
You’re The Star Blog Hop
Okay, this is super cute, and once again you could do a spin on this for every season. How fun and cute. What a greeting to walk up to!
I’m loving this idea, Chloe. I need to do this.
Well, it would certainly go with your green thumb!
love this chloe! Saw it on the link party! laura in Colorado
Not only did I love the lemon bouquet but this sign for S P R I N G is fabulous!! I will be making this for one of my doors next spring! Thank you for the simplicity of it! I am up in my 70’s and doing things that I like doing can get complicated..lol..just me! Anyway this is a much simpler project and I love it! So many different signs could be done!
P.S. I forgot to ask where you got your letters from please?
I found your supply list ..thanks
I bought mine at Joanns!