
DIY Candy Cane Swing
DIY Candy Cane Swing
 This post contains some affiliate links for your convenience. Click here to read my full disclosure policy.
I made a version of this on a Facebook Live video, but I thought it was time to re-make it and refine it just a little differently. You can watch the original video here. I will be making this on a Facebook Live for Hometalk’s Facebook page on December 8th if you want to tune in and watch and ask questions as I make it live!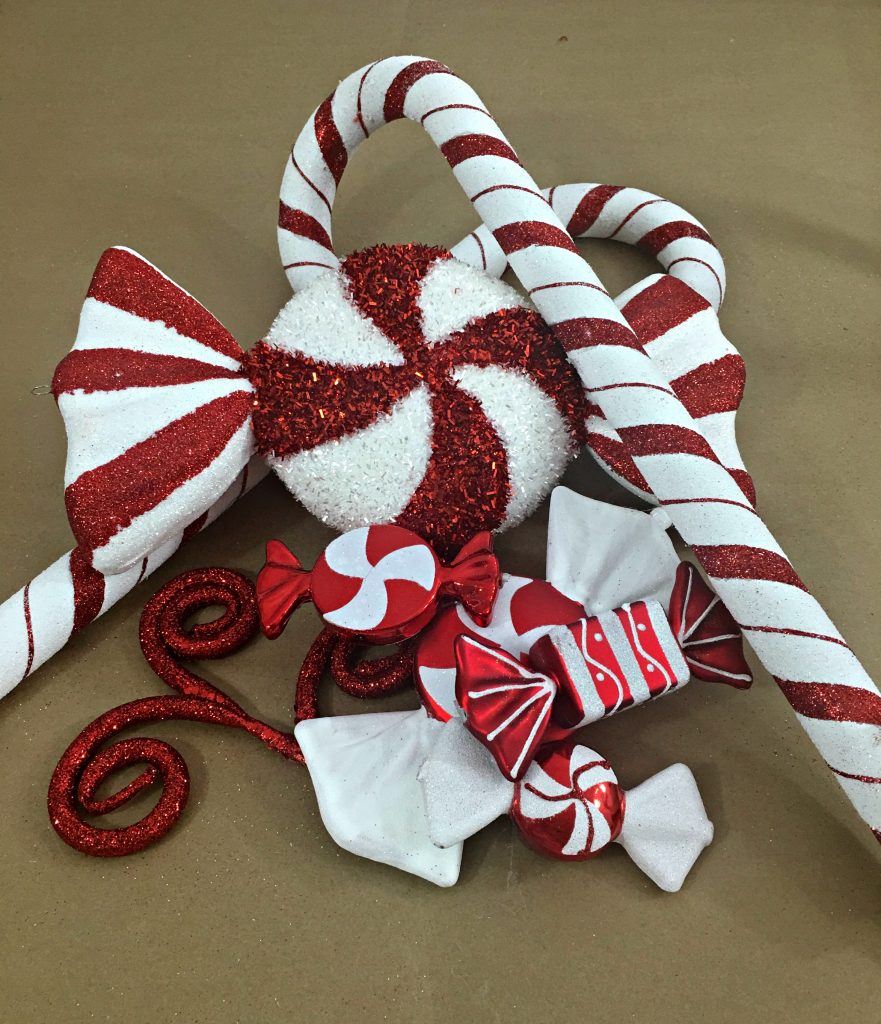
I headed out to the craft stores and picked up a selection of candy-inspired Christmas ornaments and decorations. The most important items for my swing are large candy cane picks from Michael’s. They are currently available online for just $3.19! They were out of stock earlier, so get yours quickly! 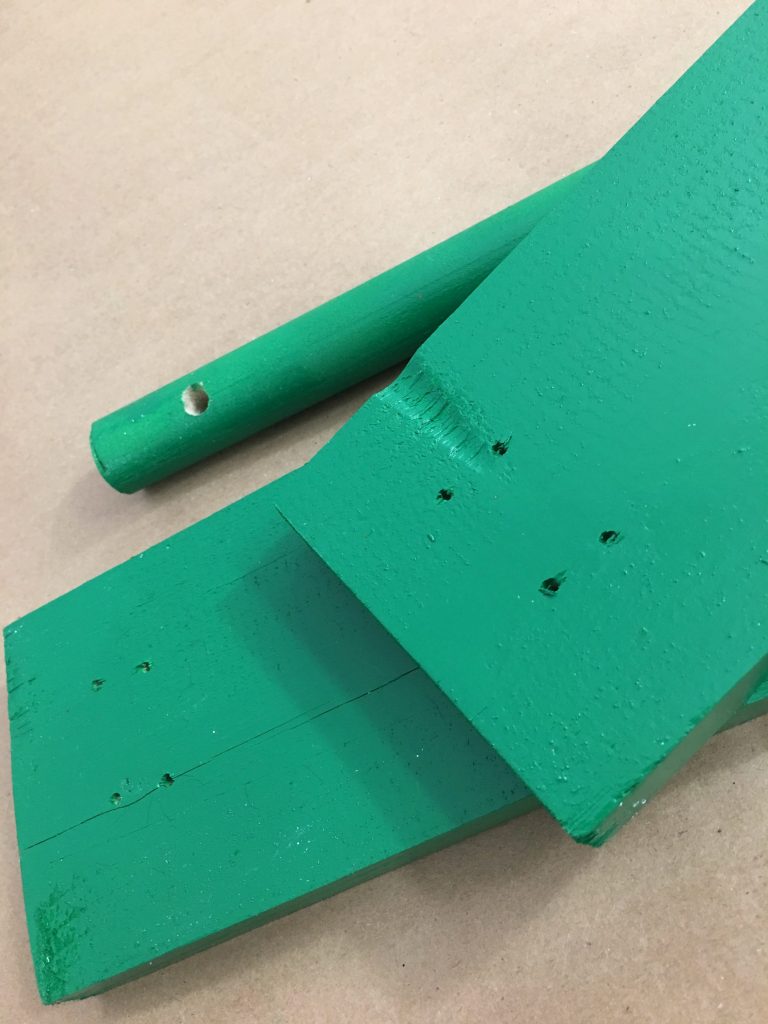 Digging around the garage I found some scrap wood and my Dad was nice enough to cut it and then drill some holes for me. What I used were two pieces of wood both 17″ long x 3 1/2″ wide x 3/4″. I painted them green, and then Dad drilled those holes. The 3/4″ diameter dowel was also painted and cut to 17″. The holes in the dowel were drilled to fit the metal poles in the bottom of my candy canes. The holes in the seat and back of my swing were just big enough to accommodate a pipe cleaner.
 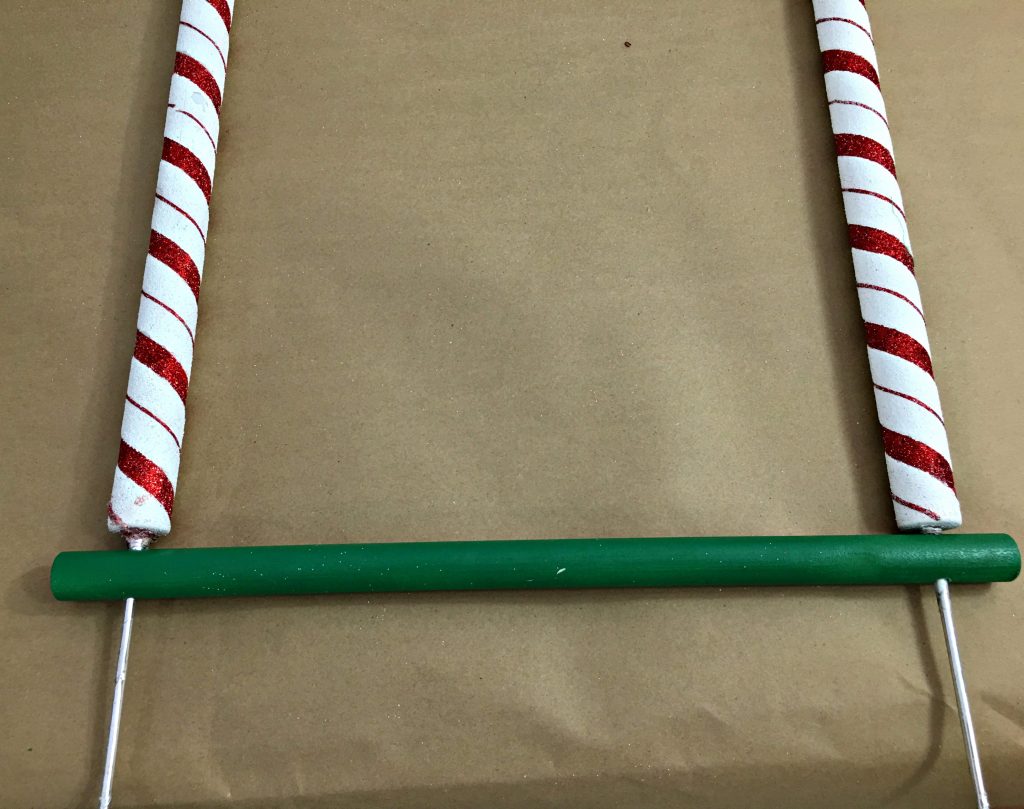 The first step is to slide the dowel down over the “stems” of the candy canes. Secure it with hot glue. I finished mine off by wrapping a pipe cleaner tightly around the top of the spot where the “stem” comes through the dowel.
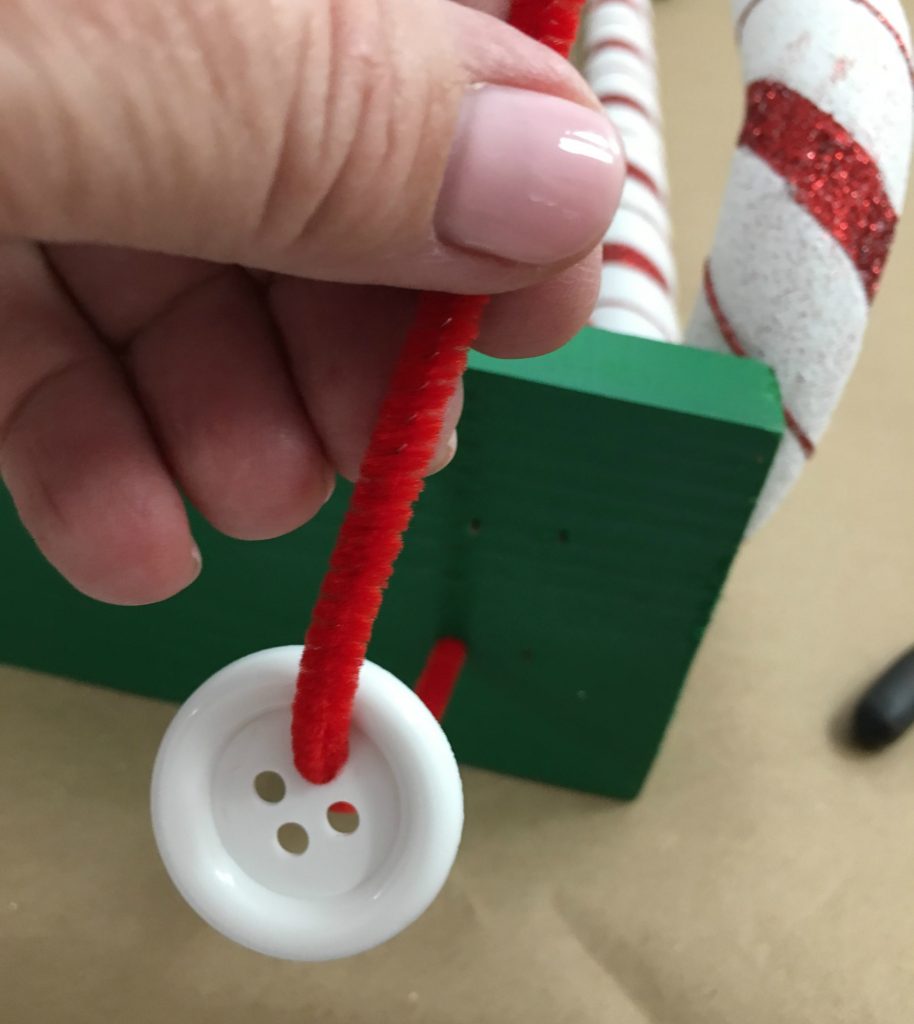
This is the complex, but easy to manage part of assembling the swing! You will want four large buttons and eight red pipe cleaners. Thread each red pipe cleaner through your button across the front of it to make and X with the two wires.
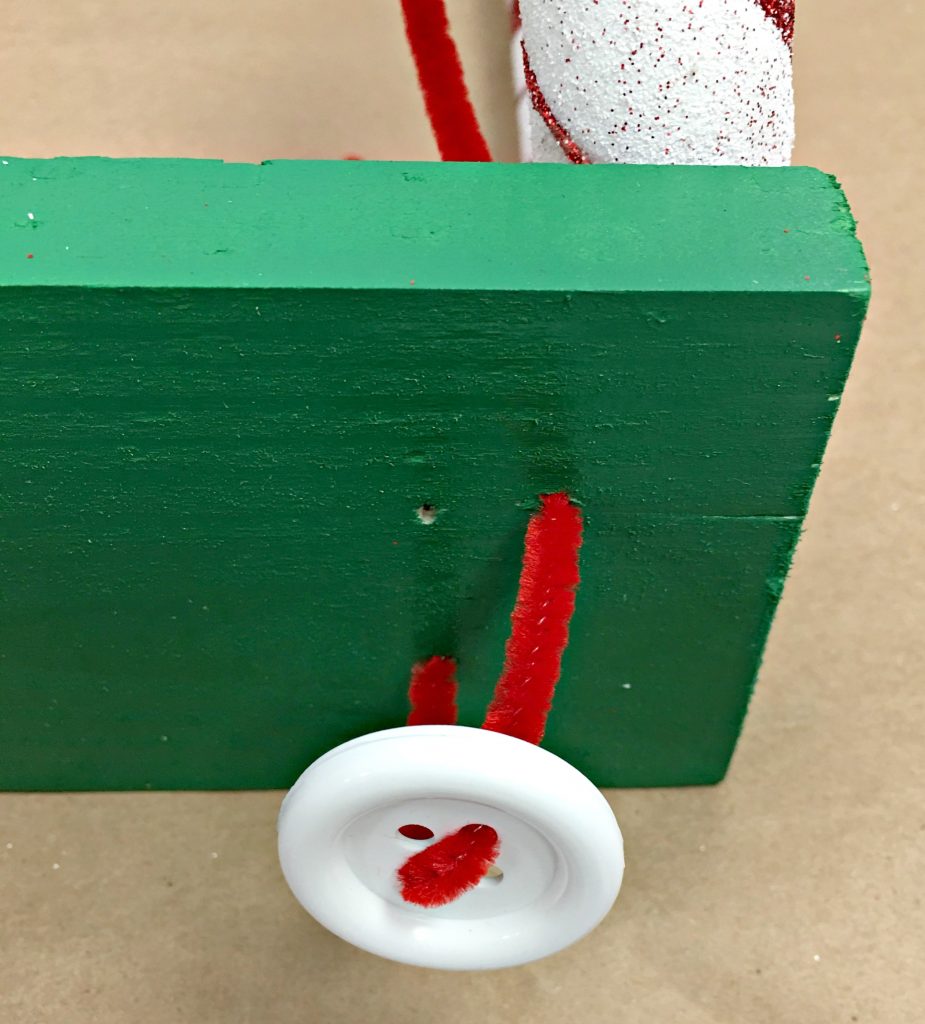 Feed the ends of your pipe cleaners through the holes in your base, using the diagonal holes for each pipe cleaner.
 The bottom of your candy cane swing and the back of it will look like this.
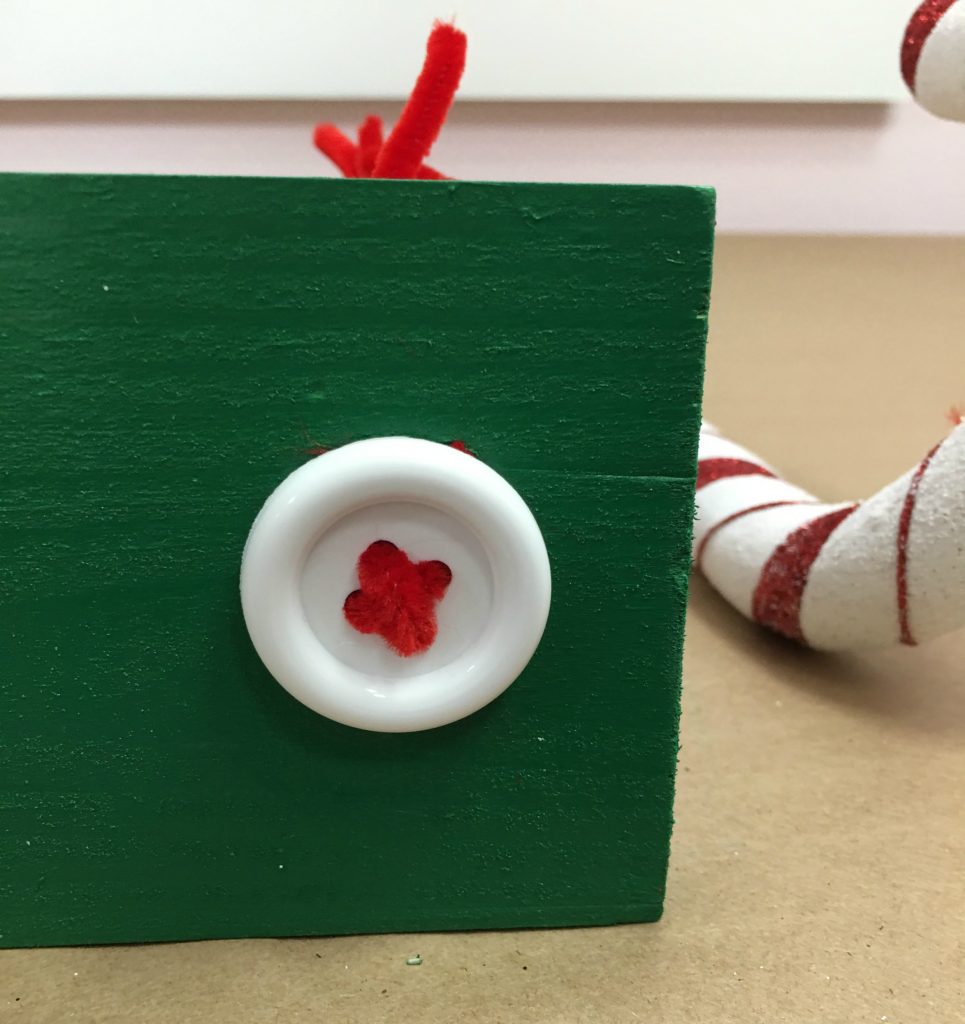
On the top of your seat and the back you will have the four ends of the pipe cleaners pulled through.
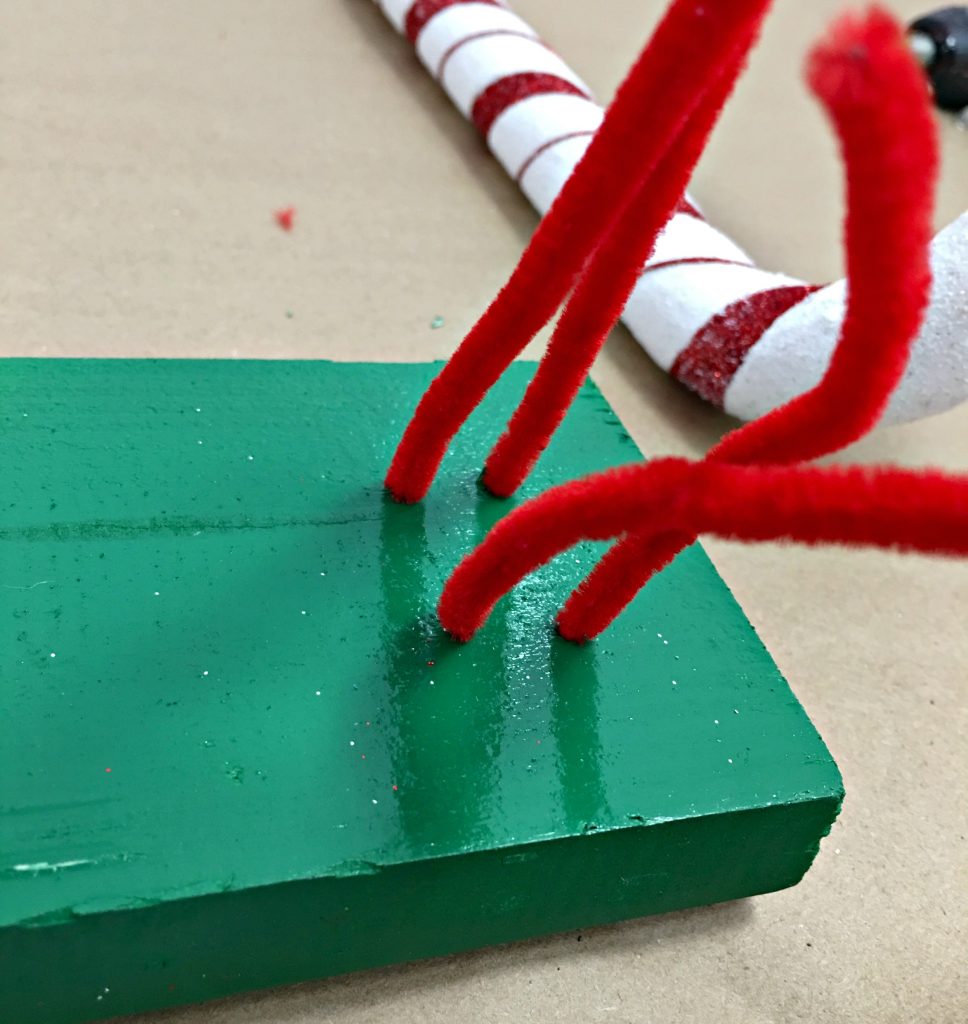
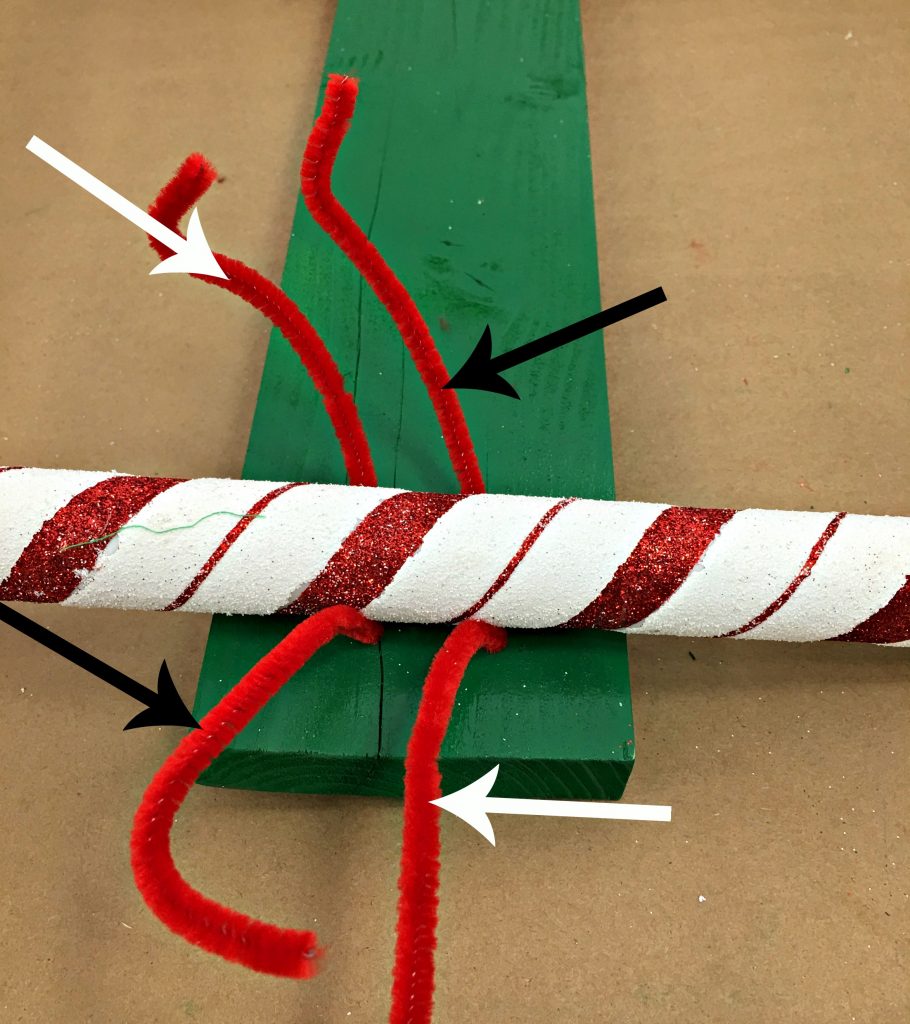 Wrap these over the candy cane, using the opposite ends. In the picture above I have shown you with the arrows, match the black ones to the white ones. Wrap them over the candy cane and twist them together tightly to secure your canes.
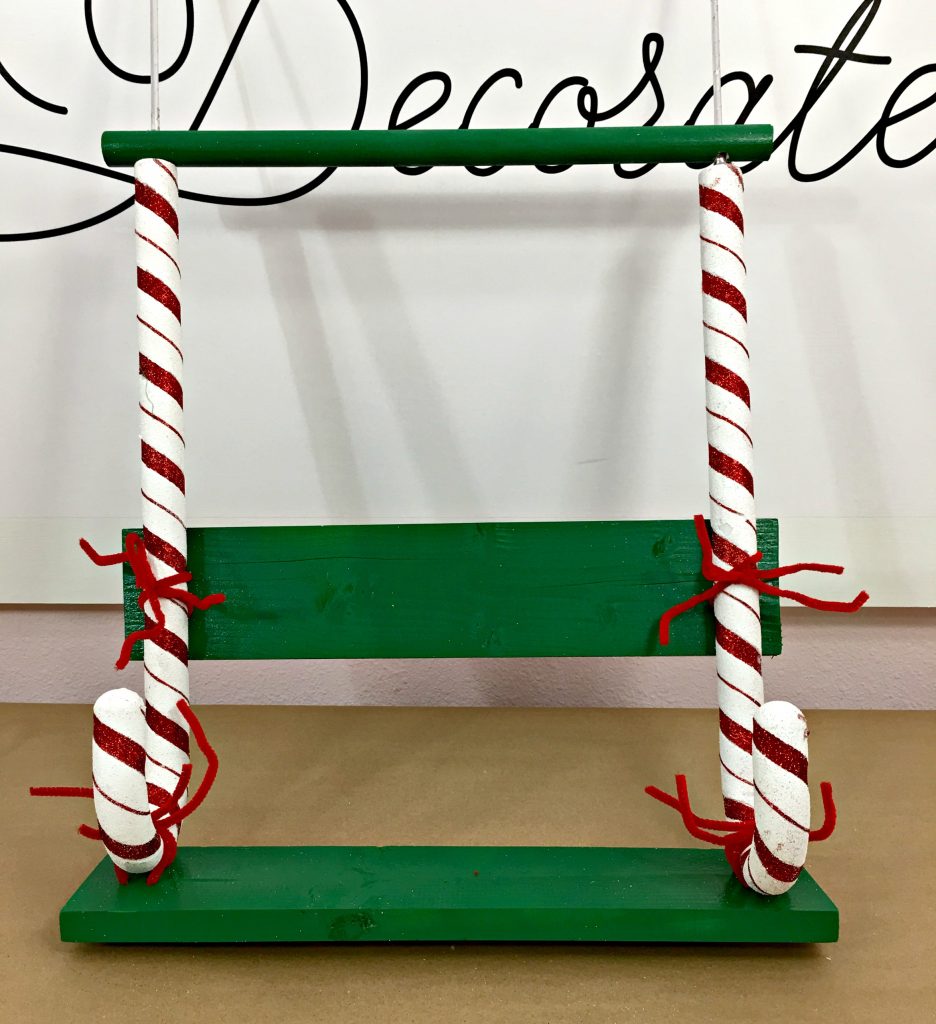 You should have something looking like this.
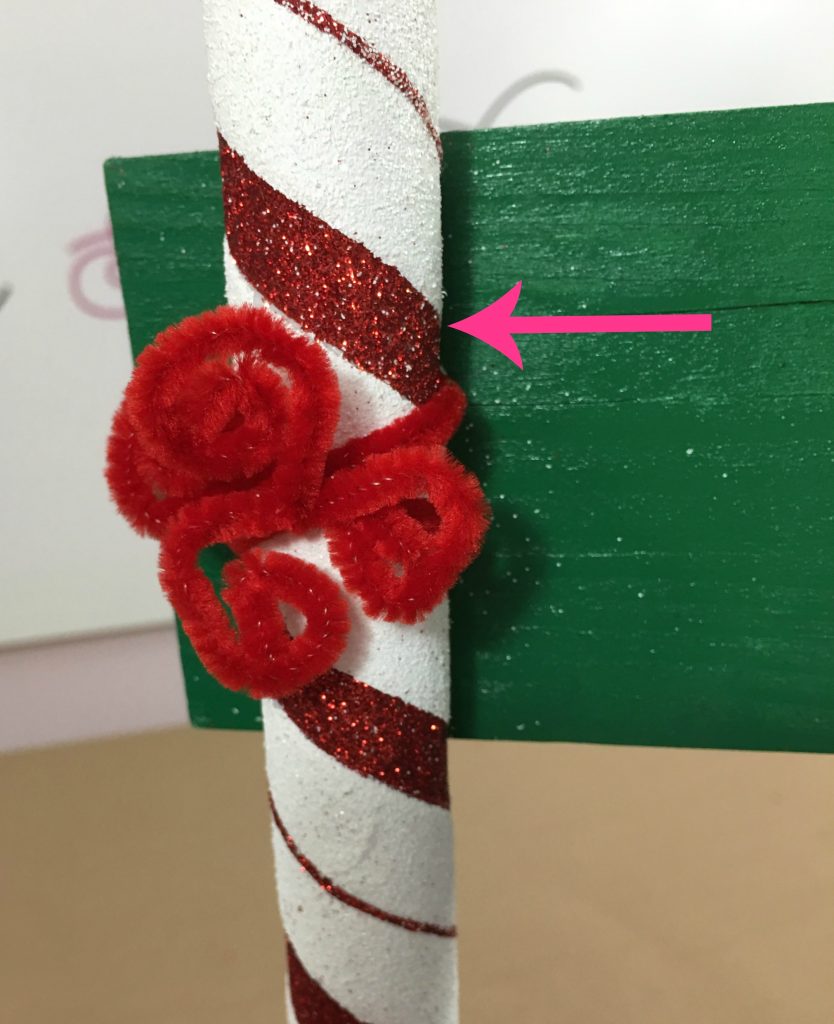
I didn’t bother to cut the ends off, I just rolled them up into little pinwheels. These will just add to the fanciful feel of the swing. You will also want to add a line of hot glue along the back of your candy cane where I am showing you with the pink arrow.
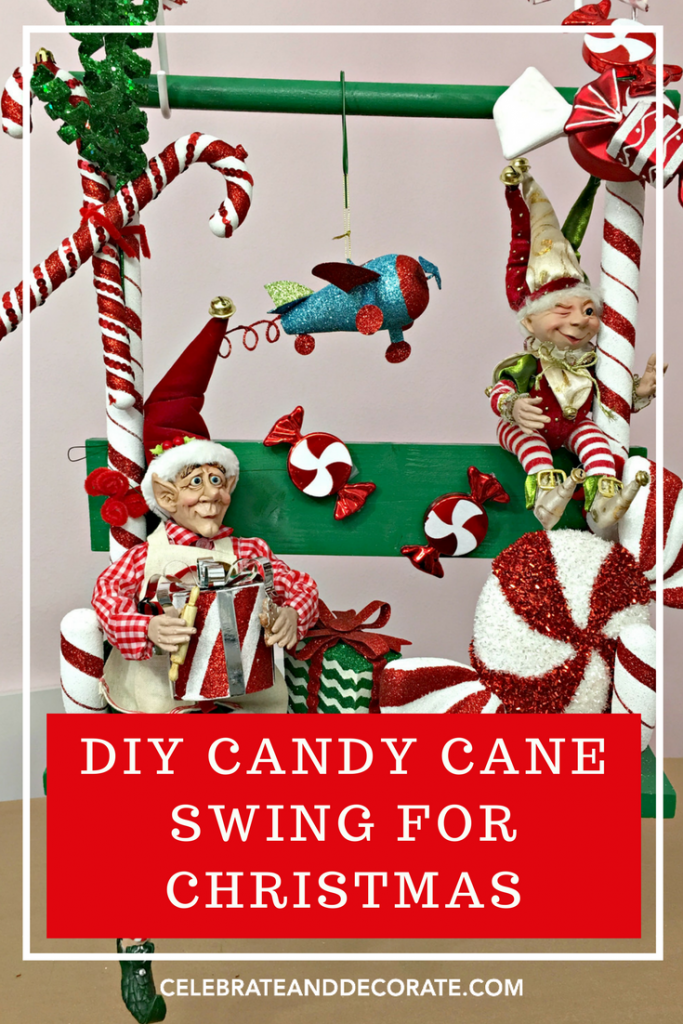
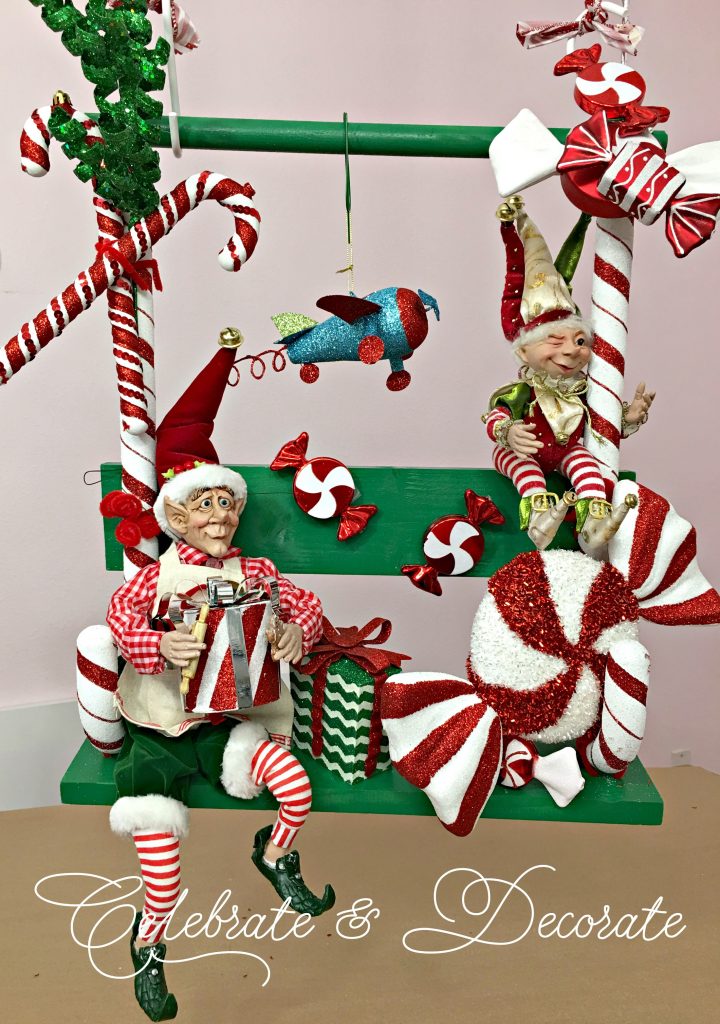
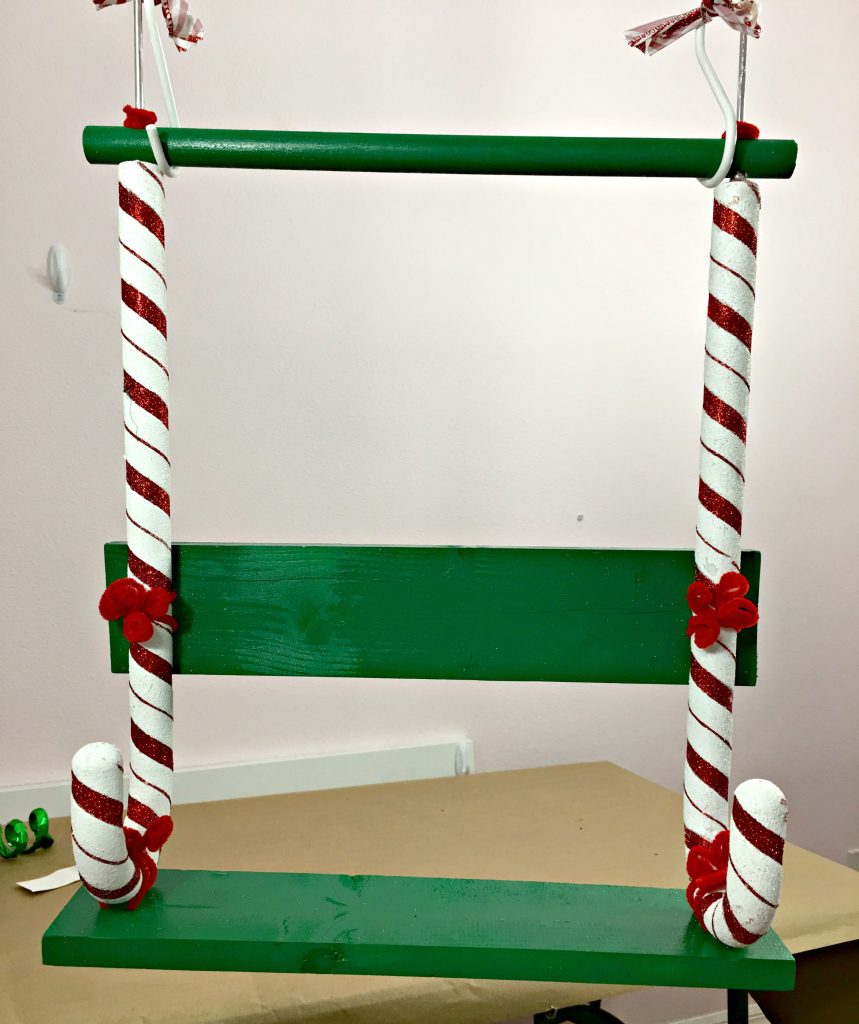 Now you have a swing! Time to have fun and add your elves and other fun decorations to your swing!
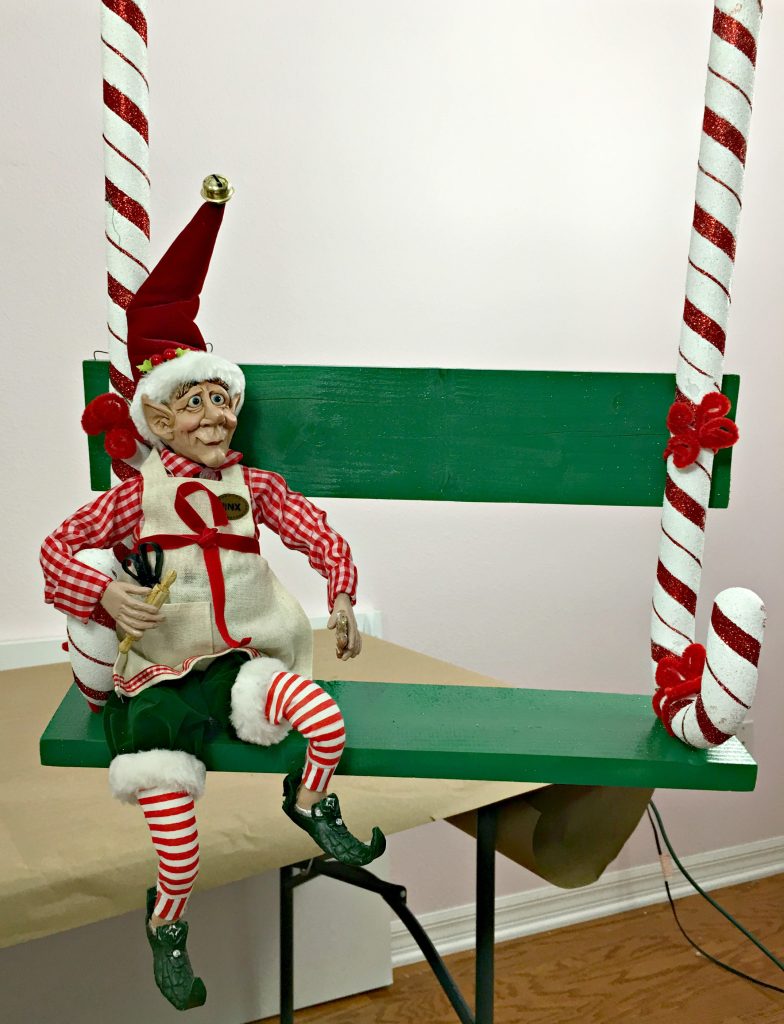 My first addition is Jinx! He is an elf by Raz! The other elf I added came without a name, but one of my Facebook viewers named him Sugarplum Jinglecrafter, which I think fits him just fine! I see more elves in my future Christmases!
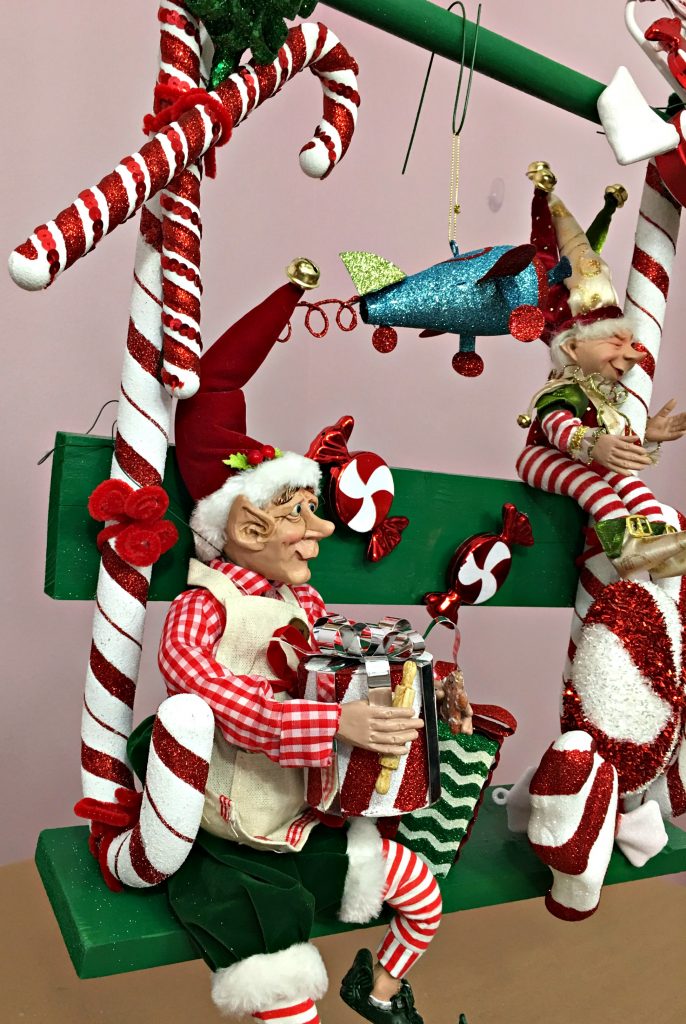 Visions of sugarplums, and little packages and even a little toy plane make this fun for children of all ages to enjoy!
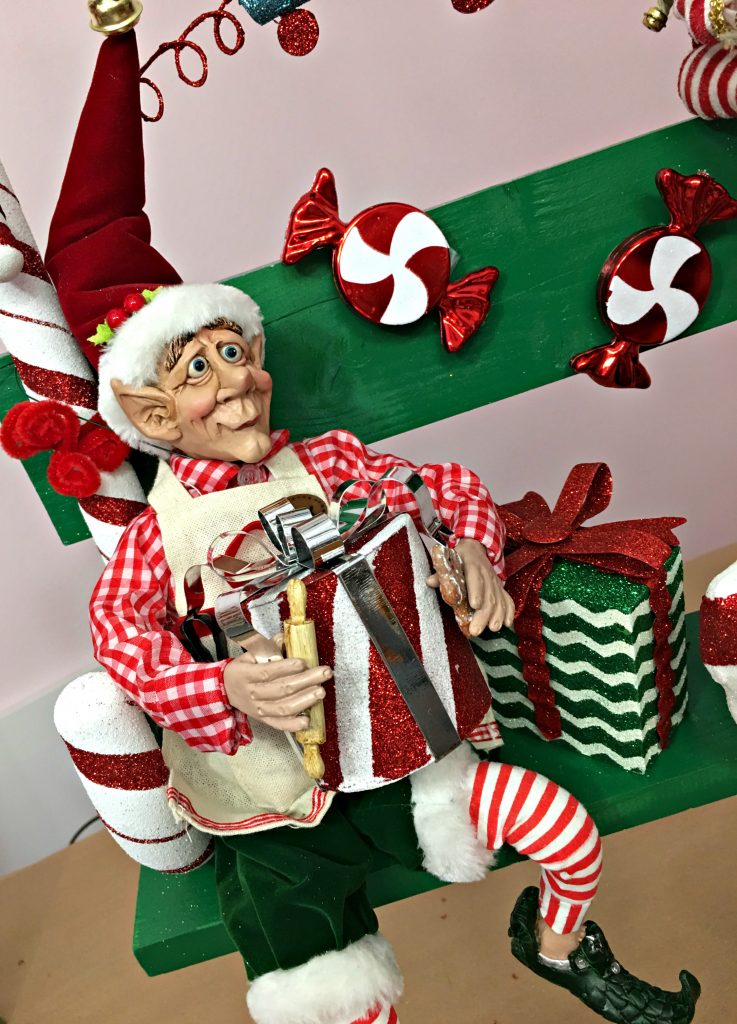 Jinx is actually a baker elf, but he doesn’t seem to mind holding a gift for a special recipient.
I will be taking this swing to Give Kids the World Village, a wonderful charity where children receiving their Make-a-Wish trips to Orlando theme parks stay. Not to worry, I will be switching out Sugarplum Jinglecrafter for a different elf, I couldn’t begin to part with him!
I will be sharing this at the following link parties: Project Inspired
SO CUTE Chloe!! Everyone needs a candy cane swing to frolic on!!
THAT is so incredibly cute and so savvy crafty, Chloe!
That swing is so stinkin cute.You have a great mind for coming up with ideas.
Thank you so much Danielle. Sometimes I wish my mind would take a break! Merry Christmas!