

Halloween Swag Tutorial
Halloween Swag 
It is time to make a Halloween Swag! You might think I am rushing things, but there are couple of reasons I am “rushing” the Fall holidays this year. Since I began hosting Facebook Live videos for Hometalk: I did some of the holiday projects closer to the holidays and then I had viewers messaging me that they couldn’t find the items for the projects. Even if you don’t want to take on one of these projects for another month, I hope you will head out and get the supplies soon! 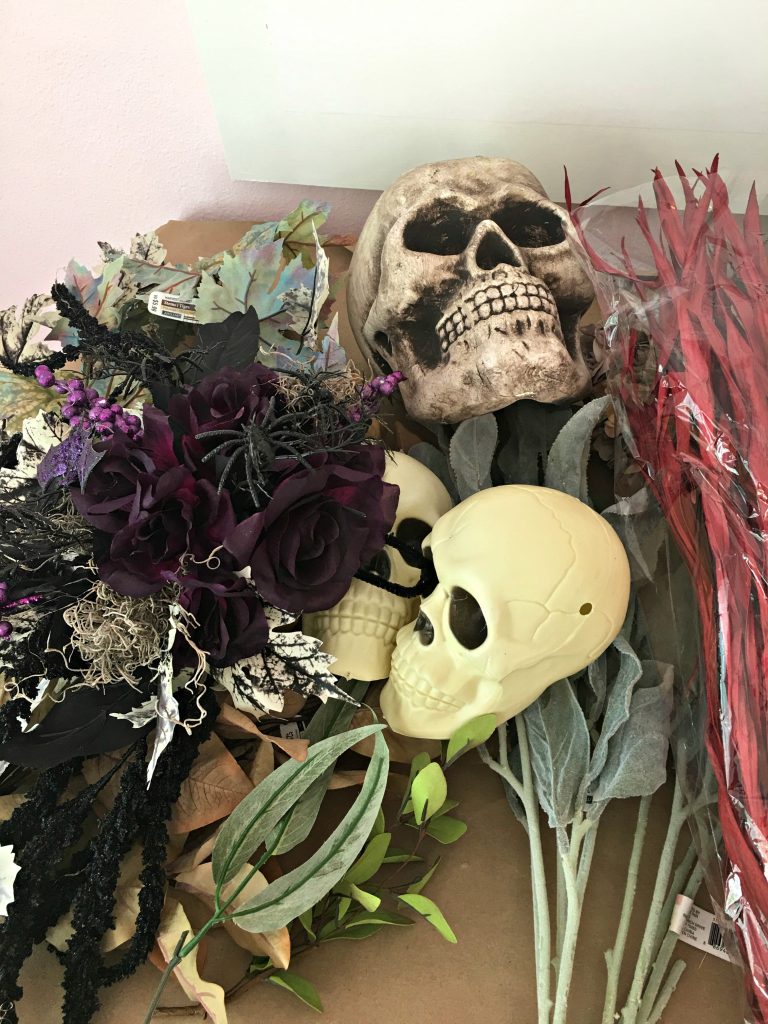 Fortunately, I didn’t have to buy anything for my Halloween swag, I had all of this and more in my stash of Halloween decor.
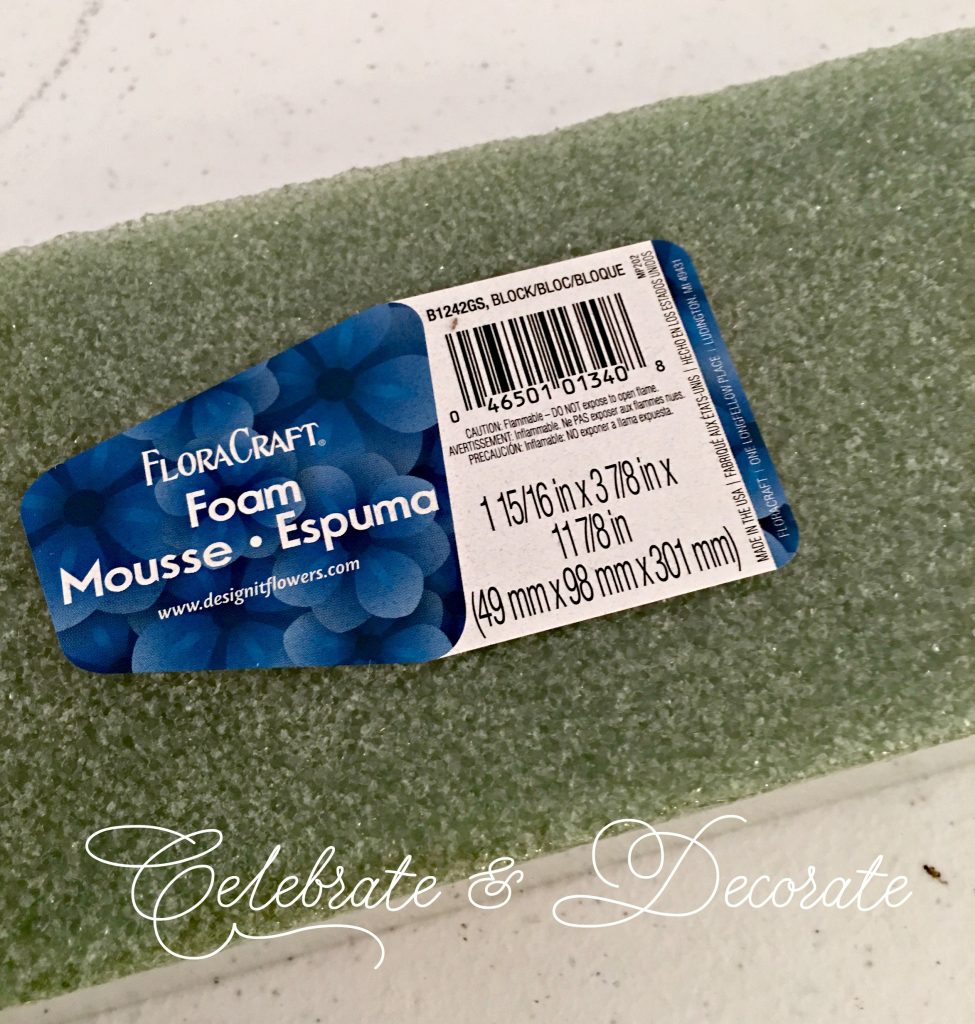 I began this swag the same way I did my catalog knock off swag with a piece of styrofoam. I wanted all of my picks and decor to be secure in their base, and I knew this would work better than floral foam.
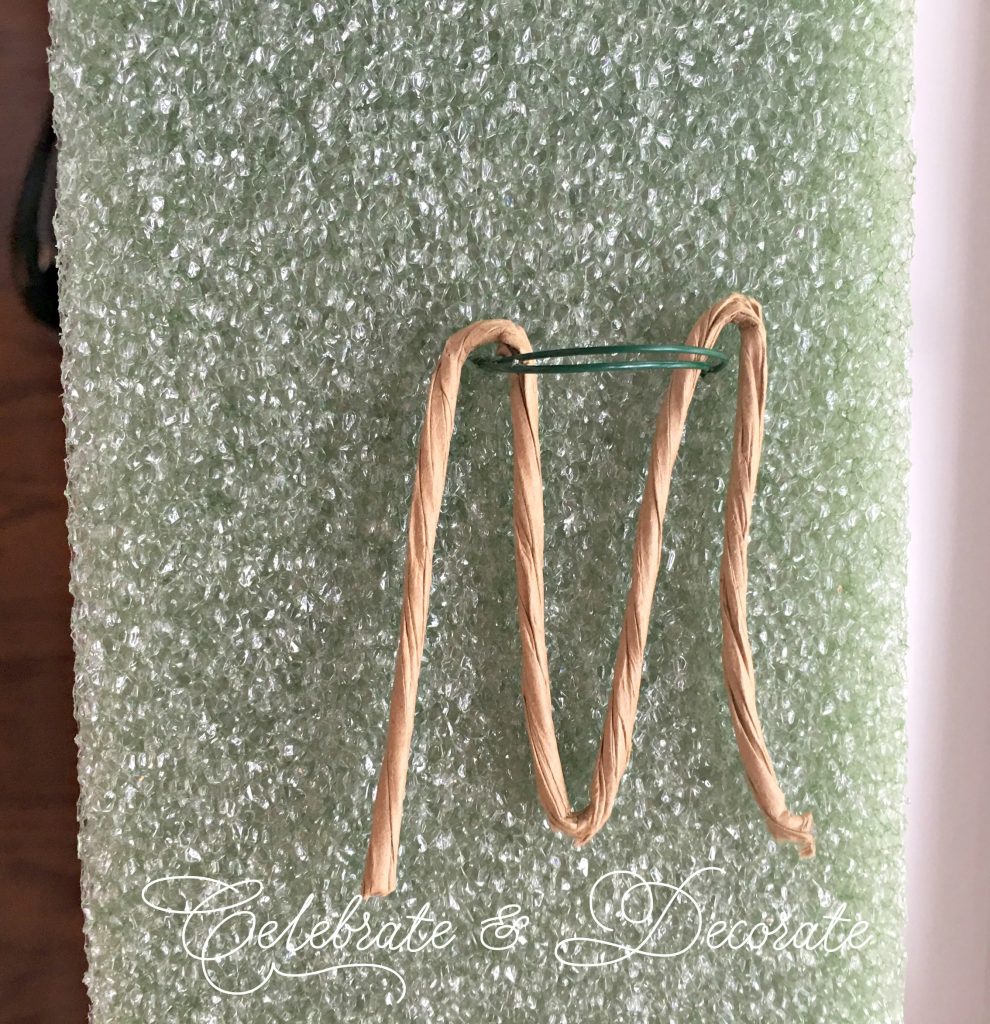
I began pushing wire through the piece of styrofoam to make my hook to hang my swag from. If you don’t put something beneath the wire, it will pull all the way through and cut the styrofoam. I chose to use a piece of tape wrapped floral wire and made it into an “M” shape to keep it from cutting through the foam. 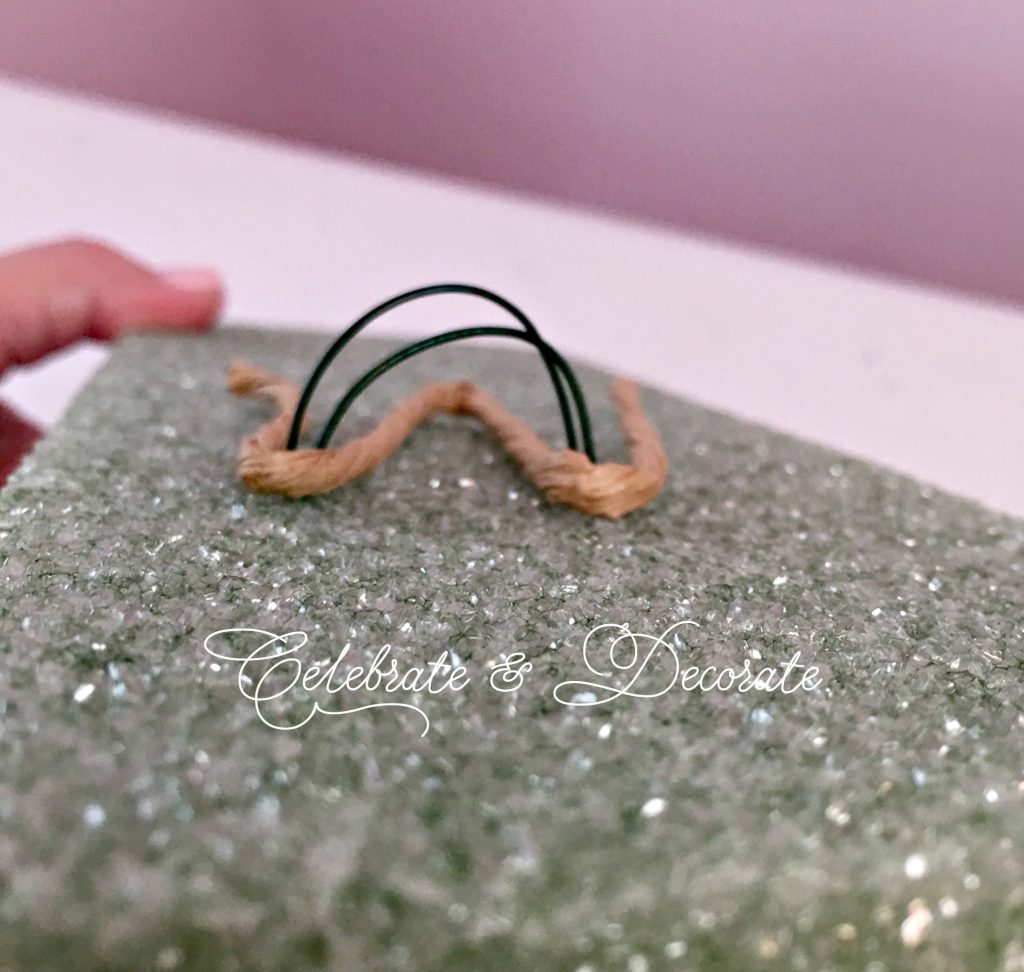
Here is another photo to show you how I pulled the wire through and down over the wrapped wire.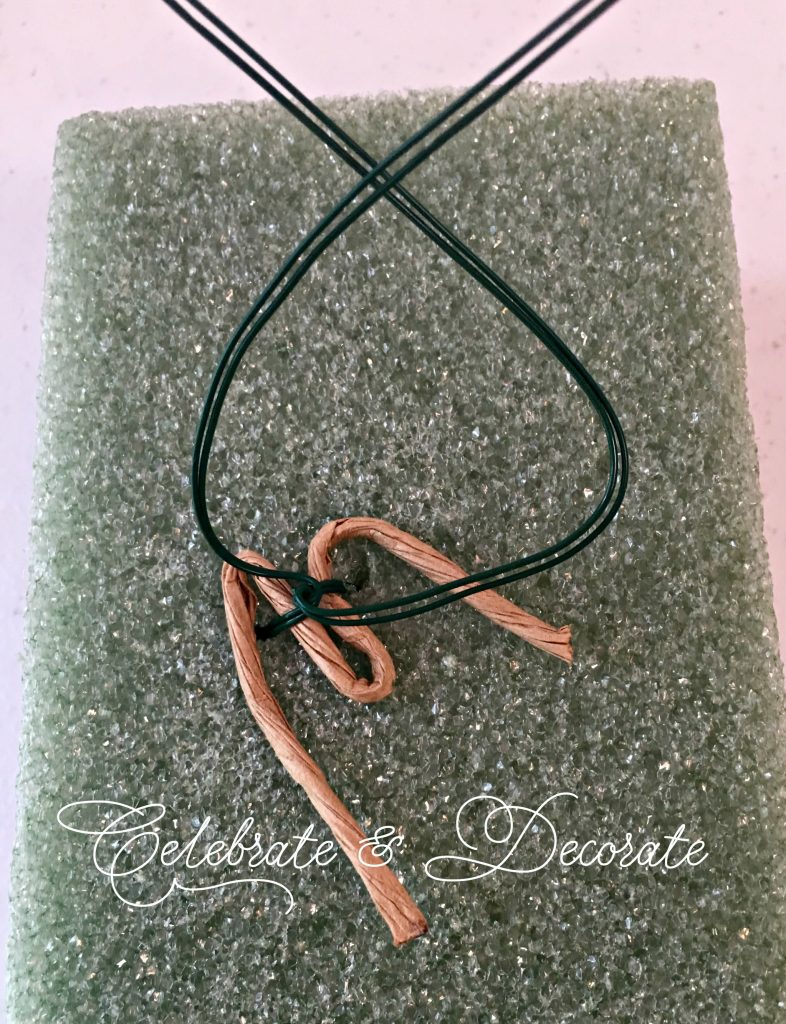
On the backside of the styrofoam I used the same technique and twisted the two ends of the wire into a circle to be able to hang my swag on a hook. 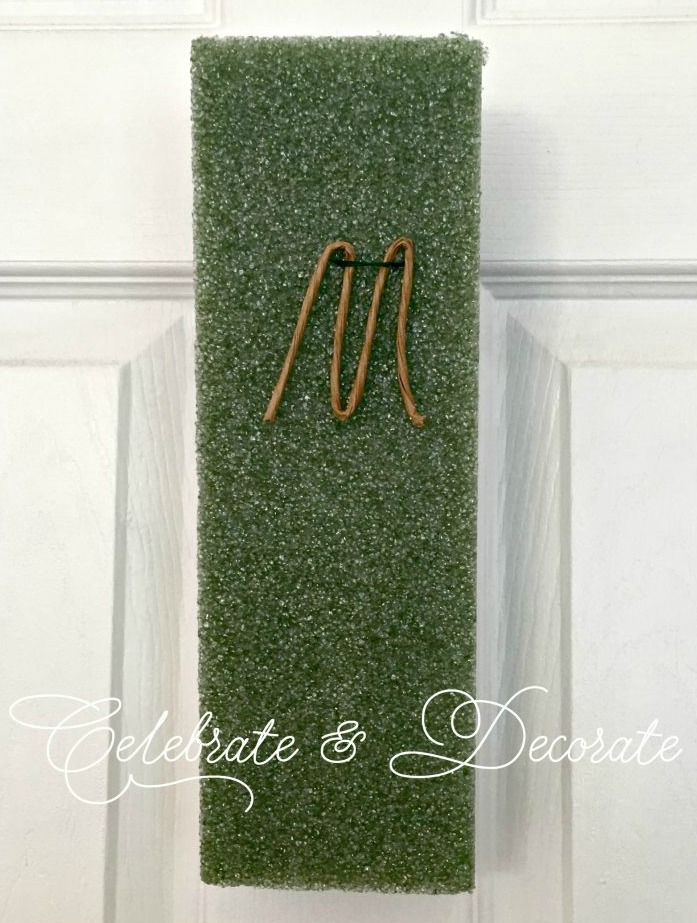
With my base hung on the door from a Command hook, I am ready to begin making my swag. 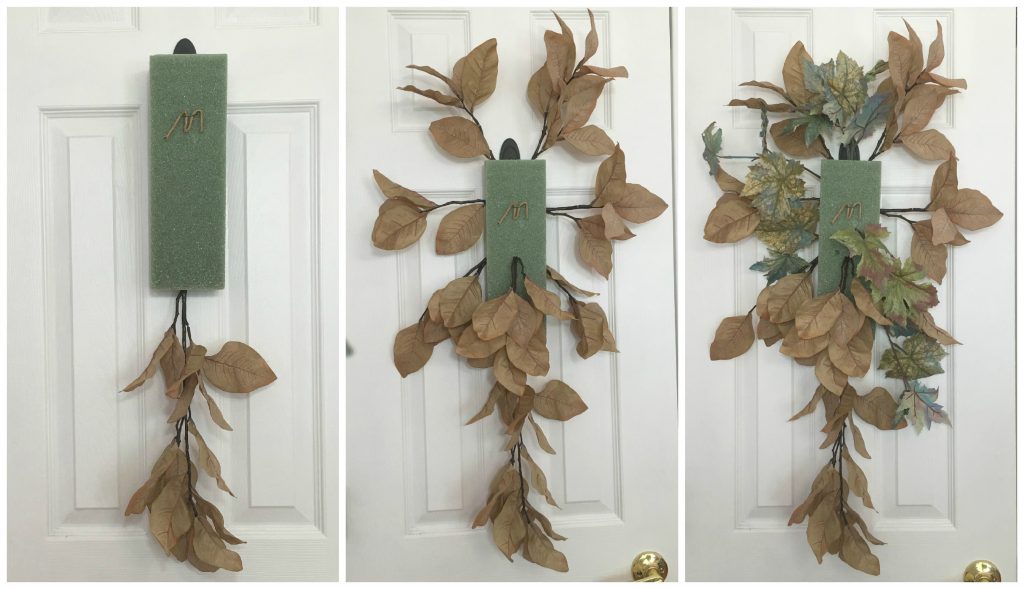 Begin building your swag with branches of leaves. I selected light brown leaves and some gray-green leaves to begin forming my shape.
 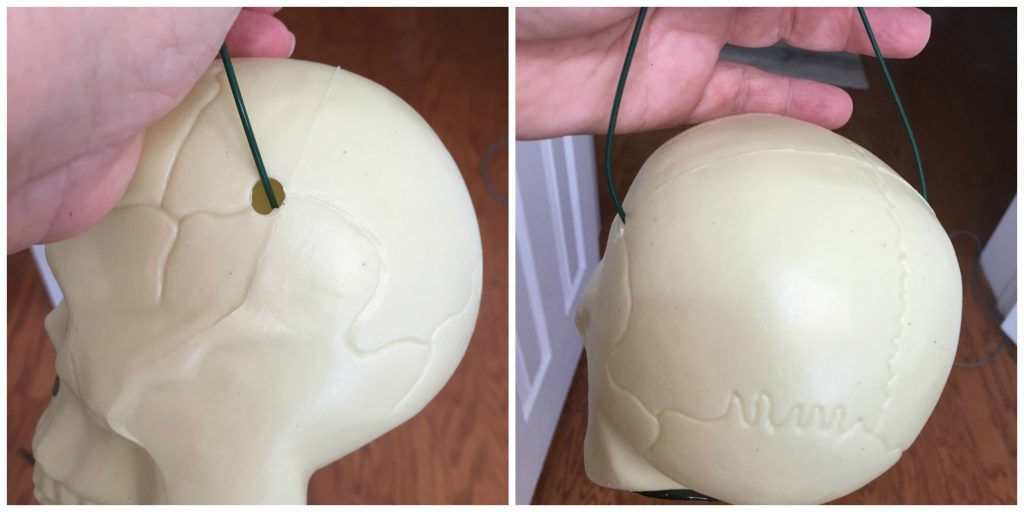 I had a lot of skulls left over from my skull garland last year that already had holes in them. Make your holes a little closer to the back of the skull and use a heavy weight wire through the skull and then pull the wires behind the skull and twist them together to form a “stem” that you can push firmly into your styrofoam. If you don’t feel your wires are firmly in the styrofoam attach the twisted wires to a wood wired stick to secure it in your styrofoam.
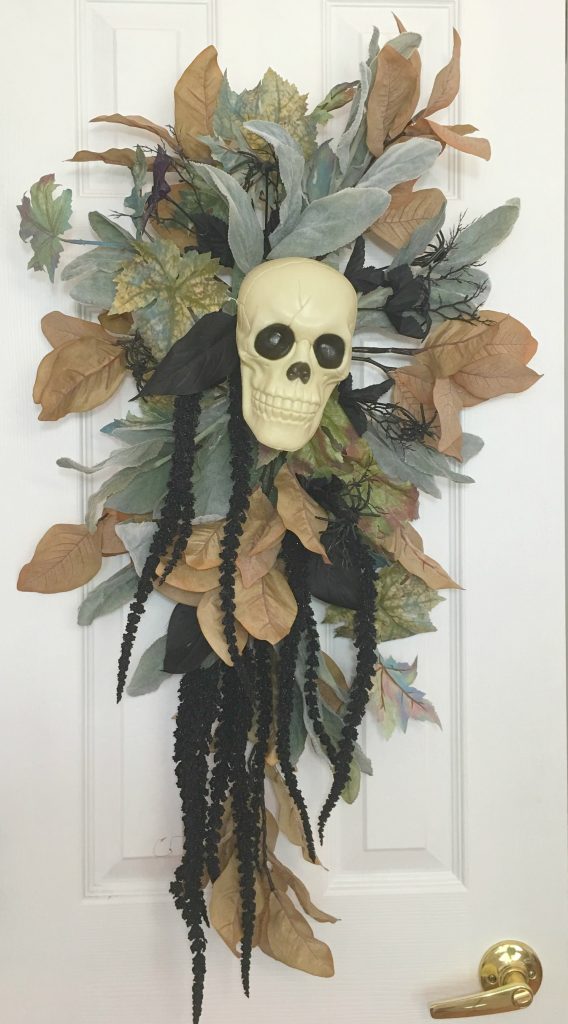
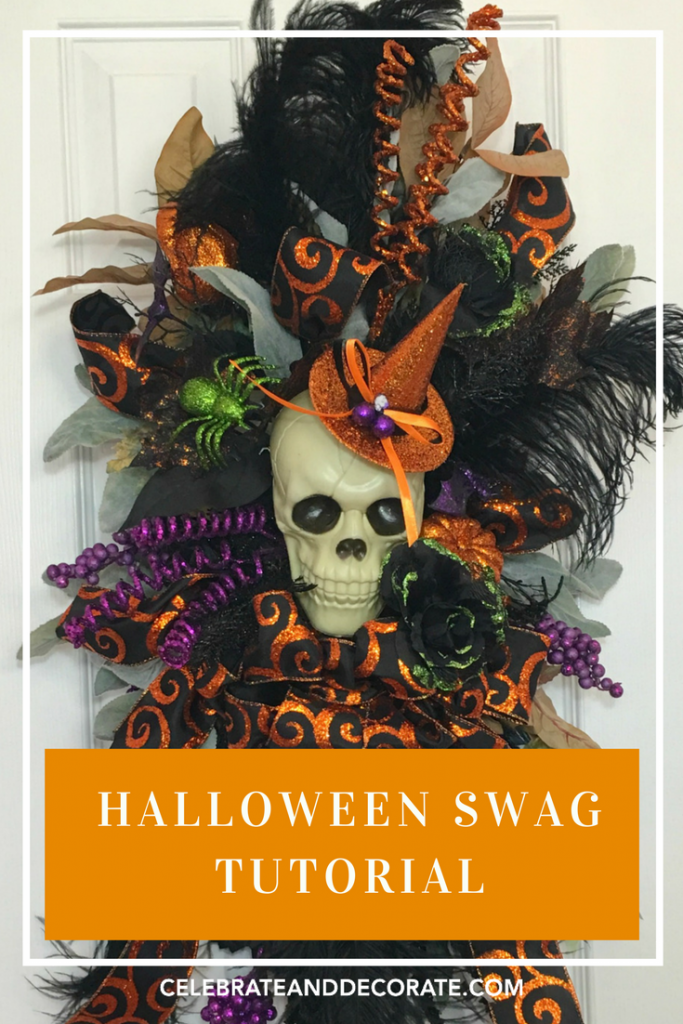
Use the wire on the back of the skull to push it firmly into the styrofoam about one quarter of the way down your styrofoam. Then add some more leaves around your skull and add some long black accent pieces. The spiders you can see came from the Dollar Tree in clusters that I cut apart to add. I found these great stringy black pieces at Michaels. 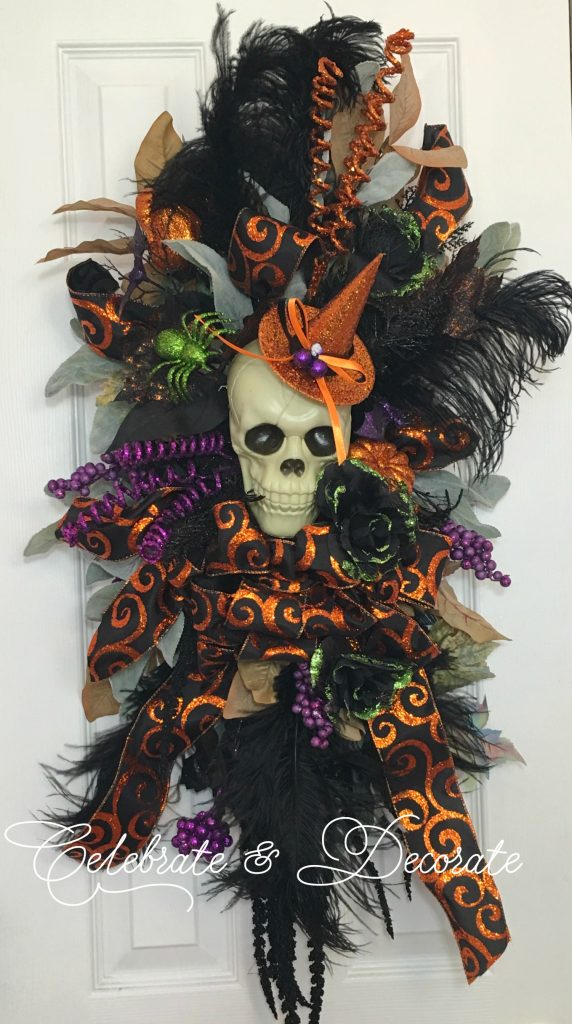 Next is the fun part! Gather up whatever picks, pumpkins, ribbon and other fun things you want to add to your Halloween Swag. I glued a small orange witch hat to the top of my skull and tied a big orange and black bow beneath his chin. I had all of the rest of these items on hand. The purple berries are from The Dollar Tree. The rest of the Halloween picks all came from Michaels. I had spotted the black ostrich plumes in my craft closet and decided to add those, too!
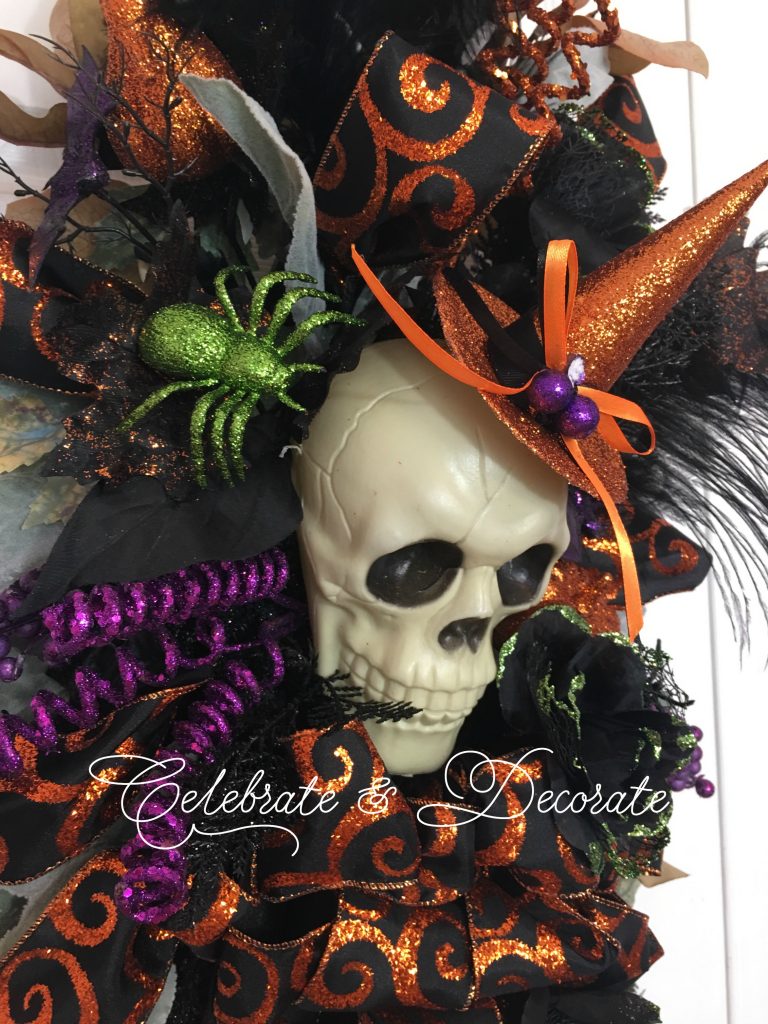
My swag will be all ready to hang on my front door in another six weeks! This swag would be best displayed where it will be protected from the elements, like a covered porch.


Another amazing project
Thank you Valerie!
Another big hit for y, looks awesomely wicked.
Thank you Miss Daisy!
Just love it wanted to know how I could make it work as a have a glass door. It would look amazing from the outside but not so much from the Inside!
If I had a glass door, I would cover the back in a complementary Halloween fabric, attaching with some craft glue. I would also make sure that I have filled the edges with fun Halloween picks so they show through on the glass side. You might want to just cut a slit in the fabric for the wire “eye”. Use some of the same Halloween ribbon you use on the front of the swag, feed it through the eye on the back of the hook and take it all the way up to the top of your door, run it over the top of your door and attach a Command hook upside down on the inside top of your door and hook the ribbon over that. I will try to remember to show this technique on the video next Friday on Hometalk Facebook Live.
Chloe, another great tutorial…you have mastered the swag wreath! I can’t wait for your Thanksgiving and Christmas ones!
Yes you have mastered the swag! A must try!
Thank you Jenna!
Your Halloween swag is gorgeous! You are so clever to add items one would not think to add and yet they make it amazing! Good jobl
Thank you Kari! I have been scouring the stores for black and orange Christmas ornaments for some upcoming crafts!
They have the orange and black Christmas balls at Hobby Lobby right now. 9/20/18.
Great job by the way!
Karen
Thanks for sharing that information!
Another gorgeous creation, congrats! You are going to be in seventh heaven with your family staying with you and I hope you can carve out lots of time to enjoy them. Forgive me if I’ve asked this before, but have you thought of having an Etsy shop? You’d do very well my friend.
Thank you Sandra! No, you hadn’t asked before, and I recently opened an Etsy shop but haven’t posted anything for sale yet. I am going to work with someone else to list and ship the items, I know I don’t have time for managing that. We shall see how it goes, but my husband would be thrilled to see the things leave the house!! I am trying to get lots of stuff done so I have time to have fun with those granddaughters and some quality time with my daughter!
Love this door swag!!! They do Halloween real big here, We moved here a year ago and found out I have to step up my game!!! Enjoy your family!!!!
Thank you Ann, I am really proud of how it turned out, now I just have to wait a month to hang it on my front door!
This is perfection. Thank you for the thorough tutorial, I cannot wait to make one of these. Pinning
Thank you Leanna! Get your supplies soon! I was at Michael’s today and a lot of the Halloween picks are out of stock already!
Thank you Leanna!
Fabulous! Command does not harm the door paint on removal? It would be so much nicer than the clear plastic over door hook I now use!
No, Command strips are wonderful! Use the outdoor ones and when you want to remove them, be sure you follow the directions and pull very gently on the bottom strip slowly. I like that it disappears behind the swag.
Oh I am so glad I discovered your blog through the Halloween hop! I love interesting wreath ideas! Thanks for linking up to Hauntingly Beautiful Decor Halloween link party!
Thank you so much Amber! I will go check out your blog! I am glad you came along!
Chloe this is so unique and wonderful. What a great entrance to welcome your guests with!
Thank you so much, Rhonda! It was a fun swag to make!
I LOVE it!!! Halloween has always been a favorite holiday. This little swag is so cute and classy! Thank you for sharing. It’s gorgeous!