
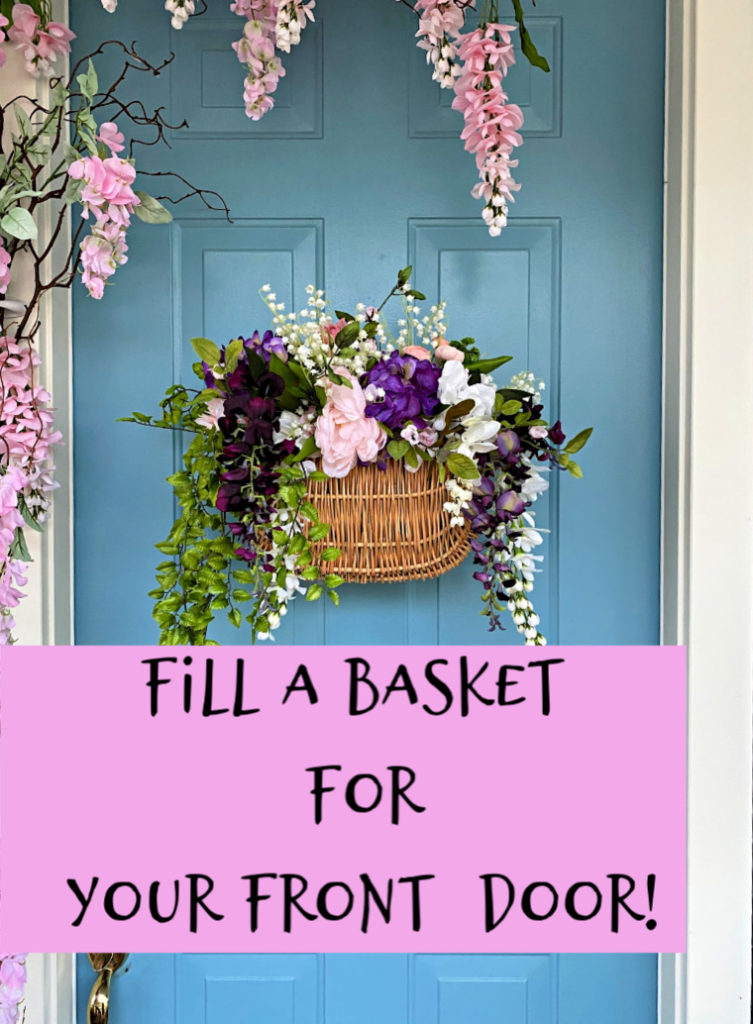
Spring Basket for Your Front Door
Spring Basket for the Front Door
Even if the temperatures where you are don’t say spring is around the corner, it is! Make this spring basket for your front door to share that spring feeling!
This post contains some affiliate links for your convenience. If you click on any of the links in this post, I may get a small commission that will in no way affect the price of anything you might purchase. Click here to read my full disclosure policy.
The container:
I spotted this sweet little basket at the craft store and it reminded me of a purse my mother had years and years ago. I just knew she would love having this basket for the front door. 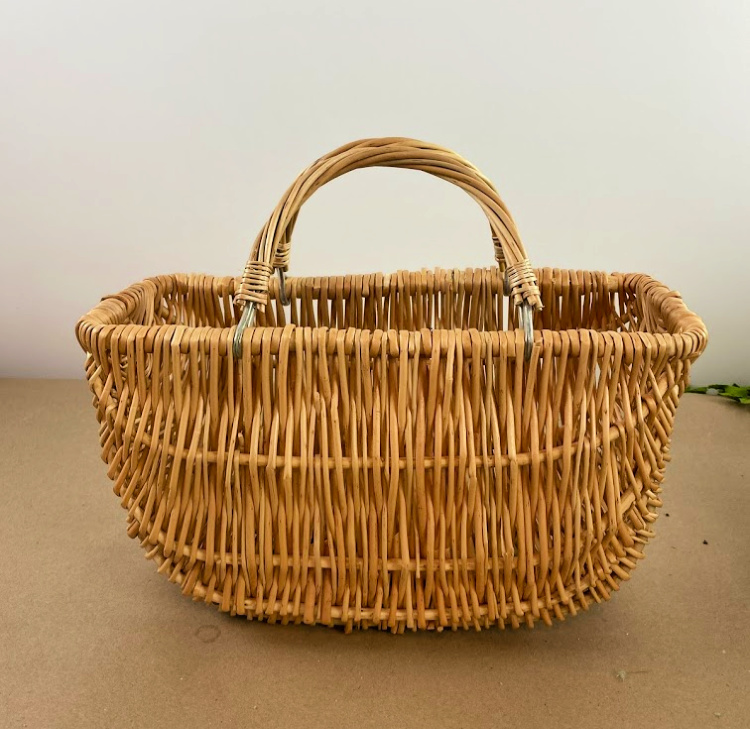
Do your remember these purses? They were lined with a fun fabric and had a drawstring at the top. 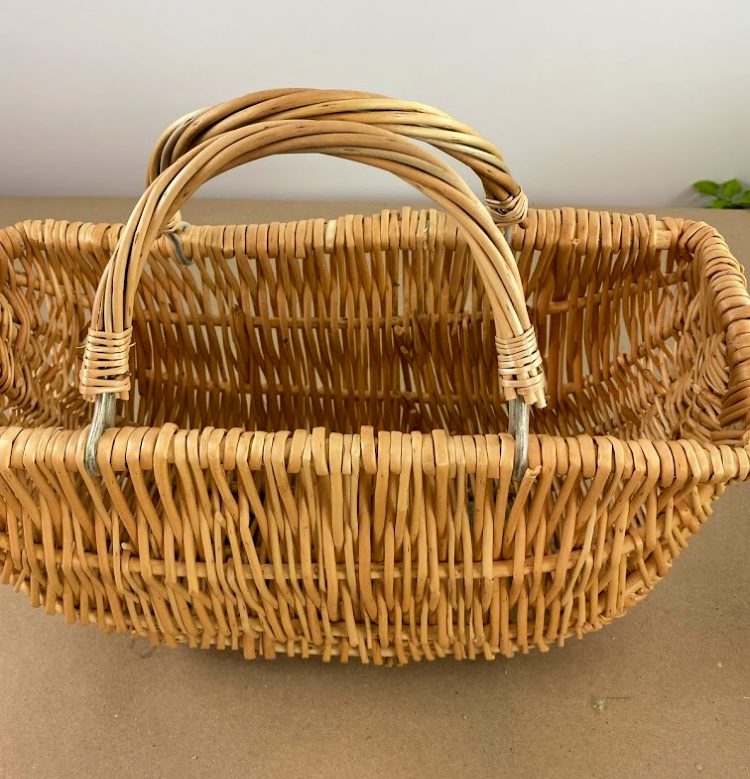 You could always take this after the holiday, empty it and turn it into a fun summer handbag by adding a DIY lining to it.
 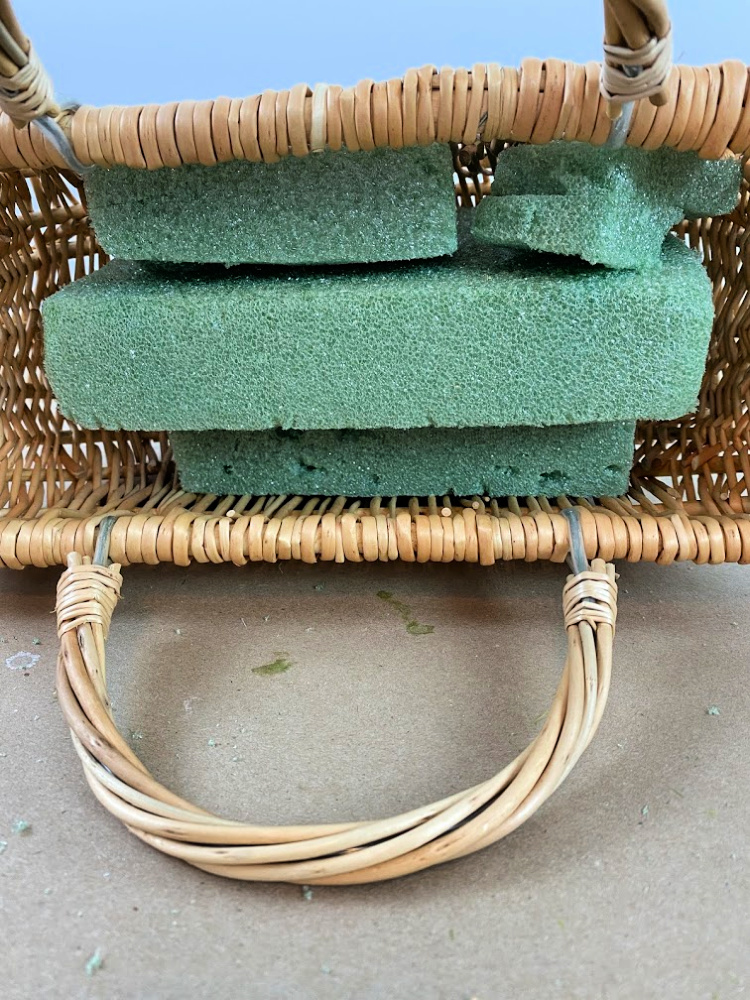 Wedge styrofoam or dry floral foam into the basket until it fits tightly and does not wiggle around. I am trying to use less styrofoam in my projects, so this was scraps from a previous craft.
Add flowers and foliage:
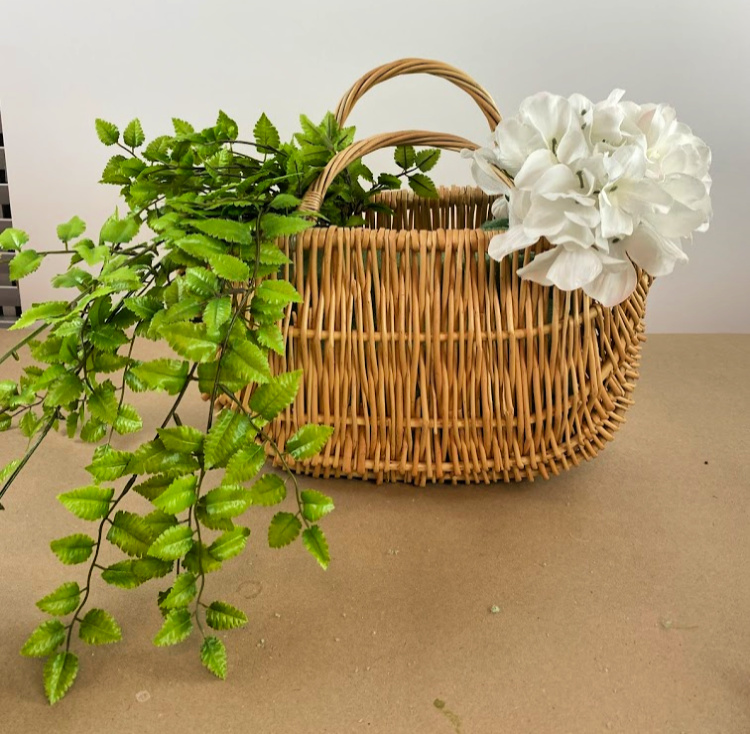 To have the arrangement to flow over the edge of the basket, but still be able to see the wicker base, add some trailing greenery to one side.
 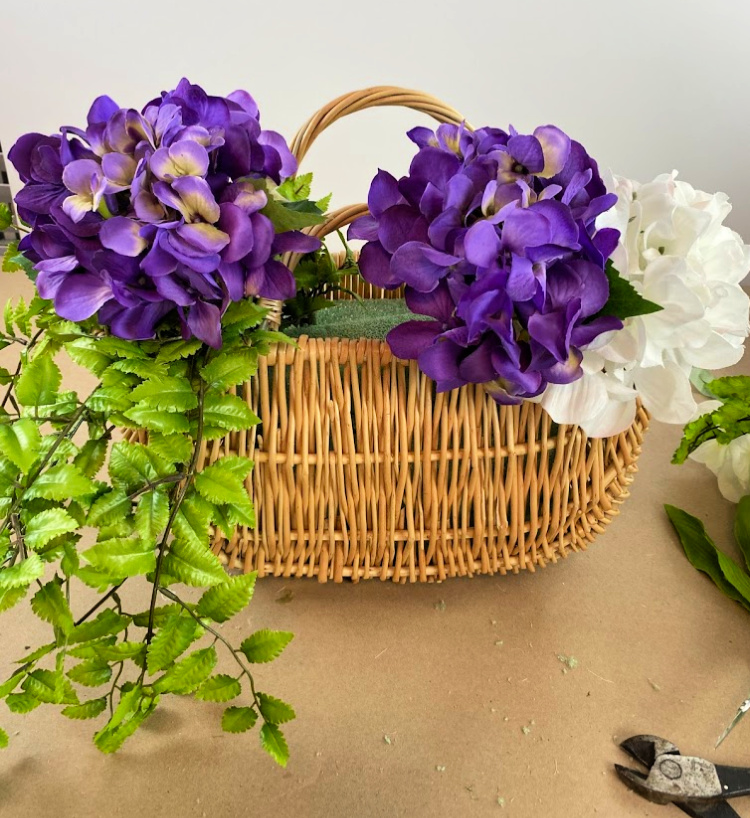 Purple hydrangeas will show up lovely against a white door, so I added a pair of those. Then it is time to fill in with more blooms.
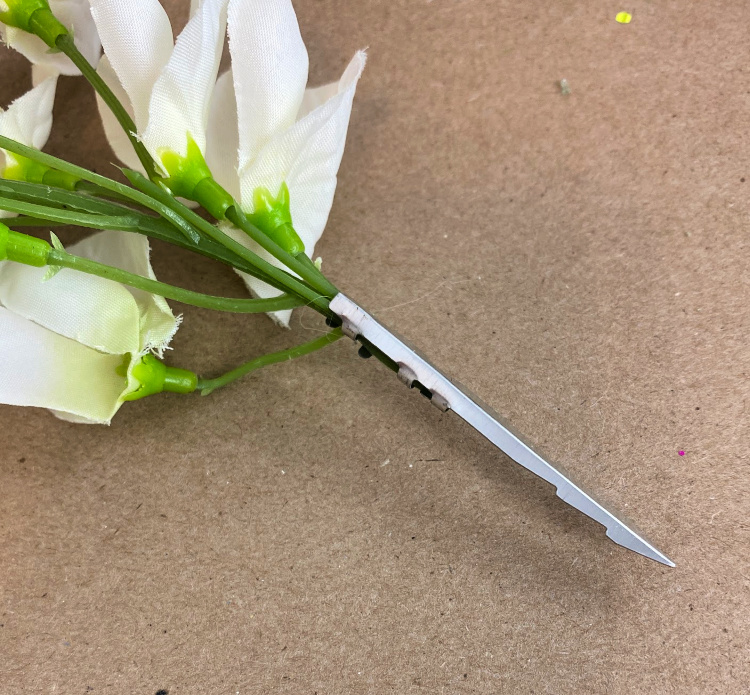 There are three different ways to secure the flowers and foliage into the foam in the basket. If the stems are thick enough, AND you are using floral foam, the stems can be stuck right into it. If you are lucky enough to have a Steel Pix machine, you can add steel picks to stems to secure them in your arrangement.
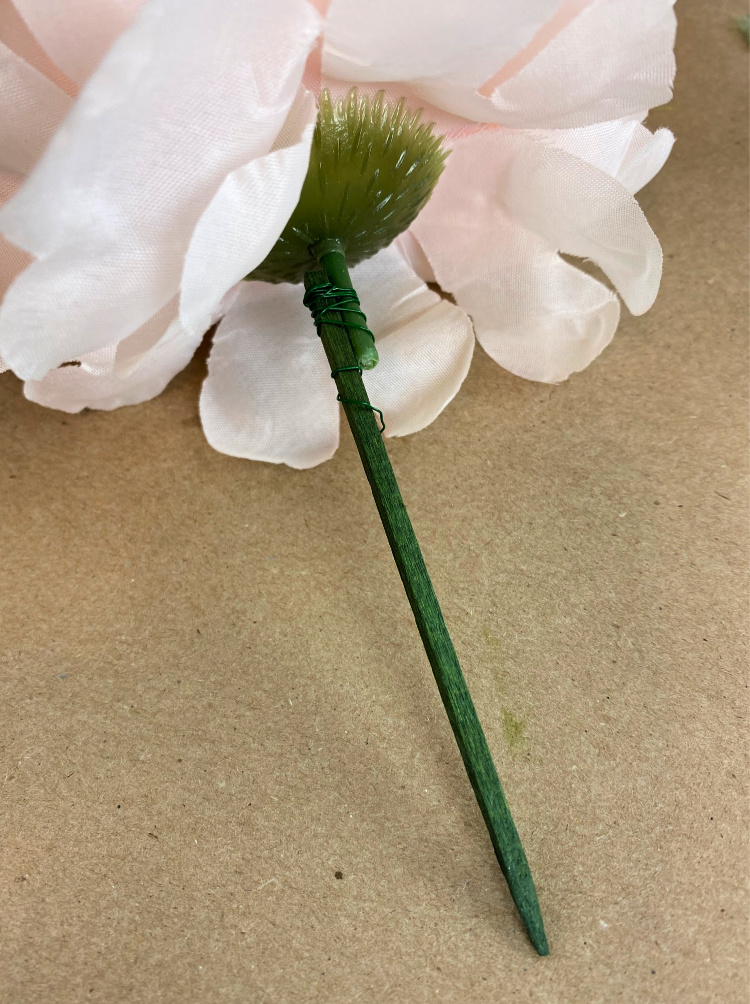 The third method is to use wood wired sticks to attach to your blooms and foliage to add to your basket for your front door.
  Adding faux wisteria in the same colors over the top of the trailing greenery softens the look.
  Continue adding faux flowers in your choice of colors, making your basket full. Trailing flowers like the wisteria is fine, but don’t cover up that basket you began with. You want some of the basket to show.
 Don’t forget about the back of your basket. When you are happy with the front of the basket, turn it around and make sure you fill in the back. Don’t obstruct the handle, you will be using it to hang the basket on your door or wall.
The results:
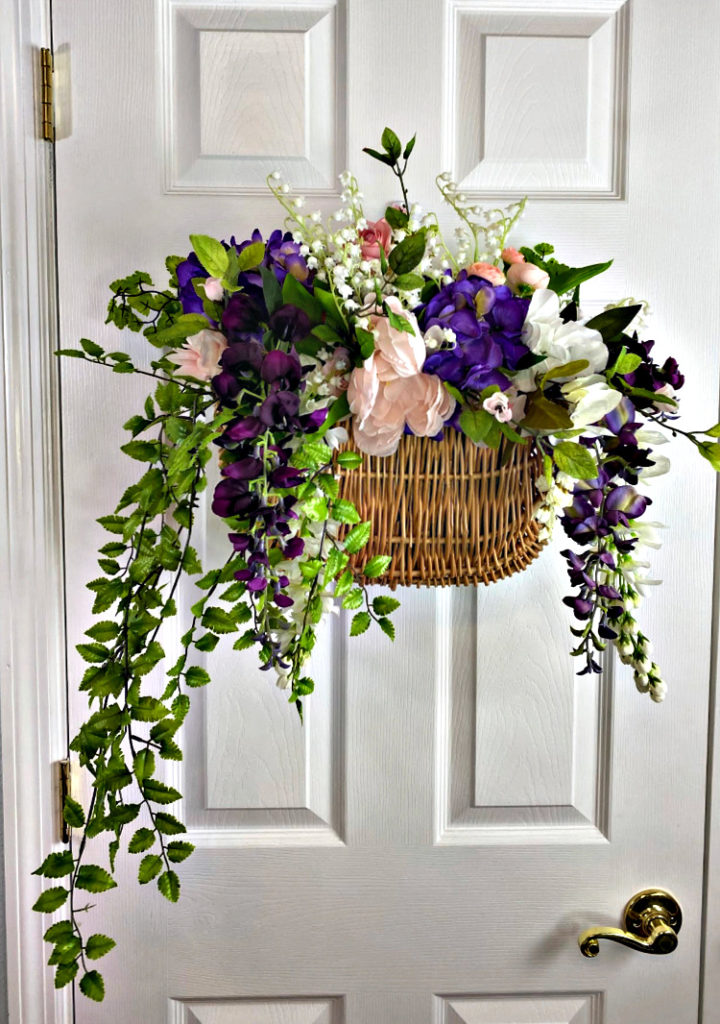
Looking pretty good on the door in my craft room, I can just imagine how it will look on the front door!
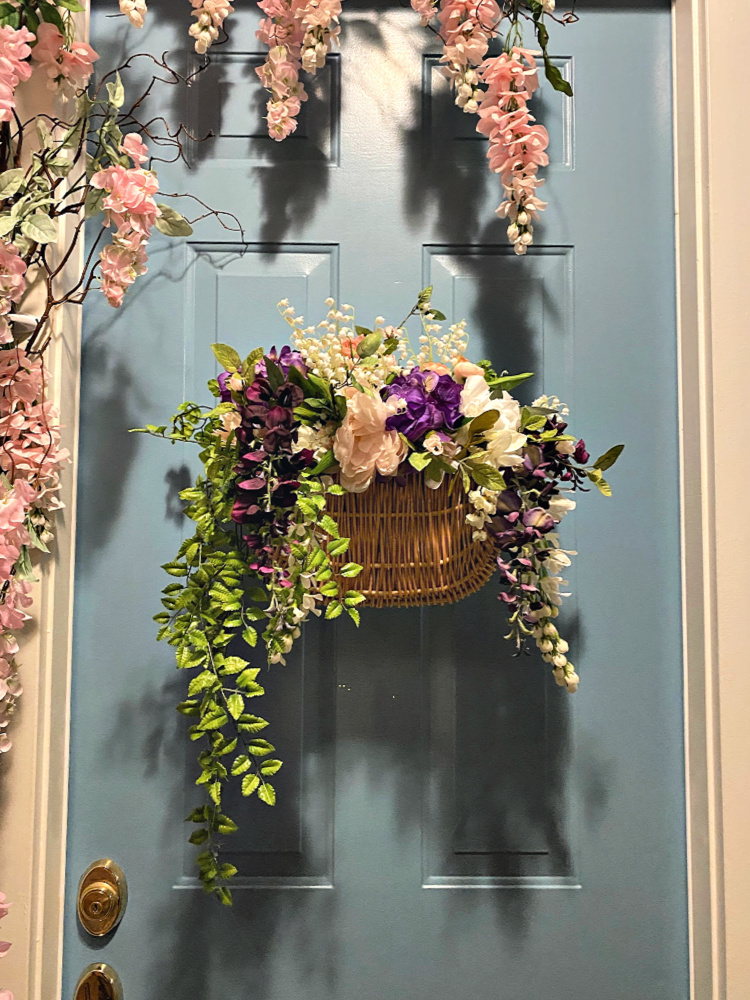
I was so excited to see how this looked on my front door, that even in the dark, it looks pretty special! 
This will be the perfect decor for my mother to greet spring at her front door! If you want something a little more showy, try a Catalog Knock Off Swag!
Love this Chloe! Looks so pretty!
Thanks so much Jenna!
What a great idea! That turned out lovely. I’m certain your mother will love seeing this basket as she enters her door each time!
That turned out great! I like how you designed it. I’m sure your mother will love having it on her door and will enjoy seeing it each time she enters!
Thank you so much Liz, she is loving it, and I still have a view of it up on the door of her apartment over our garage from my back porch.
This is such a pretty basket for a front door!!
So pretty and such a great way to welcome guests! I am so ready for spring!
Shelley
Thanks so much Shelley. I am in full spring decorating mode!
Thank you Chloé! You are the best instructor!! Through your instructions and videos I was able to make Christmas swags and now I will be making a spring basket filled with tulips. I had never heard of the Steel Pix machine before until I watched one of your videos (it is going on my wish list )
Thank you so much Sandra! I am so glad that I make things easy enough to follow. When I got my Steel Pix machine Hobby Lobby was still letting use that 40% off coupon on it, I understand they are not now…too bad! Stay tuned for my springtime front door.
Love it Chloe!! It’s fun using different items to hang on the door. Your mom will love it!
Cindy
My mom is loving it!
Pinned forgot to mention
Thank you so much Cindy!
Chloe, another winner. What is the pink branch around the door ? I like that too.
When I make a door arrangement or wreath, I glue a felt dot or bar on the back so it doesn’t scratch the door.
Beautiful, and the colors are fantastic!
Chloe, this basket is so lovely. How pretty for the front door. I need to get going on adding more spring decor. Thank you for the sweet inspiration at Love Your Creativity. Happy weekend.
Thank you so much Linda! I am ready to get it all springy around my house!
Does it cost to watch your videos? How can I watch them? I want to see the one tonight on TV. What channel? I have Direct TV. Alice
Alice, you can watch my videos on Facebook at: https://www.facebook.com/celebratedecorate/ You can watch my Hometalk videos on Hometalk TV at:https://www.hometalk.com/tv/member/2303646/chloecrabtree1
Very beautiful, Chloe….very instructive directions, but how do you attach the basket to the door??? Thanks so, much….can’t wait to get started on mine!!!!!!!
I just used the one handle to hang it on my Command hook I keep on my front door.