How to Make a Beautiful Christmas Evergreen Centerpiece
I see these similar floral arrangement Christmas centerpieces in the flower shops and garden centers and they look a little messy, like they were thrown together, and they want $50 or more for them. I knew I would be happier with a diy centerpiece. I will give you all of the steps to make your own Christmas table centerpiece. This would also be beautiful on your coffee table.

This post contains some affiliate links for your convenience. Click here to read my full disclosure policy.
Supplies for an evergreen centerpiece
First thing, I gathered all of my supplies together. Do you want some of these supplies delivered right to your door, click on the links in the list of supplies to order them from Amazon.
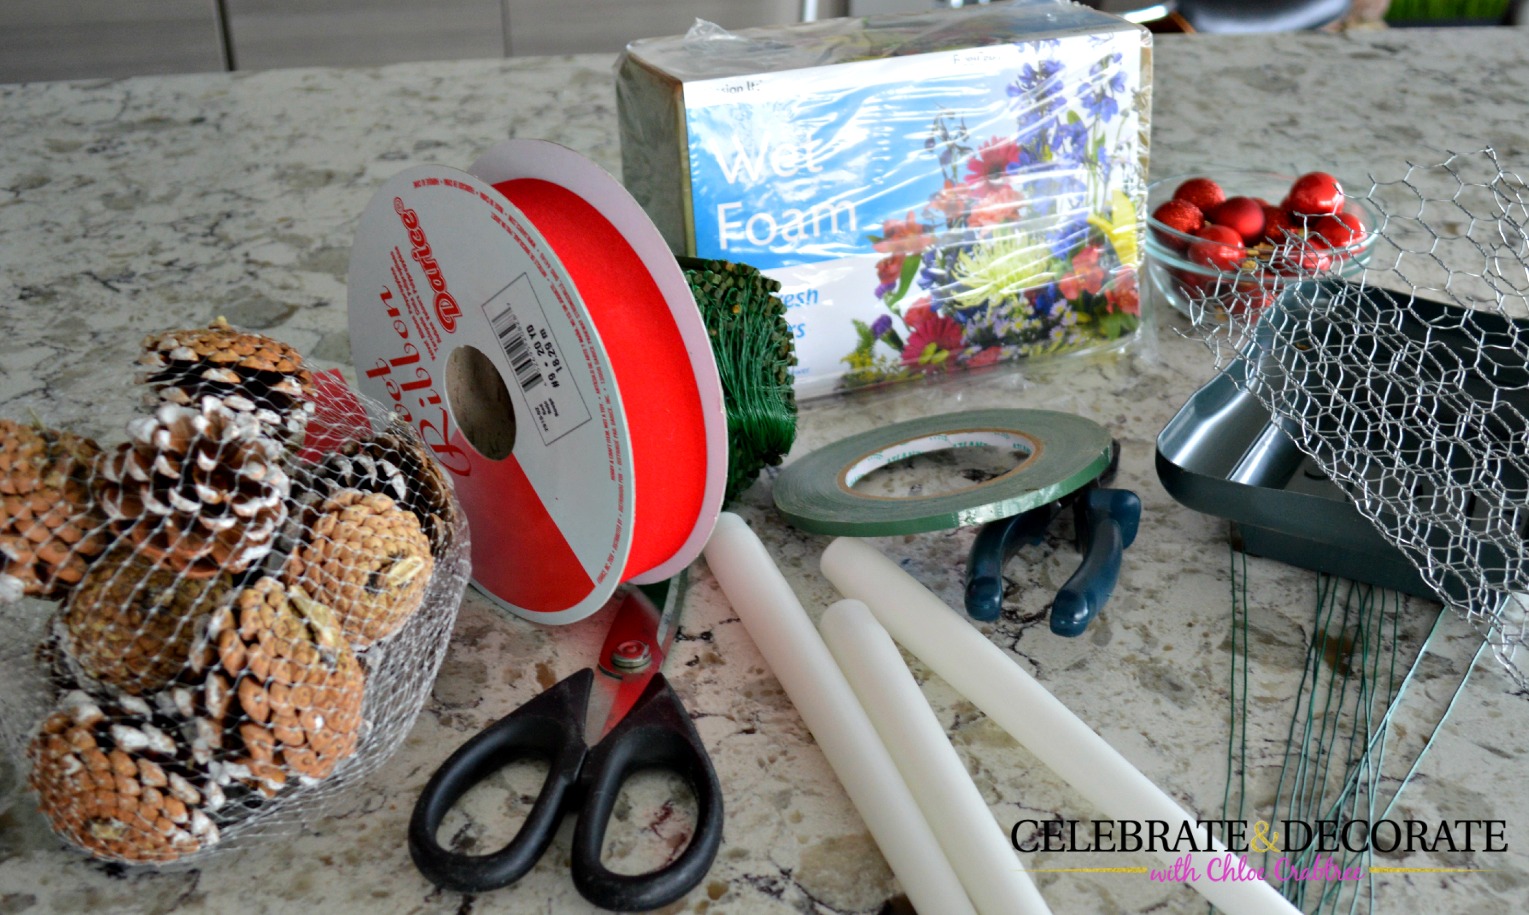
Container
Chicken wire
Wet floral foam
Red ribbon
Pinecones
Anchor Tape
3 Candles
Tiny red ornaments
Green wired sticks
Floral wire
Kitchen shears
Wire cutter
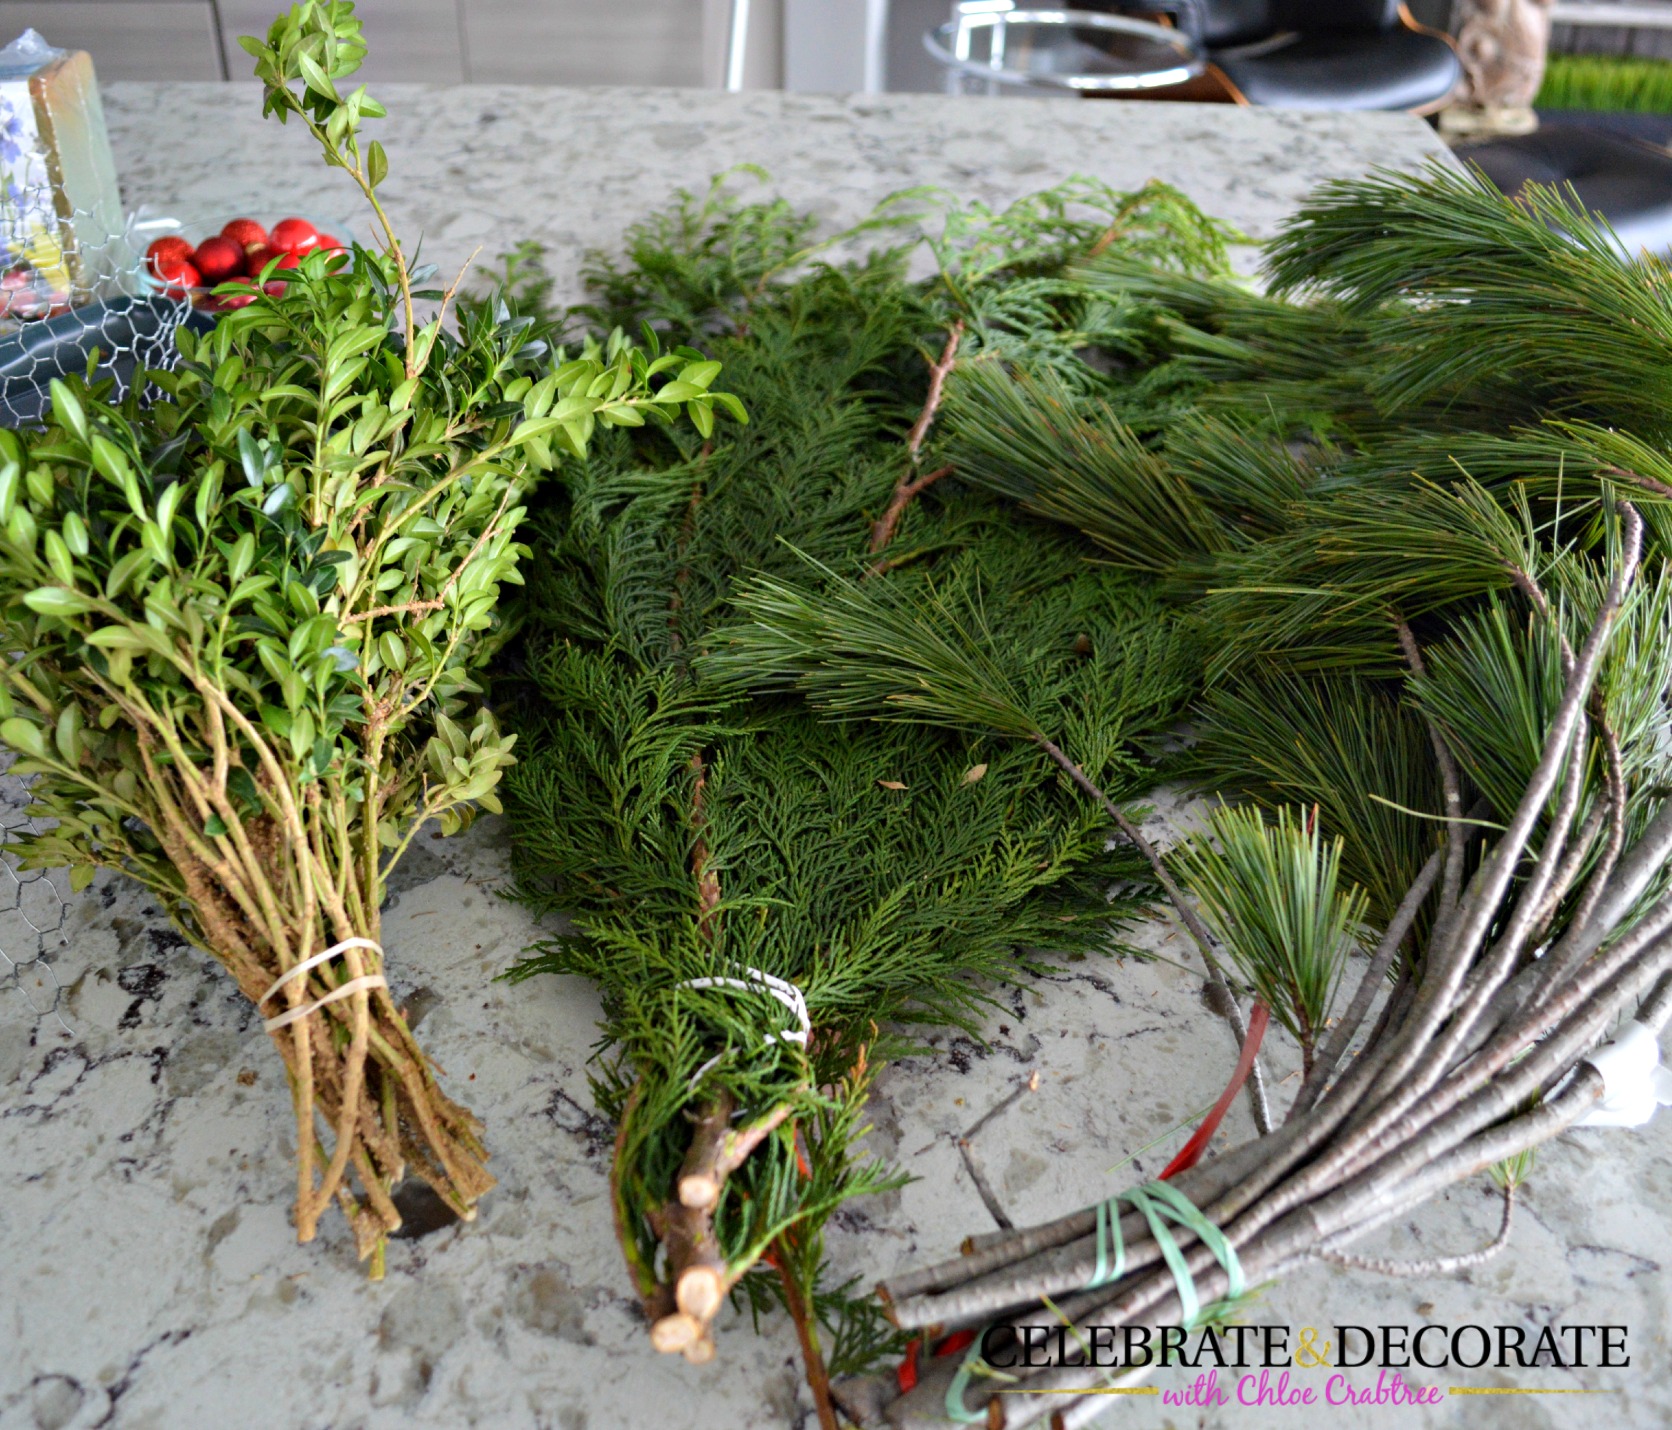
Evergreens – I used Cedar, White Pine and Boxwood – If you can’t find evergreens anywhere else, you can try Christmas tree lots for loose trimmings they may have.
Make a basic evergreen centerpiece
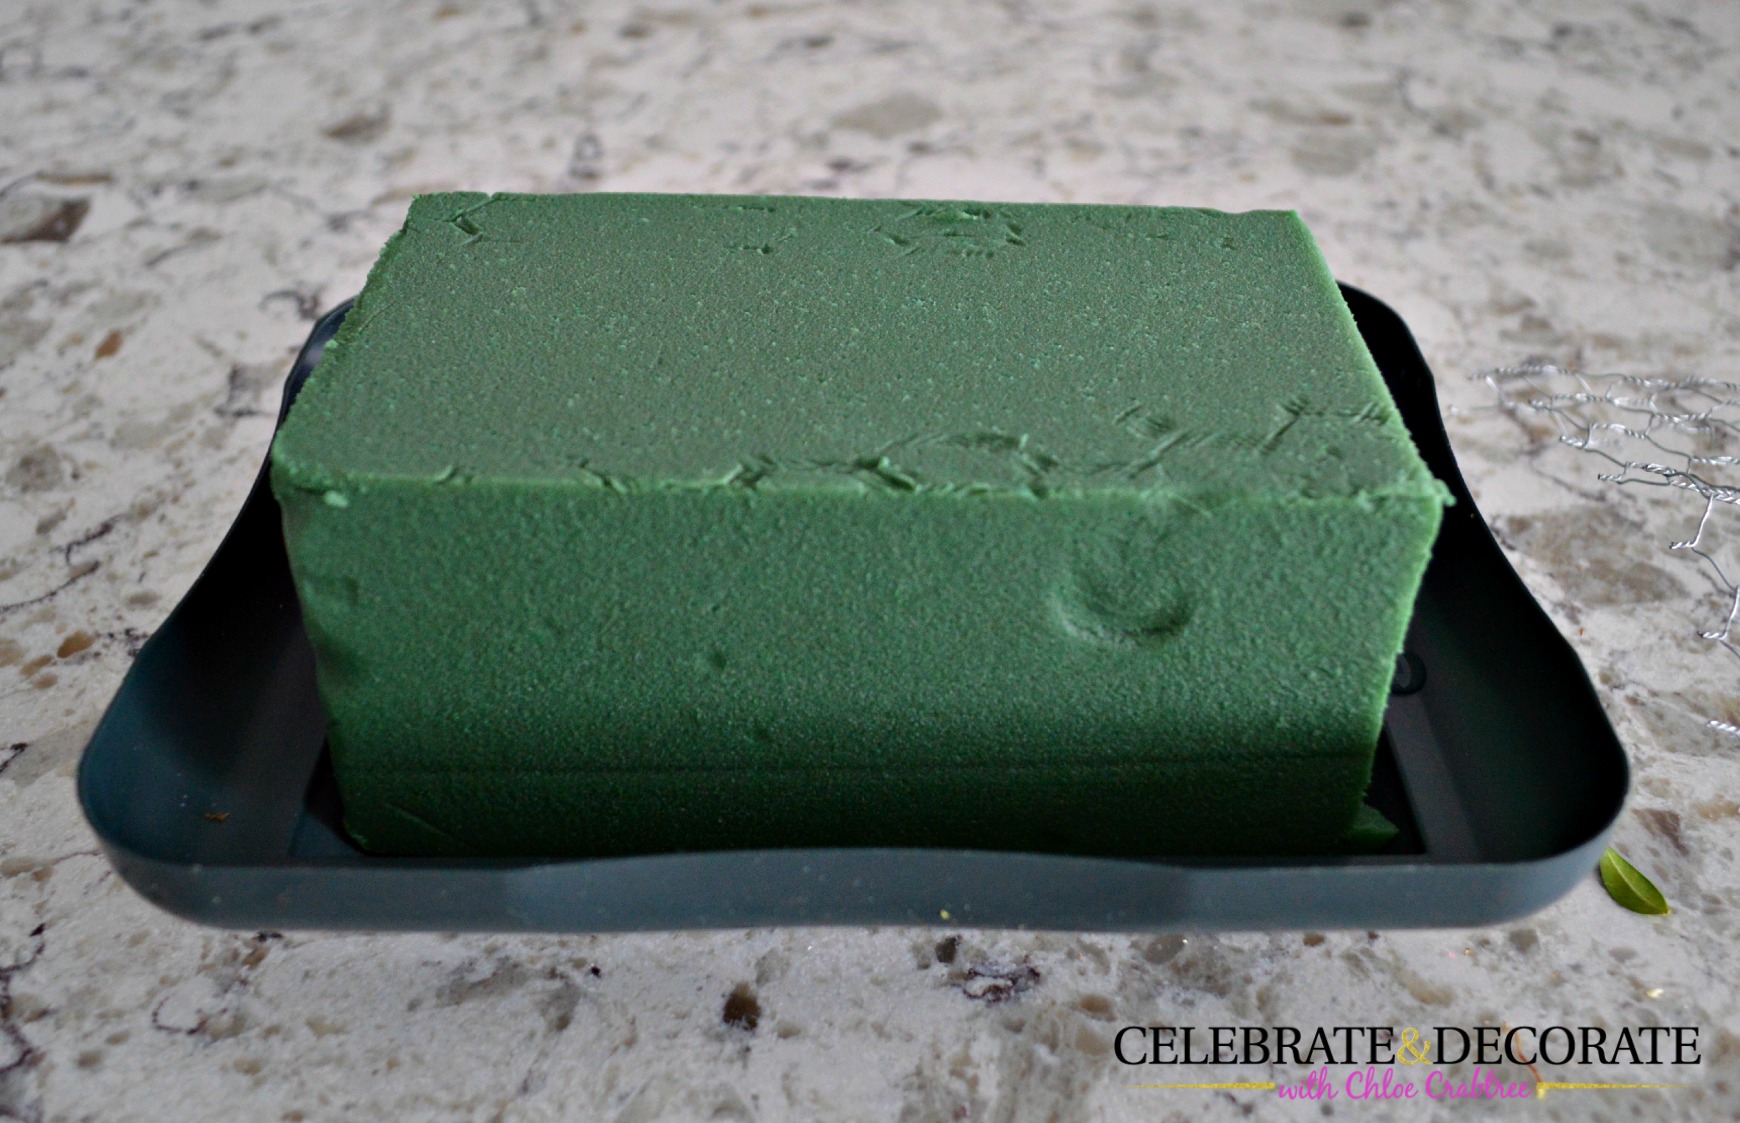
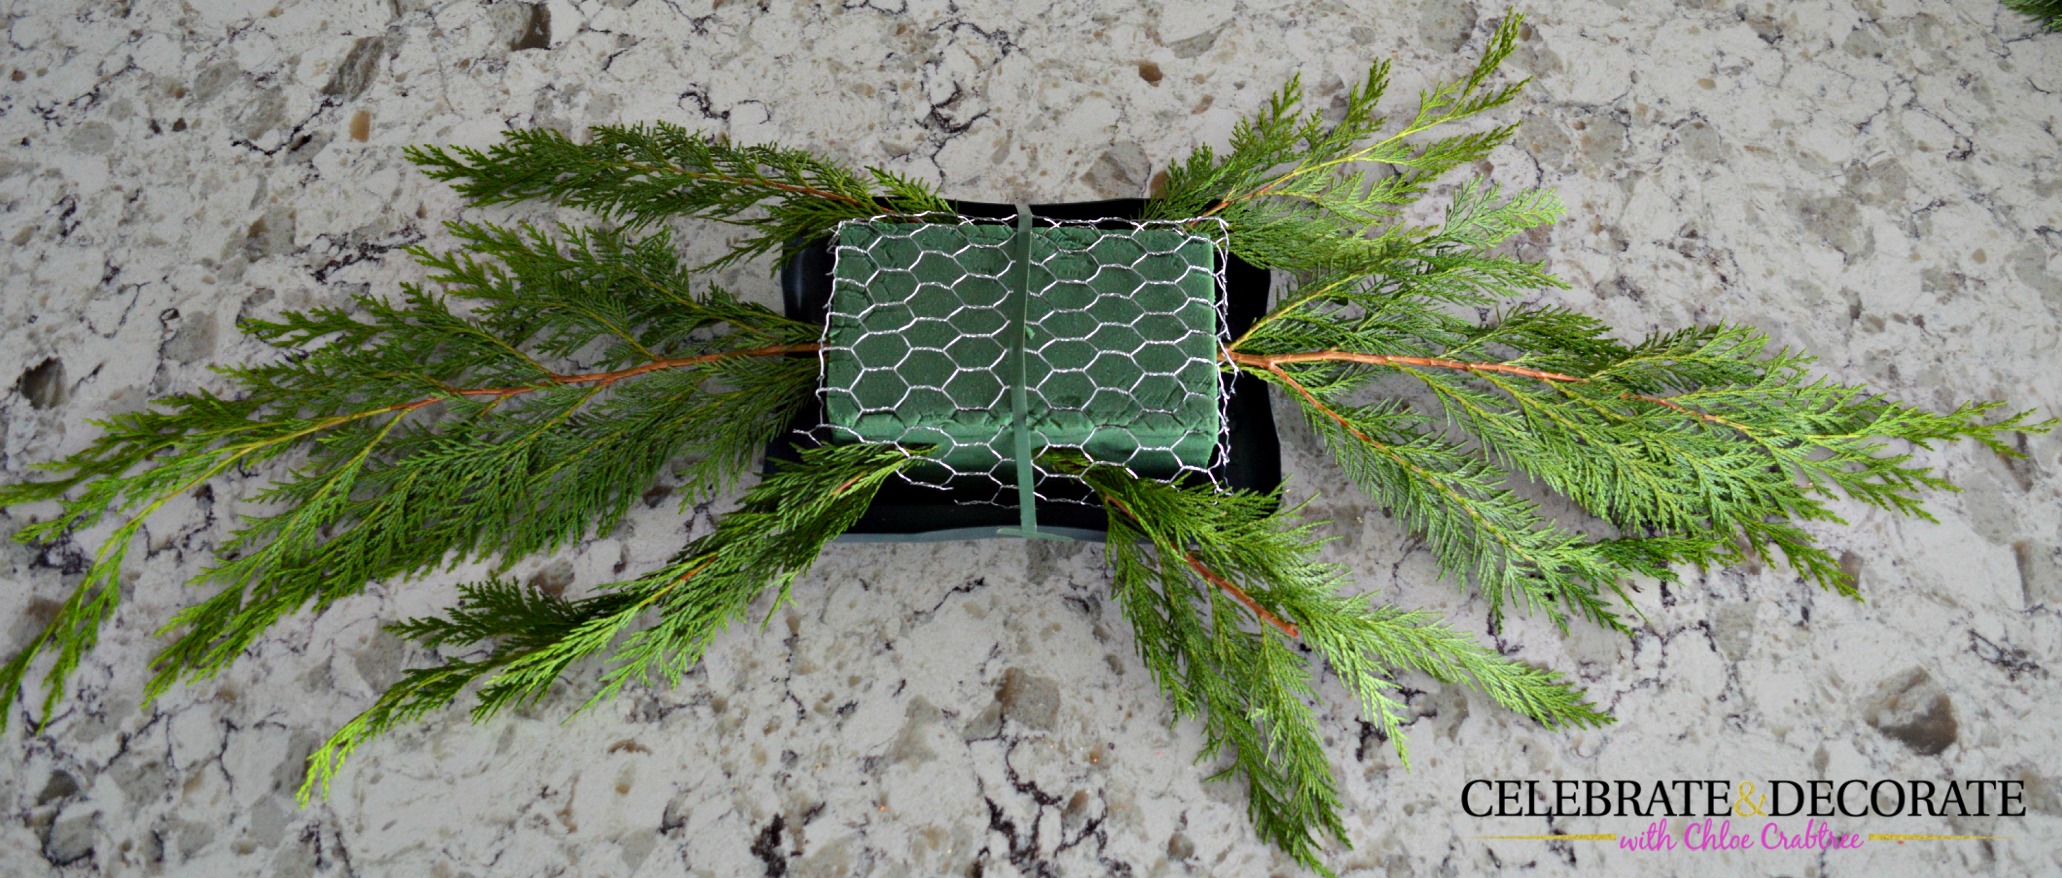
I used an inexpensive low-sided craft store container, because I knew it would not be seen. You can also use any shallow bowl. Soak your foam block until it is thoroughly saturated. Cut the piece of foam to fit in the container you have chosen.
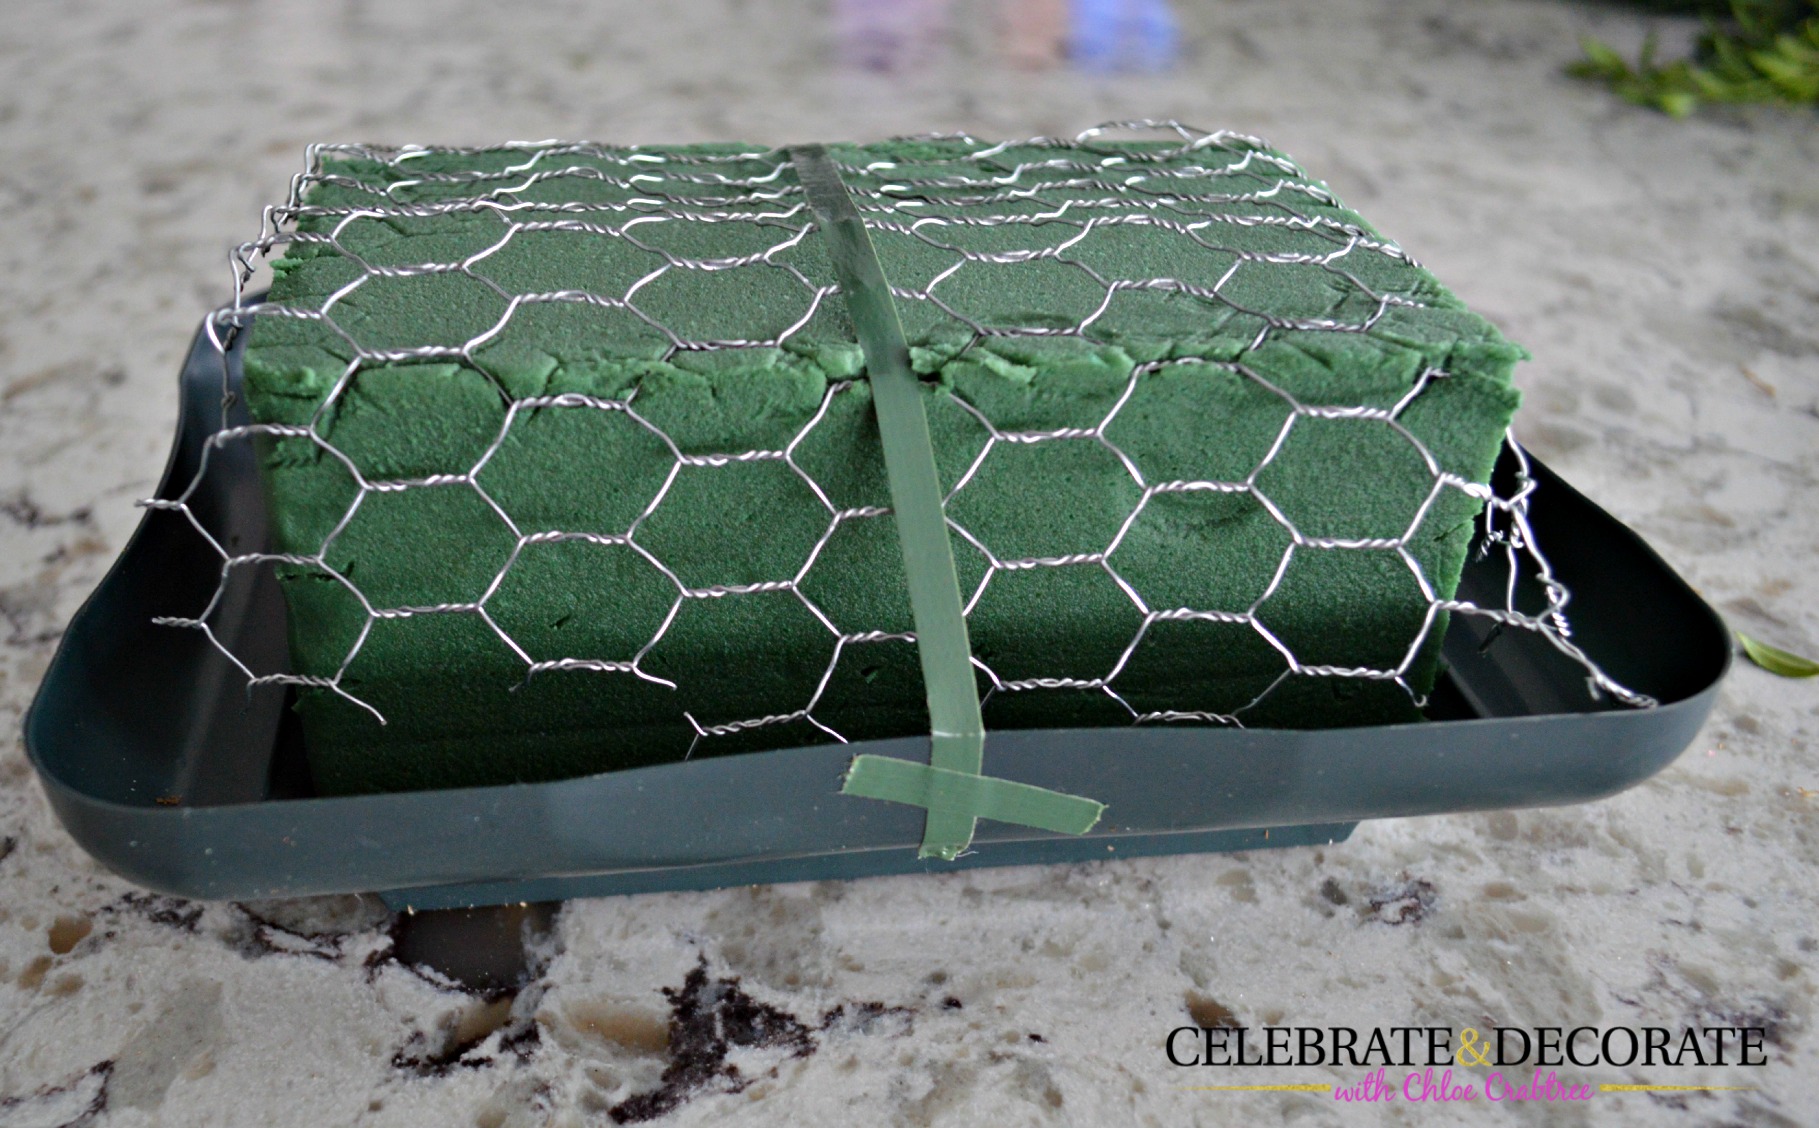
Cut a piece of chicken wire to fit over the top of the oasis and down over the edges. It is important to use chicken wire when you are making an arrangement with woody evergreens, as their large stems can break apart your floral foam without the chicken wire to keep it secure. Use floral anchor tape to secure the floral foam and the chicken wire in the container. If you would like you can run your tape all the way around your container, or you can just tape it down to the sides and then use a short piece of the tape to run perpendicular across the end of the tape to secure it as I did above.

Begin by putting two equal lengths of cedar in each end of your arrangement, the length of these will determine the length of your centerpiece. You can use pruning shears if your stems are too thick for your scissors.
The next step is to add evergreen branches of cedar at an angle from the sides to help support the desired shape of the centerpiece as shown above.
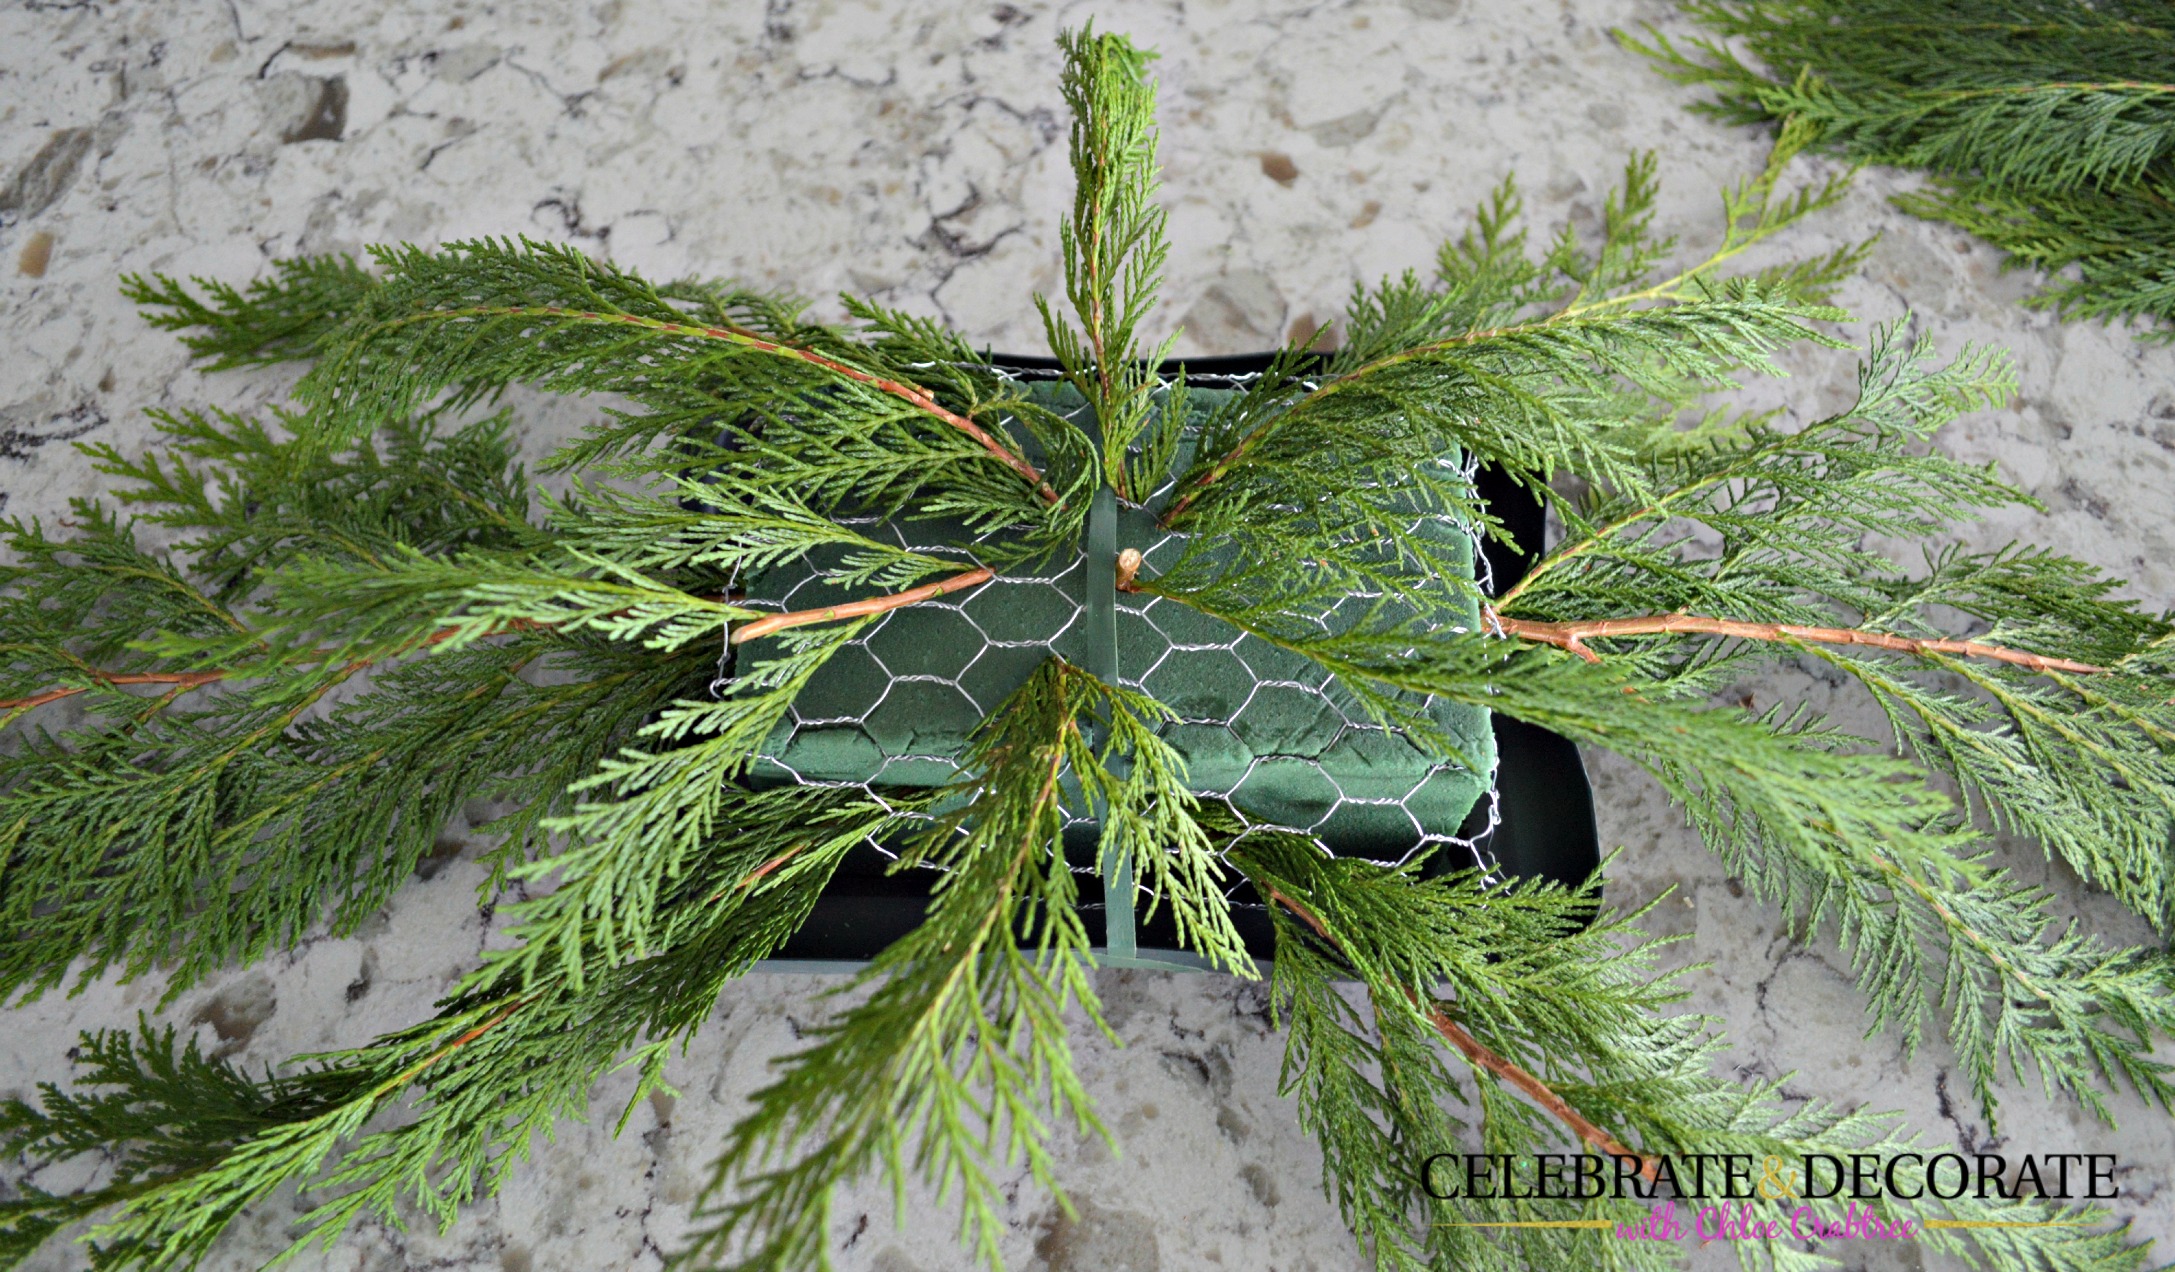
Continue adding cedar, now on the top of the floral foam placing the pieces between the ones you have already added, and moving up toward the top of your arrangement.

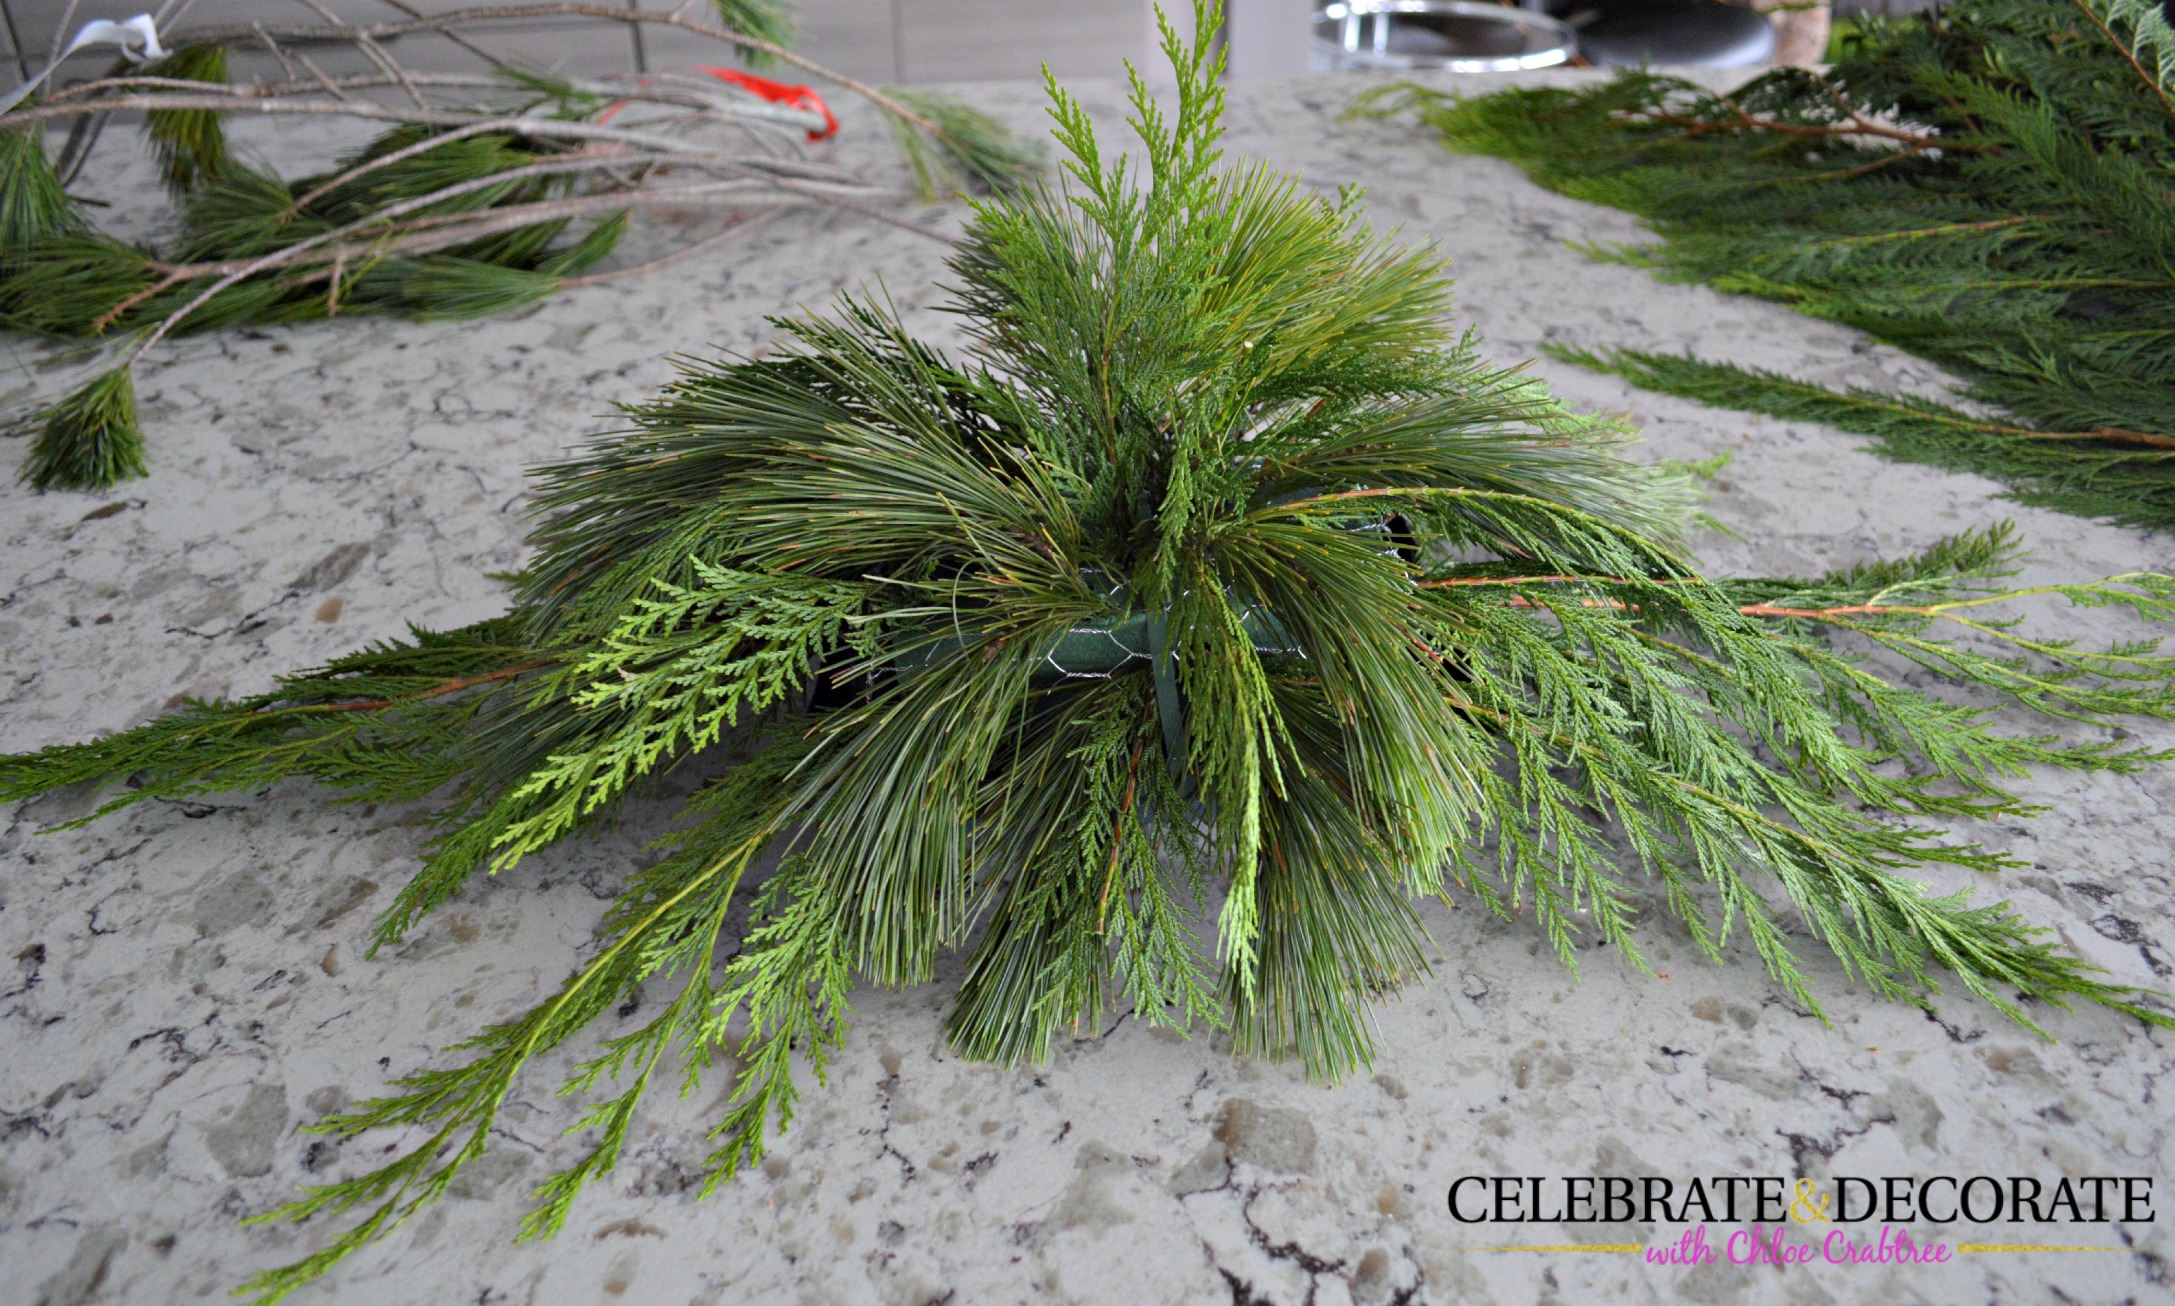
Next you will begin adding the white pine. Place the pieces of white pine in between the pieces of cedar. In the above photo you can see the piece of cedar at the bottom right hand corner is not a tip, you can use pieces that you would have after you cut the tips off. Put a piece of white pine off of each corner and then 4 pieces out of the top toward each corner as seen above.

Here is another picture taken from above to show another view of how to add the white pine tips between the cedar.
Continue filling in with cedar and white pine tips until your arrangement is looking full as this is in the photo above.
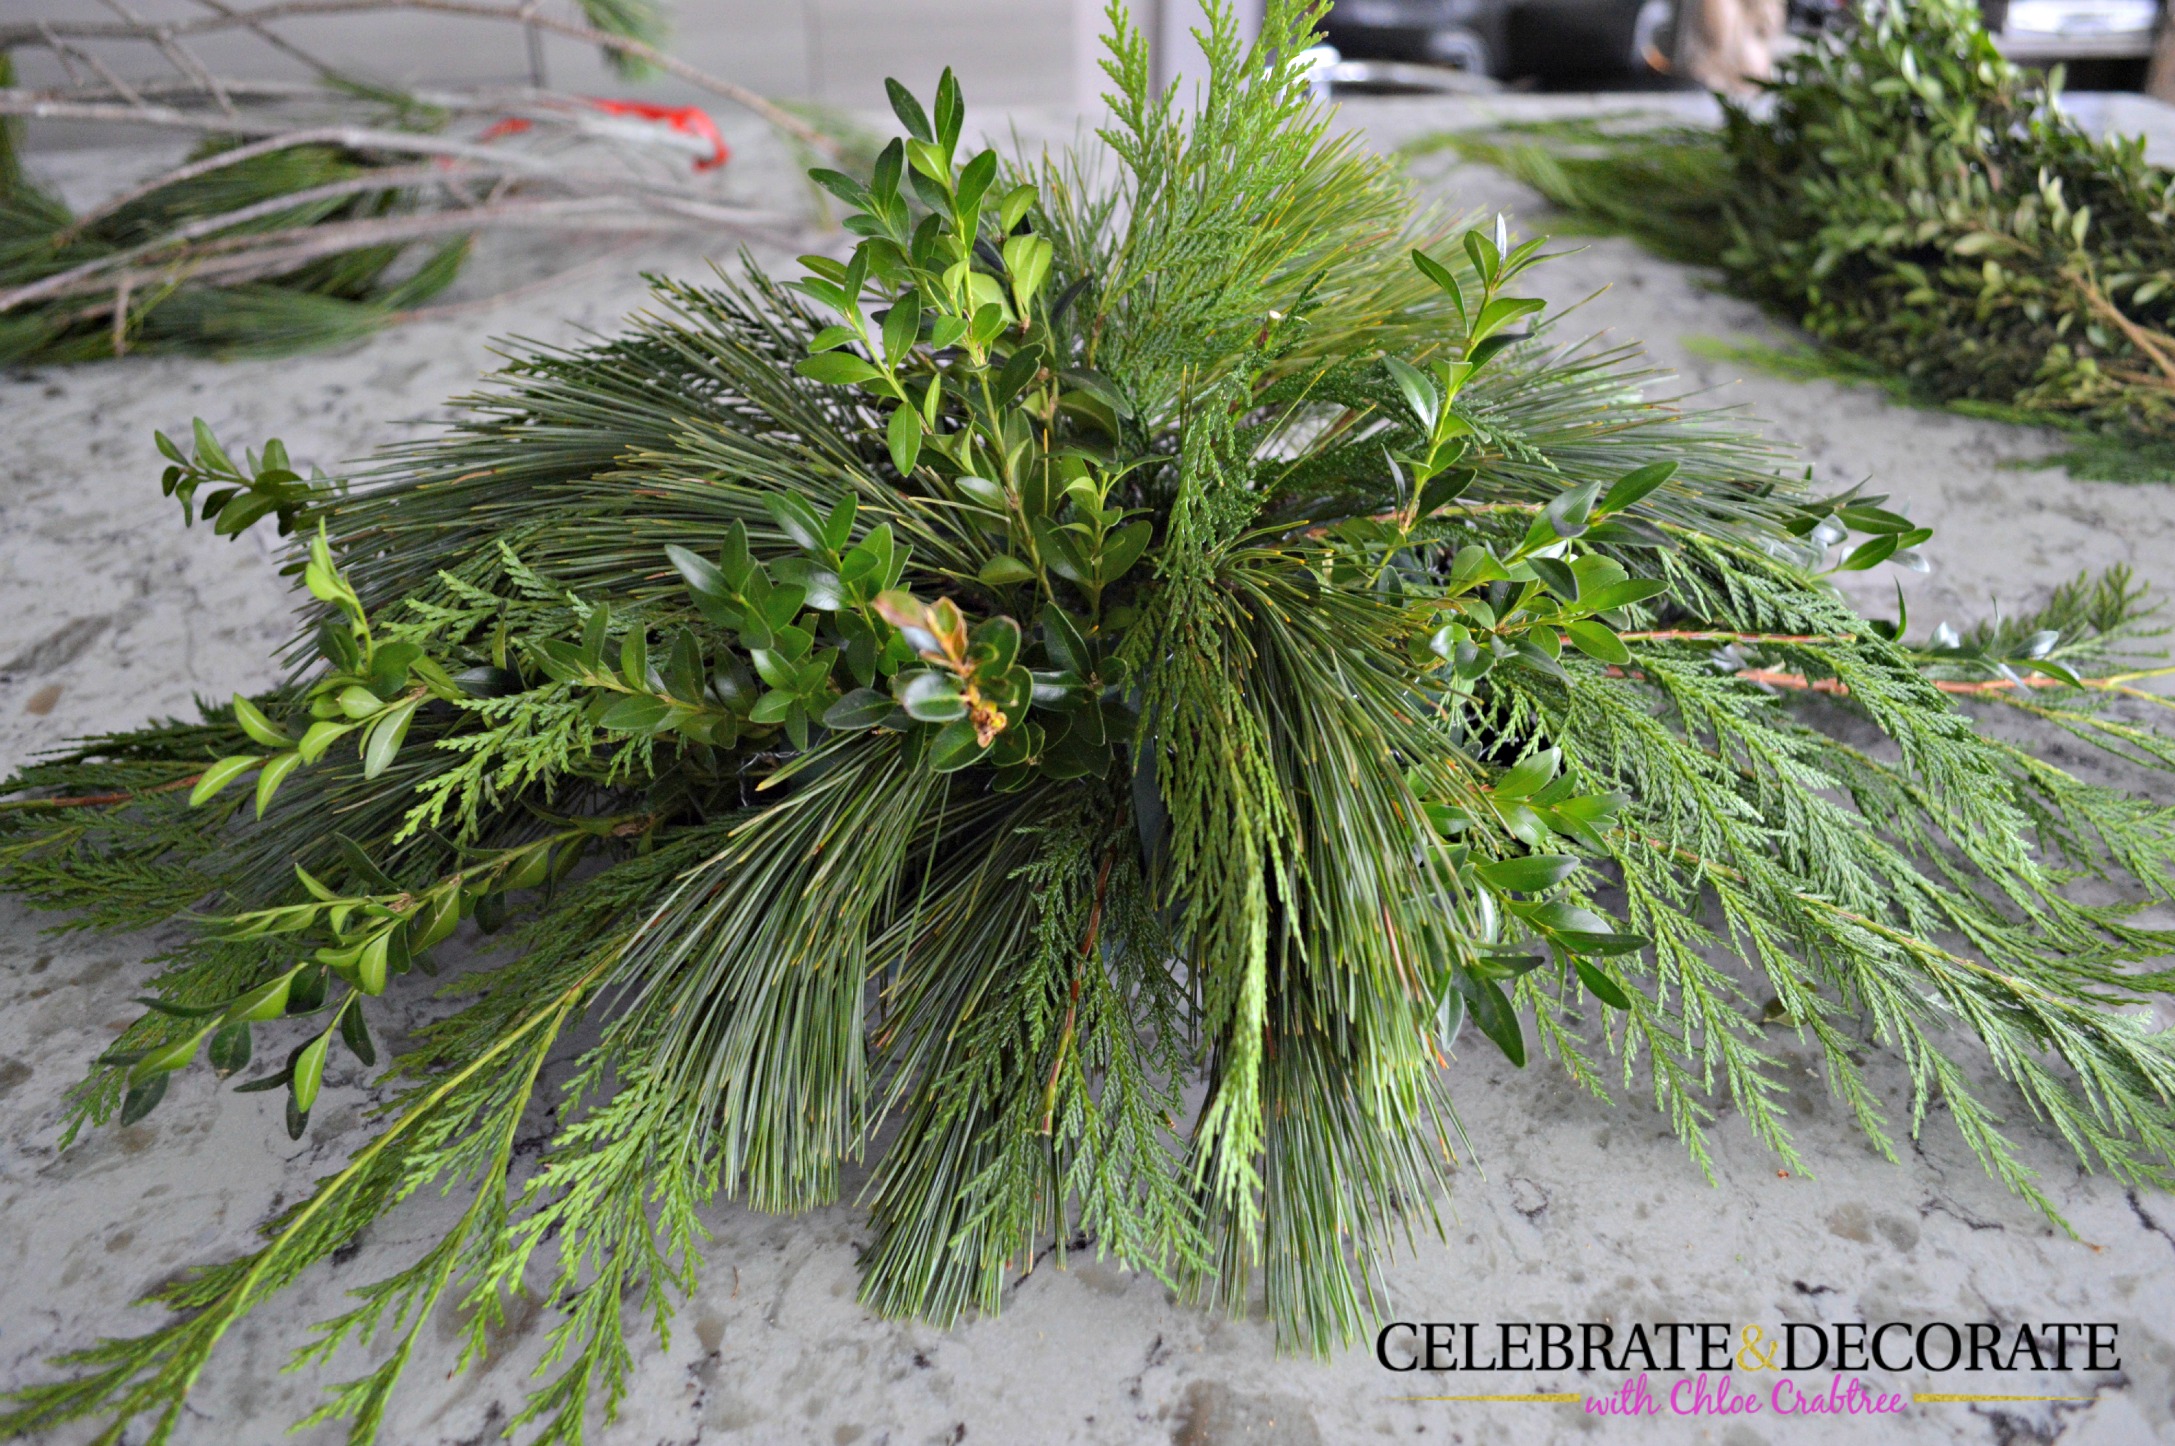
It is now time to fill in all of the spots with boxwood. Cut the boxwood into 3″ to 6″ pieces and fill in the shape of the arrangement that you have already made with the longer greens. Your arrangement should be full and have no holes in it now.
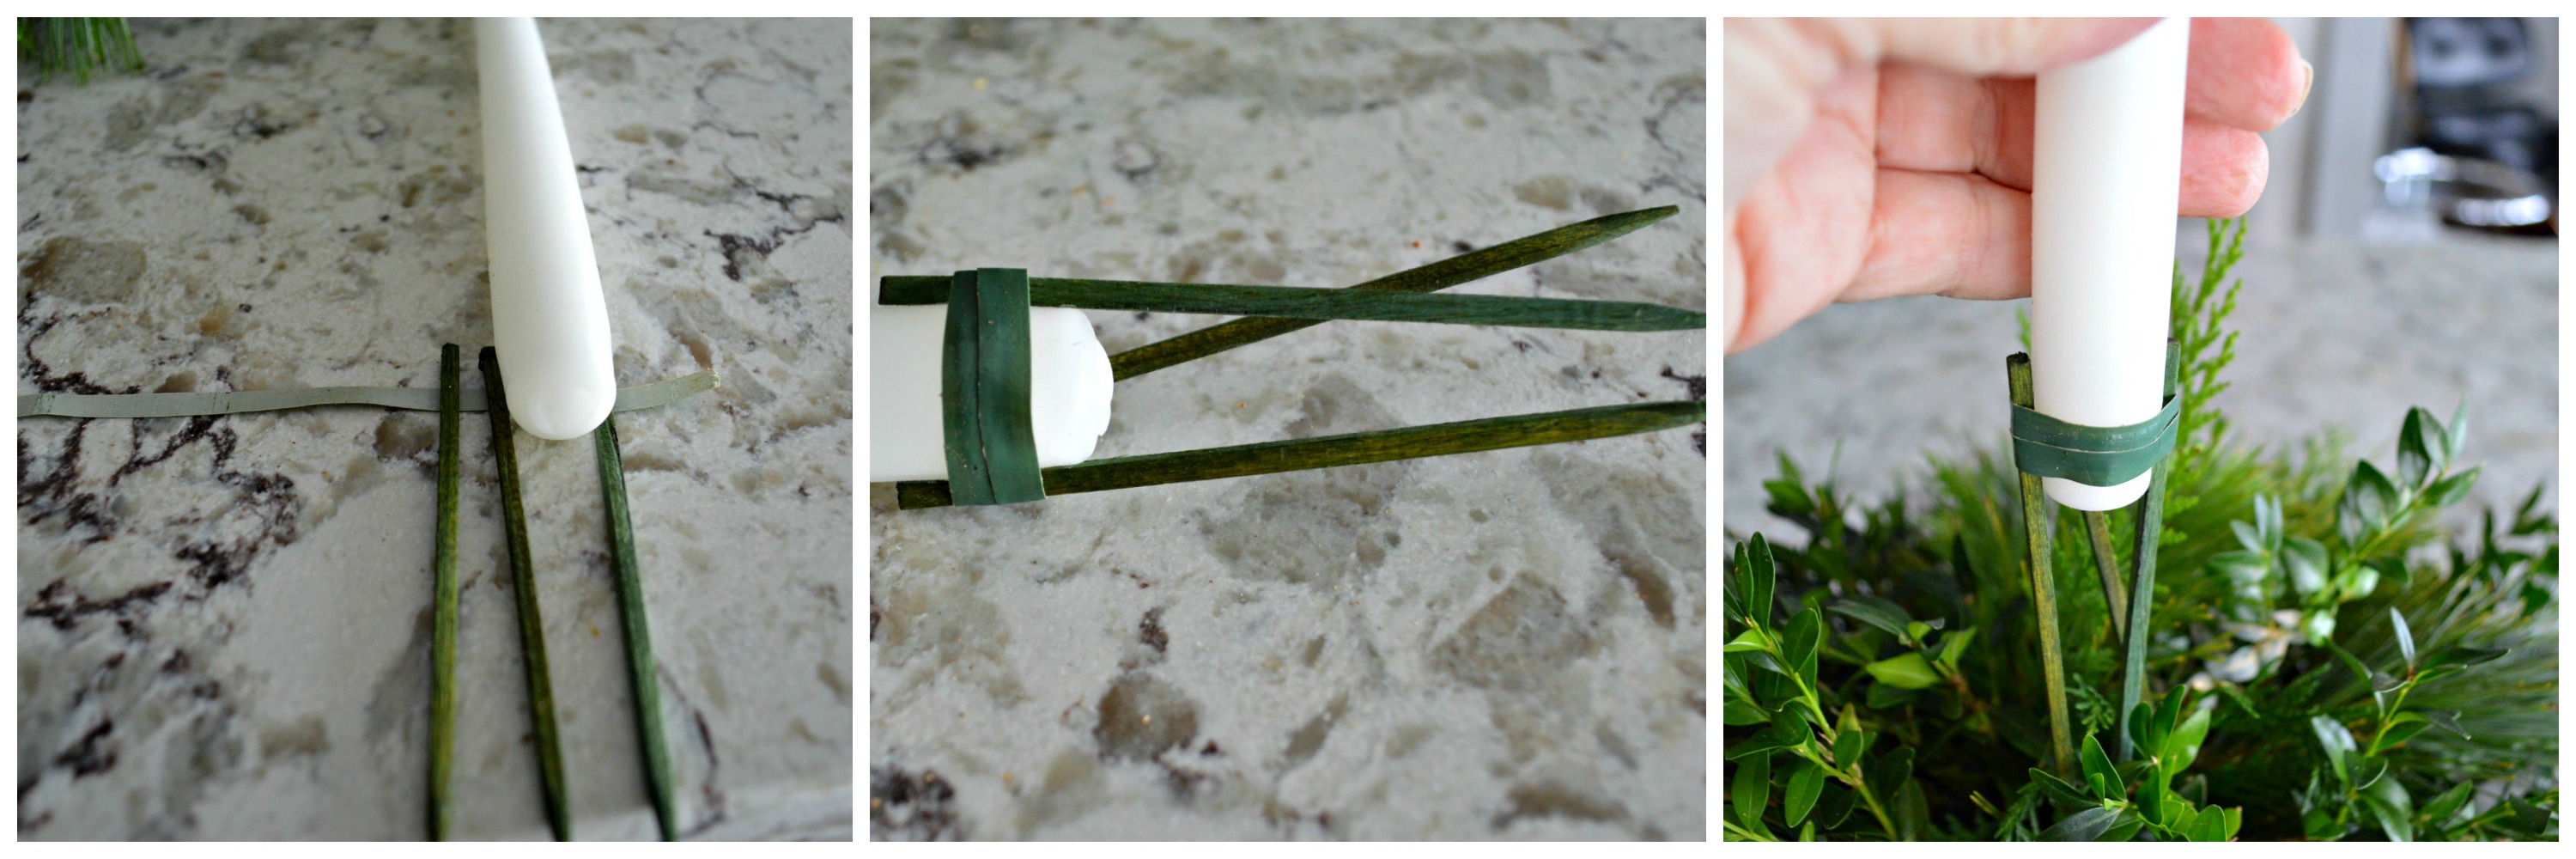
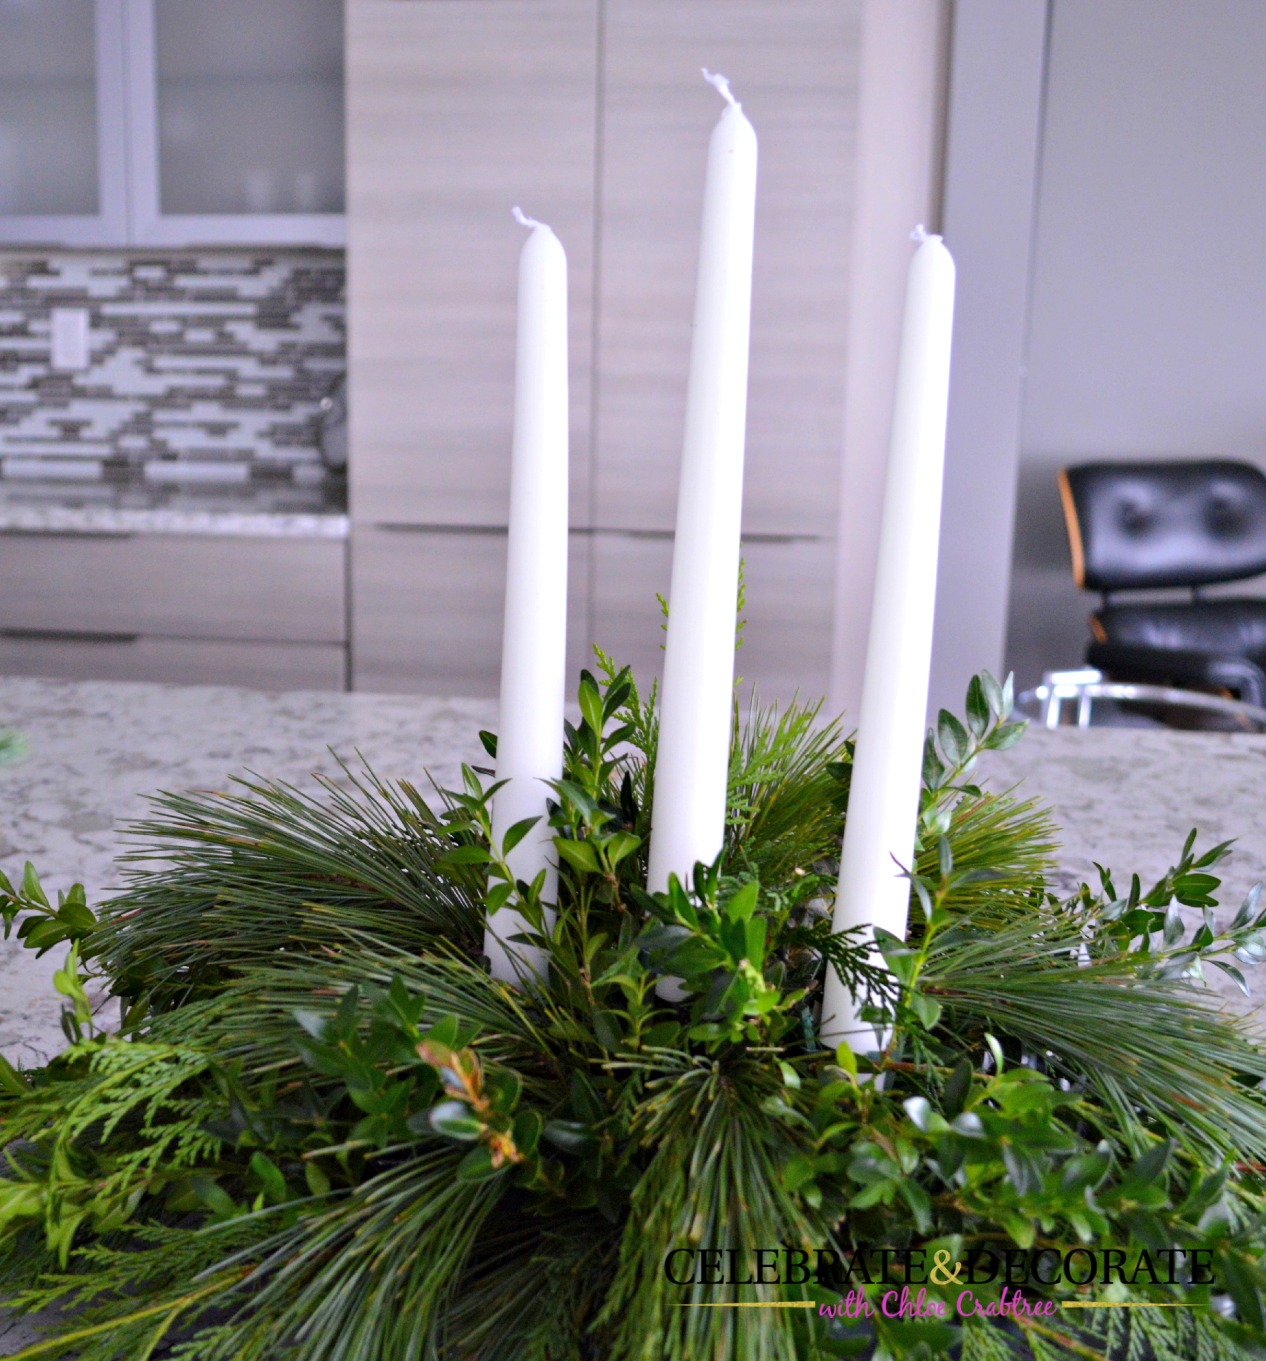
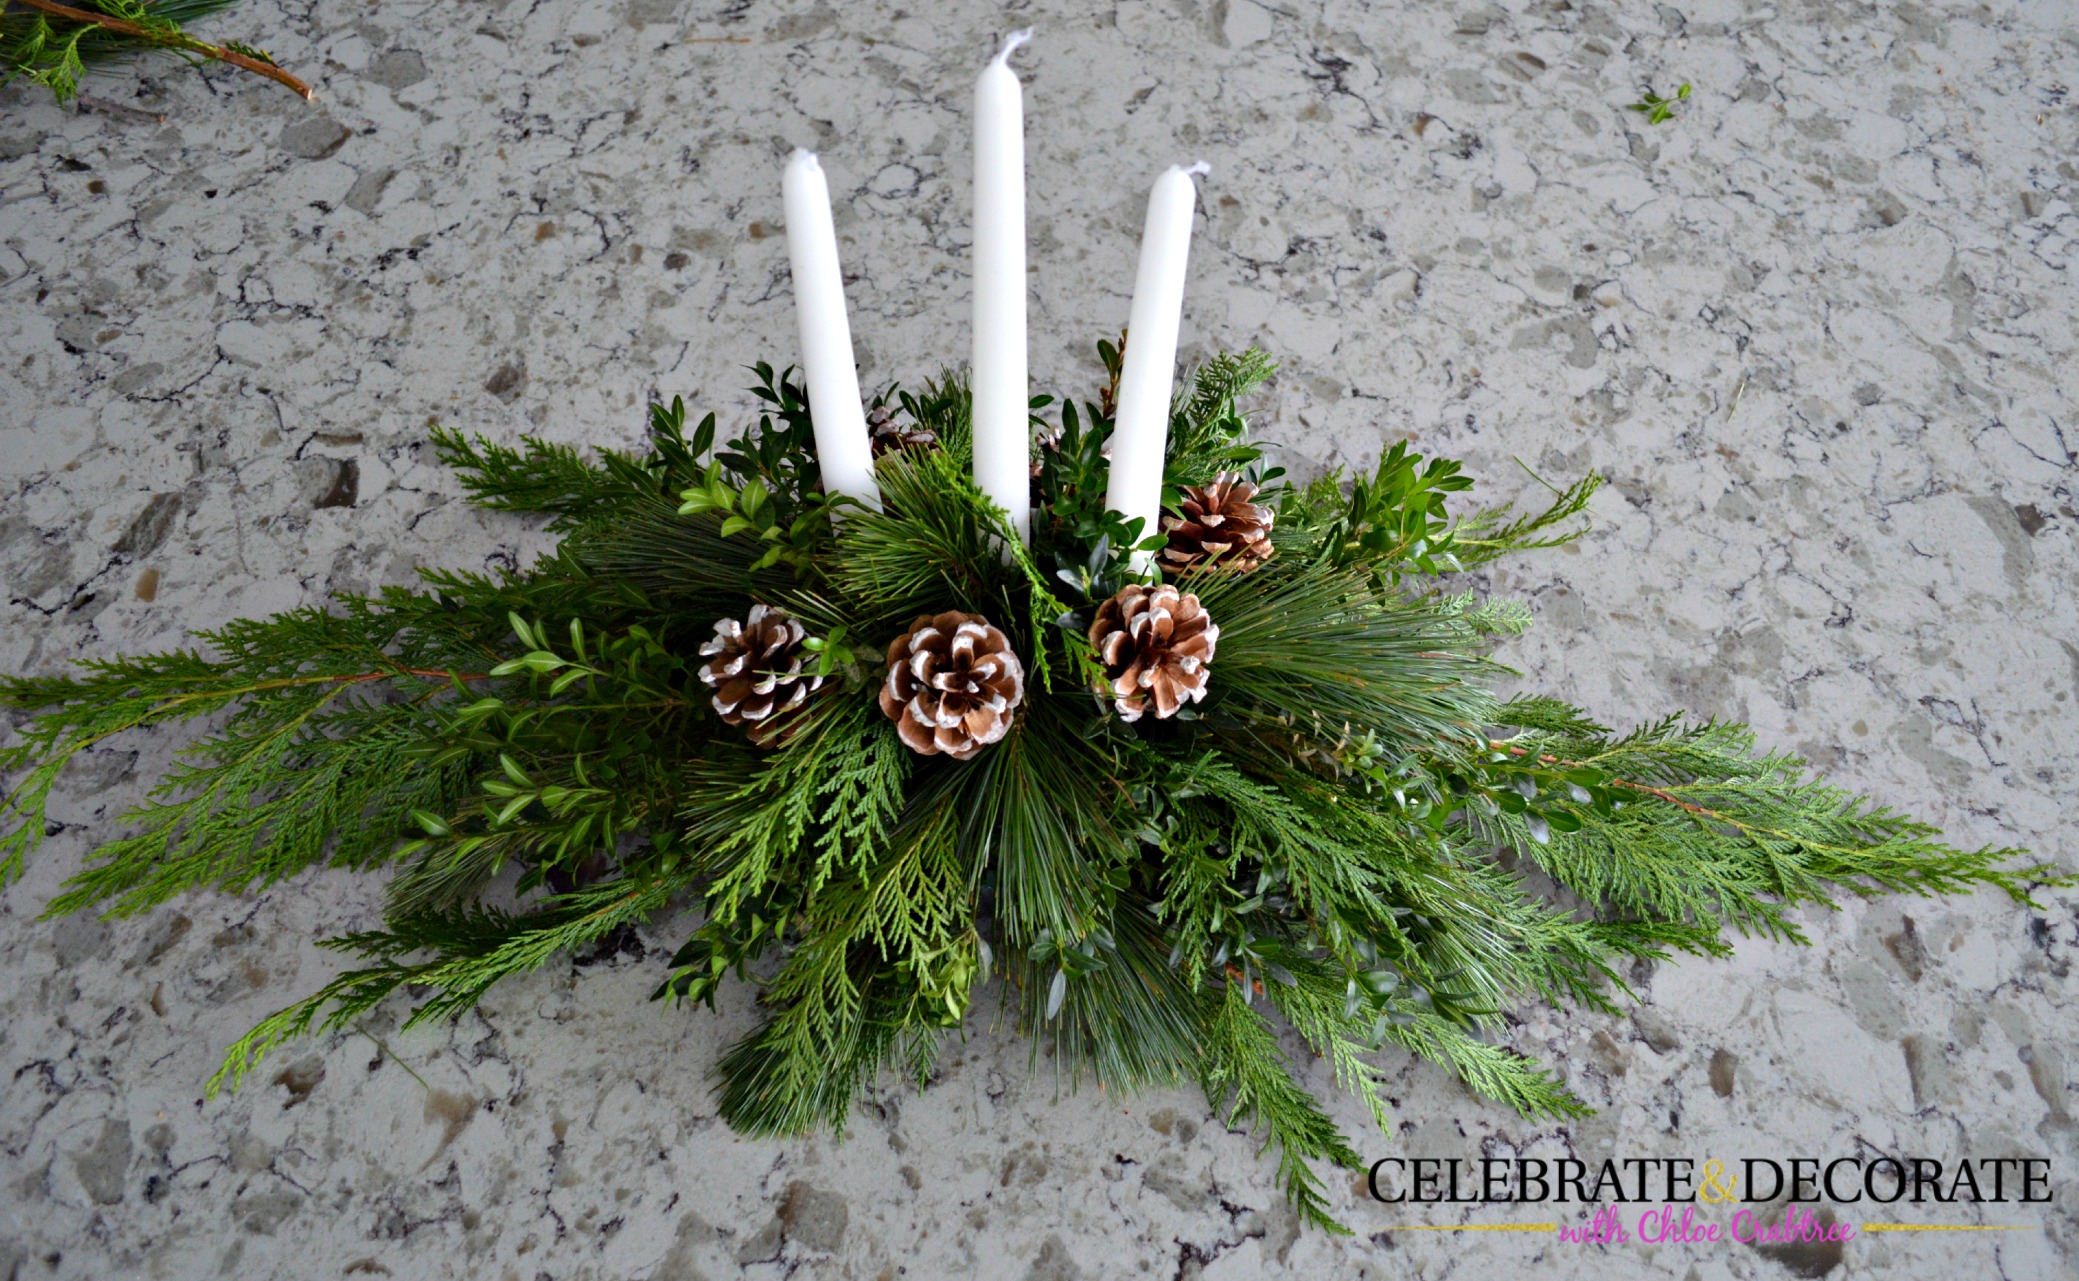
To add white candles to your arrangement, put down a piece of anchor tape and set down three of the green wood sticks that you have cut the wires off of. Tape the green sticks around the base of the candle and push it down into the floral foam. For this centerpiece I added three candles.
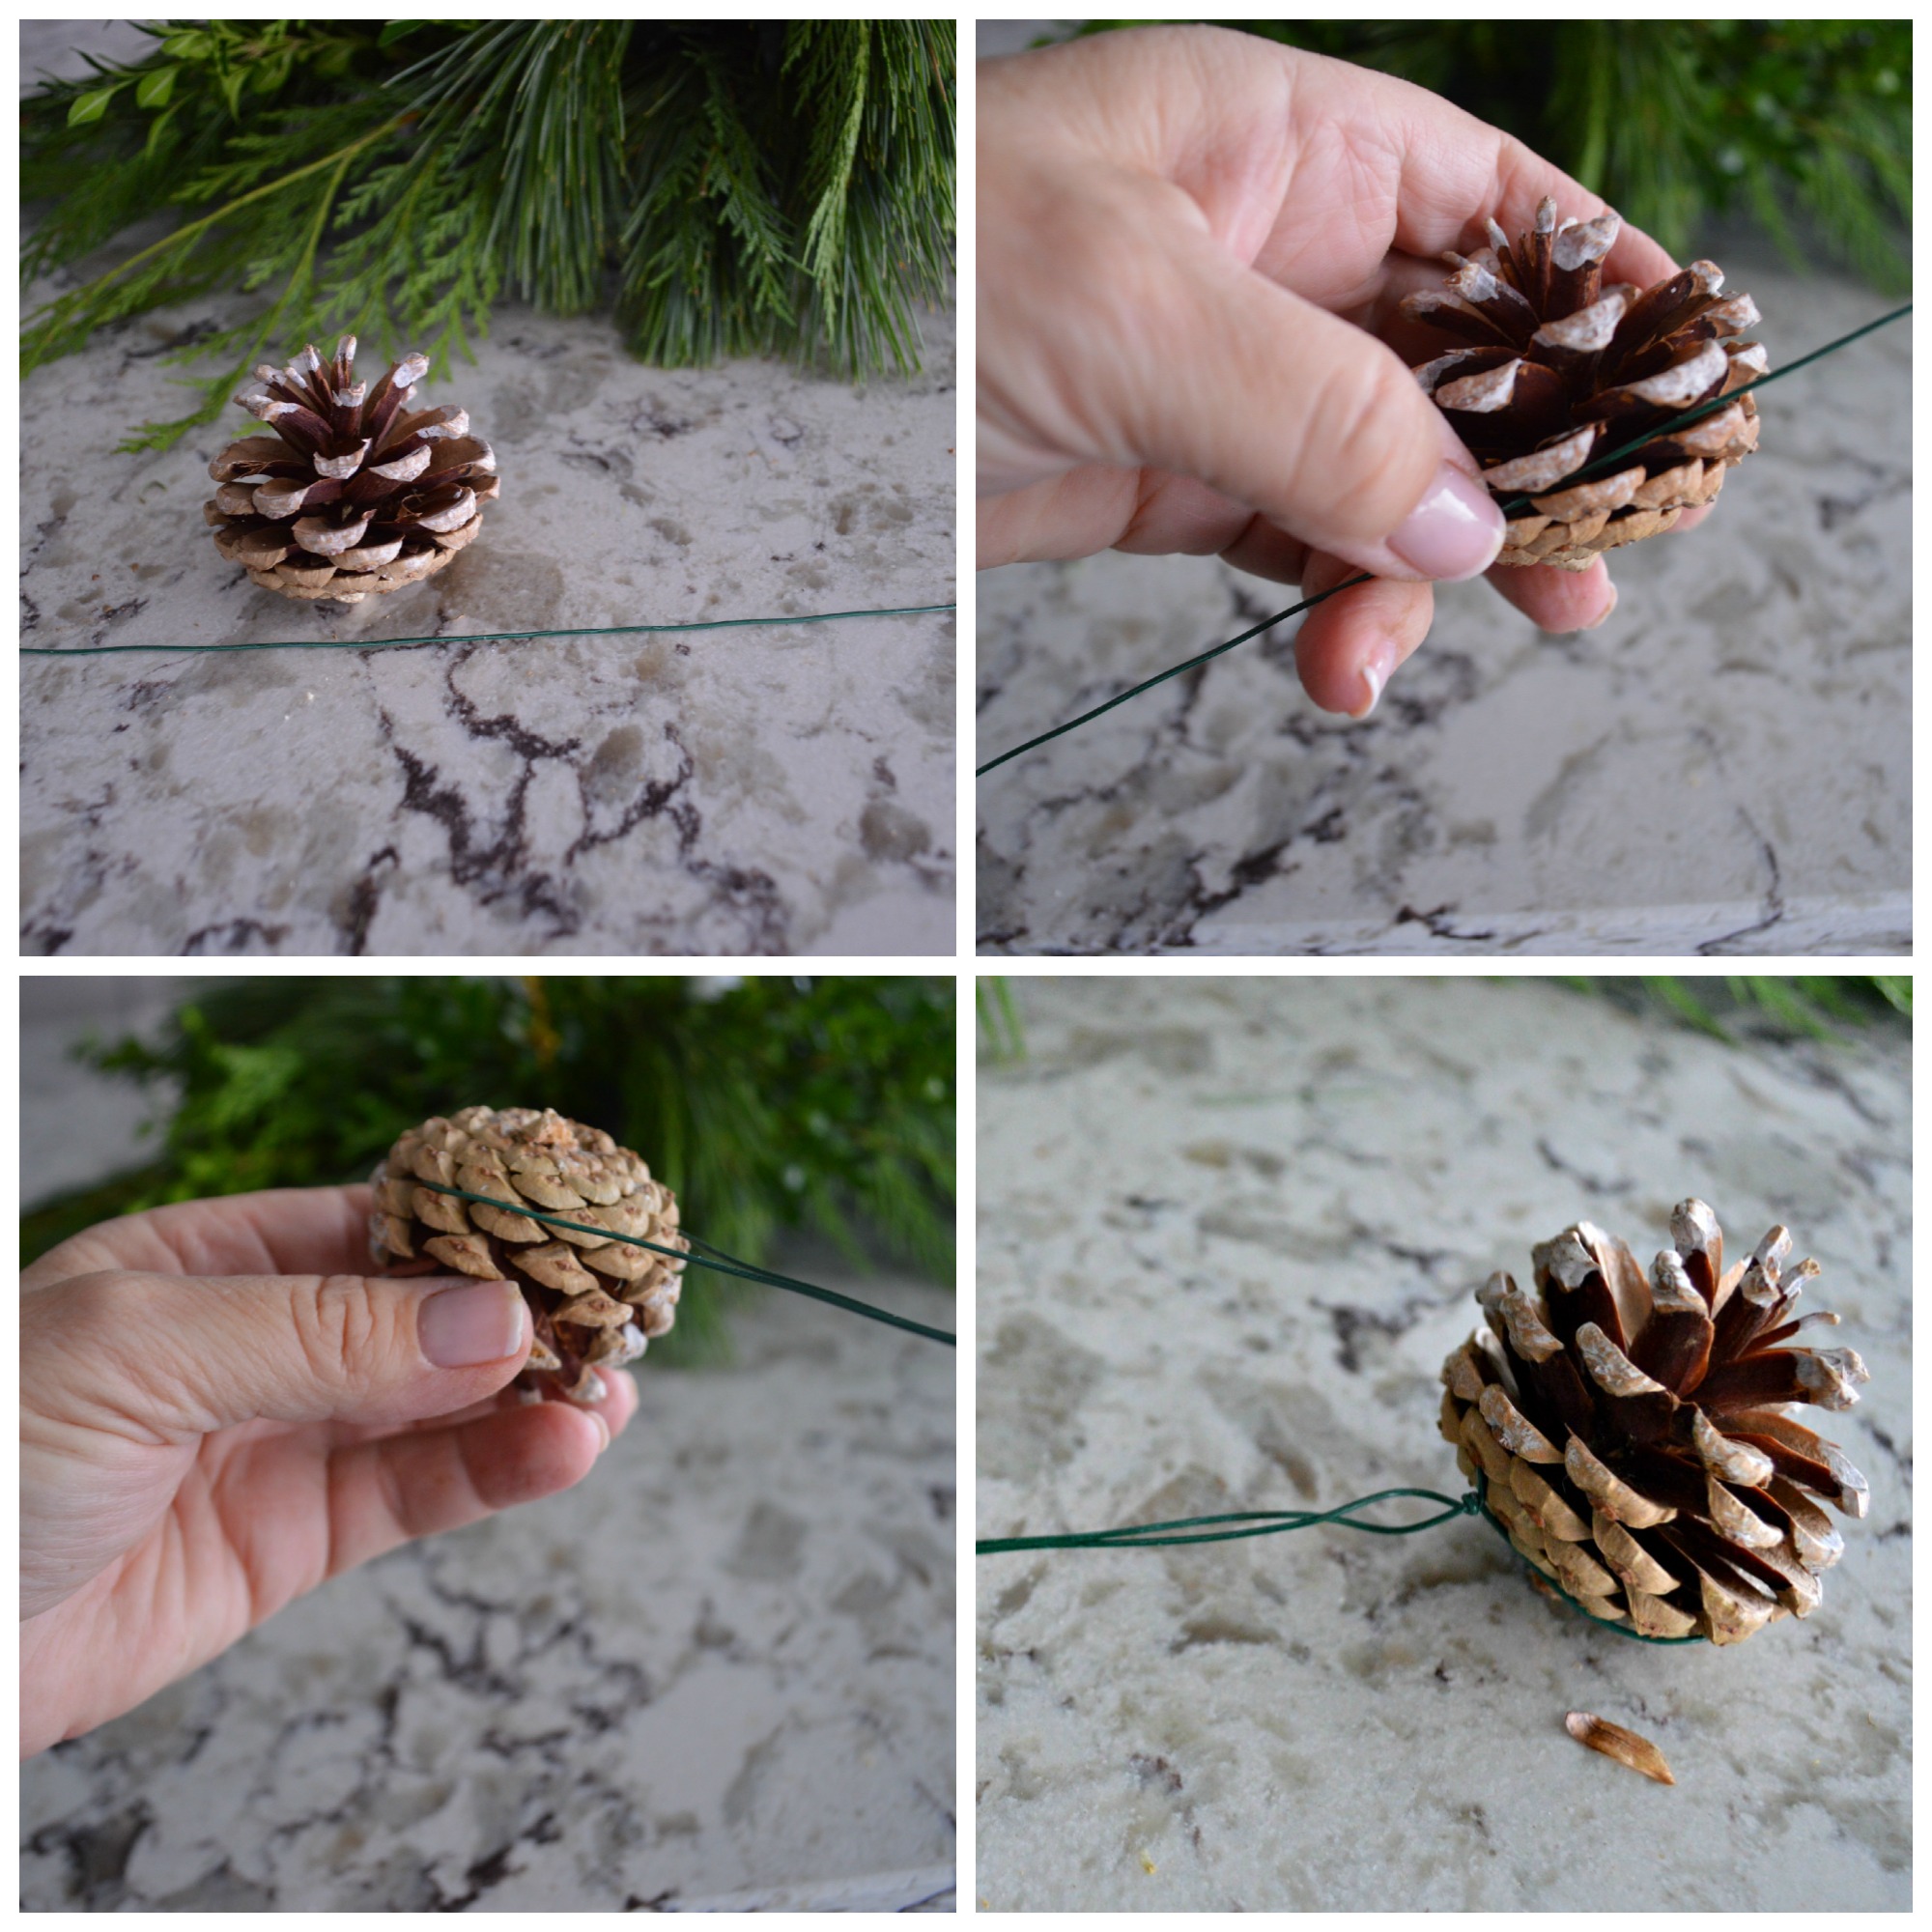
To add pine cones to your arrangement, use a stiff wire, bend it around the top of the pine cone and twist it so it becomes a single stiff wire you can push into the foam. I added three of these to each side of my arrangement near the candles.
Adding decor to your basic centerpiece:
At this point, this arrangement looks pretty nice for Christmas, but we are going to make it look even better and add some more ornamentation.
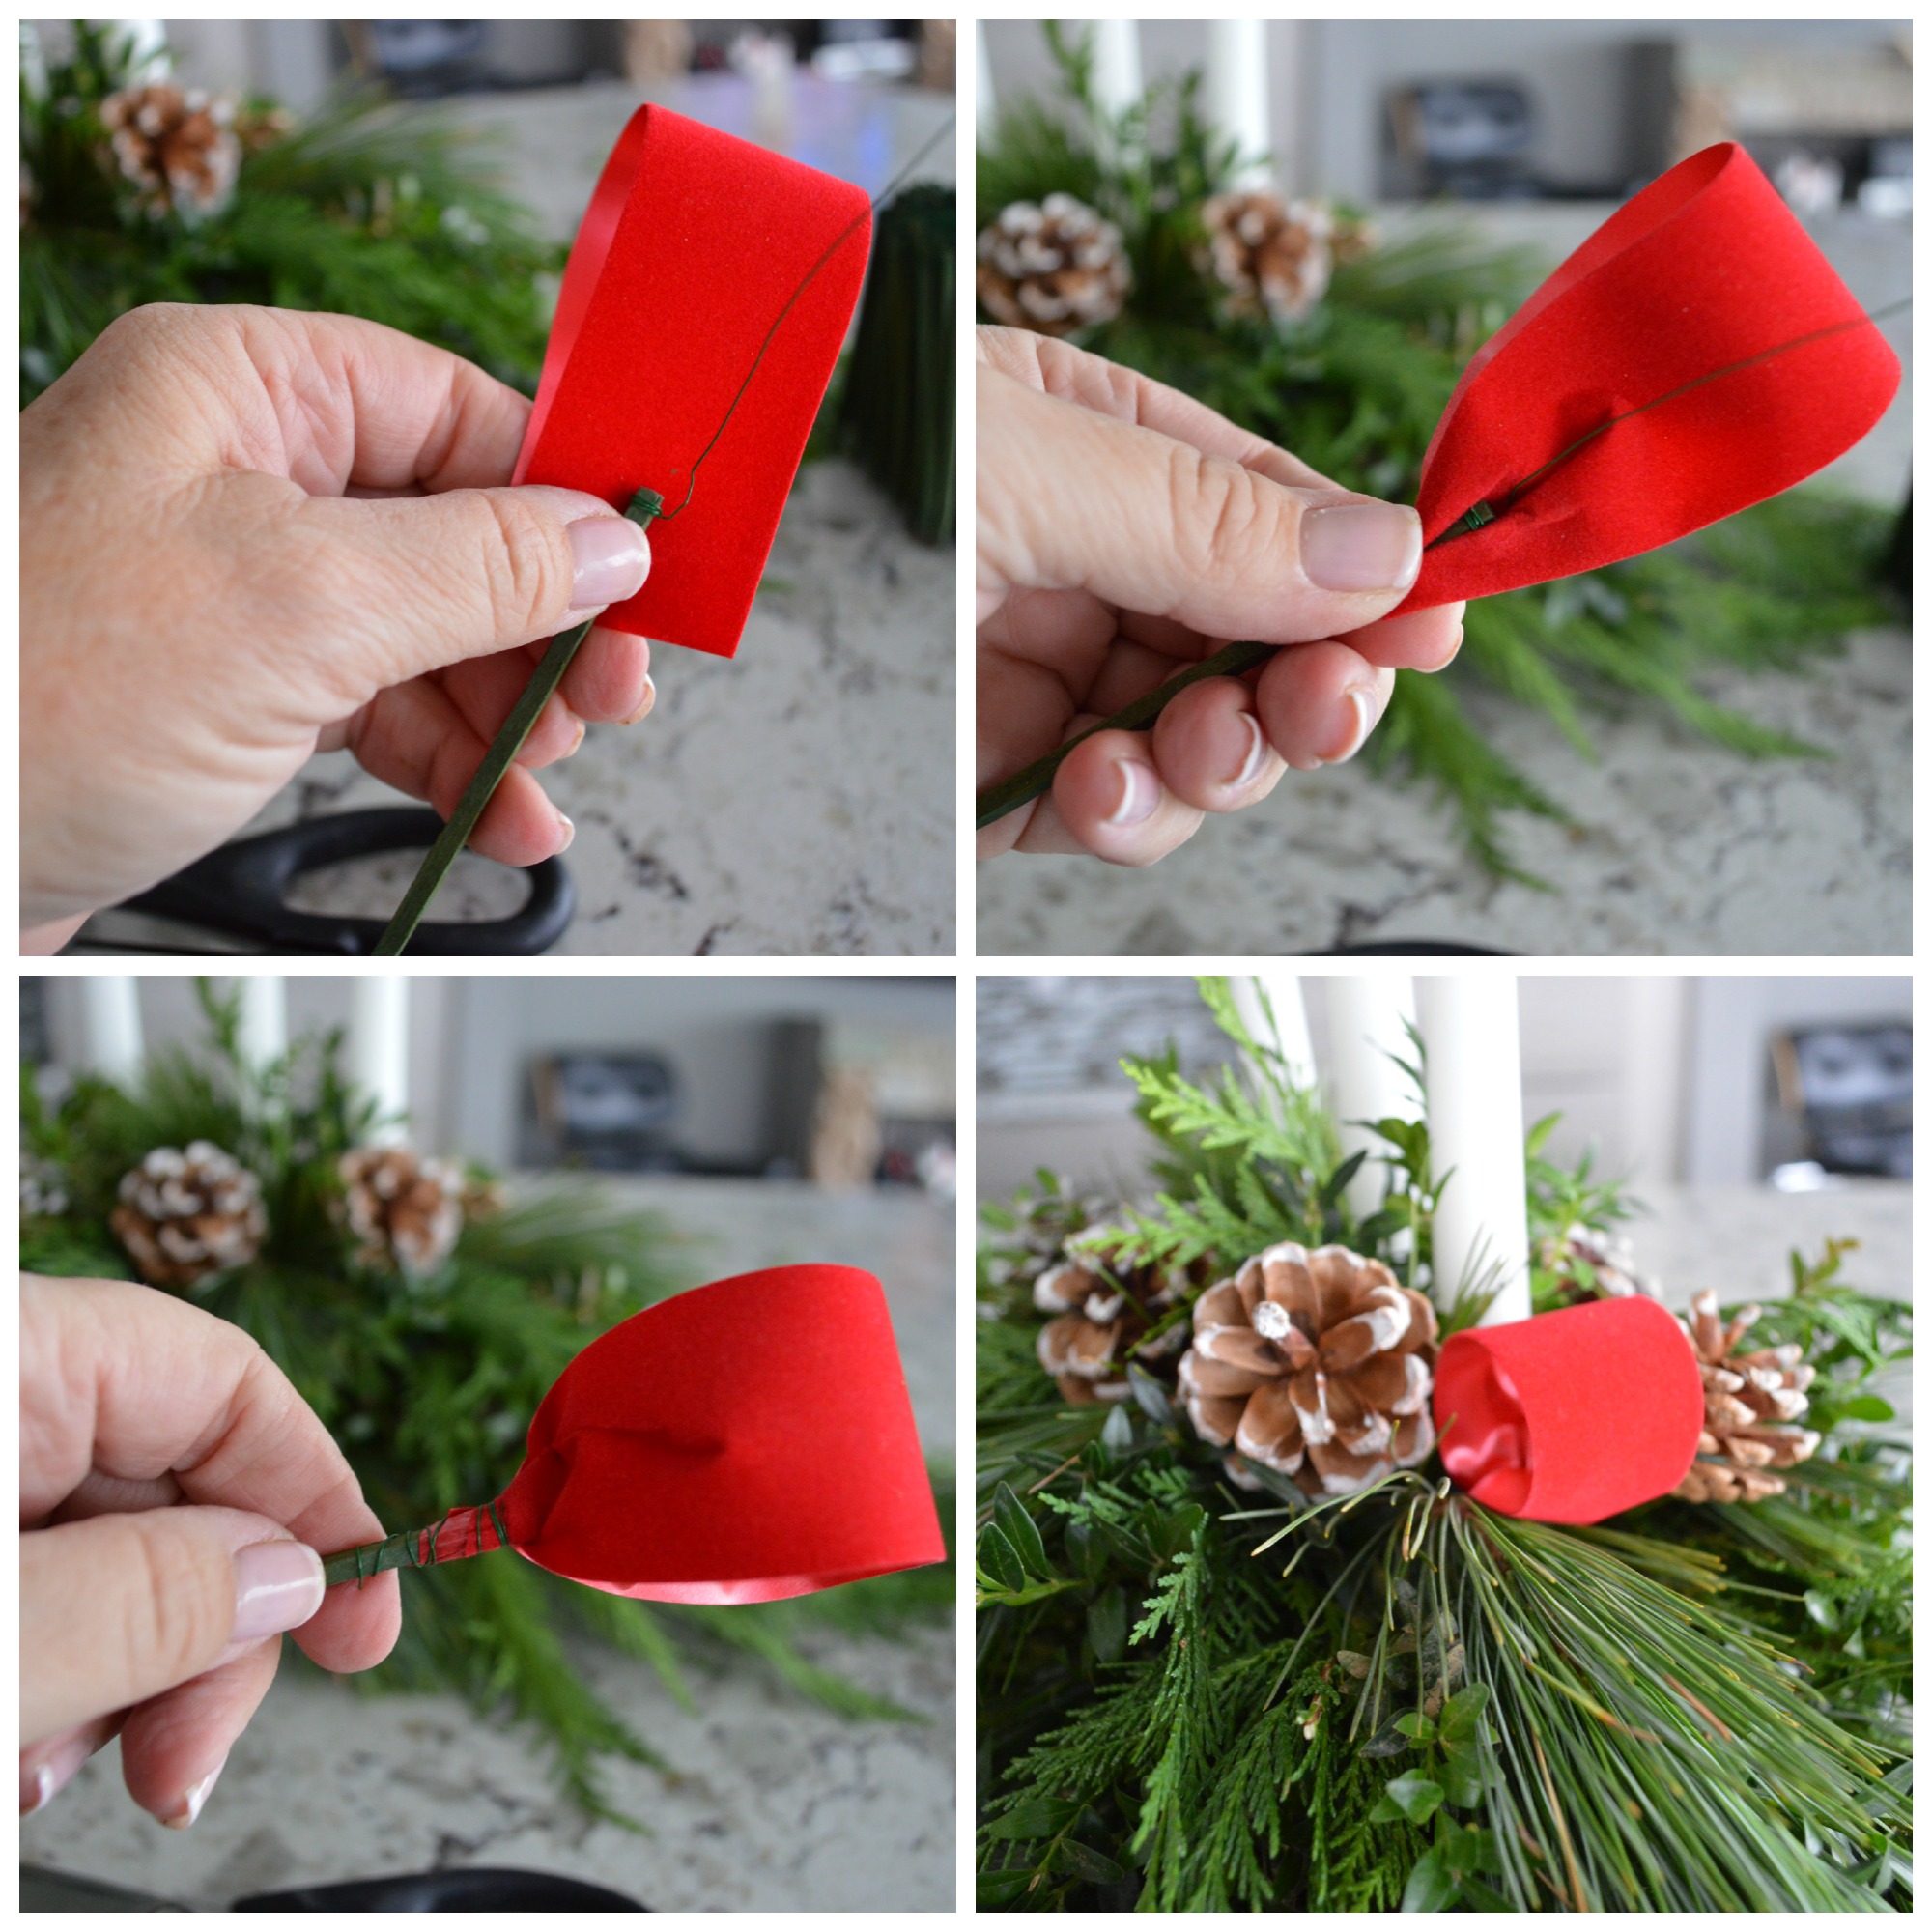
To make some ribbon loops for your arrangement, take a piece of ribbon and gather it onto the end of a wood wired stick. Wrap the wire tightly around the ribbon to secure it and add it to your arrangement. Be careful not to stick it in so deeply that the ribbon touches the floral foam or it will leach the water out of the foam.


See how pretty the loops look when you add a tail to them. It almost looks like a bow is hiding in the greens of your arrangement. Here it is, your own DIY evergreen Christmas Centerpiece. Looking at it from above you can see how pretty the loops and tails make your arrangement look. You can add as few or as many loops and tails as you would like.
To add ornaments to your arrangement you will use those same wood wired sticks. I used clusters of three tiny ornaments.

There you have it, a beautiful centerpiece for your Christmas table. If you keep this arrangement watered, you should be able to keep this and enjoy it throughout the holiday season. Should you want, you could switch out the pinecones or ornaments for different holiday picks. You could also add fresh flowers to an arrangement like this if you would prefer. I completed this entire arrangement for just $18! I could never have bought such a pretty arrangement for that money! If you keep your arrangement watered you should easily have it have it through new year’s day!
My aunt sold these years ago. I would never pay 50.00 for something I can put together with uncomplicated supplies. She flocked some of the arrangements. This was her spending money for the next year.
I thoroughly enjoy your DIY posts. I really admire your creativity, talents and skills. You are an inspiration to all of us who love to make lovely things for our homes.
Thank you so much Nancy! You are so kind!
This is gorgeous. I had an image of me lighting this on my table and it bursting into flames. You know those videos where the live tree catches on fire. I’m going to try this out and out my crazy fears behind me. Great tutorial.
You always bring a smile to my face!
Don’t laugh. I was at a hospital dinner that used real candles and the centerpiece caught on fire ! Thank goodness for all of the realistic battery candles today.
What a beautiful piece! It looks so expensive and so much better than what you see in stores.
Thanks so much Michelle! It is really easy, as you can see!
Beautiful Chloe, as always great information you shared.
Cindy
Thanks so much Cindy! Merry Christmas to you!
Very helpful! Thanks.
Thanks so much JoAnn!
It is beautiful !!
Thank you so much Debbie!
Wow, how beautiful! Fresh greenery is the best and smells so great. Looks wonderful as always friend! Hugs to you.
Thanks so much Chas!
Thank you! You give me hope! The arrangement is lovely.
Oh, I am confident you can do this Janie!!
First, congratulations on your son’s marriage! (The little girls looks so sweet!)
Second, THANK YOU for taking the mystery out of this centerpiece, especially the ribbon accents and clusters of ornaments! I purchased a Lenox “Williamsburg” cachepot and have been keeping a list of what I’d like to use to make a centerpiece with it, but your instructions give me the confidence that it will actually turn out well.
Merry Christmas, Chloe!
Thank you so much Sandra! You know Sandra, I try so hard to make all of my instructions easy for anyone to follow. I am sure you will pull this off! Merry Christmas to you and your family!!
Chloe, this is beautiful! Loved seeing your grand loves and a NY wedding sounds like fun.
OMG, the girls have grown so much! You are so talented Chloe and this arrangement is gorgeous. The step-by-step tutorial with all the pictures is so helpful. It would probably take several tries before I got it right, but forking over $50 is not happening. Thanks again for all you do and have a Merry Christmas and Happy New Year.