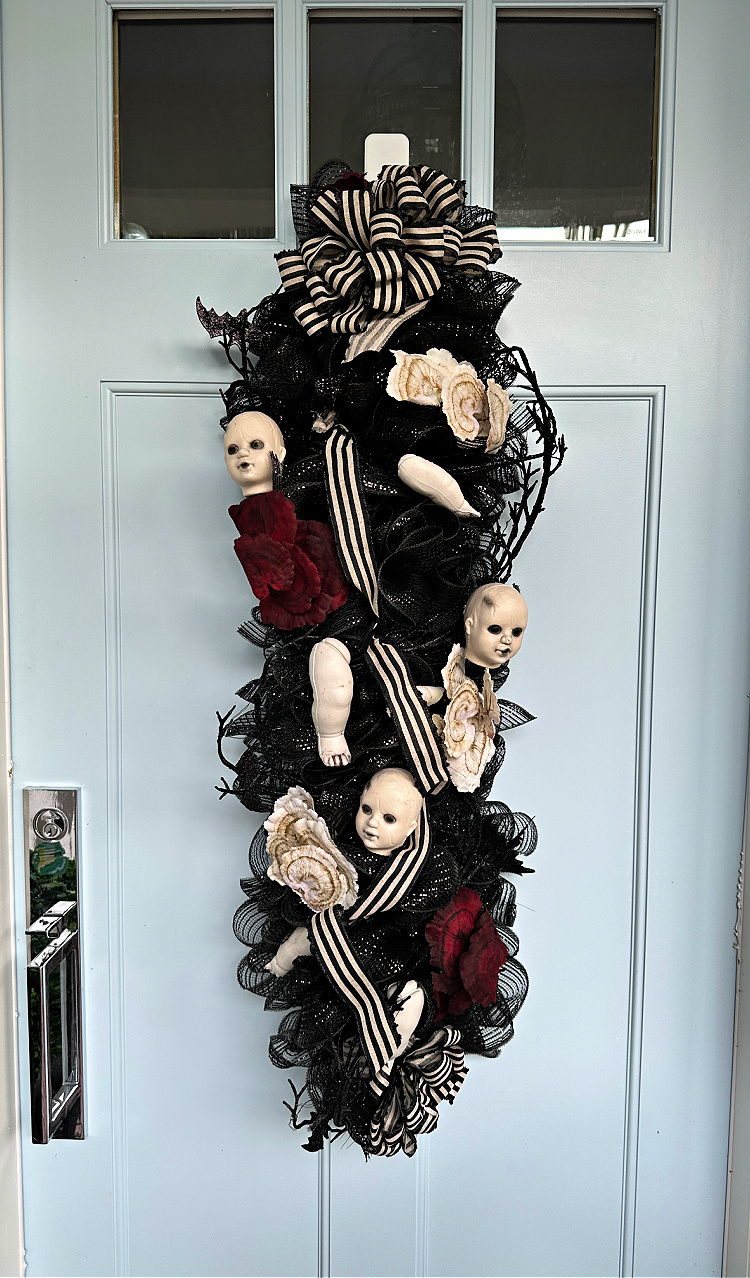
DIY Scary Halloween Door Decor
Front door decorations are an fun way to get into the Halloween spirit. I have all kinds of diy Halloween door decoration ideas for you!
This post contains some affiliate links for your convenience. If you click on any of the links in this post, I may get a small commission that will in no way affect the price of anything you might purchase. As an Amazon Influencer, I earn from qualifying purchases. Click here to read my full disclosure policy.
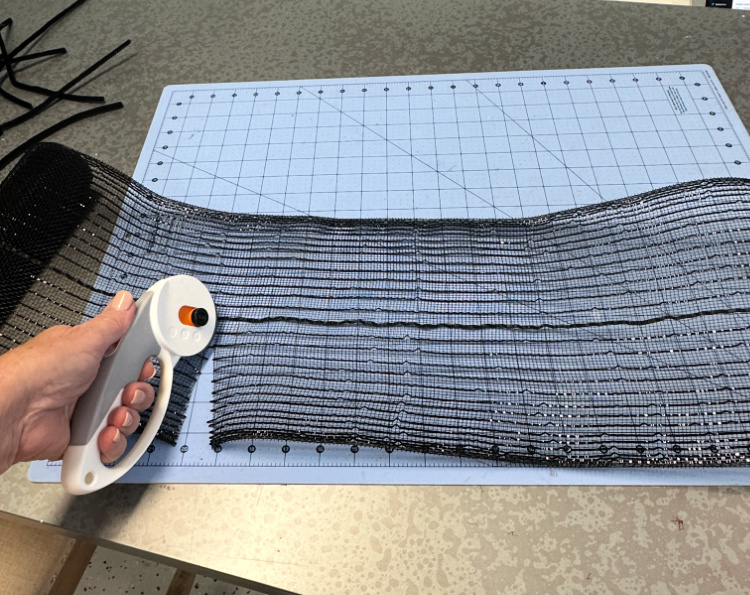
Begin with three rolls of 9.5 (or 10) inch deco mesh. I used sparkly black.

Using a rotary cutter and a self-healing cutting mat, cut 40 pieces of the mesh in 20 inch pieces.
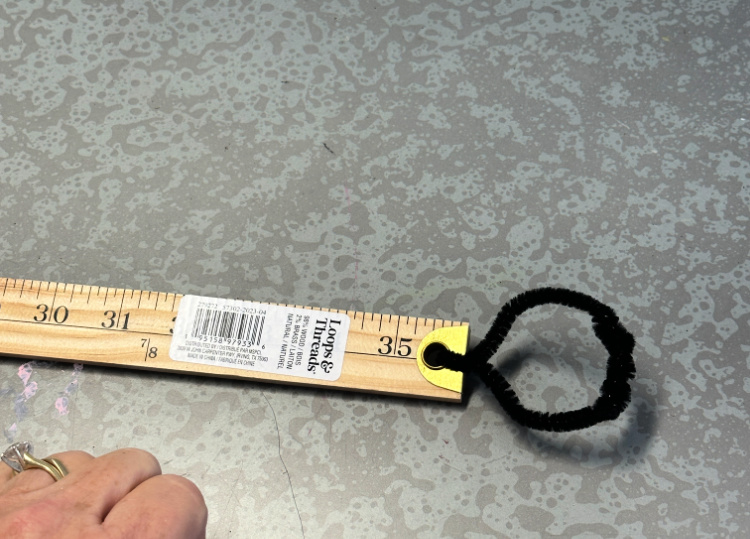
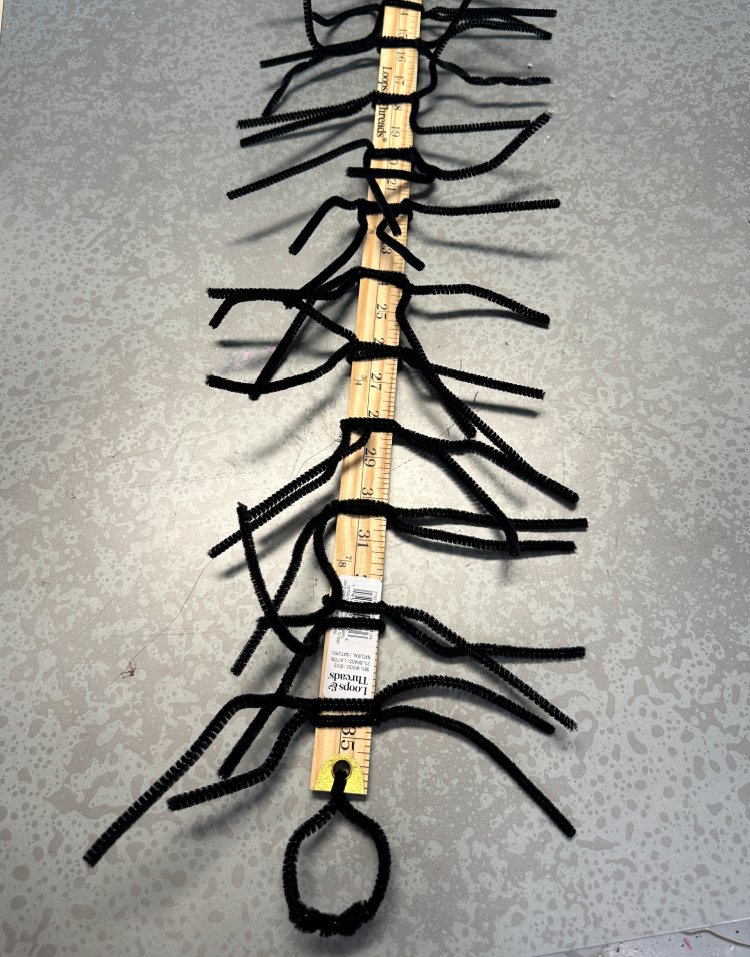
Get a wooden yardstick. I like these from Michaels. They have metal brackets on each end with a small round hole in them which will be helpful for this project. Feed a pipe cleaner through the hole on one end and form it into a tight loop so you can hang your swag when it is complete.
Gather a supply of black pipe cleaners. Take two pipe cleaners and wrap each one tightly around the yardstick at the same spot on the stick. Repeat the process every two to three inches down the entire length of the yardstick.
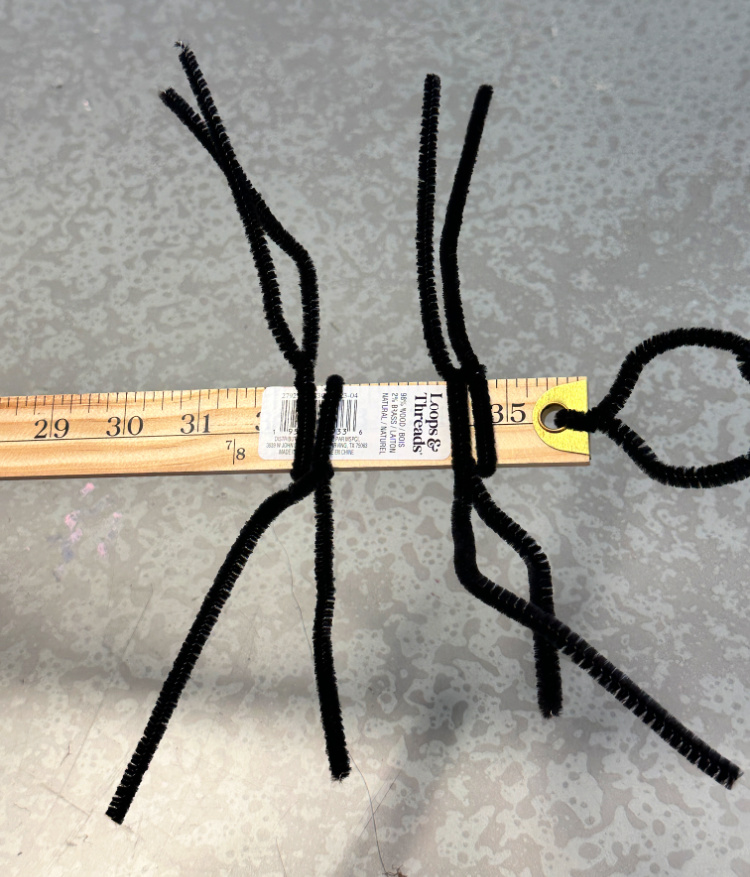
The closer you put the pipe cleaner connectors, the fuller your swag will be.
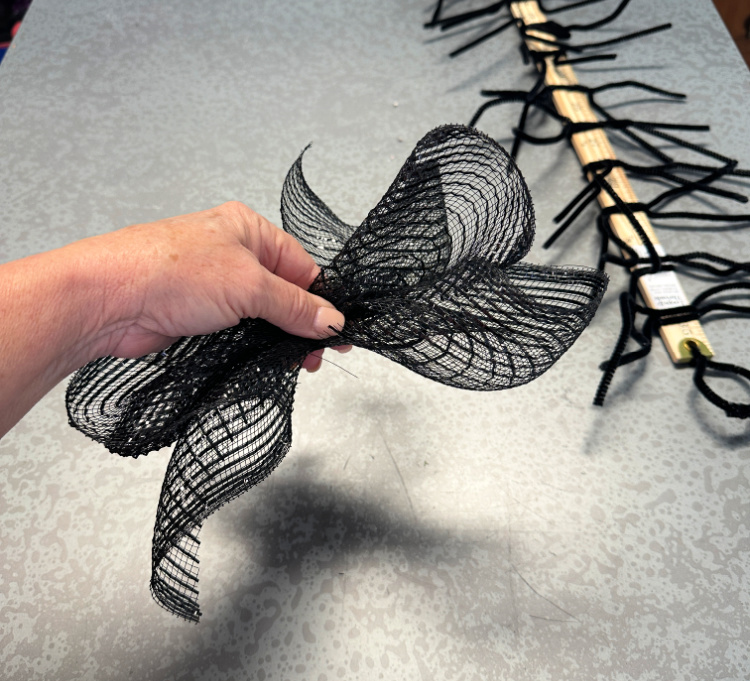
Take each piece of cut deco mesh, one at a time and scrunch it up as shown below.
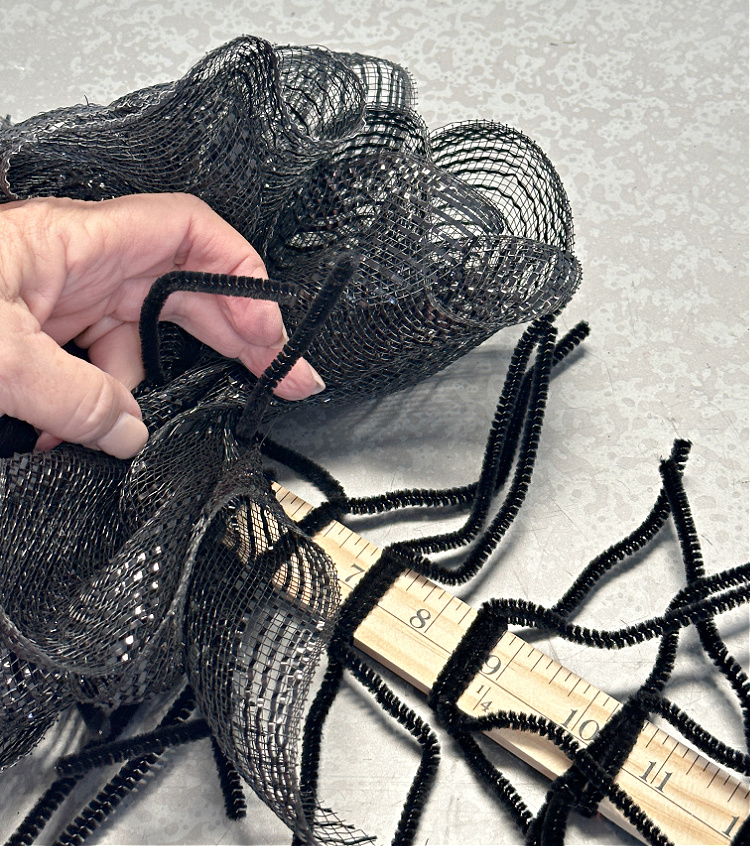
Pinch the piece of deco mesh in the center and use the ends of one of the pipe cleaners and twist it tightly at least three times around the deco mesh. Each pair of pipe cleaners will get two bunched up pieces of deco mesh. One for each pipe cleaner.
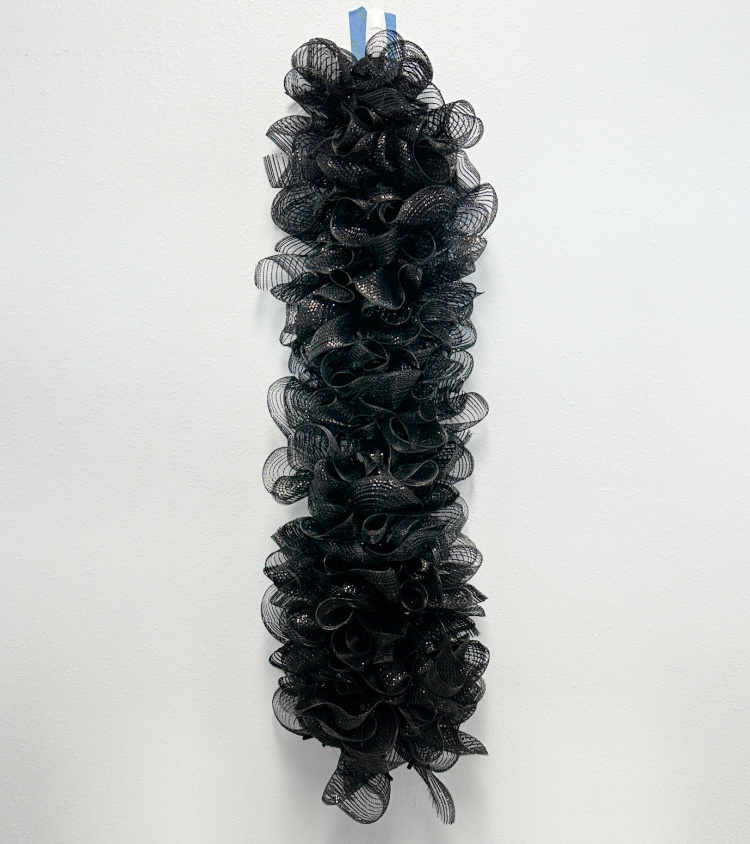
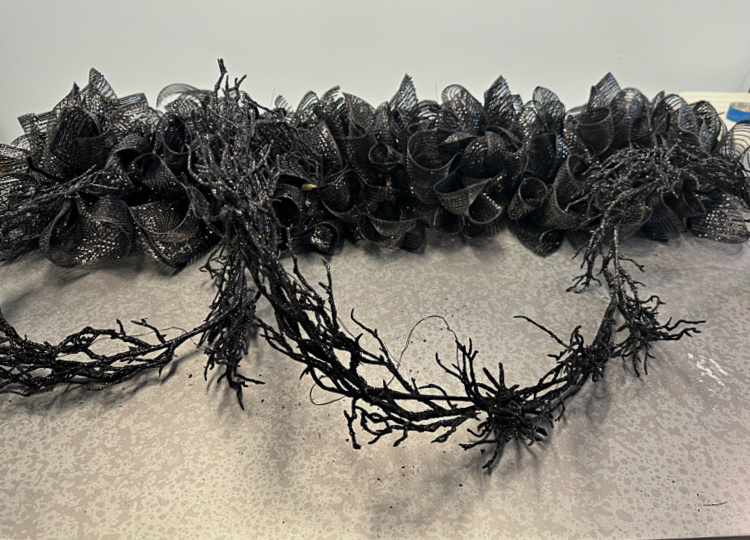
When you have completed attaching the deco mesh, your swag will be looking like this:
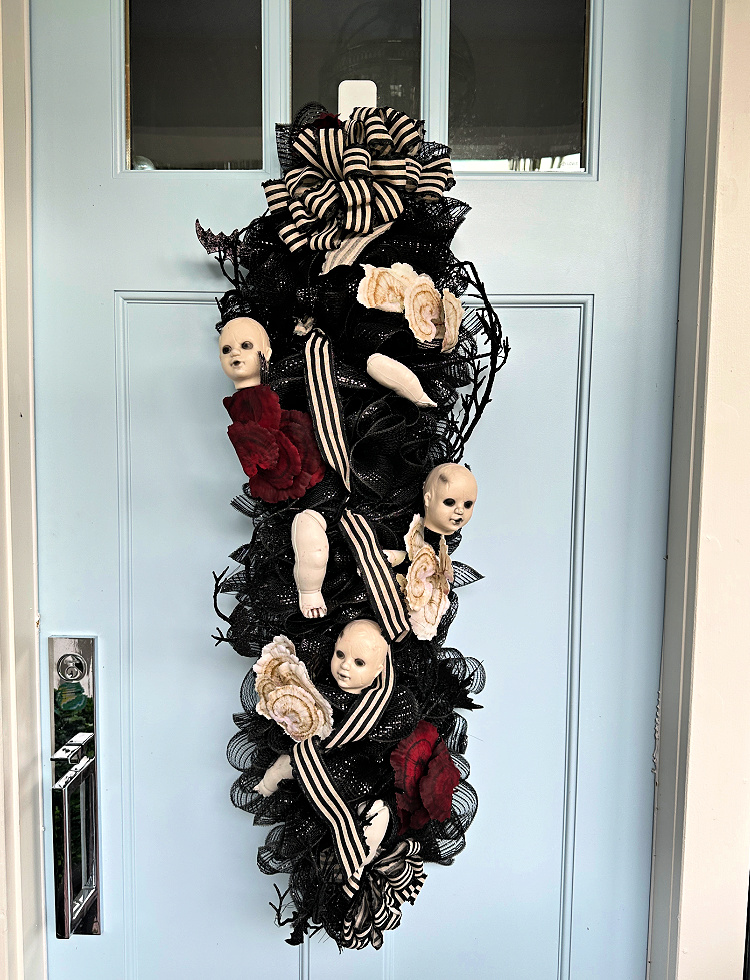
The first thing to add to the deco mesh swag is a black glitter branch with lights. Using the black pipe cleaners that you have already used to secure the deco mesh to attach it all to the yardstick. Attach the battery pack to the brass bracket at the bottom of the swag.
Next up, let’s make this swag a little creepy! Use a wood burning tool to melt a hole in each side of the head toward the back of the head. Repeat the process with the arms and legs.

Feed a pipe cleaner through the holes in each of the body parts.
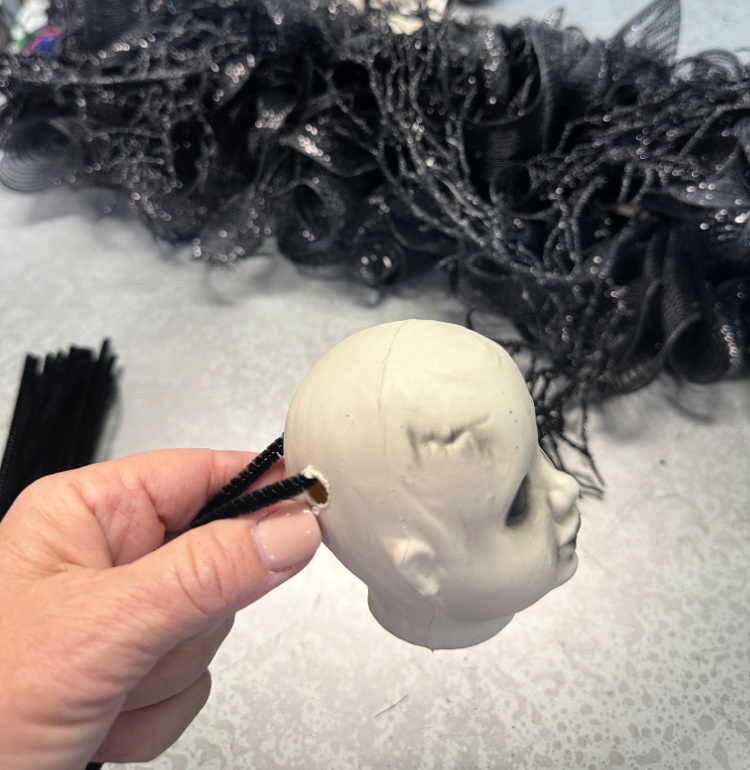
Use the pipe cleaner to attach each head or body part to the swag. Feed the pipe cleaner that goes through the body part through the pipe cleaners that are wrapped around the yard stick.
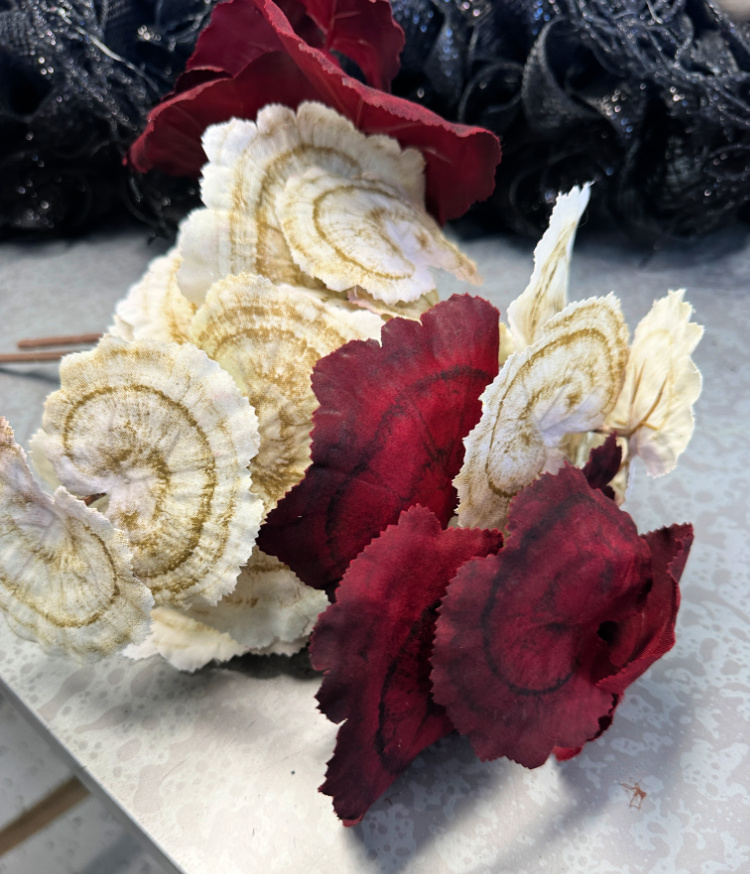
After adding the doll parts that you want to add to your swag, add a few of the faux mushrooms to the swag. Tuck the stem of the mushrooms through those same pipe cleaners that are secured around the yardstick.
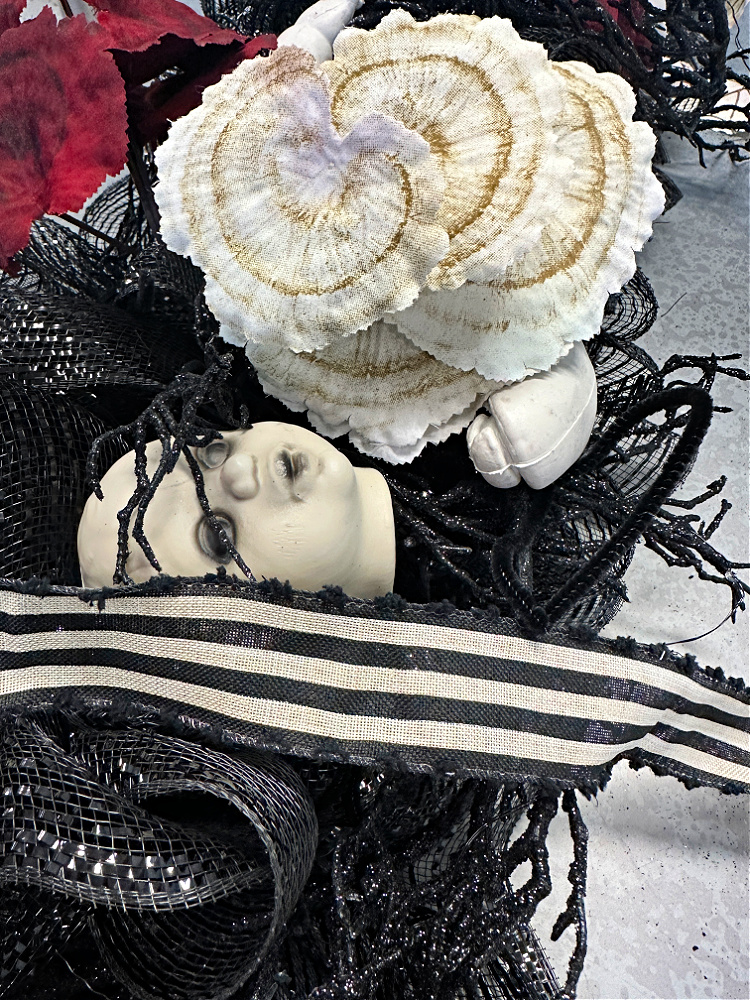
Your swag will be looking something like this at this stage:
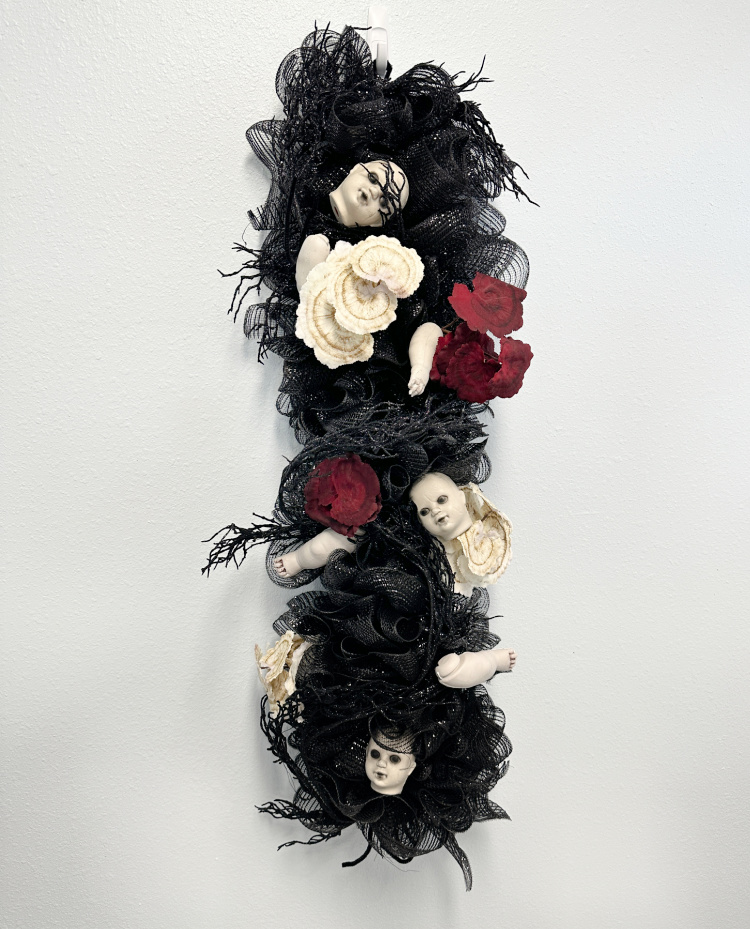
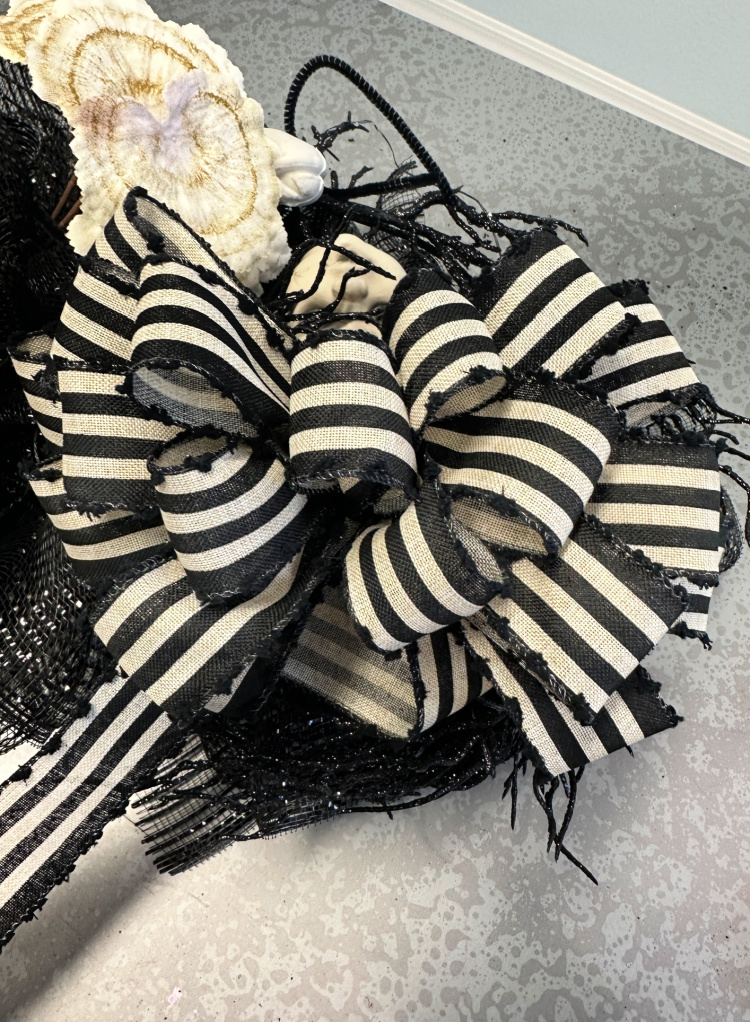
The next step is to add some ribbon. I found this striped ribbon at Michaels that coordinated well with the doll parts. Tie a larger bow for the top of the swag and attach it through the brass fitting on the top of the yardstick.
I used the excess ribbon to drape all the way down the swag, securing it in several places with those same pipe cleaners. Now your creepy doll head swag is ready to greet (or frighten) trick or treaters!
Supplies to make your own swags:
Yardstick
Black pipe cleaners
Wood burning kit
Black deco mesh
Creepy doll heads
Creepy doll parts
Faux mushrooms cream
Faux mushrooms burgundy
Black glitter vines with lights
Linen wired striped ribbon
I love the way you used a yardstick, that is brilliant!
Thank you Jenna! It is my new easy go-to door swag!
This is spooktacular Chloe! and the yard stick is so creative. Love this idea.
Thanks so much Wendy!!
Thanks for all the great ideas for the holidays. I wish the best of them.