Halloween Wreath on a Picture Frame
I knew I was going to make a Halloween wreath on this picture frame after the late summer picture frame wreath was so popular. It is so fun to start with a creative base like these inexpensive Ikea UNG Drill frames.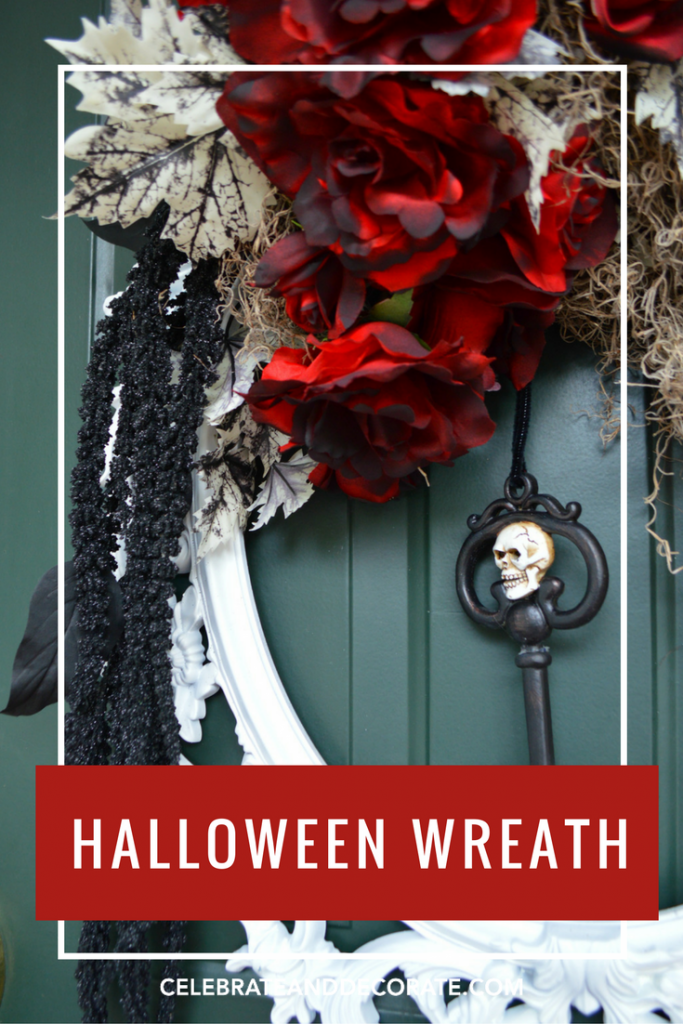
This post contains some affiliate links for your convenience. Click here to read my full disclosure policy.

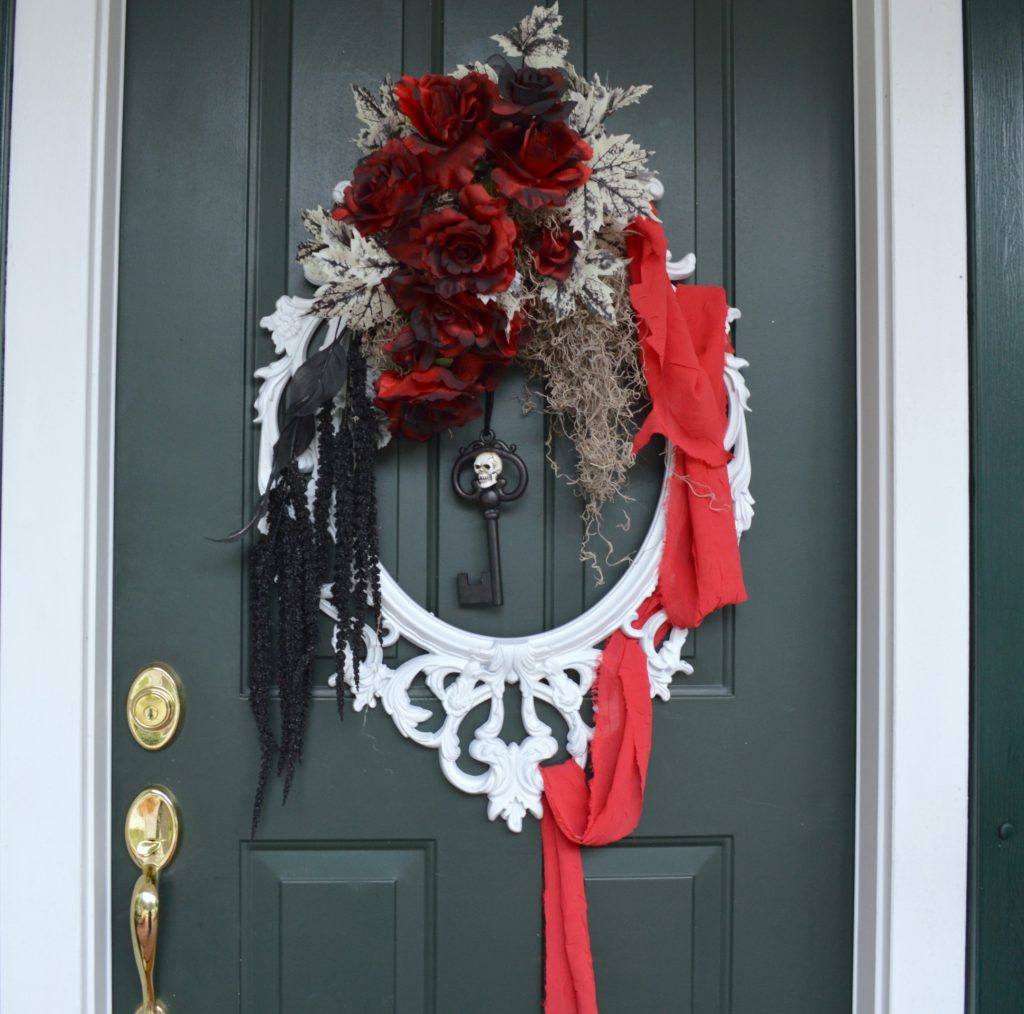
I know this looks a little stark with a white wreath on a white door, but I will be putting this white frame on my dark green front door, so keep reading! In this case I decided to hang the frame upside down, so the larger ornamentation is at the bottom. You will see why as we progress. For now all I did was drape a scrap of red fabric on one side of the frame. 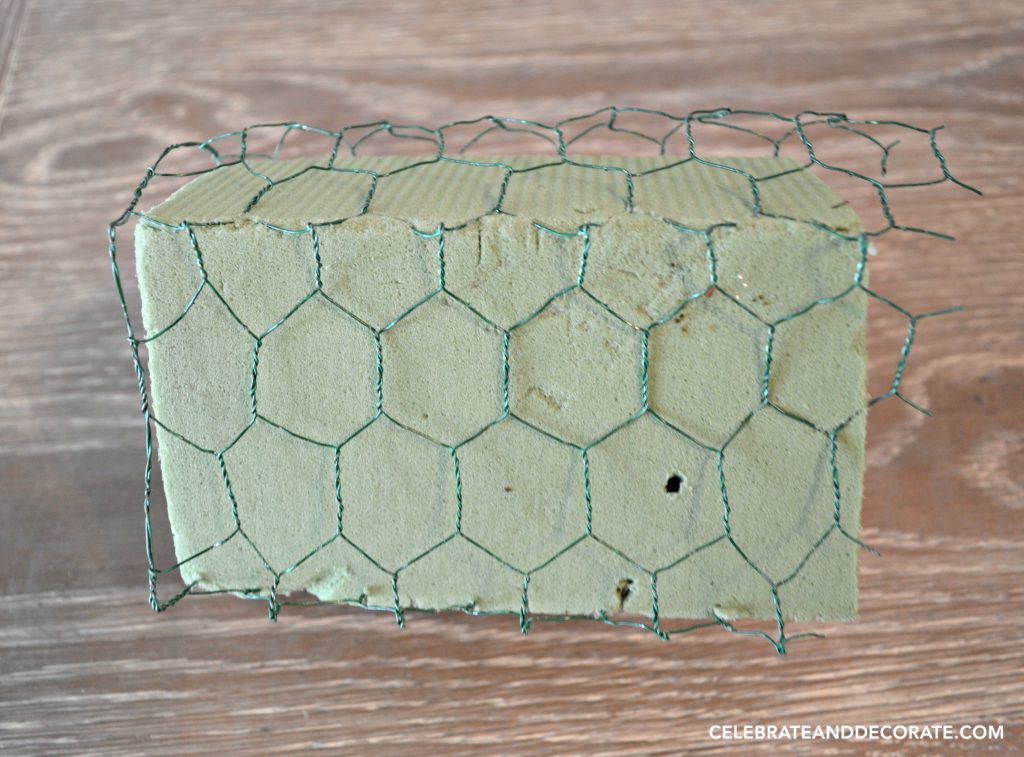 I cut about 1/3 off of a block of Sahara dry floral foam. I took the larger piece and wrapped a piece of chicken wire around it. This will keep the foam from cracking apart as you start to stick your florals into it.
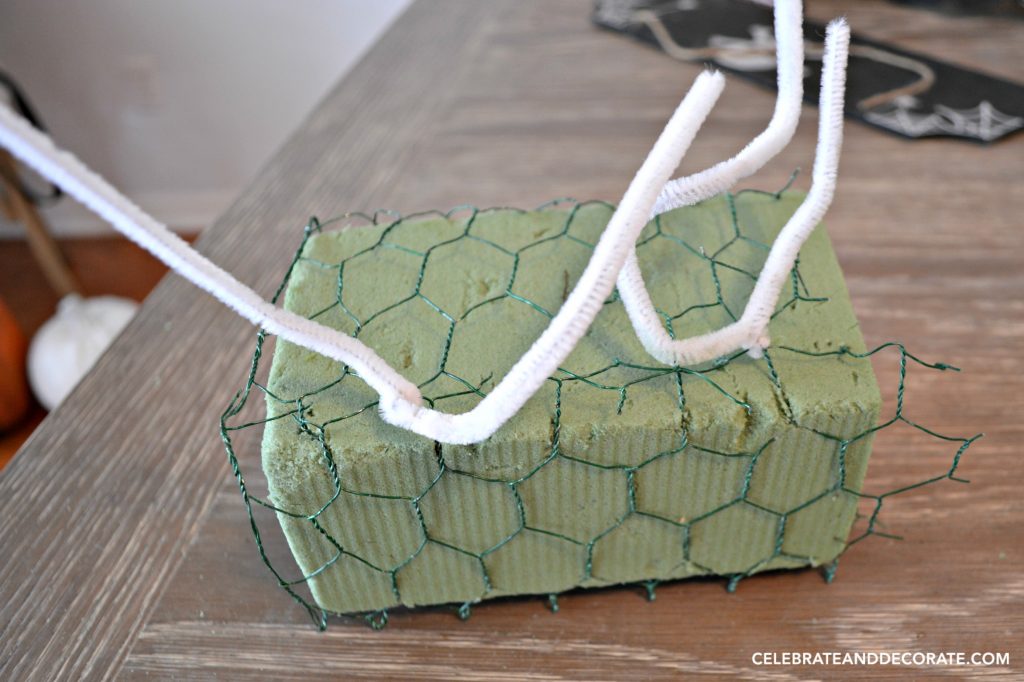
Secure the chicken wire frame around the floral foam with chenille stems and leave them long to use to attach this to the picture frame. 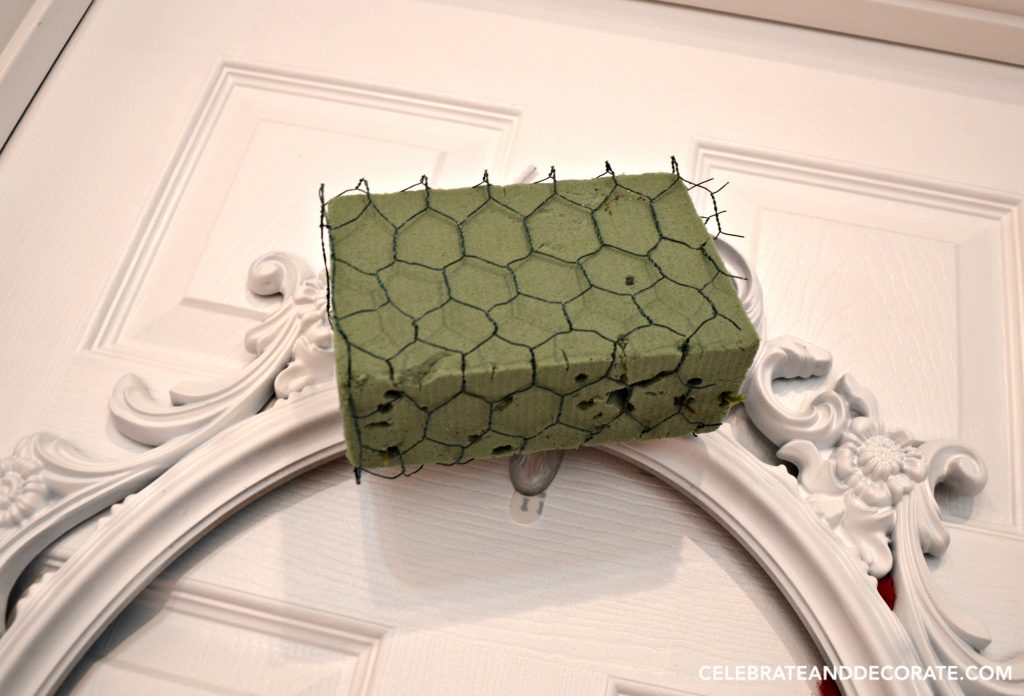 Use the chenille stems to wire your block of floral foam securely to the top of the frame.
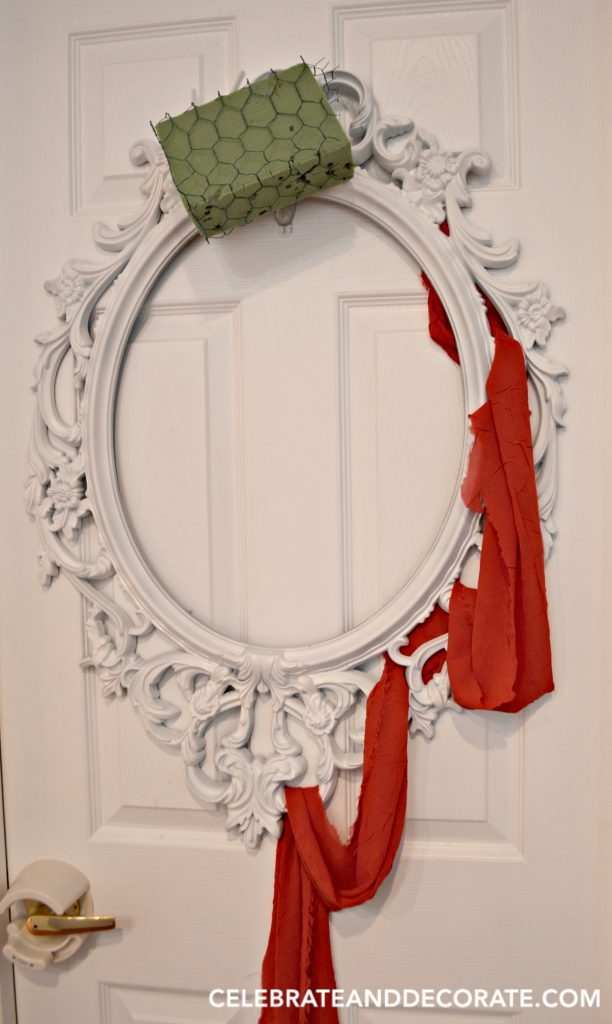
This is what you will have at this point and you will begin adding your florals now. My first step was to add some long black florals that will define how long my arrangement will be.
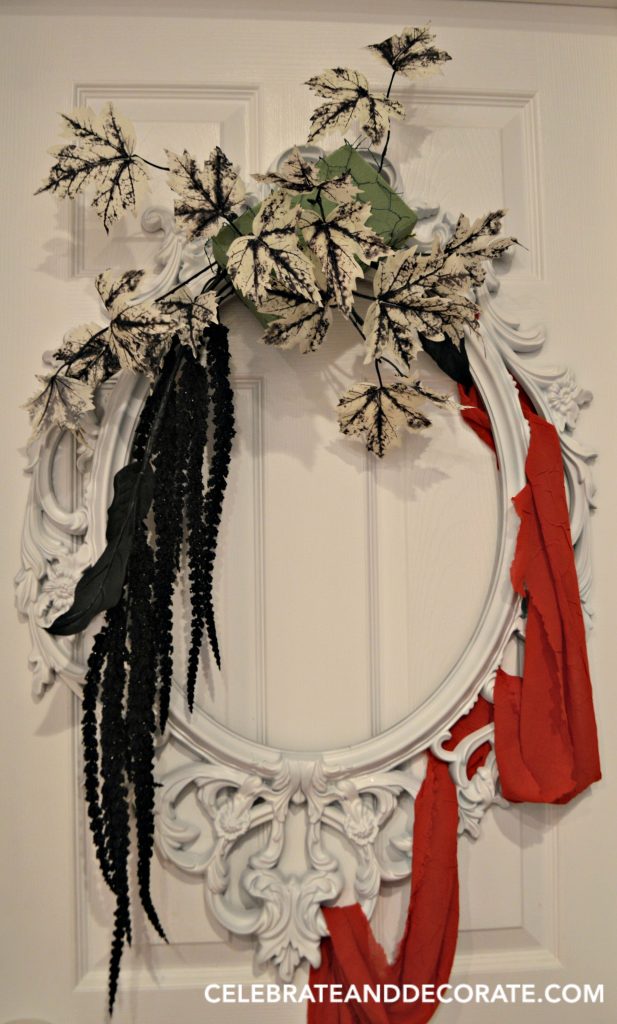 The next step was to add some of white leaves with black veins on them. I cut these off of the stem they came on so that I could add them in small clusters or individual leaves.
To give my red roses a spooky look, I gave them a light spraying of black spray paint.

I began to add the roses to my wreath. 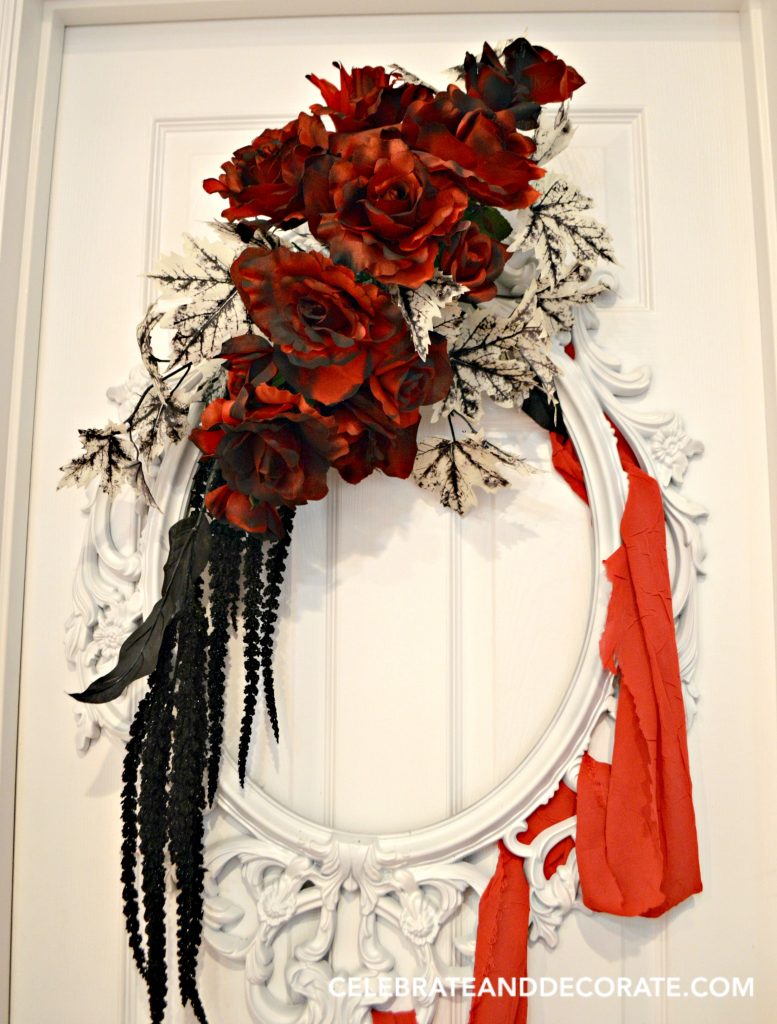 I filled out the rest of arrangement with the rest of my red roses. I used a couple of better quality silk roses and filled in with red silk roses from the Dollar Tree store.
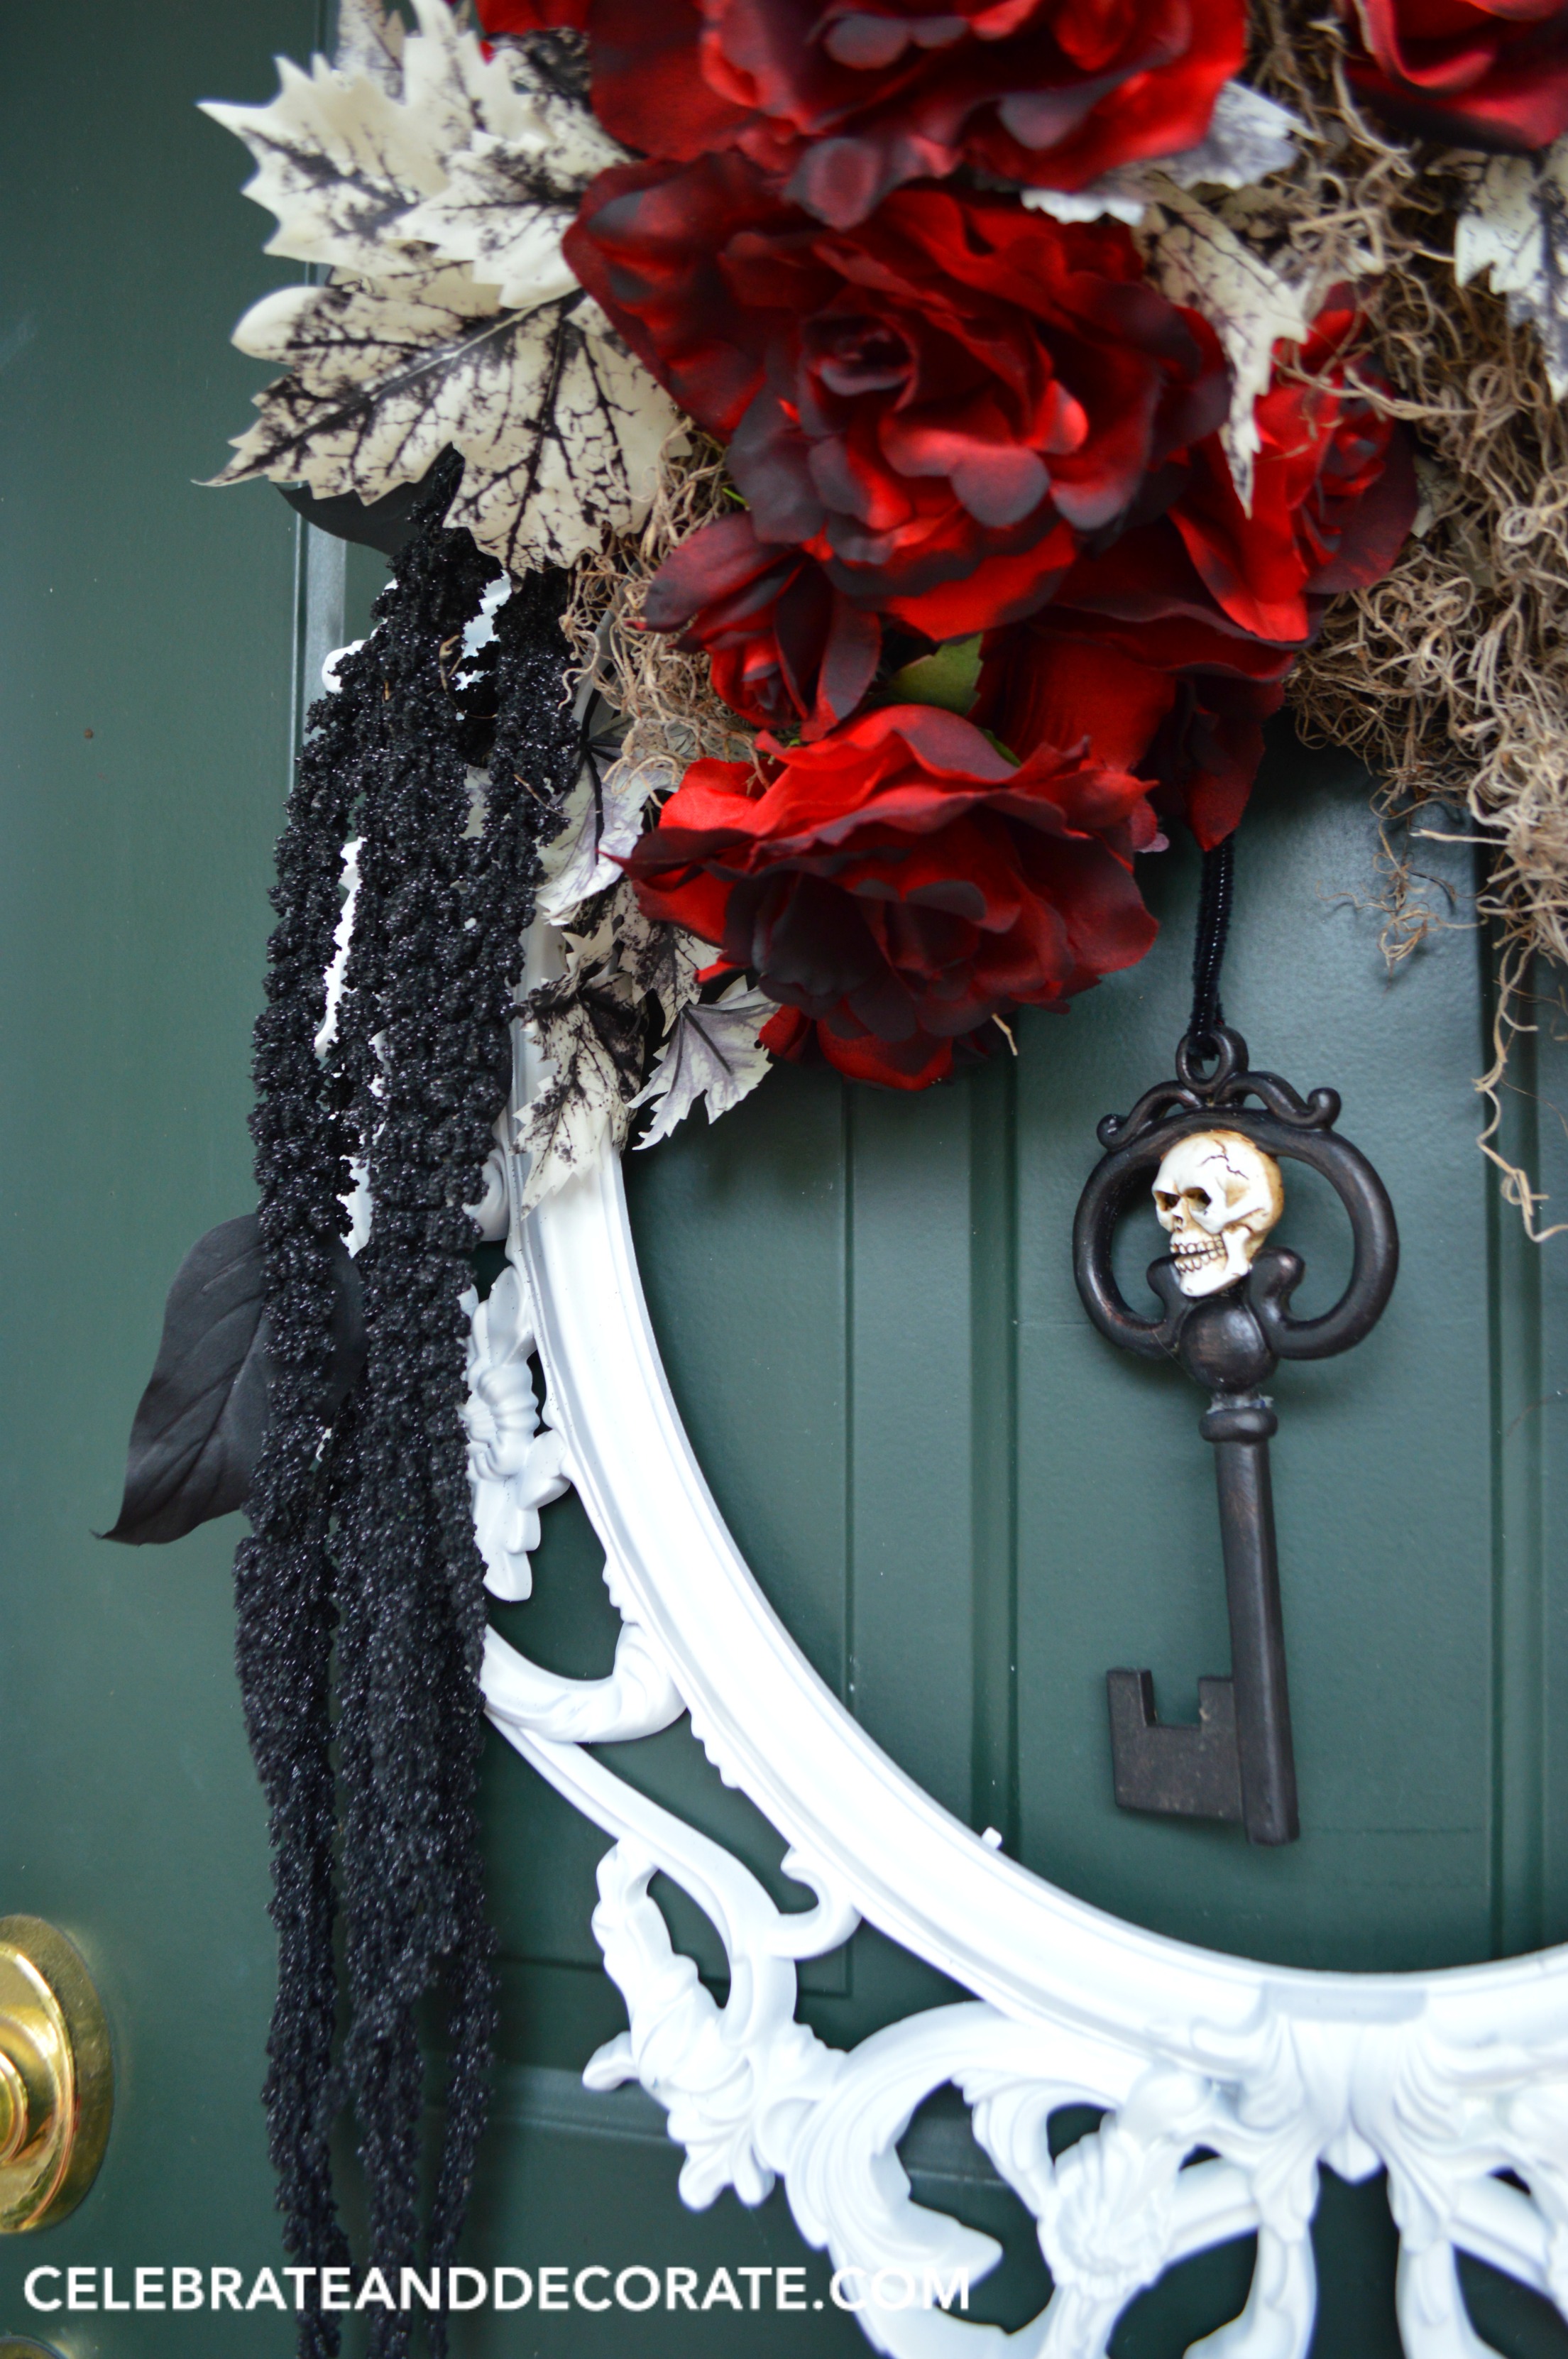
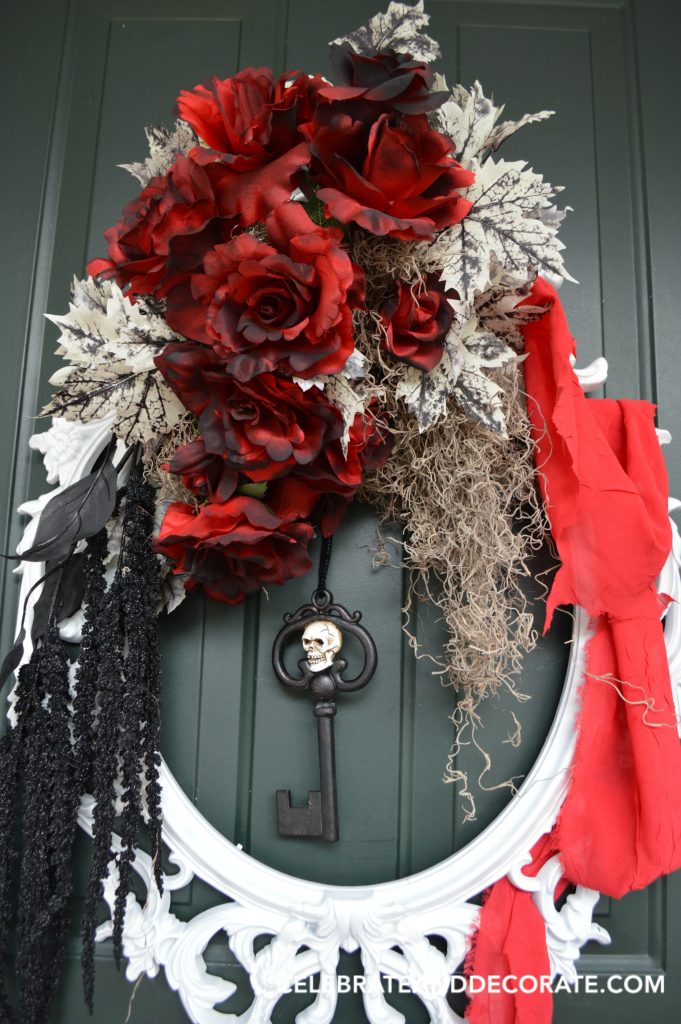 I finished off my wreath by filling in any holes in the arrangement with Spanish moss attached to the floral foam with “S” pins. Then I added a spooky key with a skeleton head that I picked up from Michael’s.
 My wreath is ready to greet Trick or Treaters as they come close to ring the bell at my house!
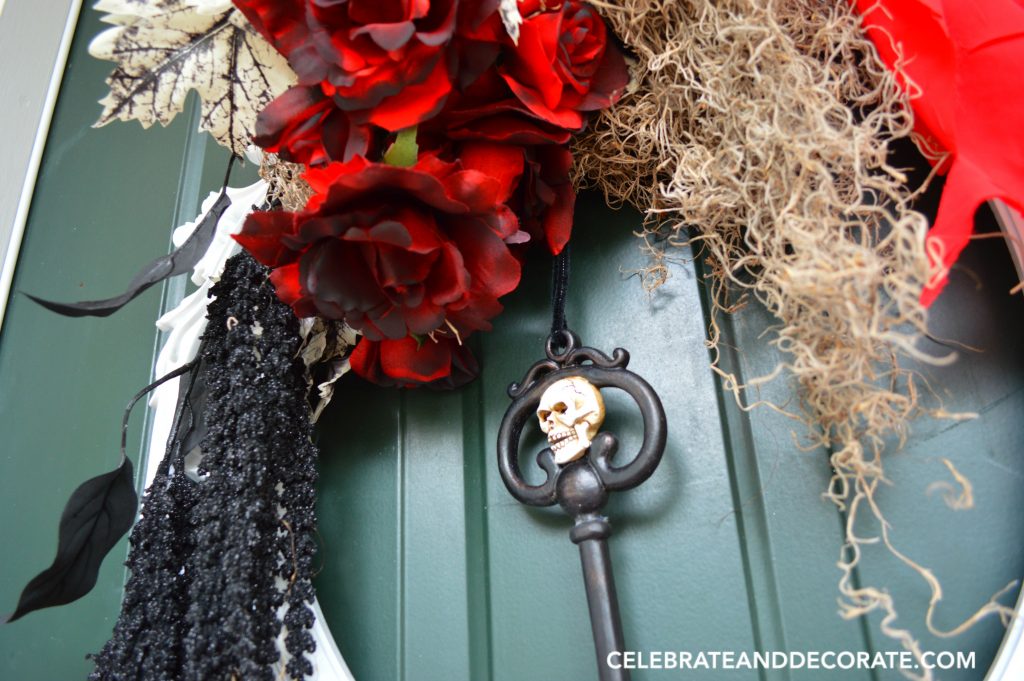

 My entryway is ready to greet anyone who is coming to visit! Will you be hanging a Halloween wreath or do you just hang a Fall wreath? I will be changing things up for Fall in the next couple of weeks, so stay tuned!
Shop This Project:
Dry Floral Foam – Amazon
Craft Chicken Wire – Amazon
Plastic Frame – Ikea
Skull Head Key – Michael’s
Halloween Floral’s – Michael’s
Spanish Moss – Amazon
“S” Pins (also called “greening” or “fern” pins) – Amazon
I will be sharing this at the following link parties: Your Inspired Design | TaDa Thursdays | Bouquet of Talent | Silver Pennies Link Party | Inspiration Monday | Dishing It & Digging It | Amaze Me Monday Merry Monday | Create Link Inspire | Make It Pretty Monday | Show and Share | Two Uses Tuesday | It’s A Party | Wednesday Showcase | Creative Spark | Home Matters Linky | Creative Circle
What a pretty wreath, with just a touch of spooky! I love it! Do you know I am hosting a Halloween Blog Hop thru the month of October? If you have time, this post would be a perfect addition! -Marci @ Stone Cottage Adventures
Thank you Marci, I will swing by!
Cute cute Chloe!
Thanks you Jenna!
Chloe, that looks totally awesome! With the snake plants (aka mother-in-law’s tongue) flanking the door, it’s perfect for the season. Bravo!
I hope you are nowhere near the path of Matthew. It’s frightening. I pray for you and all of my friends and family (there are many) who may potentially be affected. Stay safe!
Rita
Thank you Rita. It is a little less decor than I did last year, but there is always time to add more!
Chloe, I love this wreath, it is so creative! I hope that you are in a safe place during this terrifying hurricane!
Thank you Pam. Yes, everything is inside and off my porch! Ready for the rain and wind here.
Chloe, you are so creative! I love your picture frame wreaths, and this one is perfect for Halloween! What a perfect greeting for the all the little ones trick or treating!
Thank you Shannon, but I think I need to try a new trick and put the picture frames away for a bit after this one!
LOVE IT! <3
Unique and AWESOME! I love the recycling of the picture frame.
🙂 gwingal
What a spooky-yet-classy wreath! Very fun idea!
Thank you Kristen!
Beautiful and easy wreath to create, thank you so much for sharing with us. I must ask what is an “S” pin? And where do we find them?
Thank you! They are also called greening pins or fern pins. I have added a link to where you can buy them or see what they are in the shopping list above. They are very inexpensive, but a much needed item. You can probably pick them up at a local craft store also.
So creative. I love it 🙂 Thank you so much for joining the party at Dishing It & Digging It! Hope to see you share with us this week!
Thank you Angie!
Lovely wreath . Great idea to use picture frame as a wreath.Thank you for linking up with us at #HomeMattersParty. See you again next week.
Thank you Sahana!
I absolutely love this! It looks amazing. Thanks for sharing at the Wednesday Showcase party. Pinned!
Beautiful wreath! Can you tell me what the black floral is? I have searched everywhere and cannot find anything that comes close to what you used. Thank you!
Hi Phyllis, Thank you! It is just a long kind of stringy artificial floral. I bought it at Michael’s but I haven’t noticed if there is anything similar available this year.
The long flowers look like amaranthus or wisteria. Love using the frame as a wreath.