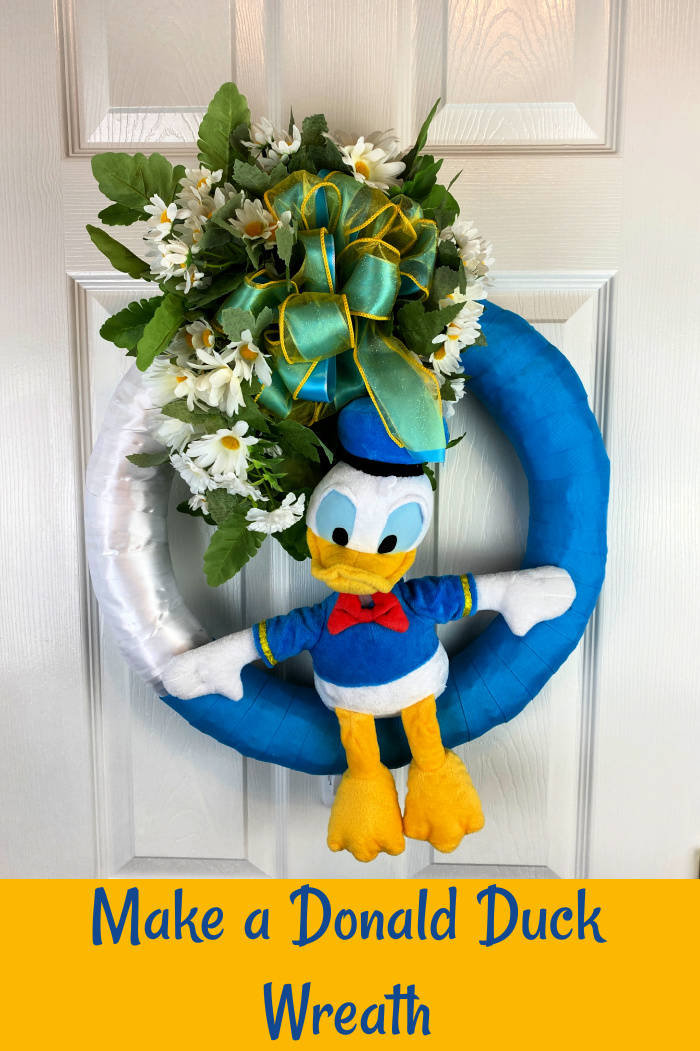
Make a Disney Wreath with Donald Duck!
I guess since I live in the community that Disney developed, it is not surprise that everything Disney is never too far away at any time. Oh, did you not know that Disney developed Celebration, Florida? Actually, World Drive that starts (or is that ends?) at the parking plaza for the Magic Kingdom ends right in Celebration! Yes, I don’t even have to go out and drive on the crazy I-4 with all of the traffic to get to any of the Disney parks!
This post contains some affiliate links for your convenience. Click here to read my full disclosure policy.
So, when my mom needed a sweet thank you gift for a dear friend and an absolutely devoted Disney fan, I immediately thought of a Disney themed wreath for her. I have previously made her a Goofy themed wreath, because I know that Goofy is her favorite. I wanted to do something different this time, and I just thought Donald was perfect for summertime.
TIP:
You can use these tips for any Disney character wreath, just change up the character and the colors of the ribbon to coordinate with the character you choose!
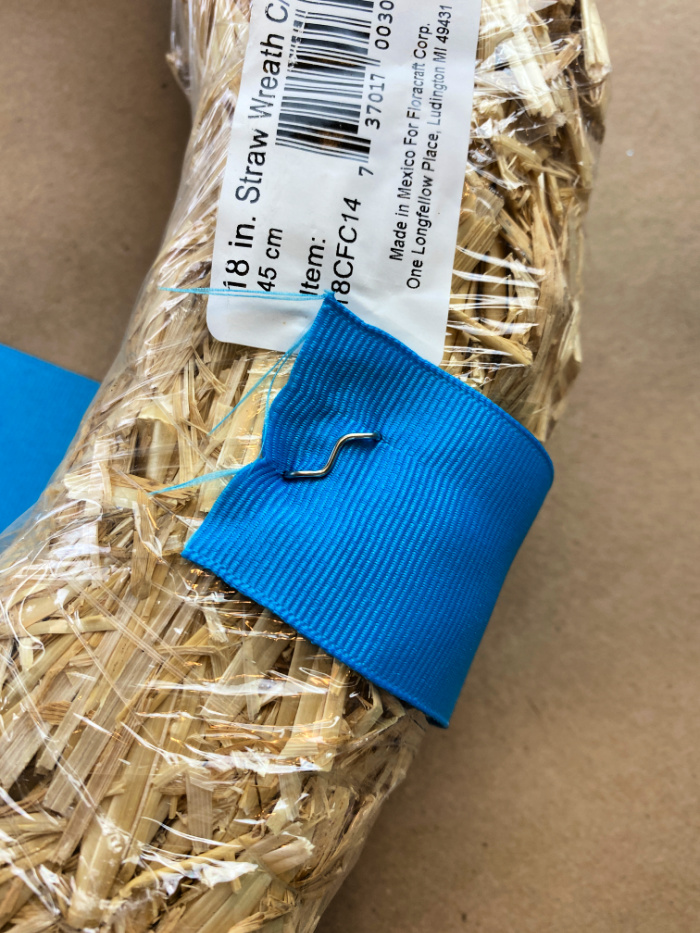
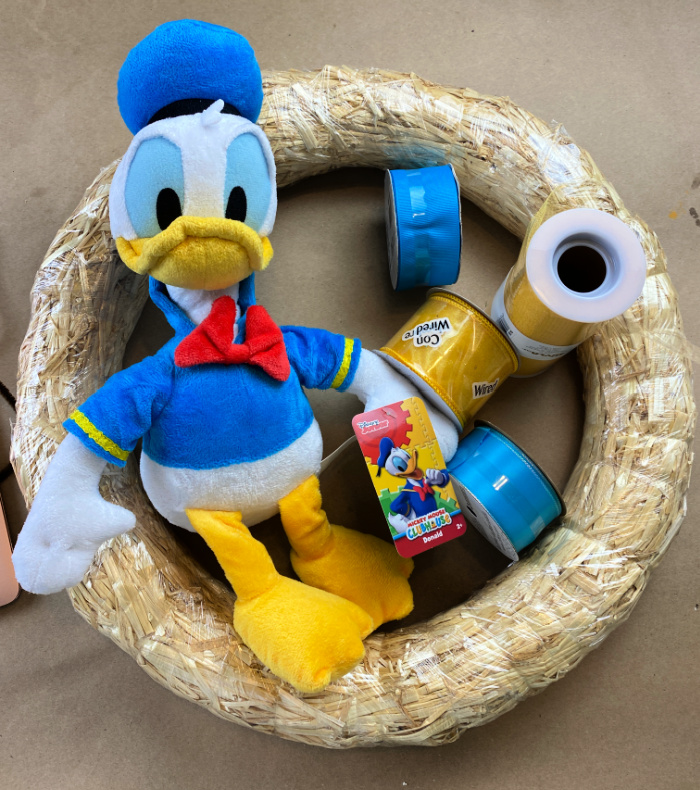
Now, this wreath is made for an indoor location. I know that the recipient will enjoy displaying this on the door in her hallway and that it will likely bring smile to the faces of those that pass by. I began this with an 18 inch straw wreath form. Using wide blue grosgrain ribbon, I secured one end to the back of the wreath form with an “S” pin as shown in the photo above!
TIP:
Do NOT remove the plastic wrap on the straw wreath form before you begin covering it. Although straw wreath forms are tied with a strong thread, if you remove the plastic wrap, the wreath will begin to shed straw.

Begin wrapping the ribbon around the wreath as shown above. You want the ribbon to be tight, and you want the ribbon to overlap itself so there are no gaps showing the straw wreath form. You can wrap your entire wreath with one color like this if you want or mix it up like I decided to.
TIP:
If you cannot hold the ribbon tight enough as you wrap the wreath, you may add additional “S” pins on the back side to secure it.

I wanted my wreath to simulate Donald’s costume and colors, so after finishing the blue, I wrapped a part of it with white ribbon.
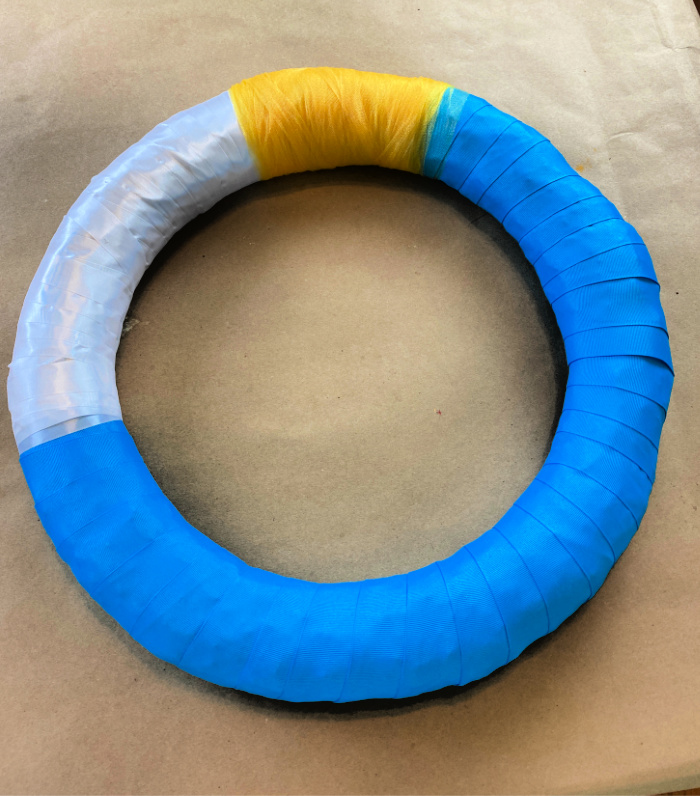
Do you ever start a project and realize you don’t have everything you need to finish it? How many times has that happened to you and it meant putting everything down and running out to the store? There it was, I got the blue and white done and had a little bit to still cover. I didn’t have any more blue or white ribbon and I was determined I was not going out in the crazy rainstorm we were having. What I DID have was yellow tulle! Donald’s beak and feet are yellow, so why wouldn’t that work?! I wrapped that little bit still exposed with the yellow tulle. I wrapped it enough times to cover the straw completely.
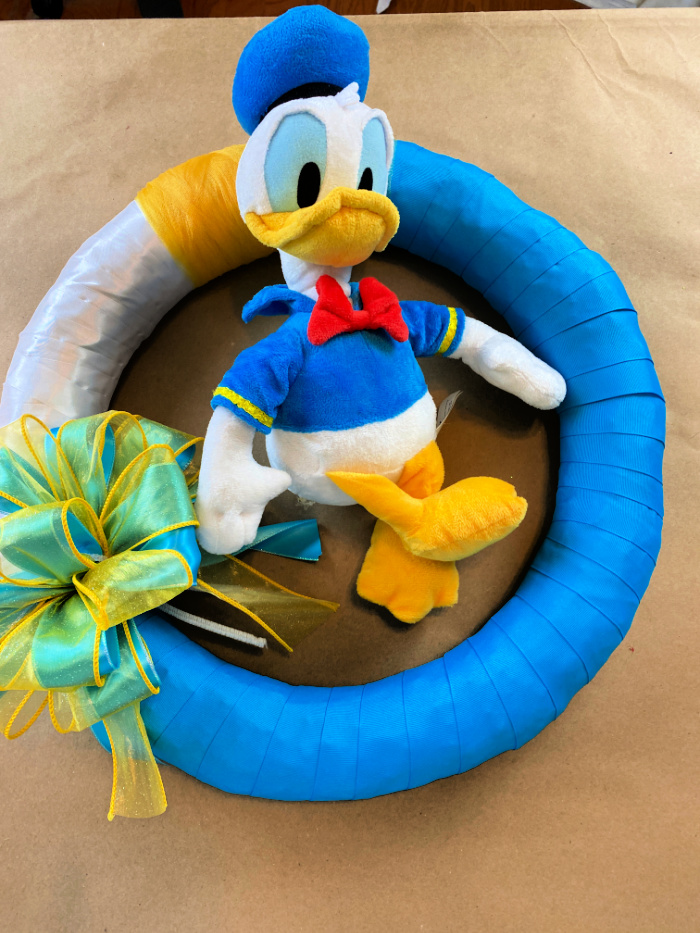
I tied a bow with blue satin ribbon covered with a sheer yellow ribbon. Donald matches well, don’t you think?

It was time to add Donald to the wreath! I didn’t want to use glue or any adhesive that would damage him. I went back to the “S” pins and stuck one through his hand and into the wreath form to secure his hand. I repeated this for each hand.
TIP:
An “S” pin is also known as a “greening” pin or a “fern” pin. They are NOT the same as a “T” pin. You can find them at craft stores or right here on Amazon.

I did the same thing to hold Donald’s behind on the bottom of the wreath. I wanted it to appear that he was just sitting and hanging out on the wreath.
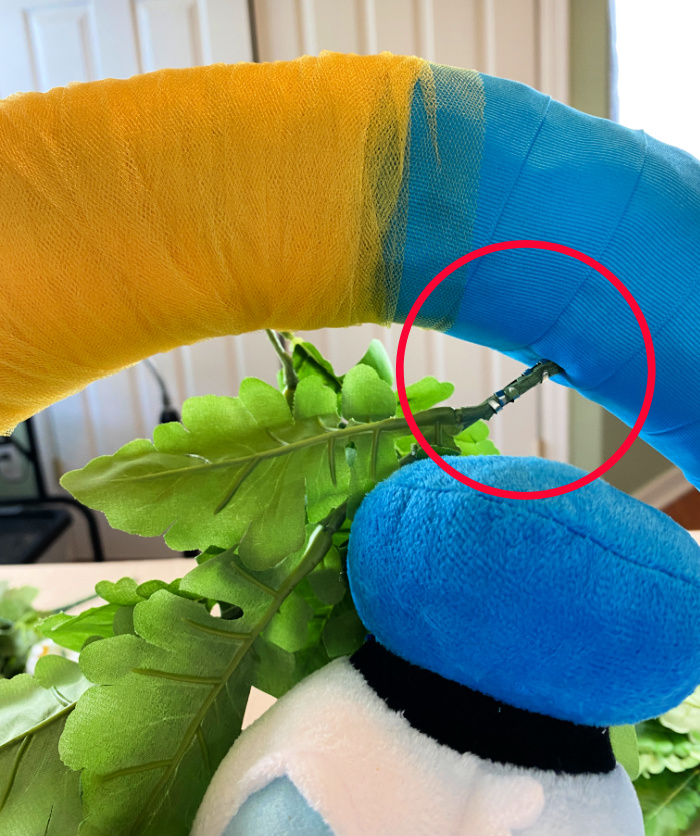
After I secured Donald Duck to the wreath, I wanted to add some floral accents to the wreath. It is difficult to push stems of flowers through the ribbon and into the straw wreath form. The only way I feel I am able to get the florals secured is by using my steel pick machine. I know they are a pricy investment, but over the years, it has made such a difference for me. You can see above how I stuck the steel pick right through the ribbons into the wreath form. There are barbs on the steel picks that keep these from pulling back out of the wreath form.

This is how the wreath is starting to look from the front with just that first piece of greenery added to it.
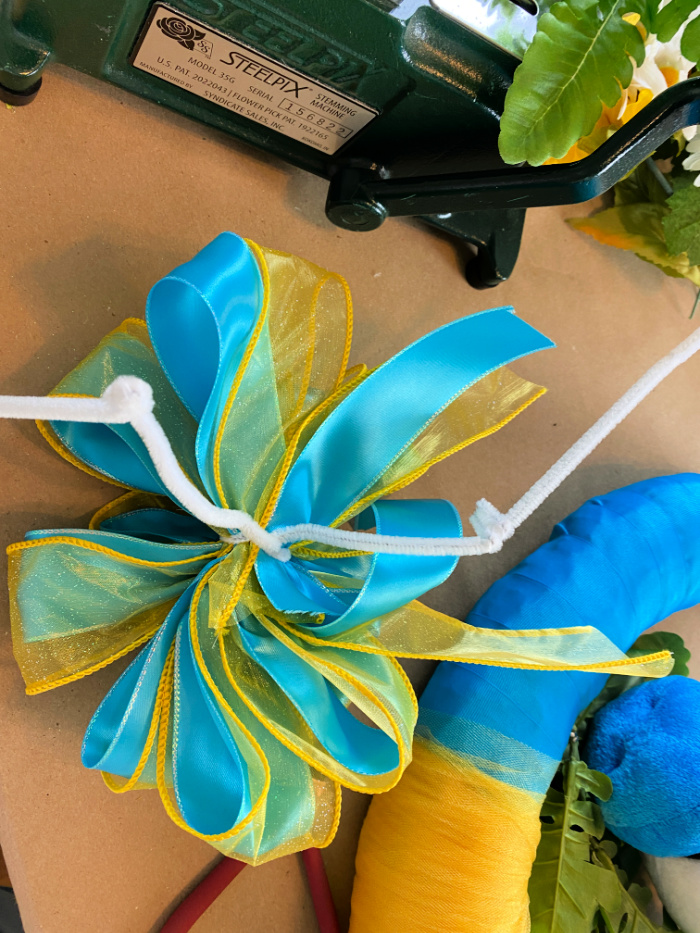
To add my bow to the wreath, I added some additional length of pipe cleaners to those I used to secure the bow. That will give me enough length to wrap the pipe cleaners around the wreath form and twist them really tight.

After adding some greenery, I want to add the bow and then tuck flowers in around the bow.
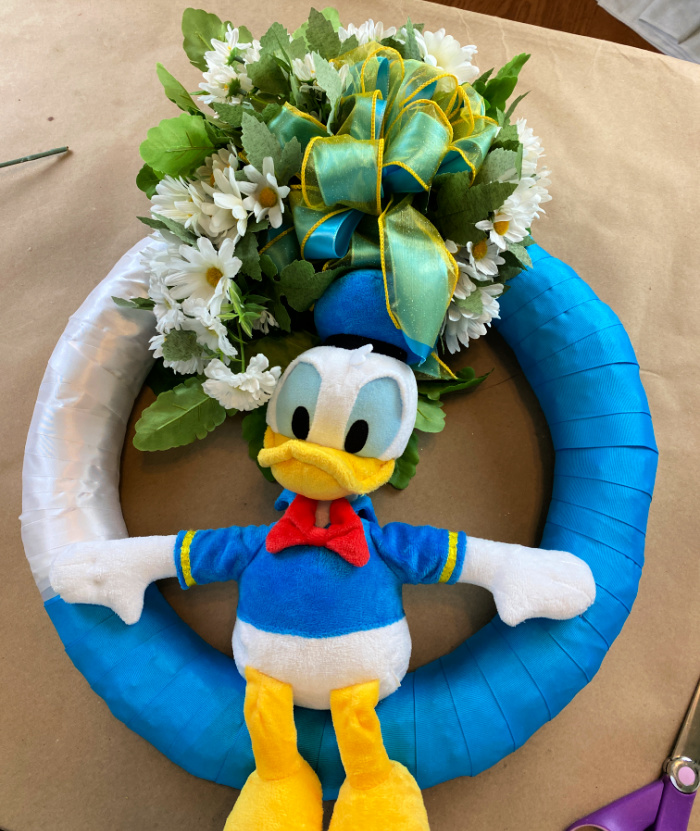
There was no doubt in my mind that the flowers of choice for a Donald Duck wreath are…(wait for it)…daisies! Fitting, right?
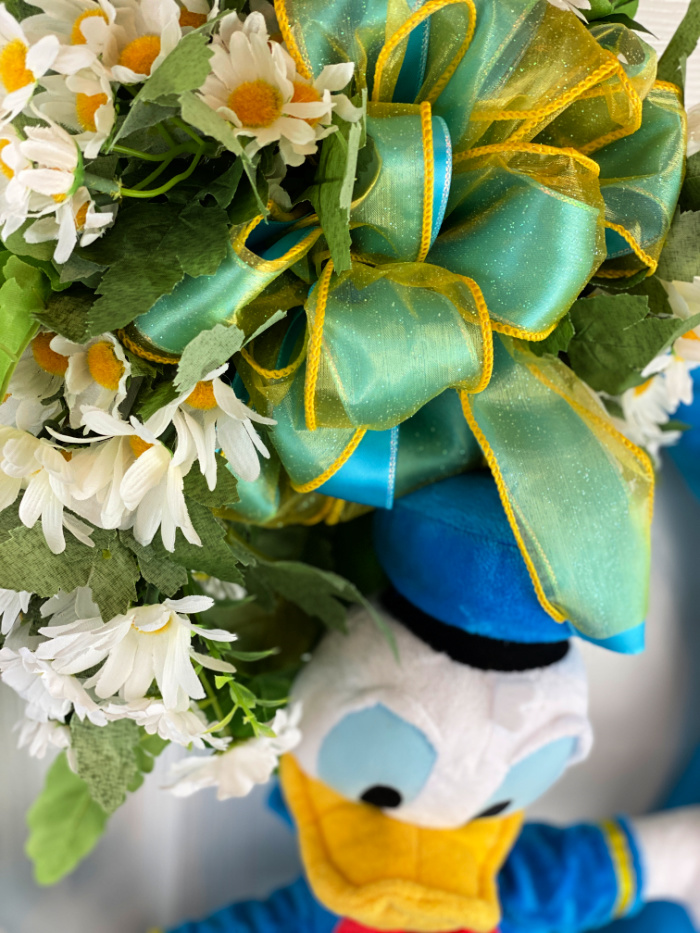
Using the same steel pick method, I added lots of daisies to the top of my wreath.

Just like that, in no time at all, you can have a cute Disney themed wreath to display in your home or gift to your favorite Disney loving friend!
It looks like you planned it that way, with the yellow. I always start a project and find out I don’t have something. I never know what I need until I start making it. It turned out so cute!
Chloe,
This is so cute. I didn’t realize that you lived right at Disney World. How fun. Have a wonderful 4th.
What a cute project Chloe! It is really creative and I am pretty sure will be greatly appreciated by its receiver.
Chloe, I learn so much from you. From not removing the plastic from the straw wreath to the S pin…and you are the only person I know who owns a steel pick machine! Great post and love the daisies!
Adorable and suitable for the young and young at heart. I like the idea of using S-pins to secure Donald Duck. So many times I’ve wanted to take a wreath apart and picking through hot glue was frustrating.