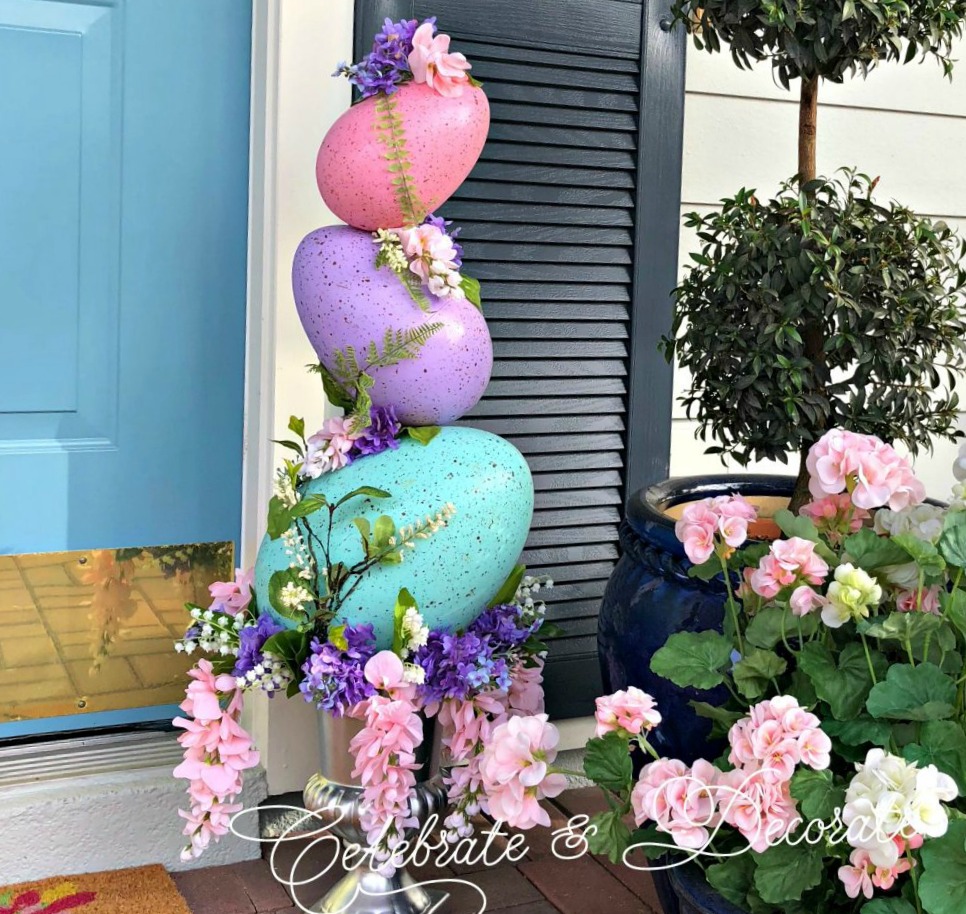
Make an Easter Egg Topiary
I found these big eggs at Michael’s several years ago and made this Easter Egg Topiary. These eggs aren’t available any longer, but I have found all kinds of them and shared the sources at the end of this post. You might want to make this fun topiary to welcome friends to your front door!

This post contains some affiliate links for your convenience. Click here to read my full disclosure policy.
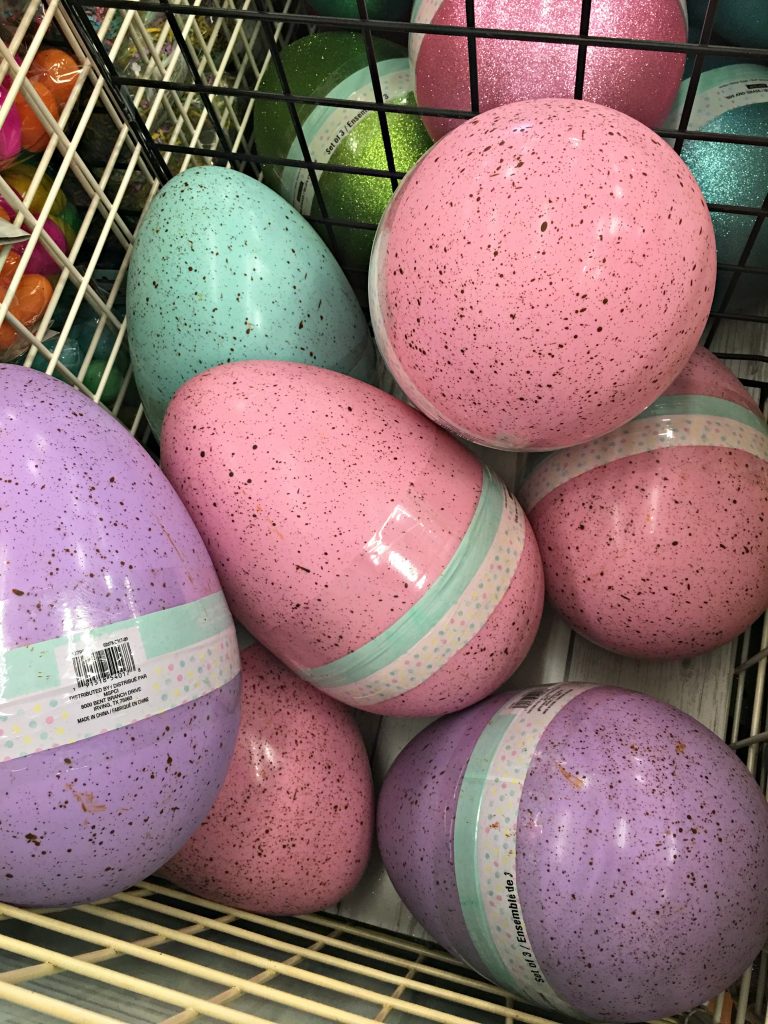
When I first spotted these big eggs I knew I didn’t just want to set them out in my lawn, I brought several of these home and also brought home a 36″ long 5/8″ dowel and a large block of styrofoam. I was going to stack these up into a topiary!
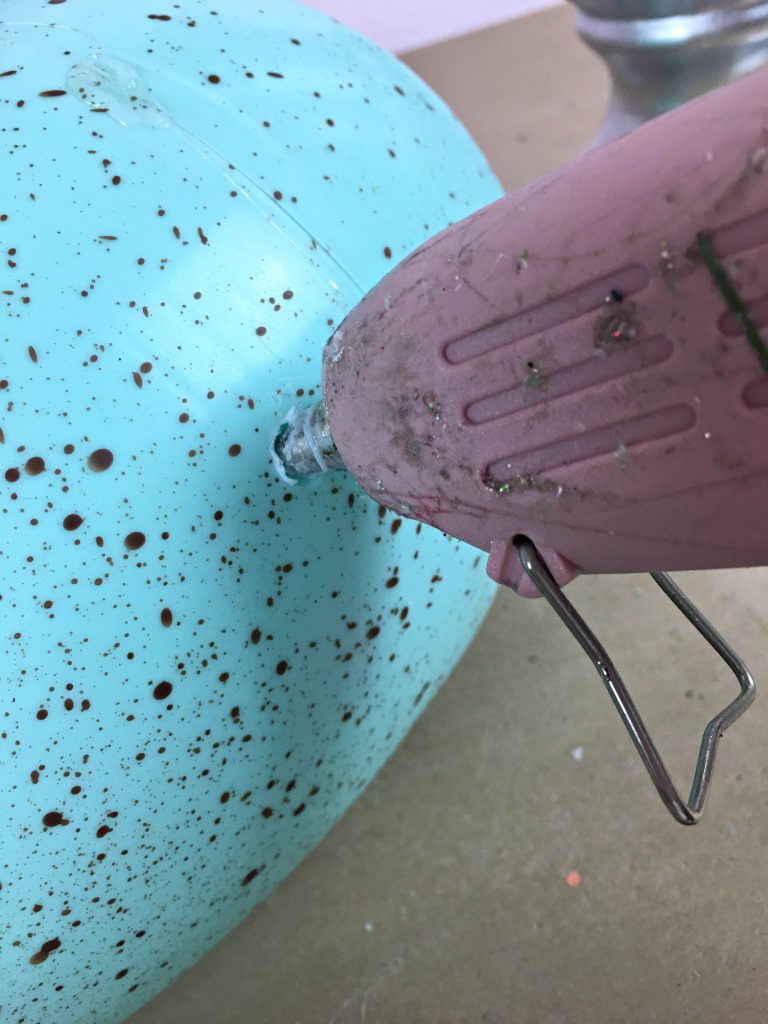
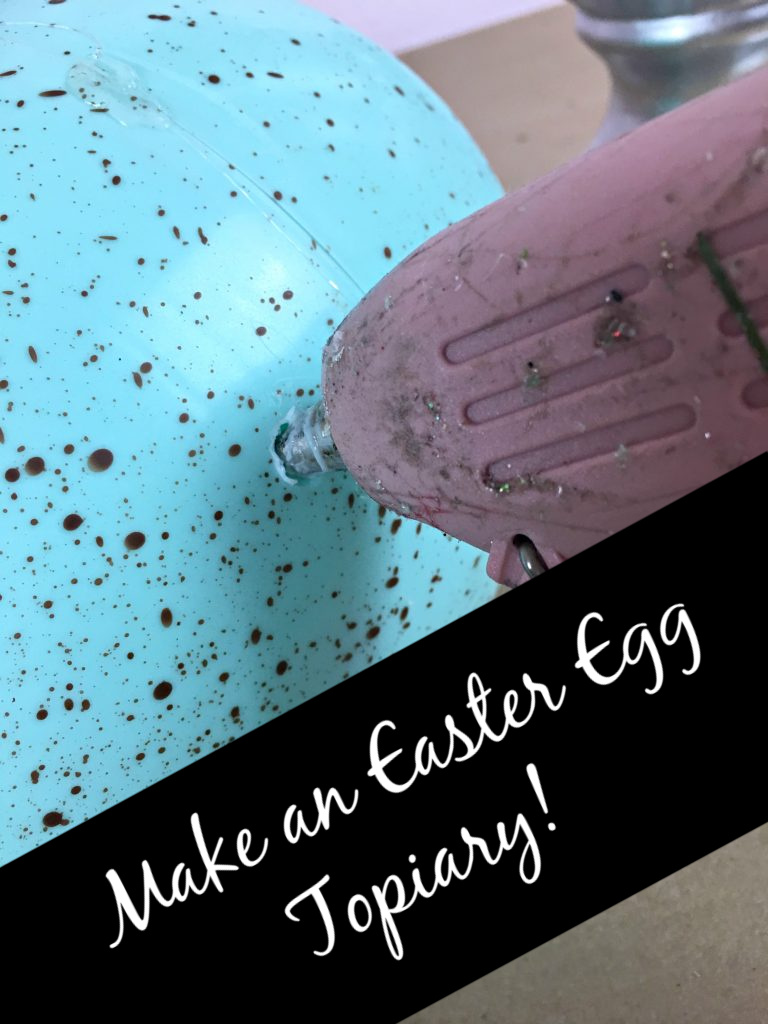
I tried a drill which didn’t work too well, so I turned back to my Christmas topiary trick by melting with my old glue gun. If you do this, make sure you are outdoors or in a well-ventilated area as it may cause noxious fumes. Hold an old empty glue gun against the eggs and melt a hold big enough for a 5/8″ dowel to fit through.
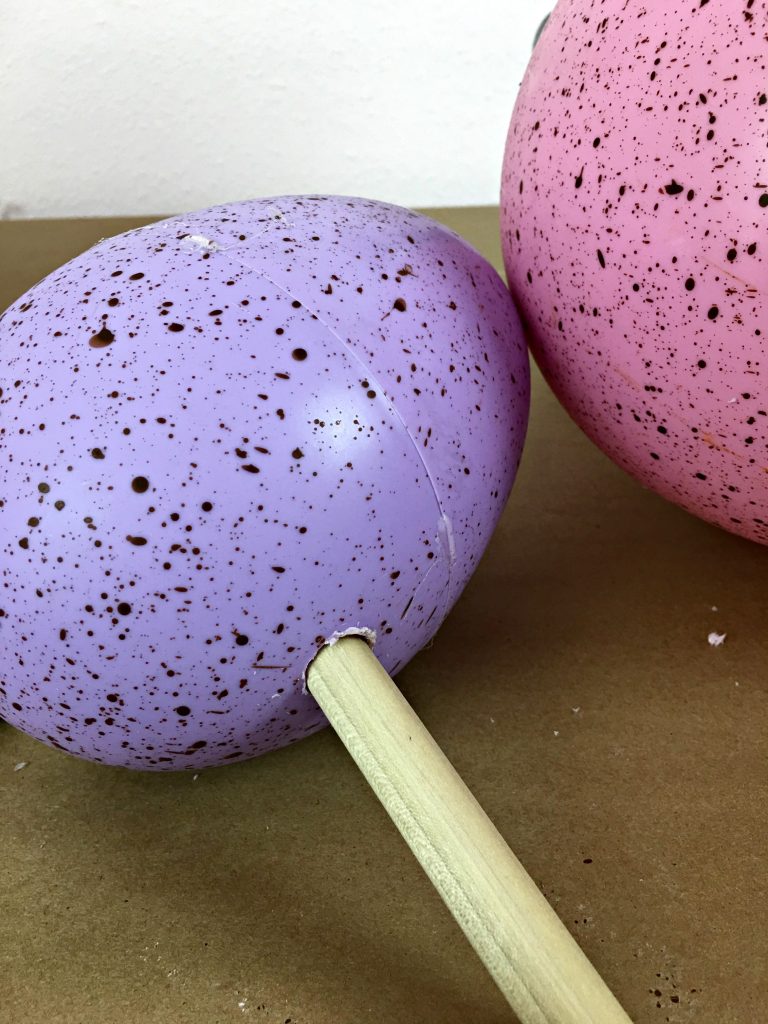
These eggs came in a nested set of three, each a different pastel color. I made the holes across the eggs in an angle, I knew I didn’t want my eggs to be stacked straight on one another.
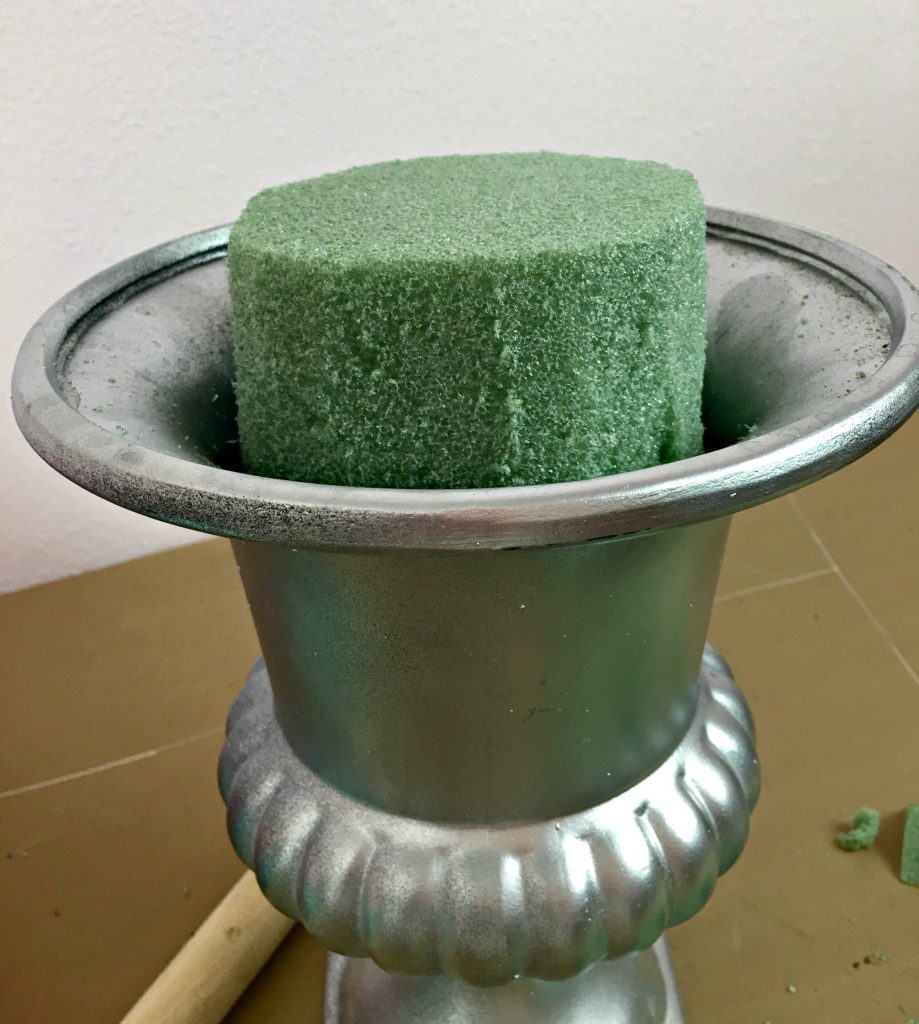
I had this container at home, I took the block of styrofoam, trimmed it and wedged it very firmly into my urn.
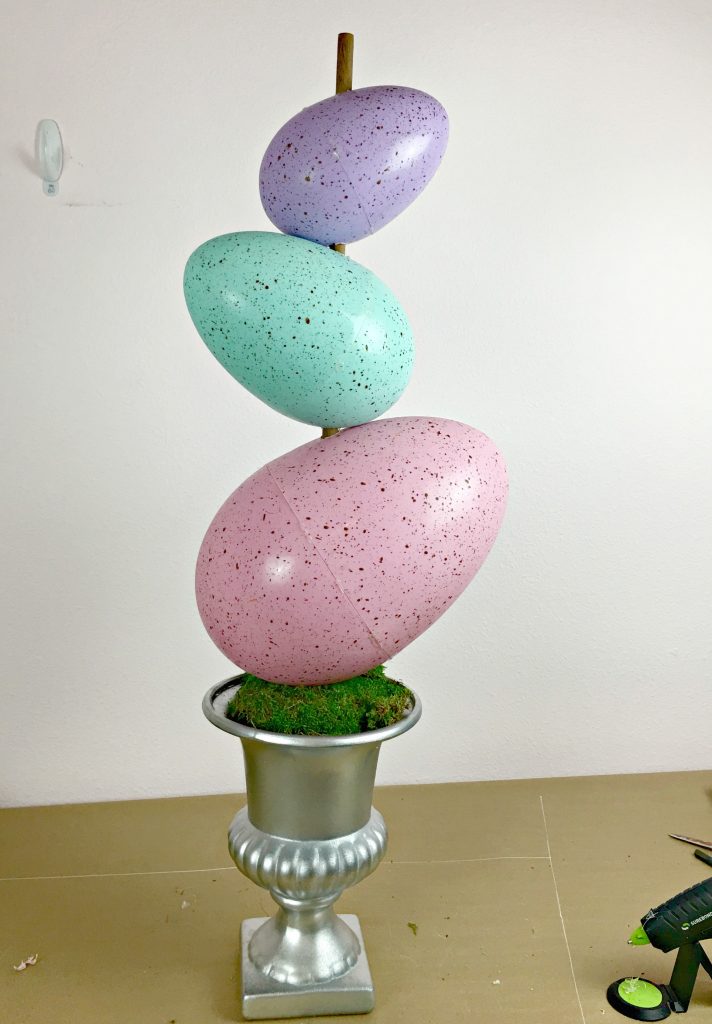
When all of the holes are done and the eggs are threaded on the dowel, you simply stick the dowel down into the styrofoam. I covered my styrofoam with moss. You could not melt a hole in the top of the smallest egg and just finish it off with the egg at the top, cutting the dowel to fit, but I found my egg was more secure with the dowel going all the way through.
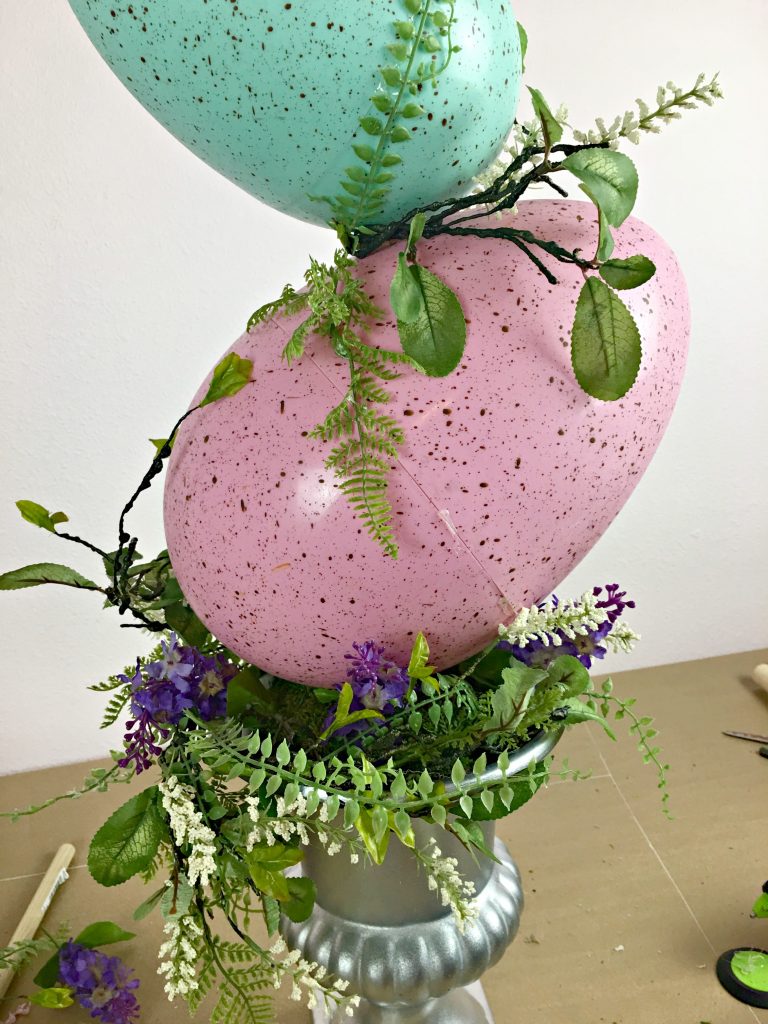
Fill the pot around the bottom egg with artificial flowers and greenery to make a little “nest” for your eggs. You can even add a little bunny peeking out if you would like.
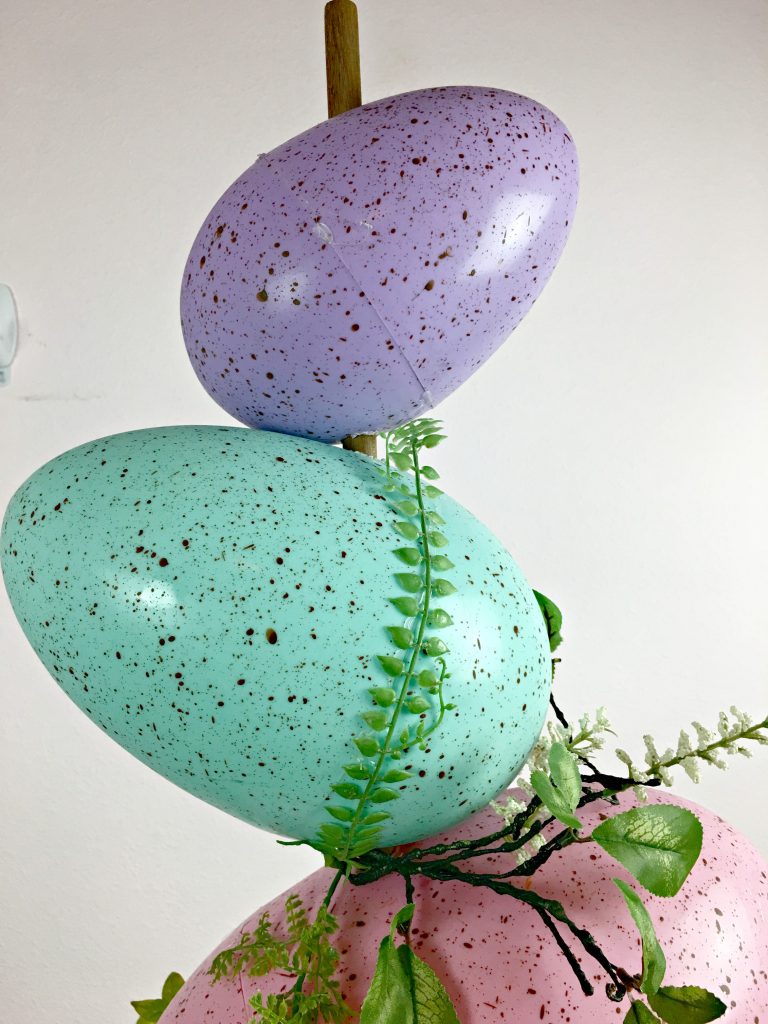
Once the mechanics are done, it is time to have some fun and decorate the topiary. I used a variety of silk flowers and foliage, using hot glue to attach them to my eggs. Above you can see how I used a fern to hide the seam in my middle egg.
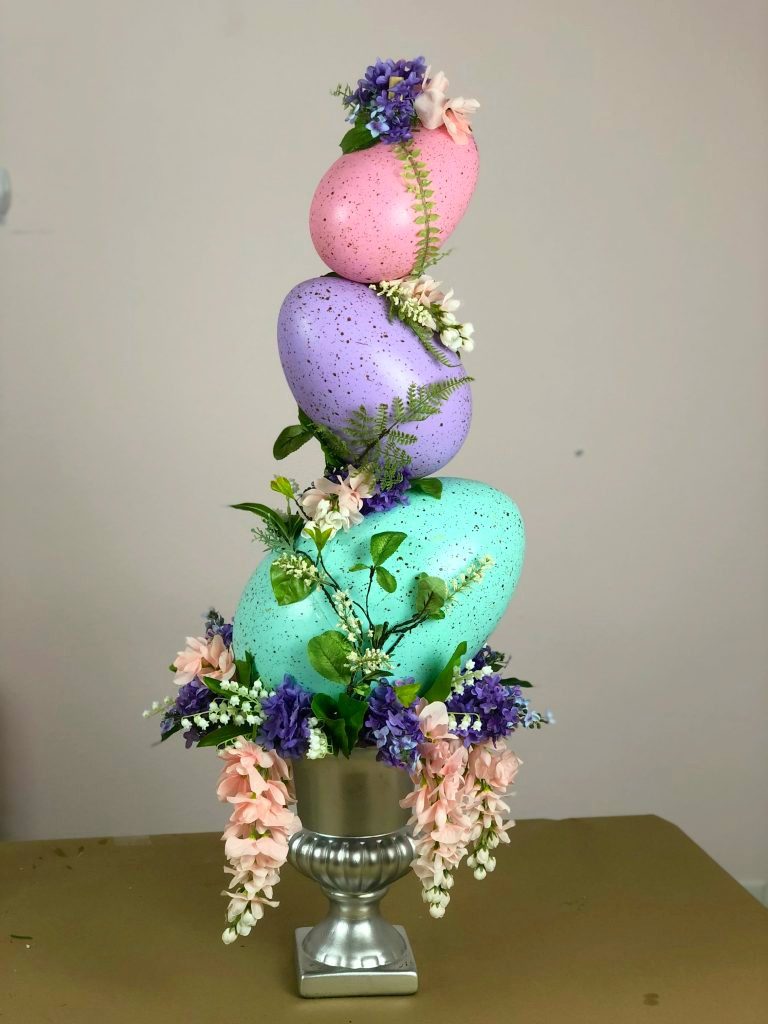
My favorite of the flowers that I added were the pretty pink silk wisteria, also from Michael’s. Those along with lilacs and lily of the valley were nestled around my bottom egg and glued between the eggs of my Easter egg topiary, hiding the mechanics of the dowel. The same treatment was made for the dowel on the top of the top egg.

This is the perfect addition to my front porch to celebrate springtime and Easter! Let me know if you make one of these!
Supplies for making your own Easter egg topiary:
I am as disappointed as you surely are that Michael’s isn’t carrying these pretty Easter eggs any longer. If you want to get really creative, you could paint some some of these eggs to give them a custom look.
Jumbo gold Easter egg
Jumbo pink Easter egg
Jumbo blue Easter egg
Assorted bright jumbo Easter eggs
If you want to watch a video tutorial, see it here: youtube
Thank you so much for this wonderful idea. I enjoyed making this project:)! It surely does help to use the full size heat gun which I did not have at first. It melted through the plastic egg at 100 w vs 60 w.
The set of plastic eggs I got did not come multi colored which at first was disappointing but it still turned out beautiful. Thanks again!
I am so glad yours turned out beautiful for you! Thank you, and you are welcome!
Hello Chloe, I am having a hard time finding the jumbo eggs any ideas where I can find these eggs?
Hi Shirley. I saw that both Michaels and Hobby Lobby have the big eggs this year, but they are just solid color, not pretty speckled like these were.
I love this Chloe, so so cute!
What a great idea! I love eggs and I love topiaries! Thank you for marrying them. 🙂
Happy day friend!
karianne
Chloe, I bought on line (about 5 years ago) 4 giant eggs (mine are not speckled) and I like you thought I would set the in the yard and I did. I never thought of making a topiary. great job.
Thanks so much Kari! I have something in mind for next year. Sadly with time out of town, there was no time for me to do it. Actually, I might do it and photograph it and write a post and just schedule it for next year!
Oh, this is so pretty! I love everything you did here and how you paid great attention to details. It kind of looks like a fun Easter crown 🙂 I’m definitely trying this project out. Although there are only a few days left until Easter, I think I can pull it through because you’ve explained everything so clear and it seems to be fairly easy to make this Easter egg topiary. Thank you for the idea!
Thank you so much!
This is AWESOME! The tip to use a hot glue gun to melt the plastic – genius!
I have been wanting to try my hand at one of these topsy turvy topiaries. Pinned. Thank you!
Thank you so much Alexandra! I appreciate you taking the time to pin and to comment!
I’m loving this idea, Chloe. I would have never even thought of making a topiary out of eggs! Happy Easter my friend.
Hey Chloe,
You made this few years back. And I loved it. I had to make one for myself. I’m a crafter but never messed with flowers. So I couldnt stand it I had to make this topiary. Lol And I did it. I put it on my front porch every year at Easter time. I love it so much. Only thing I wish I would have made two of them to put one on each side of my door. Do you have more topiaries you have created? I would like to see more topiaries. You’re a great crafter. I love everything you do.
Thank you for sharing with all of us.
Thank you SO much Carla! I am so happy that you made one and love putting it out each Easter! I will email you a list of all of the different topiaries I have made!!