
How to Make a Windowsill Fairy Garden
How to Make a Windowsill Fairy Garden

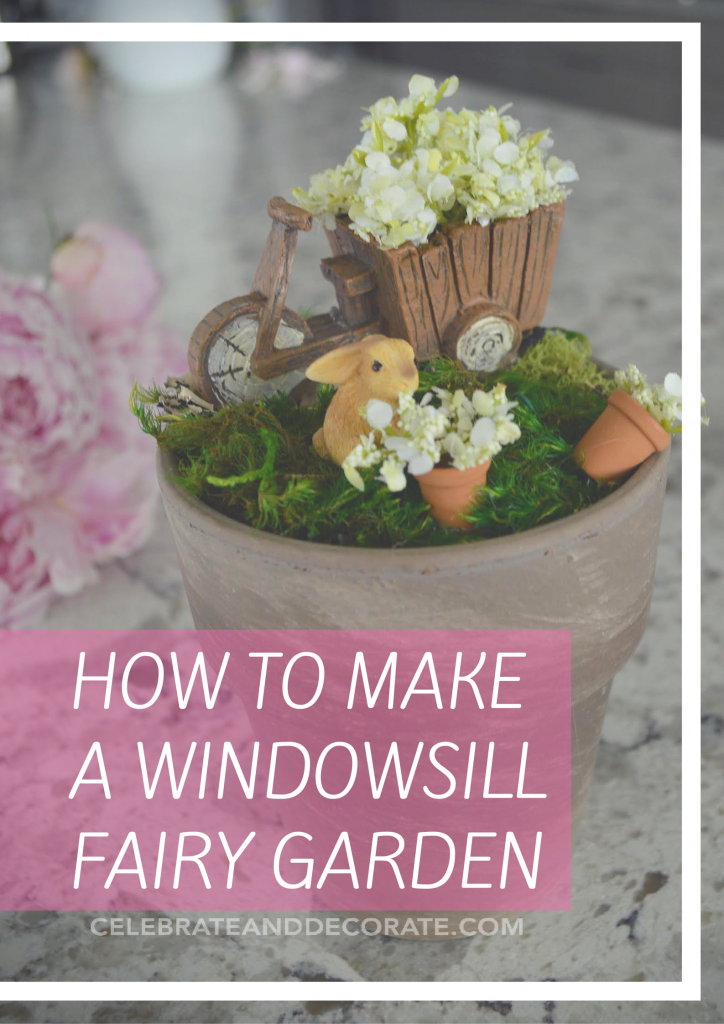
Not everyone has a garden where they can carve out a cute little fairy garden, so I decided to try a windowsill fairy garden!
This post contains some affiliate links for your convenience. Click here to read my full disclosure policy.
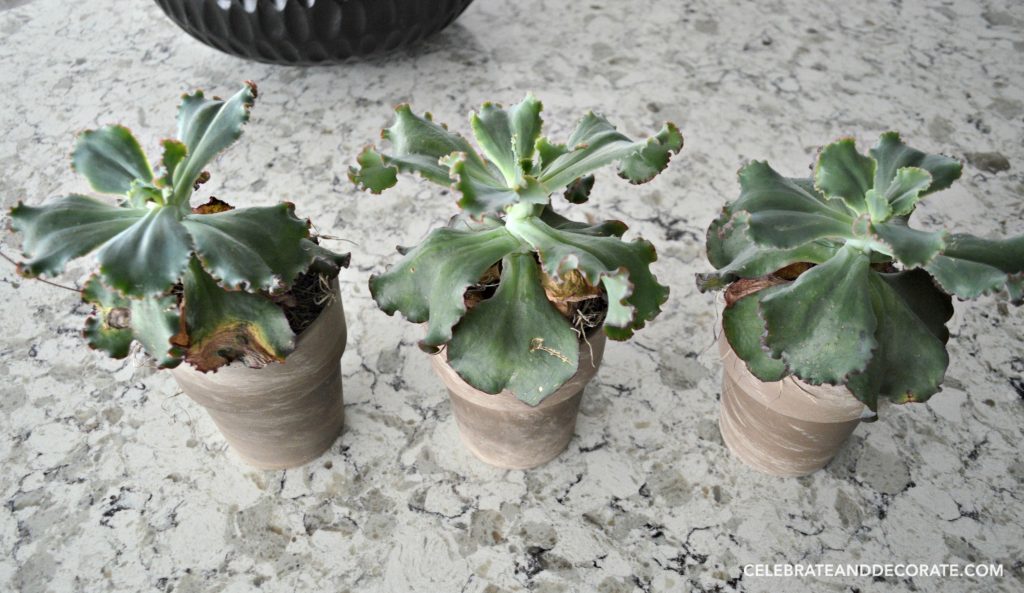
My black thumb could not keep these plants alive, so I decided to do something different with the pots!

I couldn’t throw these pots aways, but what was I going to do with them? So many of the houseplants you buy from the big box stores these days come with such nice pots. I don’t have room to keep them all. The rustic brown appearance of these kind of spoke to me and I decided it was time to try creating a couple of those cute little fairy gardens. These would just be little windowsill fairy gardens!
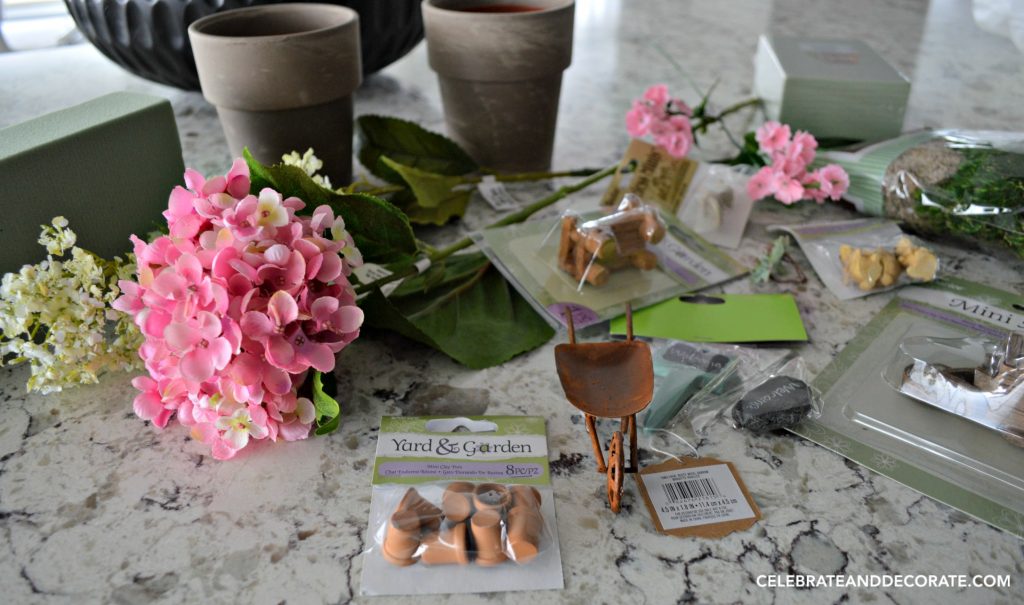
Step One: Gather Your Supplies
I went online to Joann.com and picked out an assortment of adorable little things to decorate my gardens with. I had some artificial flowers around that I used to add some flowers to the garden. There are so many tiny little things, I can see how making these could get addictive! I decided not to put actual fairies in mine, I think my fairies have flown off somewhere. I did want to make them look like little gardens that needed tended. 
Little bunnies and tiny flower pots caught my eye along with a cute little bench, welcome signs and a rusty wheelbarrow were going to define my gardens.
 If you like crafting, join Chas and I for our members only craft group! Sign up here: Craft with Chloe and Chas! NEW THIS MONTH! SIGN UP A NEW MEMBER AND GET A FREE MONTH FOR YOURSELF! Leave a comment below if you are interested!

Step Two: Stuff Your Pot
I began by cutting a piece of dry floral foam and wedging it into the pot.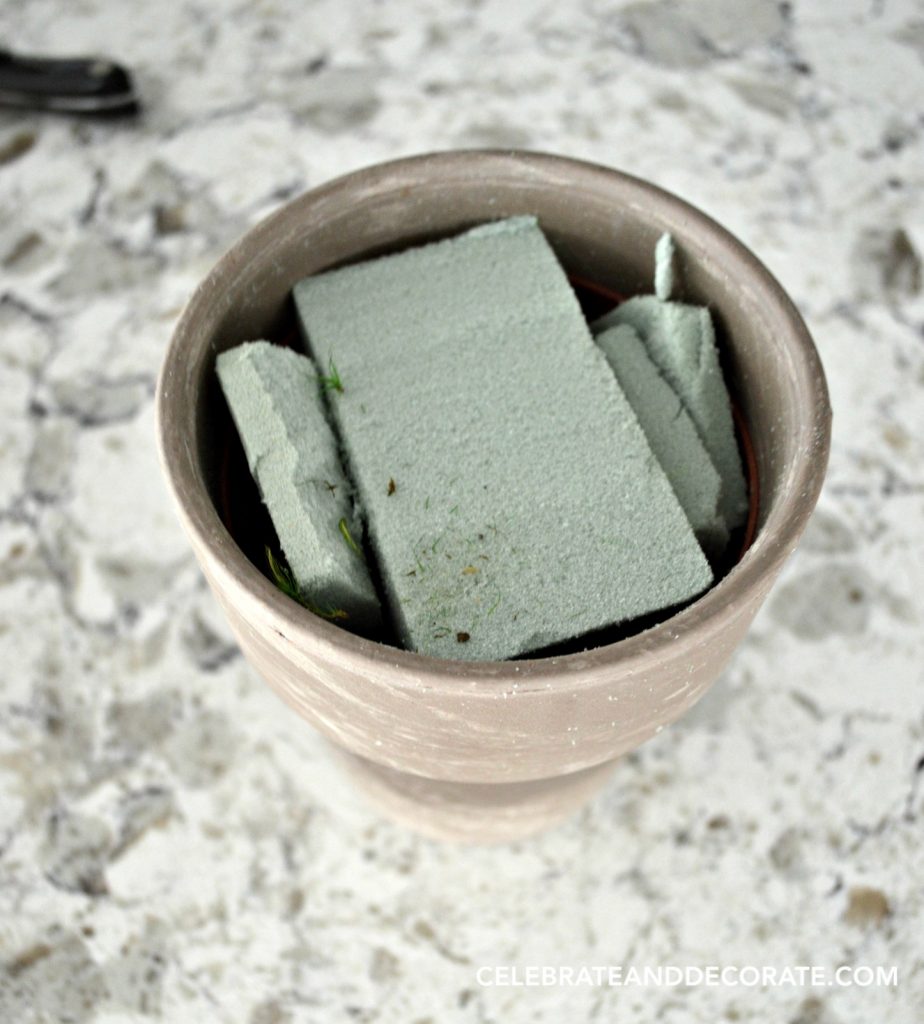
I then used the scrap pieces to fill in the pot, wedging it in tightly. 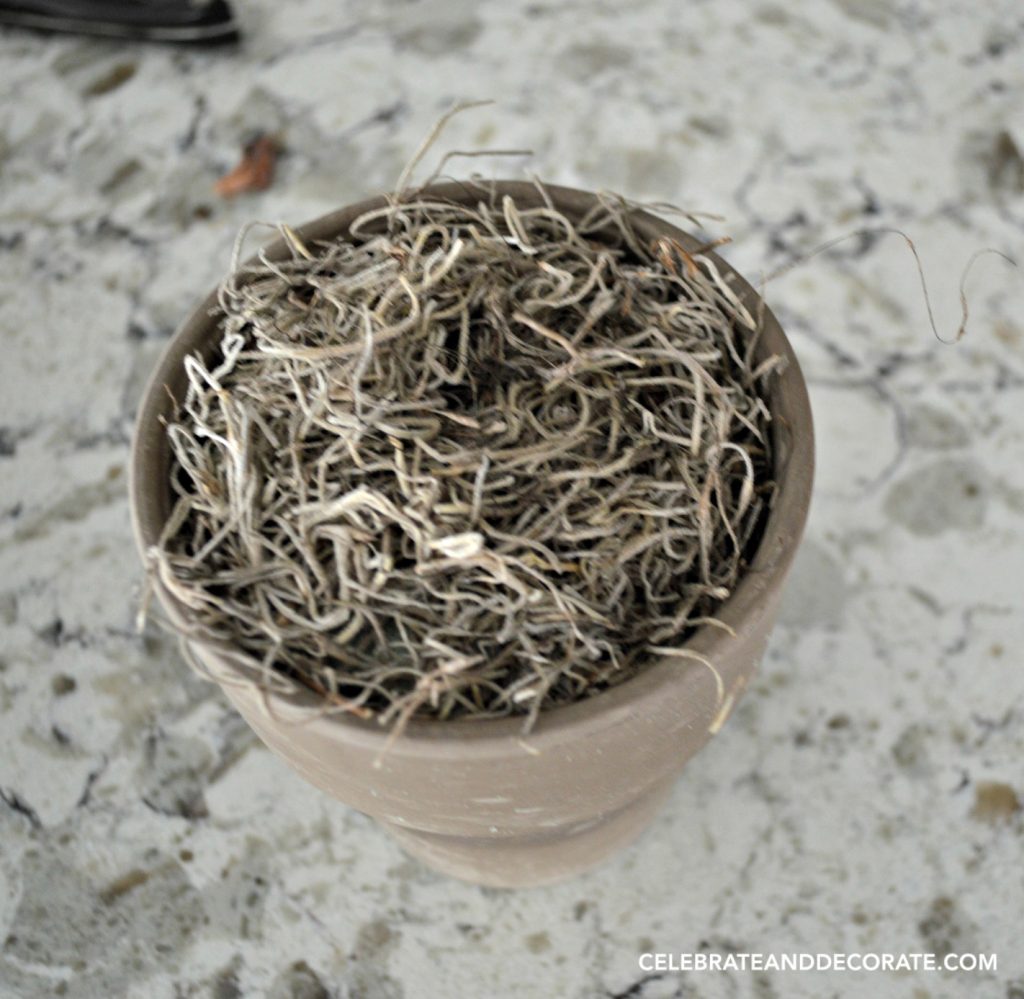 Next step was to add a layer of moss to the top of the dry foam, covering it completely. Make sure the dry foam is cut low enough that it sits below the top edge of the pot.
I just bought a small bag of assorted mosses, so I used different ones for different pots. I like having the variety. The arrow is pointing at one of the wire “pins” showing how it is holding the moss secure in the pot. 
Step Three: Cut and Position Anchors
I cut a number of pieces of wire just a couple inches long and bent them to make little pins to hold the moss and some of the other items in my pots. You want to make sure the moss is secure so that you can use hot glue to add some of your elements to your garden. 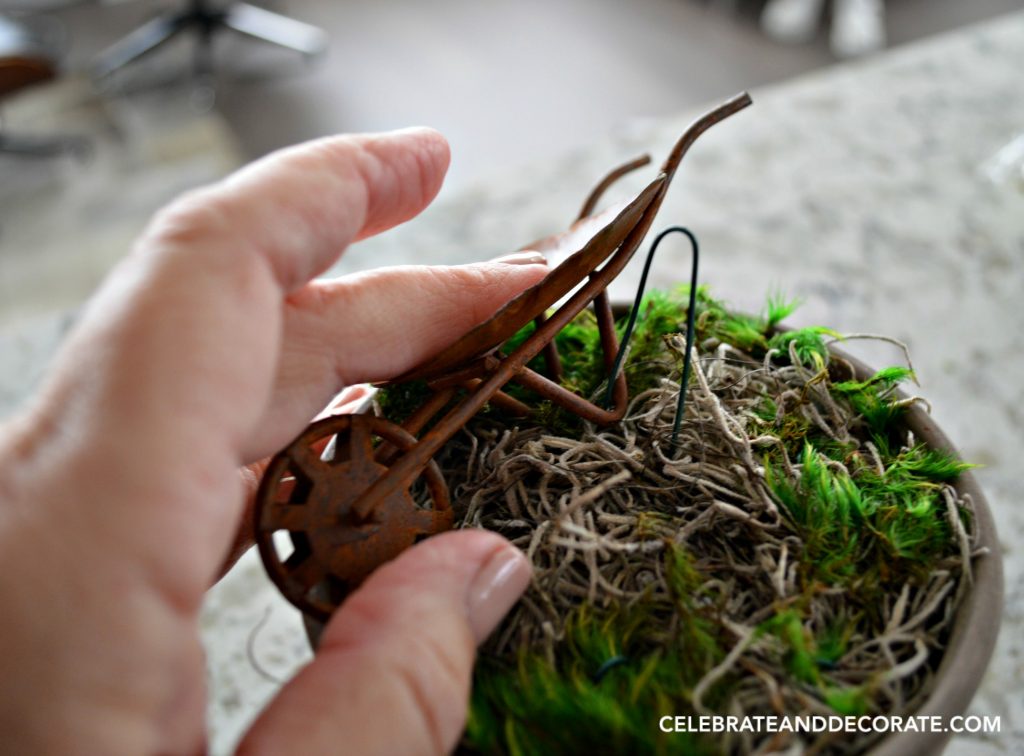
Here you can see how I used one of the wire pins to secure the wheelbarrow to the foam beneath the moss. 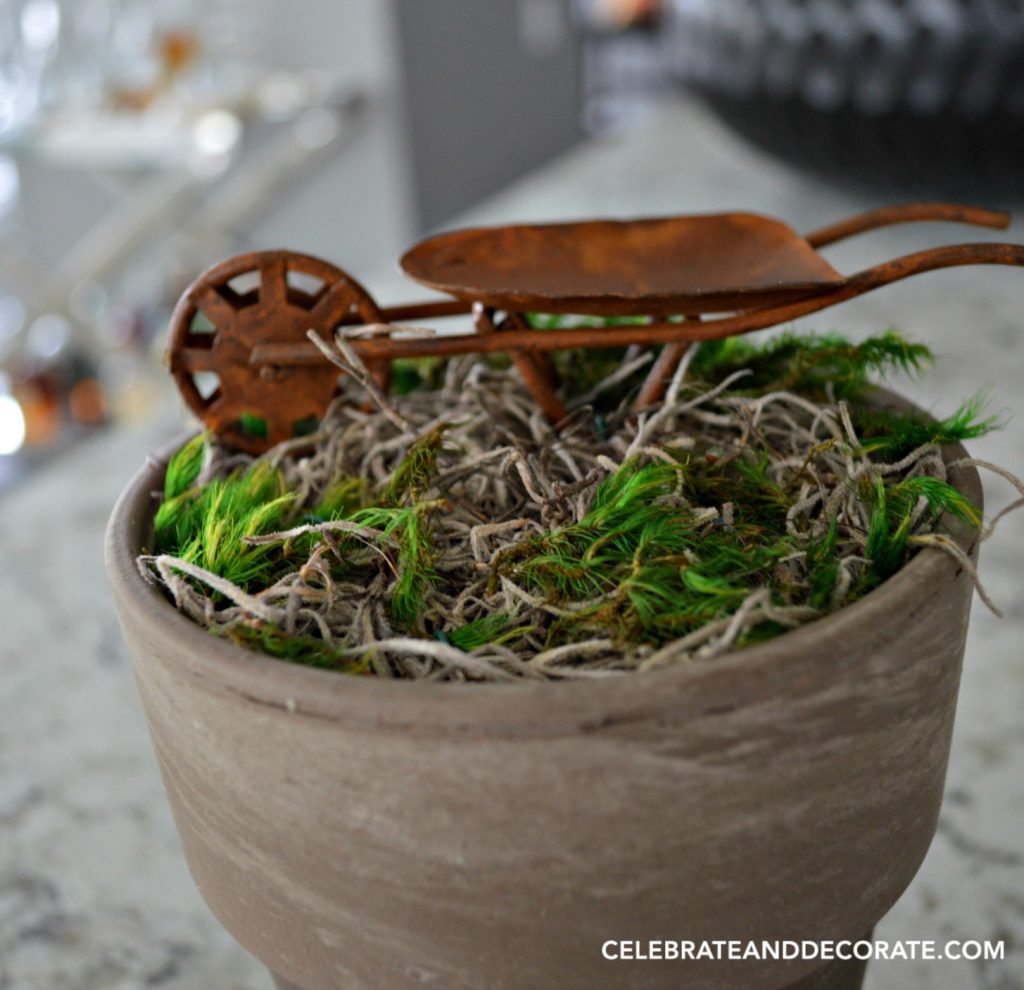 The wheelbarrow is secure and can now have elements added to it.
 Now what in the world is this? I cut all of the tiny flowers off of a stem so I can add them to my gardens.
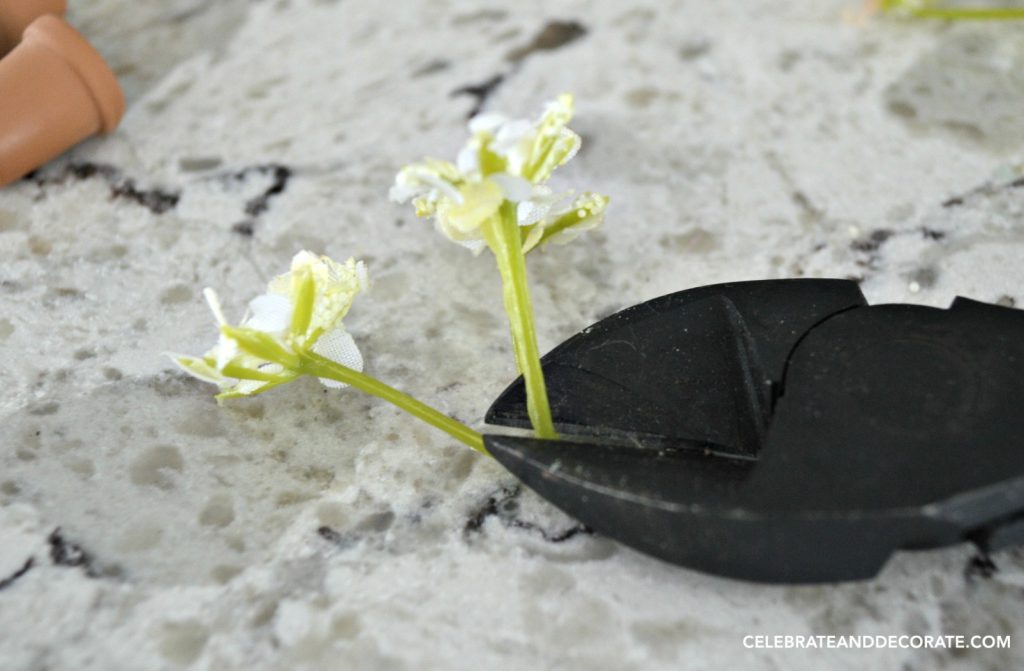
Step Four: Add Your Elements
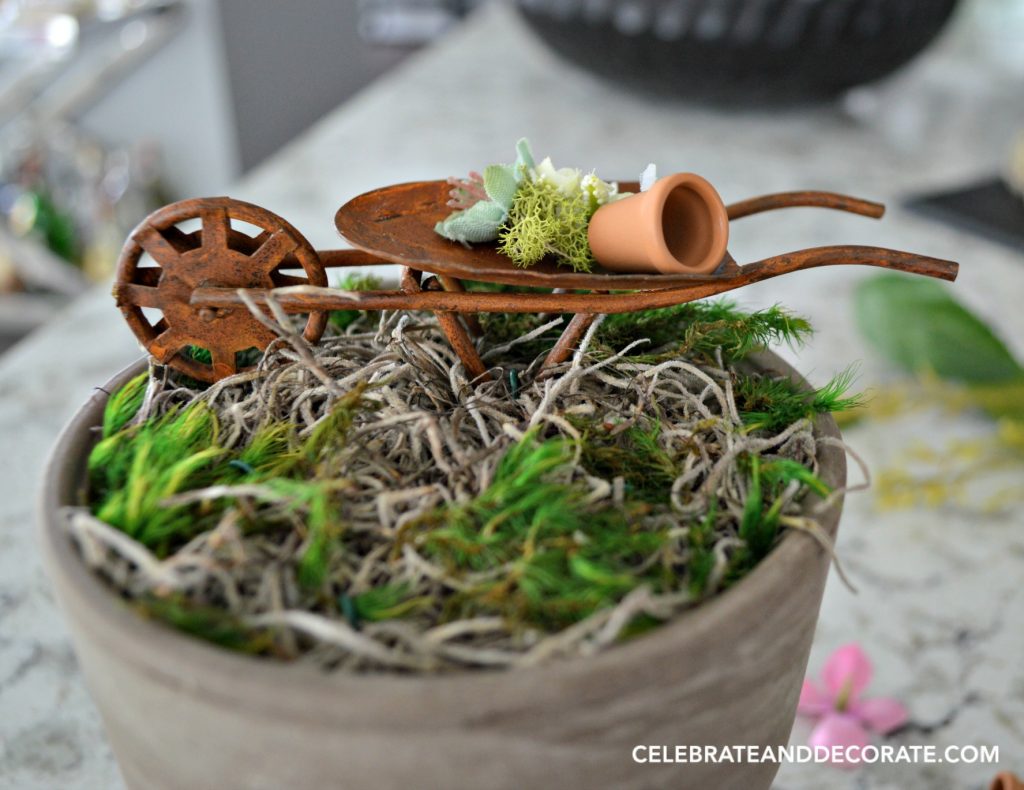
I added a little moss and dirt to the inside of a tiny flower pot and a couple of blooms to the wheelbarrow. I used a hot glue gun to add all of these items and make them secure in the wheelbarrow. 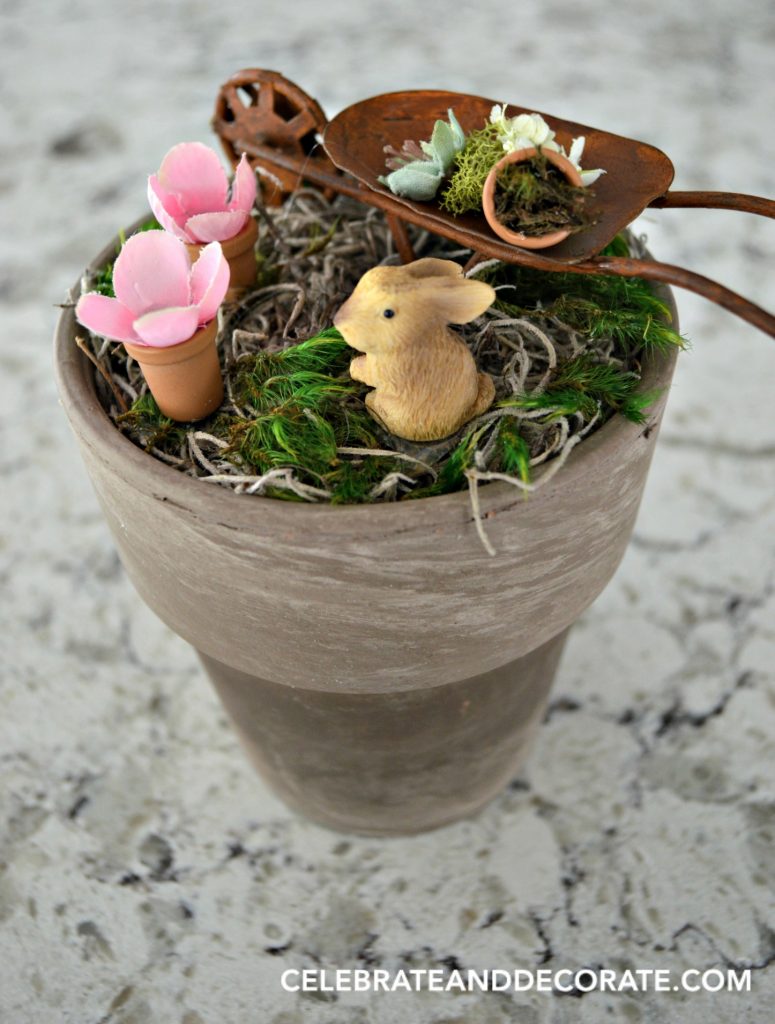
This little bunny might nibble on the flowers just a bit. 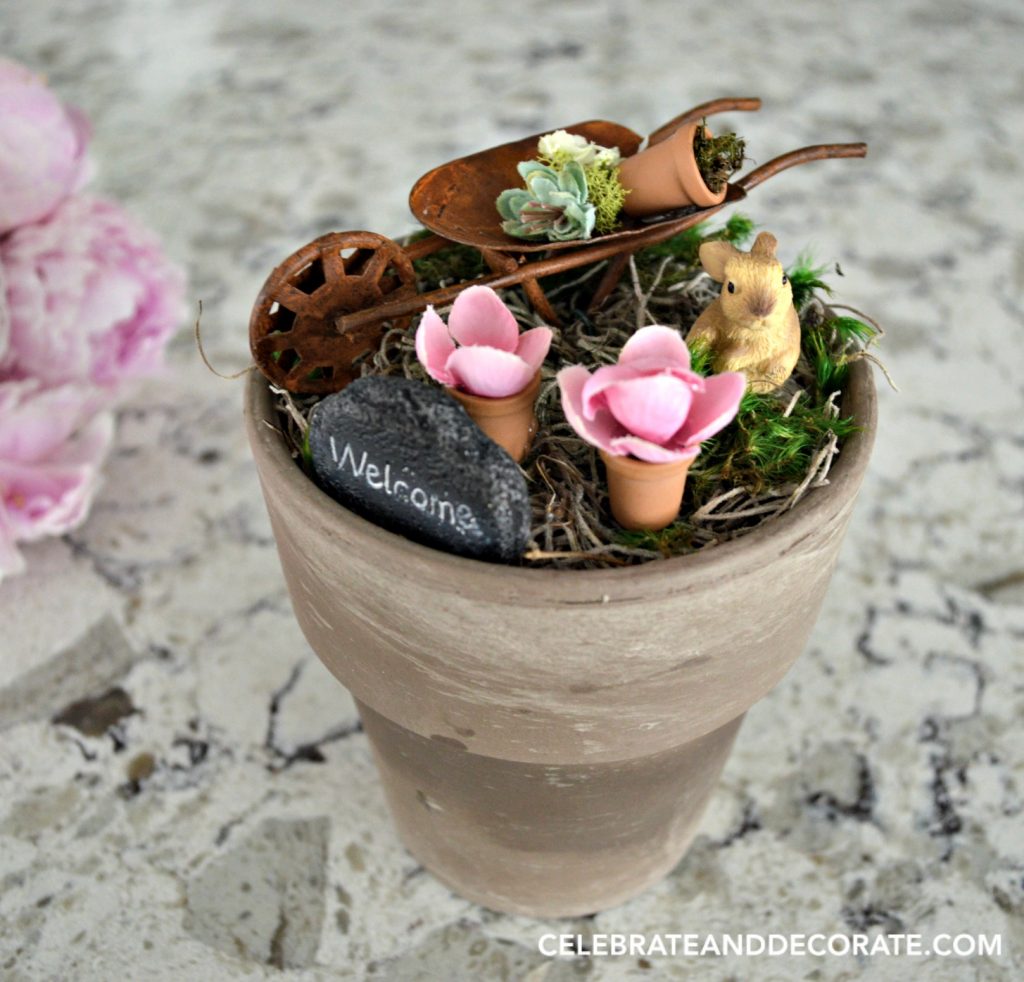
Welcome to a windowsill fairy garden! 
Would the fairies like to sit in the garden on a little bench for a bit? Some little fairy left a cartful of blooms behind.
Step Five: Enjoy Your Windowsill Fairy Gardens

I hope you see how much fun you can have creating this little fairy gardens. I don’t have a window in my kitchen, but if I did, I know one of these would find a home there. I think these would be a lovely gift for someone who spends all day at a desk, adding a tiny bit of a garden and whimsy to their daily grind.
How cute. I love every little thing in the pots. Great job Chloe.
So cute Chloe!
SO CUTE!!! I have always wanted one of these. Thanks for the great tutorial.
Great minds think alike ! They are really cute and just the right size for windowsills. I just bought some little wheelbarrows. When all else fails, I search Dollar General and found cute mini’s.
Did you know the mini’s at Michael’s come from a local company ?
PS Don’t forget it’s Christmas in July at Marge’s Specialties this Sunday.
I didn’t know those tiny ones came from a local company!
I love this, I have a young grand daughter that loves fairy gardens. I think we need to make this to put in her window seal. You can see her little imagination working. Thank you for sharing. So glad I found your web site.
Oh, you two will have so much fun! Make sure you come back on the 27th for my Fairy wreath! It is so cute! Hey, is your last name Crabtree, too?
This is adorable! I’ve always wanted to have one. Thanks for this wonderful tutorial.
Thank you so much, thi is such a cute little size, isn’t it?