Friends will be Amazed you made this Orange Tree Topiary

Building the Base:
I knew I wanted to use a silver champagne bucket to display my DIY topiary tree. I first tried to just put styrofoam in the champagne bucket, but it was not going to be strong enough to hold up this orange tree topiary. Find the container you want to display your tree in and then find an inexpensive container that will fit inside it well.

I went to my local Dollar Tree with my Champagne bucket in hand! I found this plastic bowl that fit perfectly! Mix up plaster of paris and fill your bowl like I did above.
This post contains some affiliate links for your convenience. Click here to read my full disclosure policy.

I purchased a piece of 1″ PVC from the Home Depot and cut it into a piece, about 18″ long. Use duct tape on one end of the PVC to seal it well, so it stays hollow, and does not let the wet plaster of paris seep into it.

Stick the piece of PVC down into the plaster of paris with the duct tape end down. Use a level against the PVC to make sure it is straight and level.

Here, you can see when the plaster of paris hardens how the pot with the pvc will fit down inside the champagne bucket. This will make it possible for me to use my champagne bucket again without ruining it with plaster of paris!
NOTE: If you do not care about filling your container with plaster of paris (and it is waterproof), you can fill it directly without using the plastic pot inside of it.

I used a 5″ styrofoam ball. You can choose to use a larger or smaller one, depending upon the size of the ball topiary you are looking to make.

A 1″ dowel will fit down inside your 1″ PVC. This will also make it possible to switch out the orange topiary for something else, like a lemon topiary or a Christmas topiary.
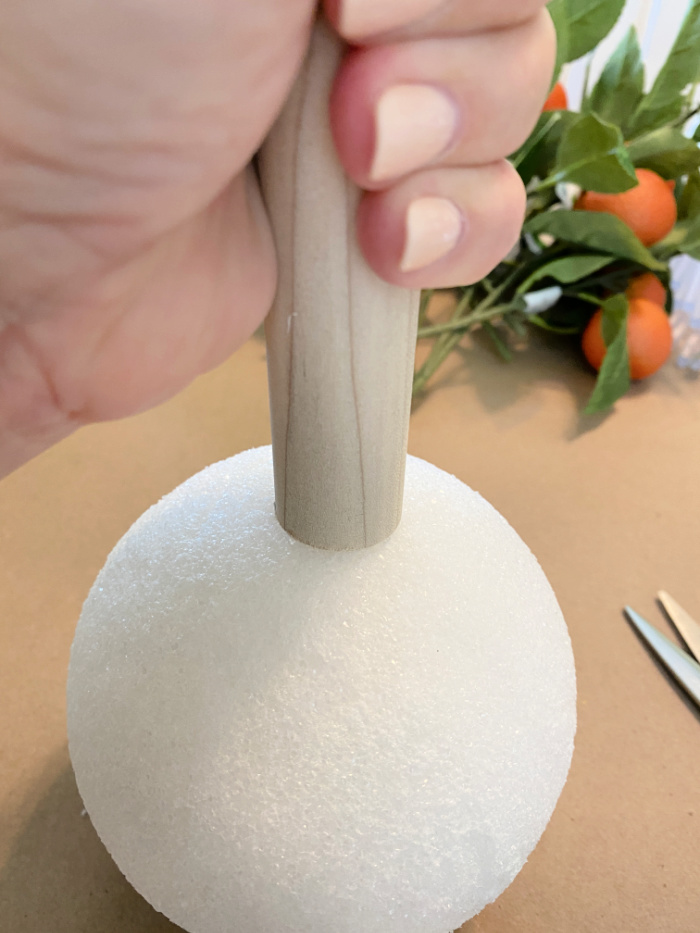
Press the dowel into the styrofoam ball to make an indentation.
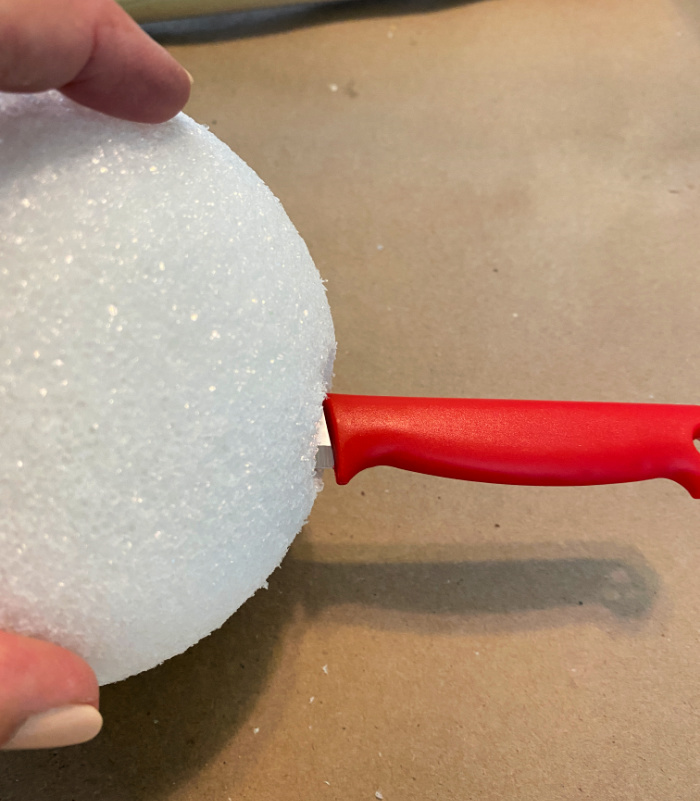
Use a knife to cut out the space where the indentation was.

I cut my space to 2 1/2″ deep. You don’t want to cut down all the way through your styrofoam ball.
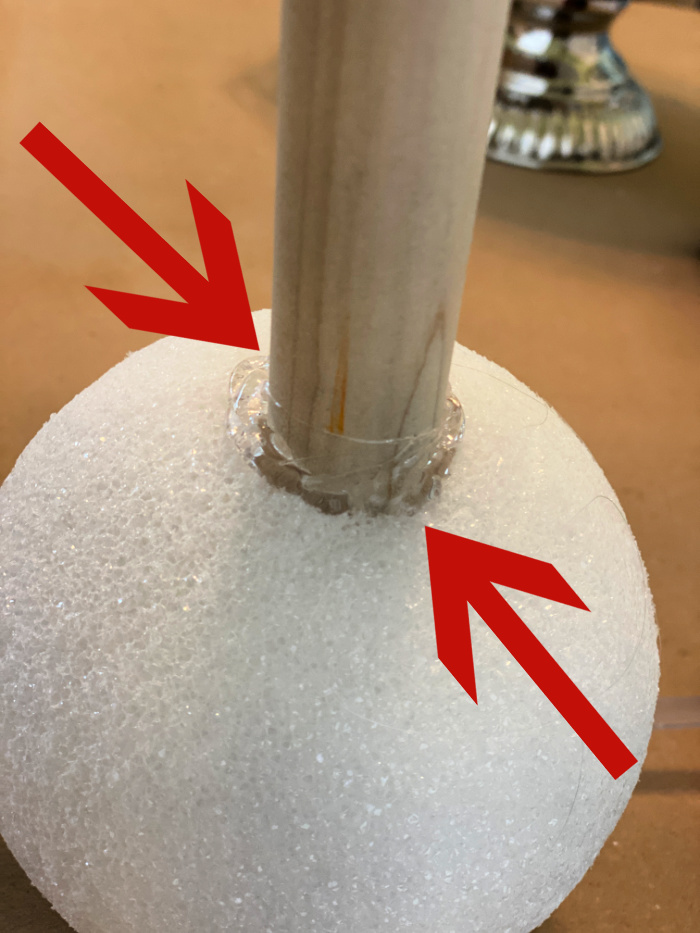
Use LOW TEMP hot glue to secure the dowel. Be generous with the glue. Fill the hole with the glue and add an additional amount around the edge where the dowel exits the ball.
NOTE: Hot glue will melt the styrofoam and will not hold the dowel securely.

At this point your base is ready for you to start building your topiary!
Building your artificial topiary:
I purchased a number of branches with oranges on them and number of green leafy branches. I selected leafy branches that most resembled the leaves of orange trees.
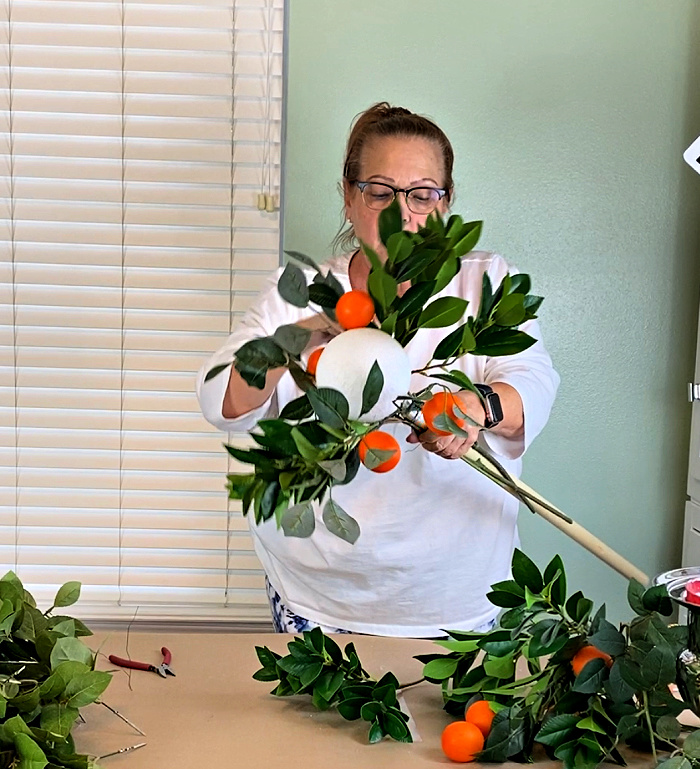
Gather some of your orange branches and greenery, and wrap them around the dowel holding them firmly. Use paddle wire to secure the branches to the dowel.
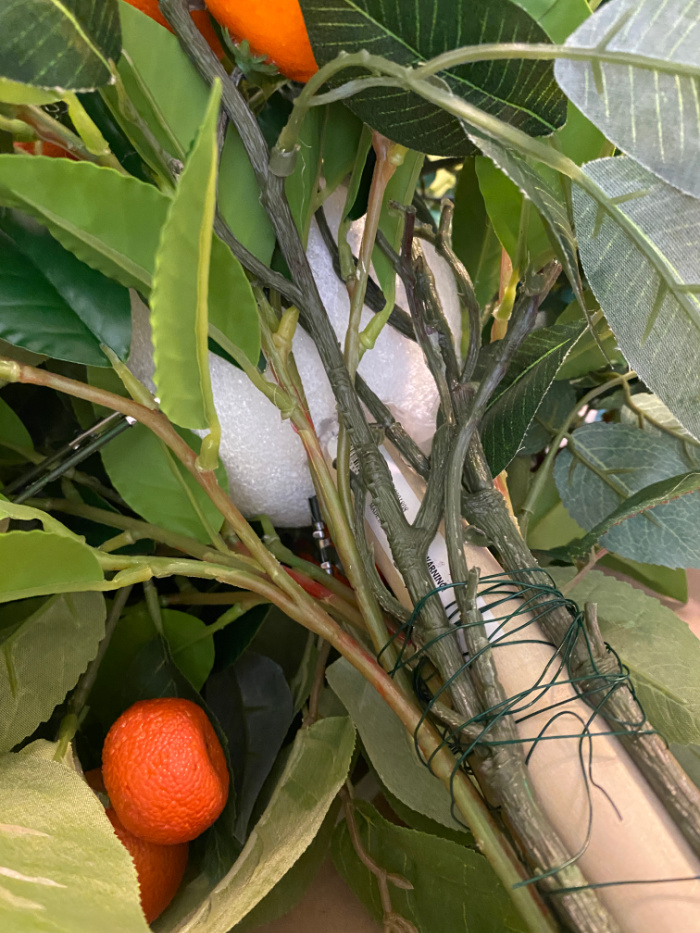
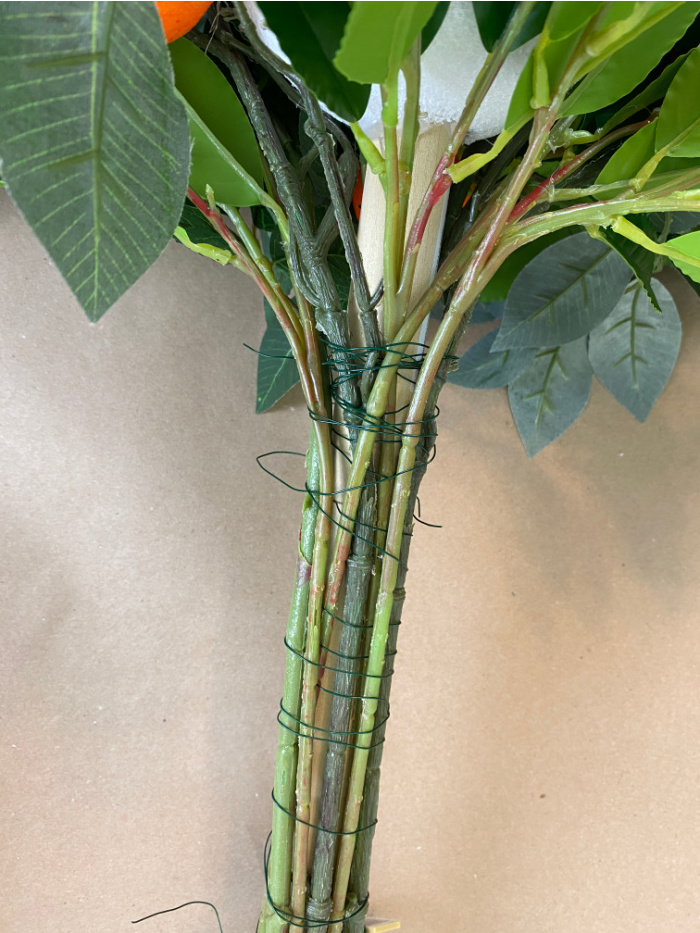
I know this looks like a big mess, but this is what mine looks like to secure it to the dowel. Use as much wire as you need to make sure these are secure. If you feel unsure about the stems, you can add waterproof floral tape around the entire thing.
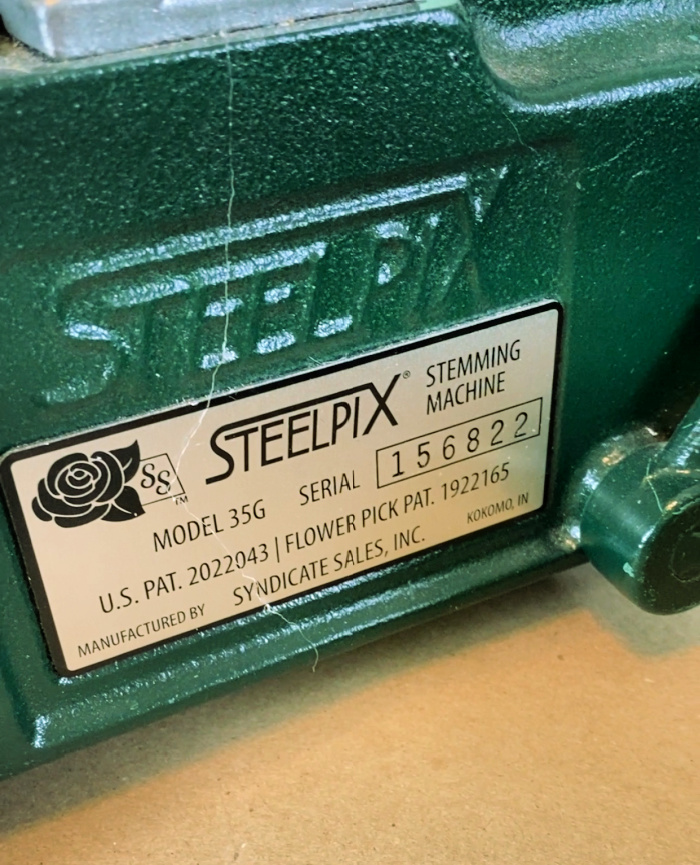
I don’t know where I would be without my SteelPix stemming machine! This is an investment, but is SO worth it!
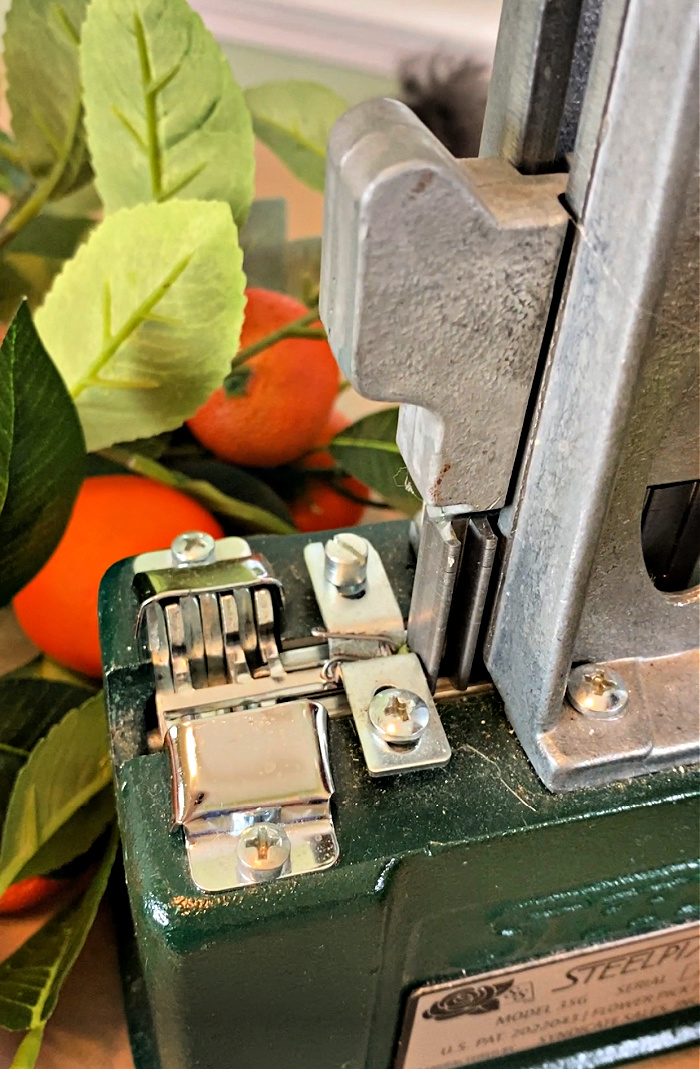
You put a stem down against the steel pick and press a lever to secure it to the stem!
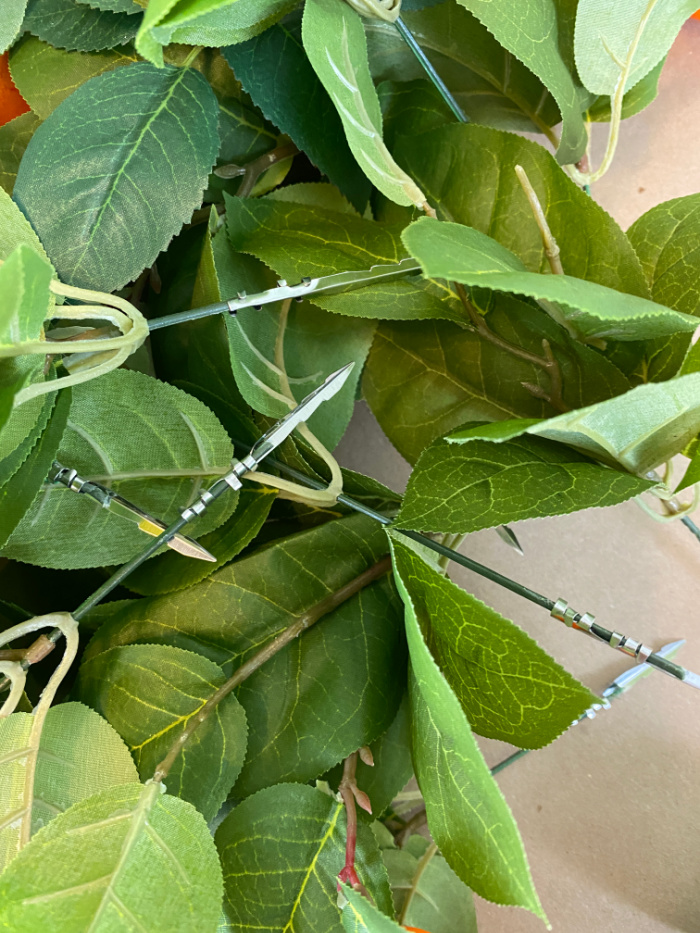
I took all of the rest of my small greenery and added steel picks to them so I could fill in my topiary.
Even though I had added all of the branches around the edge by wiring the stems to the dowel, there is still plenty of styrofoam showing. That all needs to be covered will additional stems.

I had to set my topiary down on the floor so I could see the top of it and make sure I was filling in all of the empty space.
When you feel that your topiary is full, you need to look through the greenery and see if there is any of the white styrofoam showing.

Select some reindeer moss that is similar in color to your greenery. Gather clumps of the reindeer moss and secure them with a greening pin.
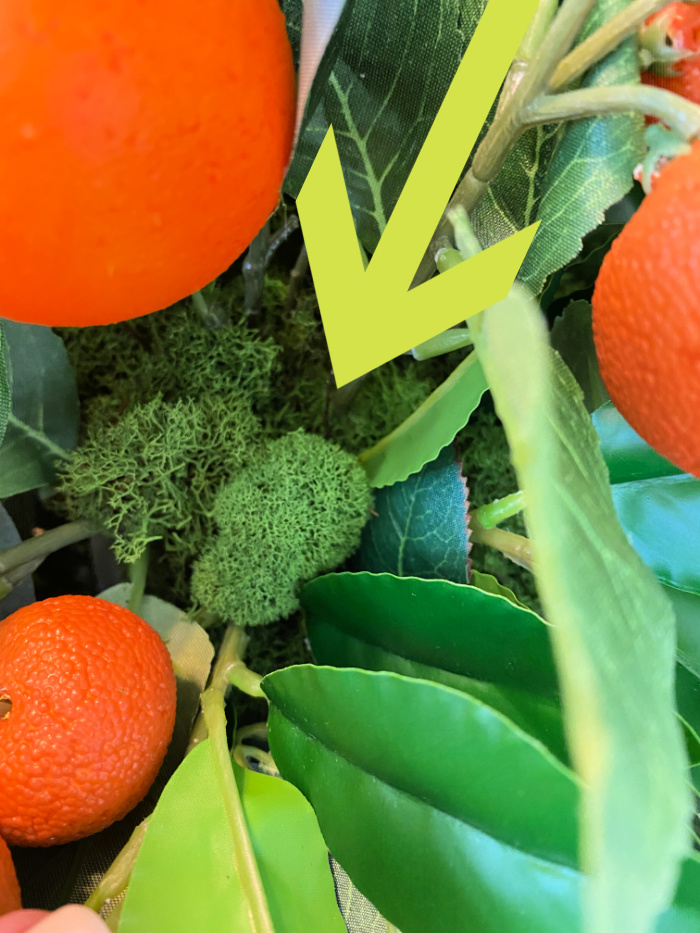
Stick the greening pin with the moss into the styrofoam ball anyplace that the white is showing.
Finishing your topiary tree trunk:
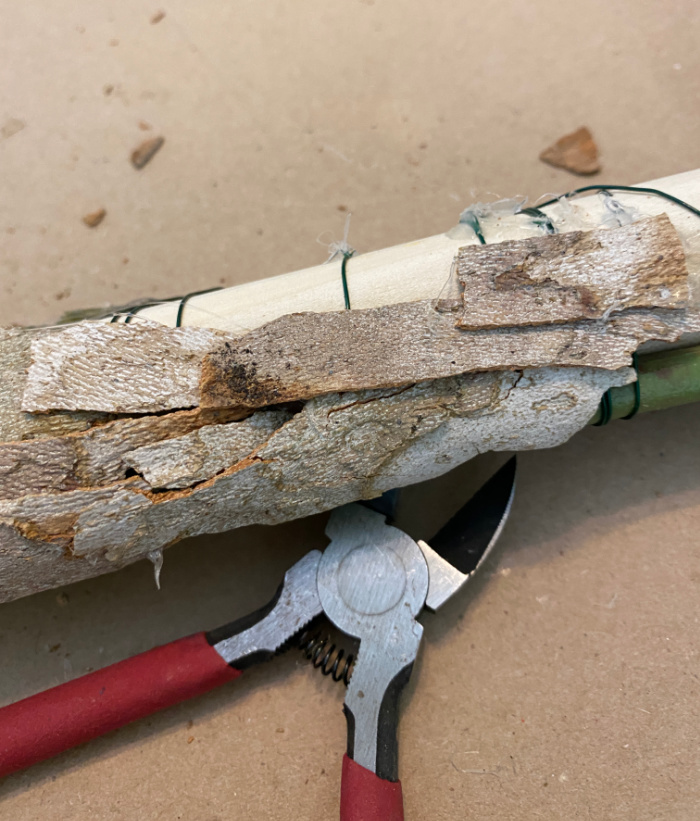
I am fortunate (my husband would say unfortunate because he has to clean up the leaves and the bark) to have a row of sycamore trees growing along the side of our home. Sycamores shed their bark. I simply collect the bark and cut it into small pieces and use hot glue to stick them to the wooden dowel and cover the wires holding my branches of my topiary.
Finish and Display:
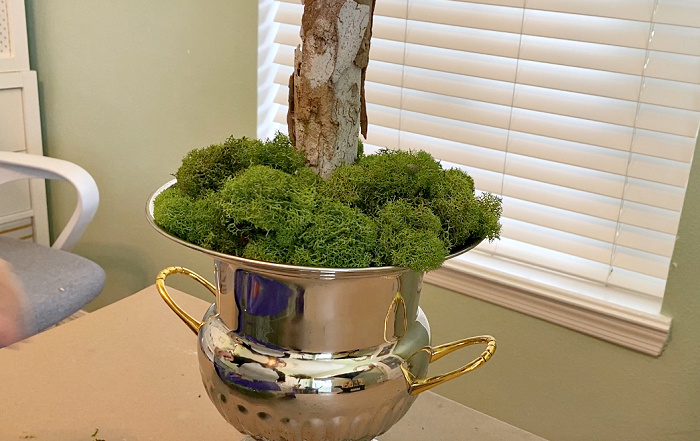
Add moss to the bottom of your topiary to cover your bowl and the plaster of paris and your tree is ready to display!
Display your orange topiary and enjoy it!
I’ve always wanted to make my own topiary! I love how your orange topiary turned out. I would love to try to make one or of lemons for next spring. Thanks for such a great tutorial.