How to Make Fun Fruit Props
I am so happy to be joining a group of creative bloggers for our monthly Creative Craft Blog Hop. All of these bloggers have different skills and different talents, so please take a moment to visit the bloggers listed at the end of this post. Much thanks to Andrea from Design Morsels for hosting these wonderful hops!
I was so fortunate to host a few bloggers at my home earlier this month. It was the perfect opportunity to style a fun and fruity luncheon! Of course that meant there had to be a craft project involved! I created these fun faux fruits and fruit slices to use as a centerpiece! You can see the tablescape at Tutti Frutti Tablescape!
This post contains some affiliate links for your convenience. Click here to read my full disclosure policy.

You begin this project with smooth styrofoam hollow spheres and half spheres. The important part is that they must be the smooth finish styrofoam. You can easily paint smooth styrofoam with acrylic paints. I used a large 12 inch one for the watermelon and 8 inch ones for my half and quarter slices of fruit.

To make the cluster of grapes I used a dozen 2 inch smooth styrofoam balls.

The smooth styrofoam balls were painted with purple acrylic paint. The easiest way to paint the styrofoam spheres is to stick them on a skewer so you can paint all around the sphere without getting the paint all over your fingers. You can stick the skewers into a piece of styrofoam to allow the ‘grapes’ to dry.

To make the watermelon, I painted a light green on the outside of the large half sphere and then used a darker green using a bristle brush in a back and forth motion to give the effect of the watermelon texture.
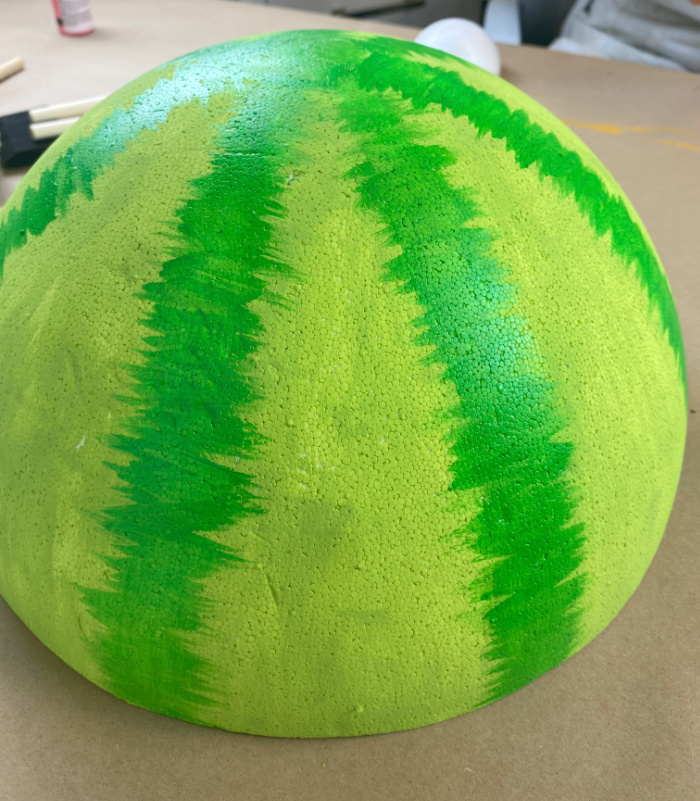
Your watermelon will look something like this when you have finished painting it. I only used my watermelon upside down like this. I did not finish the inside of my watermelon, you can if you would like using one of the techniques I explain below.
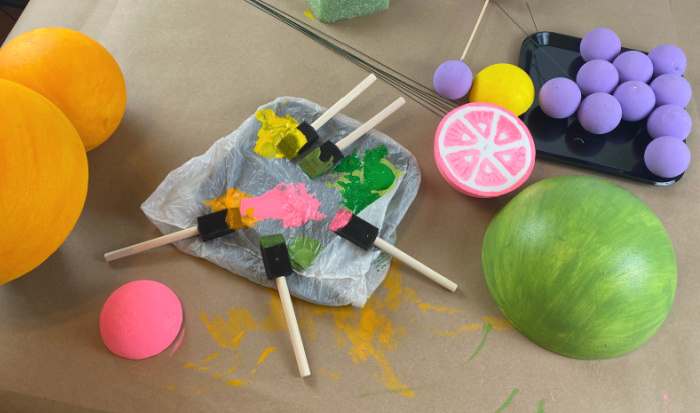
If you use a plastic plate for your paints, you can cover it with a plastic grocery bag and use it for your paint pallette. I painted half spheres yellow for lemons, and green for limes. Some of the complete spheres were painted solid orange to sit in as oranges and half spheres as pink grapefruits.
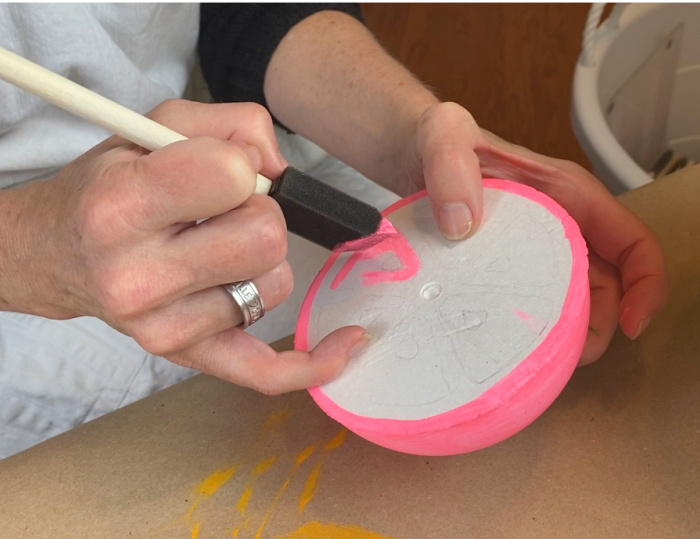
My friend, Chas from Chas’ Crazy Creations was visiting from Colorado and helped out by painting the sweet little pink grapefruit on a half sphere of smooth styrofoam.
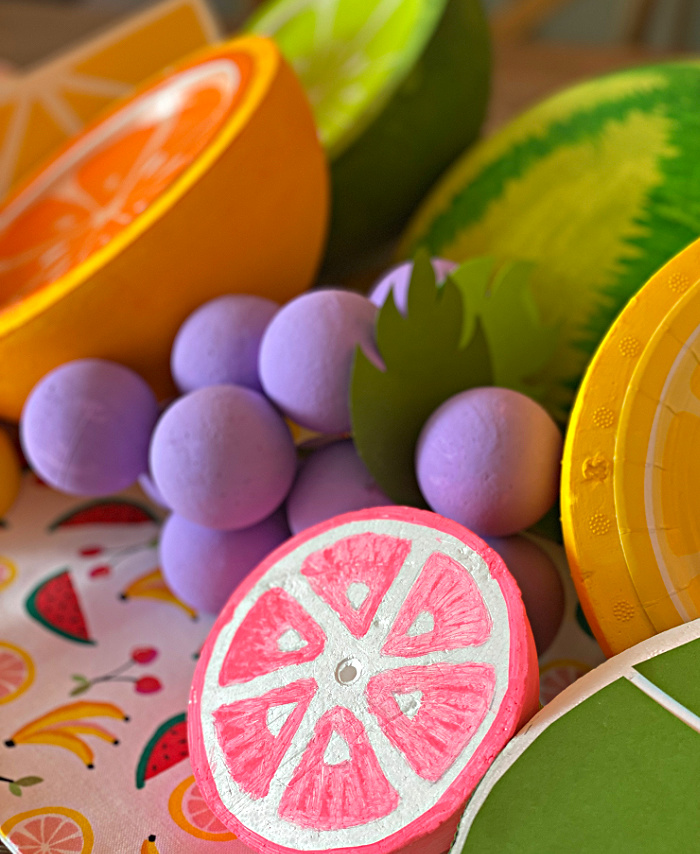
Didn’t she do a great job?! Anyone for a little bit of tart pink grapefruit?
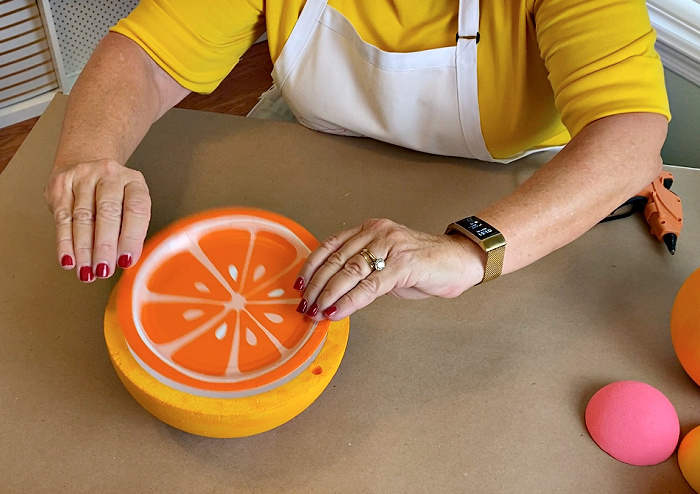
The half spheres where topped with fruit slice paper plates, oranges, limes and lemons. You would need to use 8 inch paper plates to cover the opening of the sphere.

Using a thin bead of low temperature hot glue, secure the paper plates to the edge of the half sphere and you have what appears to be a half of a lime, orange or lemon!
What if you can’t find the paper plates?
When I got ready to write this blog post I Iooked online for the paper plates I had used. Alas, they were not available. I didn’t want to leave you hanging if you are unable to find the paper plates, so I wanted to show you an alternative way to make these fun fruit props!
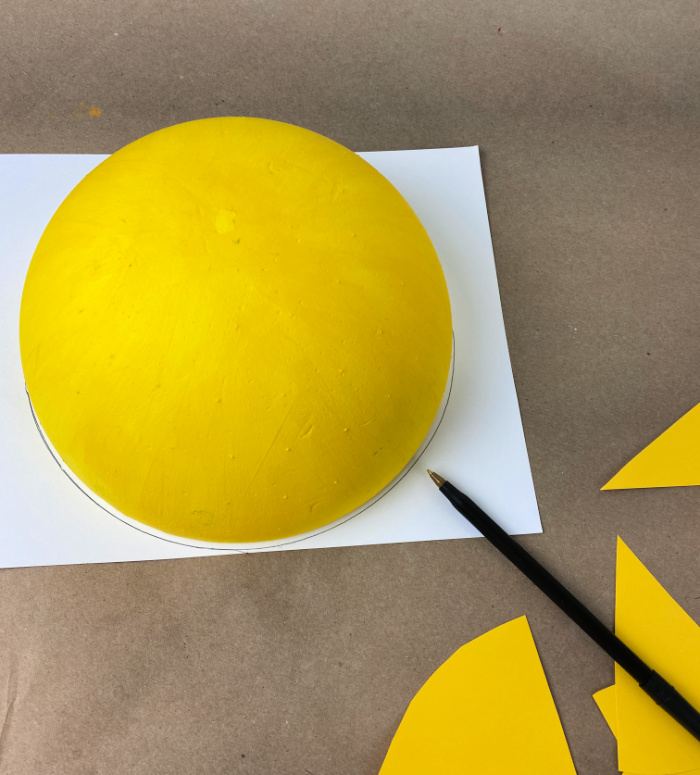
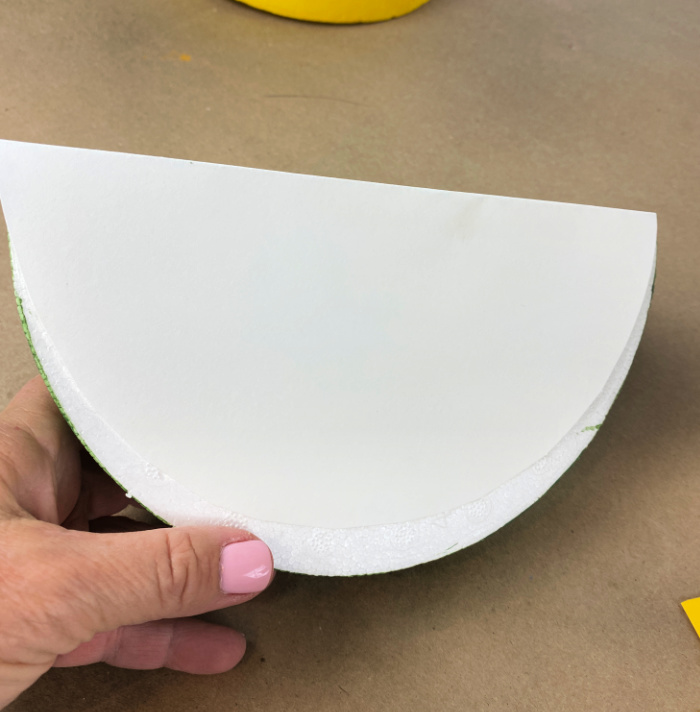
Take your eight inch hollow half spheres and paint them the color you want. In this case I made mine into lemons and limes. Place the half sphere down on a piece of white card stock and draw a circle around the half sphere as shown above. Since I already had half fruits, I decided to make these into quarter slices.
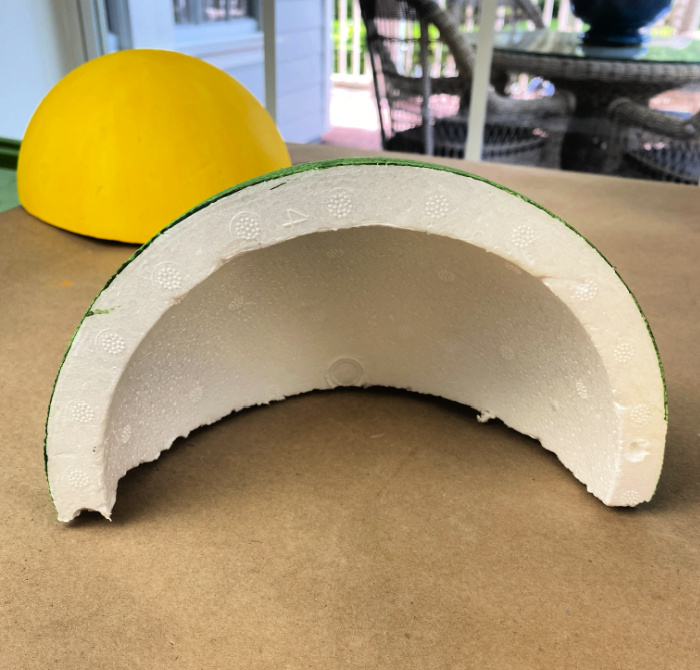
After you have used your half sphere as a pattern for your white cardstock, cut your half sphere in half as shown above.

Cut the circle of cardstock out as shown above, OR if you have a Cricut or Silhouette you can use it to cut out an eight inch circle of white cardstock.
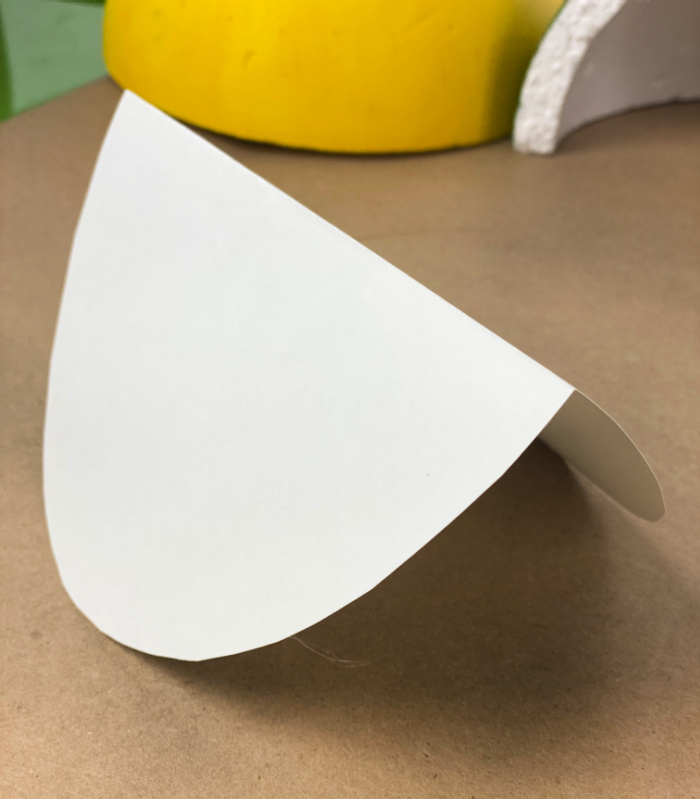
Fold the white circle of cardstock in like I have done above.
You can then use a low temp hot glue to secure the white cardstock to the quarter of the hollow sphere.

Use the appropriate color of card stock and cut your fruit sections. Glue your fruit sections onto the white cardstock…it is that easy!
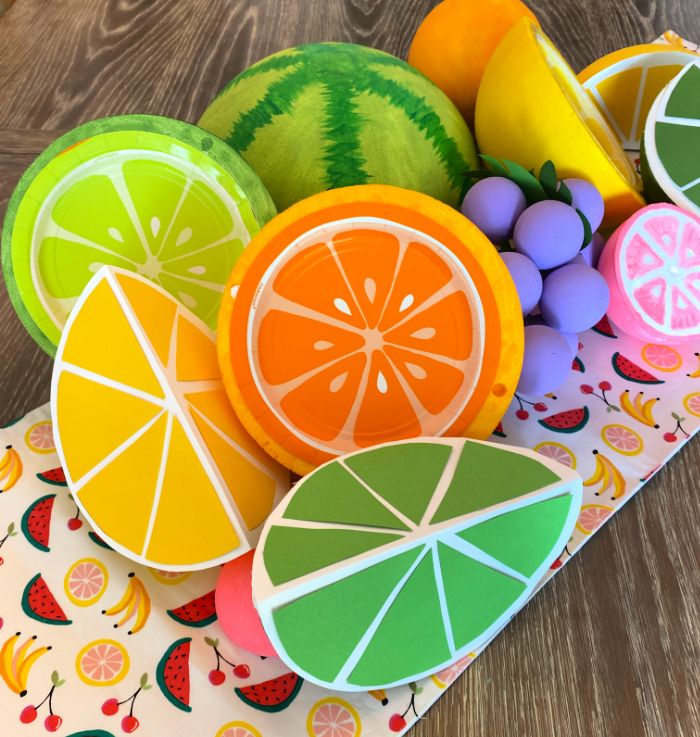
I came up with these as an answer to the problem that you may not be able to find the paper plates, but now that I finished them I love that I have the variety of the fruits! Now I am going to have to plan another tablescape or something using these fun fruit props!
Now it is time to visit the rest of these crafty bloggers:
How to Make a Patriotic Door Wreath from Dollar Tree
A Simple Outdoor Lantern Change
How I Made a Very Starry Patriotic Wreath
How to Paint a Flower Pot with Ceramic Paint
So clever to use the fruit slice paper plates and card stock sections to mimic the fruit halves and wedges Chloe! I love how you painted the watermelon rind too! Happy to be crafting with you again. Wishing you a Happy Memorial Day Weekend ♥
Looks like you had lots of fun creating these adorable fruit props, Chloe! Only you could come up with this amazing idea! Perfect in so many ways to decorate and entertain – from breakfast to outdoors gatherings!
It was so much fun painting fruit and crafting with you. (Thanks for the kind words and shout out) Thank you so much for the wonderful lunch and your tablescape was absolutely amazing!
Your watermelon looks so realistic! This is such a fun table, it would be so cute for a kid’s party or a summer party. How can you not look at this table and be happy? I like how you gave solutions if you can’t find this, you can use that. That always happens when you start to make something, doesn’t it? Thanks for being in the hop.
I love these Chloe! And great painting tip for the watermelon! Using paper plates or cut paper card stock to detail the cut sections of the fruit is such a clever idea, and the way you painted the grapes is brilliant! What fun to have a craft party with fellow bloggers. Great tutorial and thanks for the sources!
These are adorable, Chloe and what a fun tablescape theme! Happy Memorial Day weekend! Blessings, Cecilia @My Thrift Store Addiction
This is such a cute tablescape! You are so creative!
Thank you so much Candice!
I’m so jealous that you got to have a blogger get together!! Before covid I was meeting with a small local group, and now none of them have the time anymore for even a Zoom meeting. It makes me sad. An in person meeting is so much different than online groups….
Nice faux fruit– so fun!
That is so sad, Liberty! You need to find yourself some new peeps! After attending a one day seminar at KariAnne Wood’s in 2019, one of the attendees reached out and some of we attendees started connecting through a (mostly) weekly Zoom. Last November we masked up and met at one home in Phoenix and then this Spring here at my home in Florida. After blogging for more than 12 years, I feel I have finally found my “tribe”. I hope you are able to find your own tribe!
What a fun craft for a get together! I ditto what Liberty said; we’re still in lockdown so very jealous – lol!
Oh, thank you Sara! I am so sorry you are still locked down, I am SO enjoying living FREE again!
Okay, I’m pretty amazed. No, I’m really amazed. Great job of painting and improvising for the fruits. Very creative. I must’ve gazed right over your tablescape post if you mentioned you made these because I thought you bought them!
Oh Rita, you are so sweet! I love coming up with something I can craft for a tablescape and this worked perfectly!
Chloe, you always come up with the most innovative & fun crafts. Like Rita said, this really is amazing!
You are always so creative when it comes to your craft shares. I love this craft. The fruit are so pretty. Thanks for sharing.
Oh my gosh, Chloe! These are so unique and creative! You’ve taken your fun Tutti Frutti tablescape up a notch by crafting these cool fruit props! I love that Chas helped out, too. It must’ve been so nice to craft together in person! I agree that the two varieties of fruit that you made look great together! It’s always fun to hop with you, my friend 🙂
Thanks so much Rebecca! It was so much fun to sit down and craft in person with Chas!
I absolutely love this Chloe! You always find a way to make me smile. I only wish my brain worked like yours. I can’t imagine what I would be able to accomplish. Have a great holiday weekend my friend.
You accomplish amazing things, just look out your window at that garden of yours!!
Chloe, what a clever idea!! I’ve covered styrofoam in fabric, moss and decoupage, but never thought of this idea. So colorful and fresh. So awesome that you were able to get a group together. Hope to do that soon here in North Texas.
Thanks so much Carol, it was so much fun to be together!
These are so fun and creative, Chloe! I love how bright and colorful they are! It is so wonderful that you and Chas were able to get together and craft! Hope you’re having a great weekend! xo
Thank you so much Lynne. I was so lucky to host a few bloggers from across the country. I am now up in Maryland helping my daughter and granddaughters settle into a new apartment. Back home this coming weekend. It was great to be in Washington, DC for the holiday.