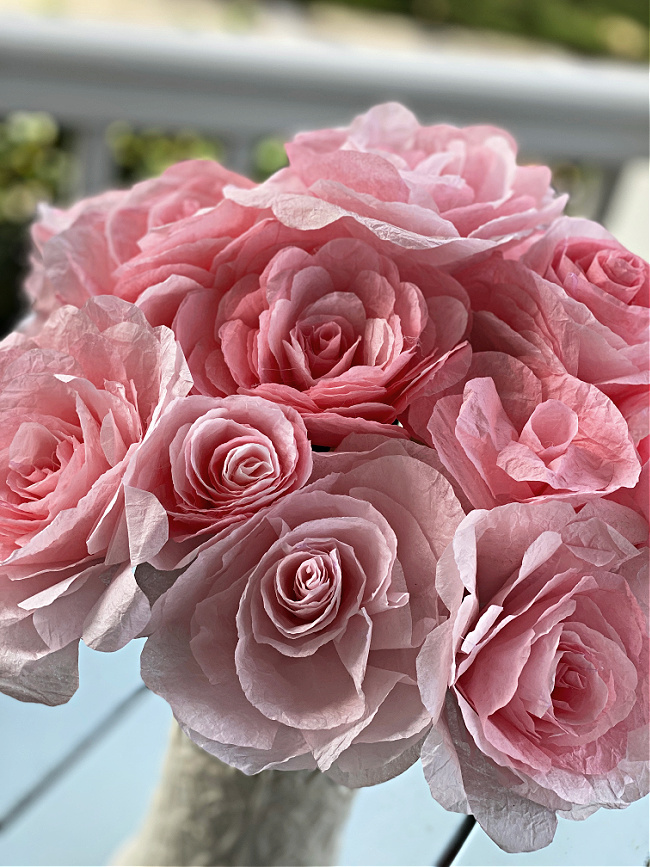
How to make beautiful DIY Coffee Filter Roses
These diy coffee filter flowers are just one of the many coffee filter crafts out there to try. The step- by-step instructions will show you how to make roses. I found this one of the easiest ways to make these colorful flowers. Once you master a rose, you might want to try an make a different type of coffee filter flower. A few simple supplies are all you need to create gorgeous coffee filter flowers!

This post contains some affiliate links for your convenience. Click here to read my full disclosure policy.
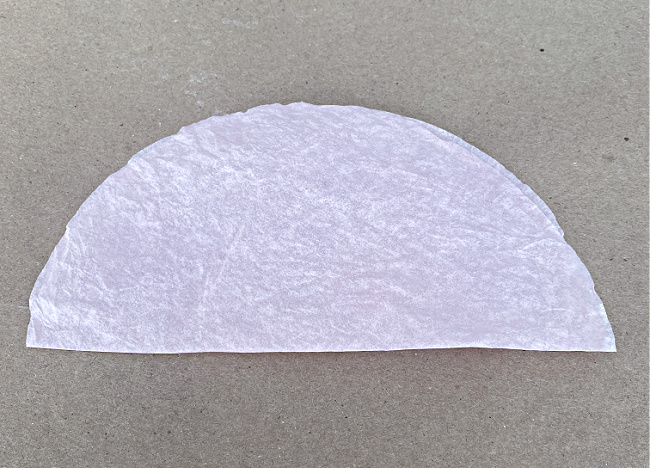
You may want to just make white roses with coffee filters right out of the package. I used white filters and dyed them two shades of pink.
How to dye your coffee filters:
I decided to use two different shades of pink to make these roses. I used four cups of water and twenty drops of red food coloring for my vibrant pink filters and four cups of water and six drops of food coloring for my second color, pale pink. (You may want to protect your table with a plastic table cloth.)
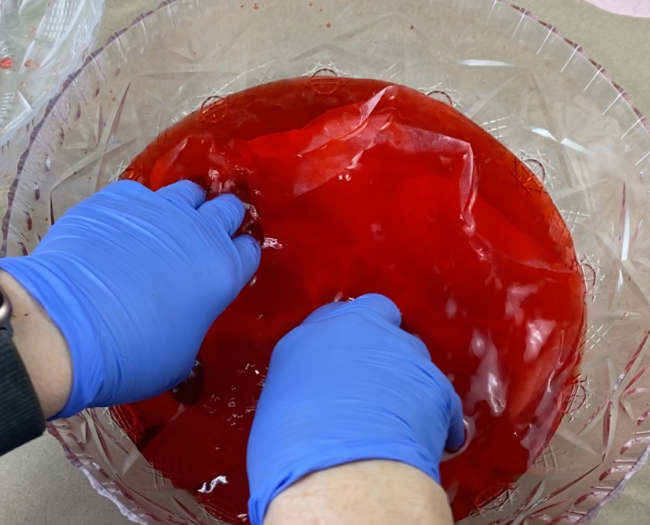
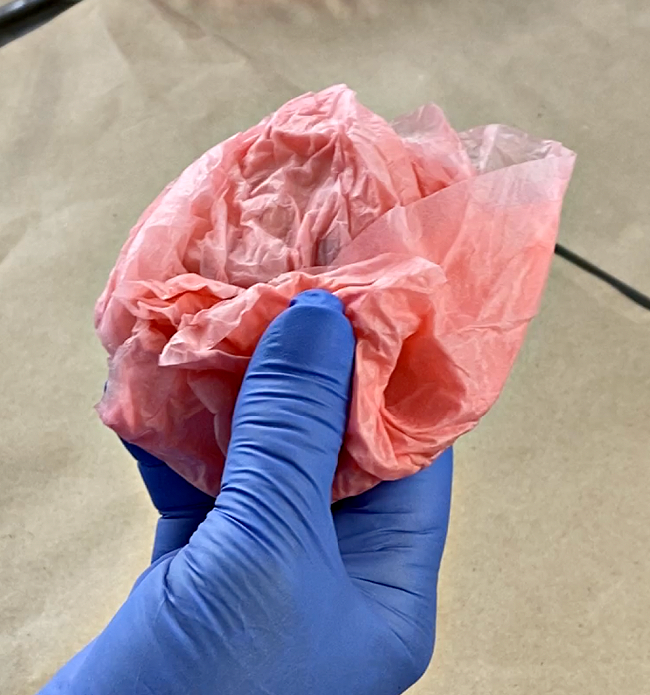
Separate your stack of filters and put ten to fifteen of them into the bowl of water. (Use a glass bowl or something disposable like my Dollar Tree bowls. You only need a small bowl for this step. (Plastic will stain from the food colouring. ) Let them soak for a couple of minutes and then gather them in your hand and squeeze as much of the water out of them as you can. You can also leave them soaking longer or shorter to get the desired effect for your own flowers. In addition to removing the water, by squeezing them, you also add texture to the coffee filters. You will want to wear gloves to protect your hands or have colorful hands for a few days! Experiment to create the beautiful colors you want for your paper roses.
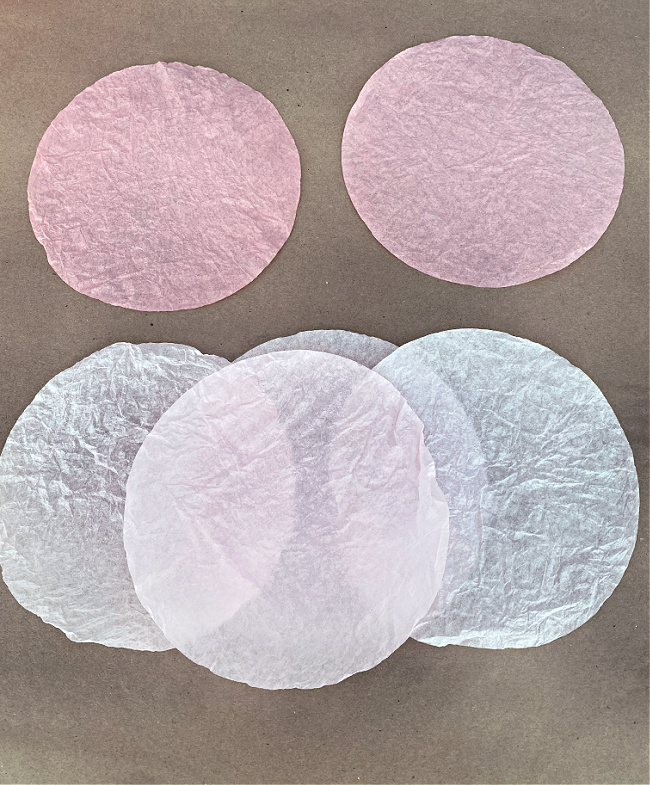
Gently separate the filters (although they are fairly tough) blot them with paper towels and then and lay them out on parchment paper or kraft paper to dry. They should dry fairly quickly, but make sure they are completely dry before starting to make your roses with them. I suggest leaving them overnight for the drying time.

There are so many different methods for coloring your coffee filters, but I like the food coloring method.
How to cut your coffee filter petals:
When your coffee filters are dry, you may stack them according to color. I have provided detailed instructions for you here. To make the roses like I have shown you here, you will use two of the darker pink coffee filters and four of the lighter pink filters.
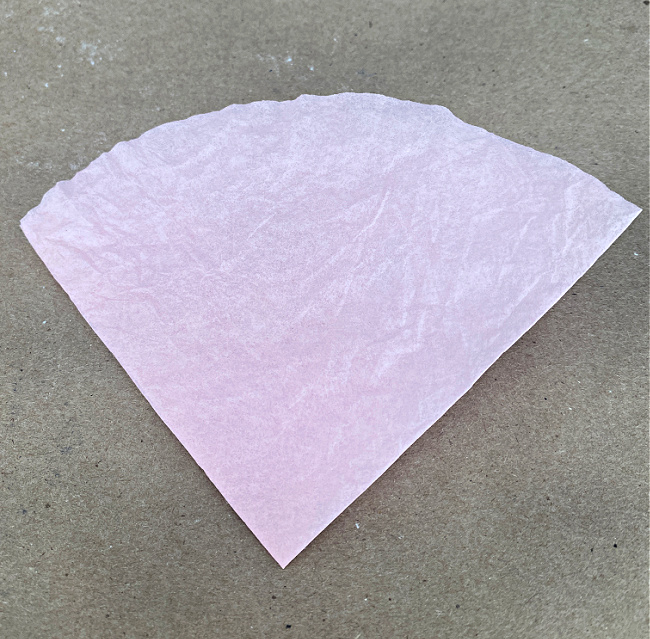
- Fold your first filter in half so it kind of looks like a taco.
2. Fold it half again.
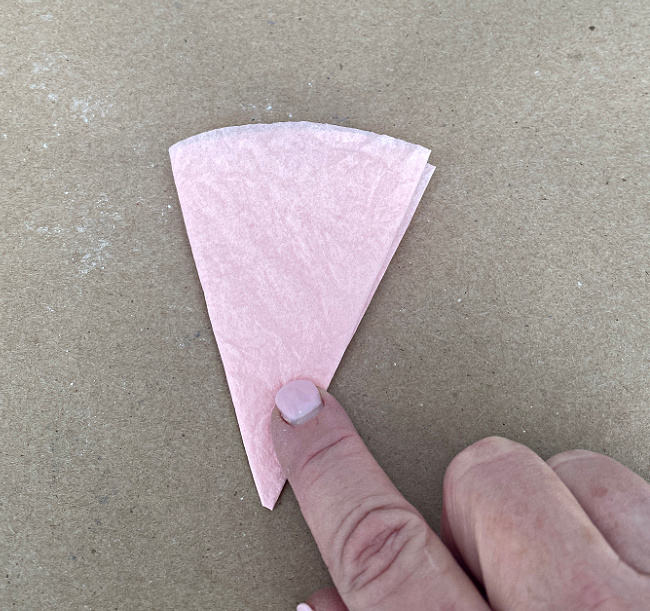
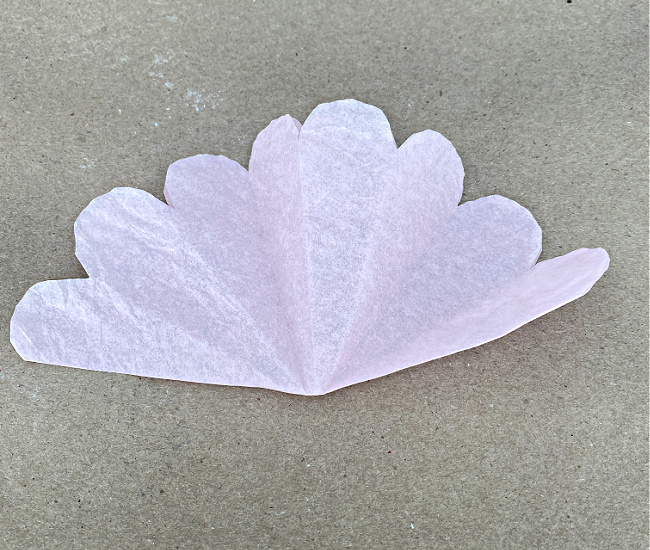
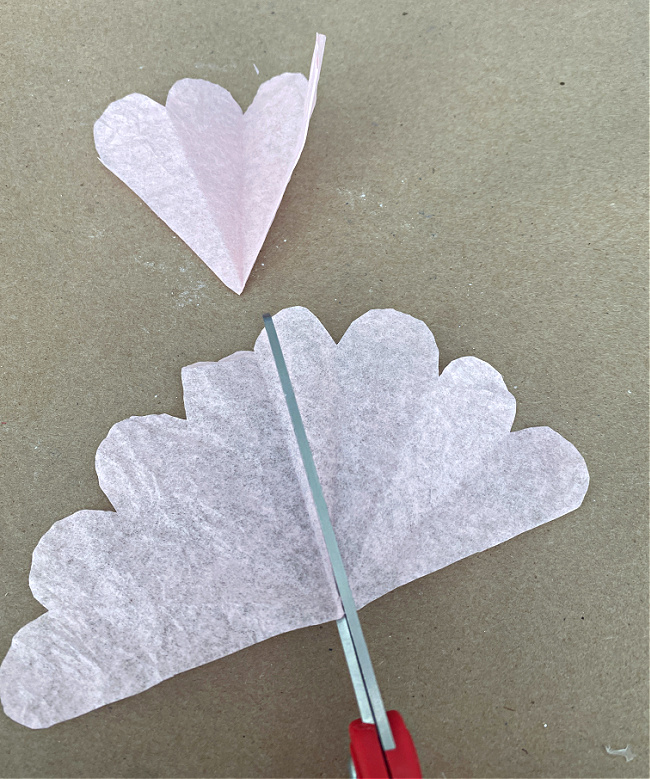
3. Fold in half a third time. You will have a point at the center of the filters as shown above.
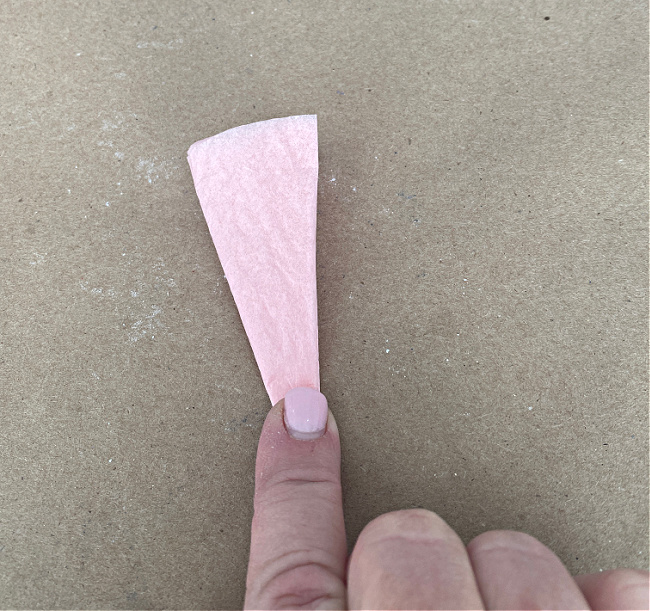
4. Fold the coffee filter in half one more time.
5. Cut the top of your folded coffee filter as shown in the photo. It should look like it is the shape of an ice cream cone.

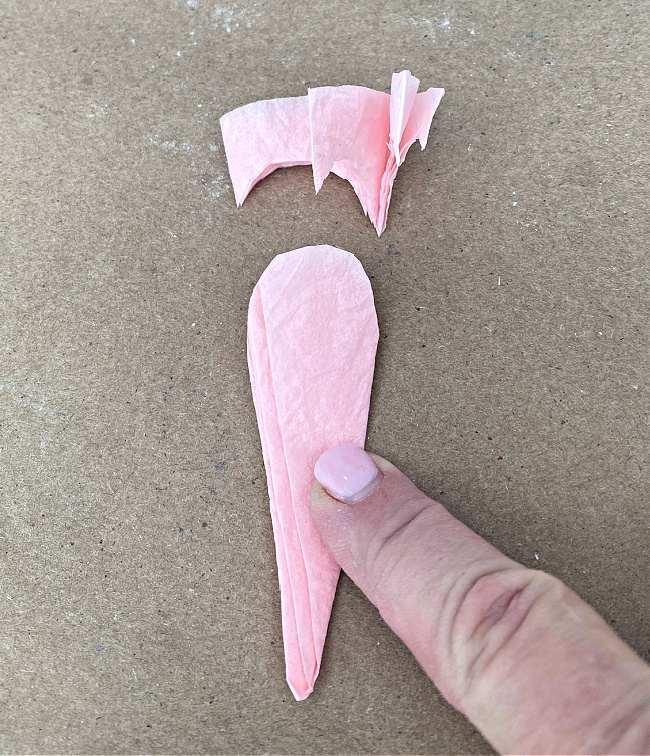
Unfold the coffee filters back to the “taco” shape and cut each one in half. This will make your petal shapes for you.
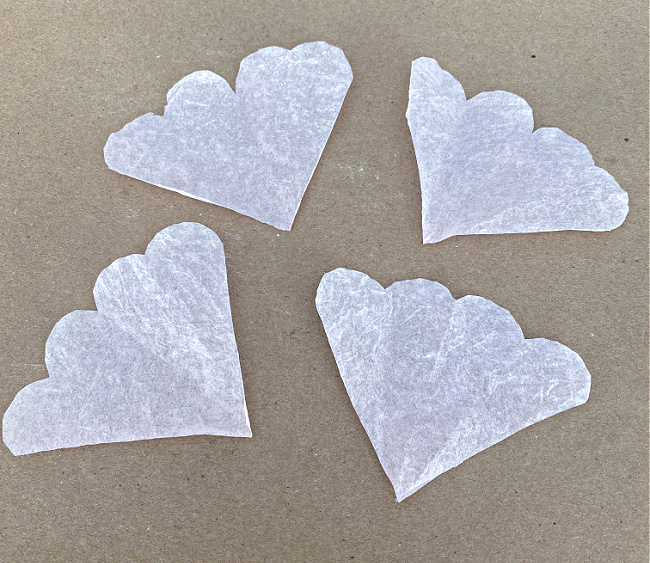
You will have two pieces that are both still folded.
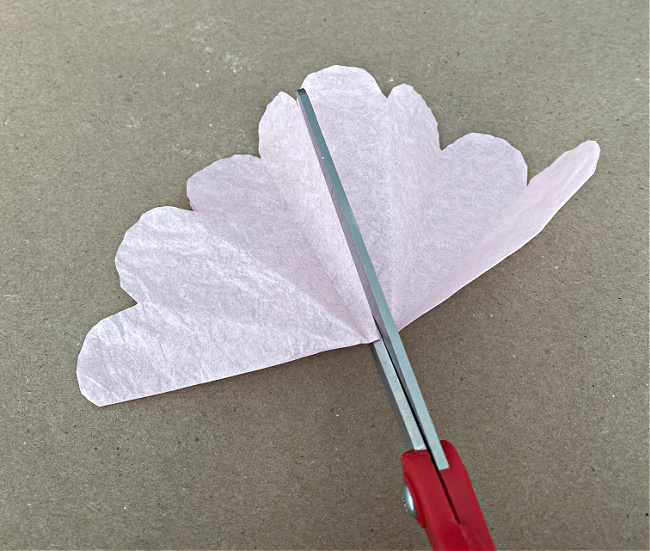
Unfold each of those and cut each one in half. In the image below, the top piece has not been unfolded yet, the bottom piece has been unfolded and is being cut in half.
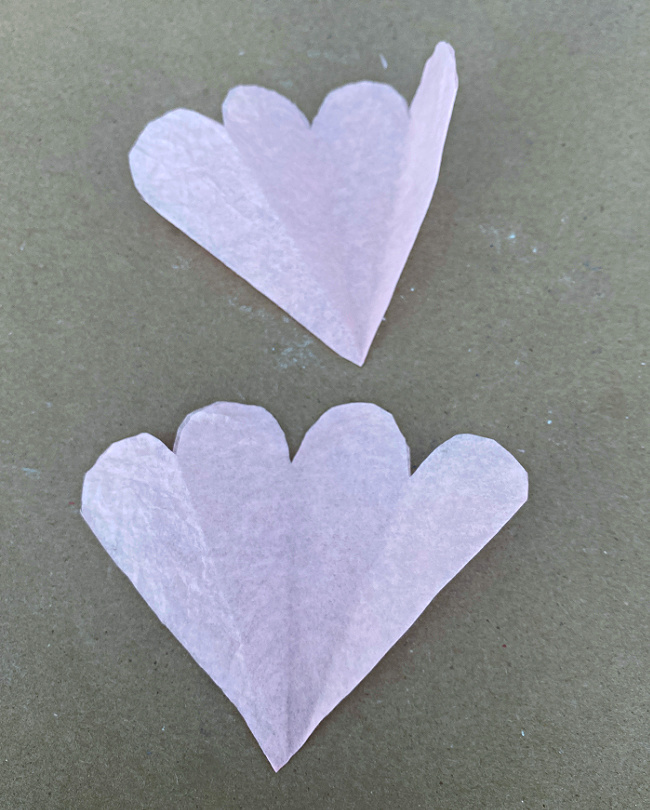
You will have four pieces from one coffee filter that look like this:
You will want to do that with all of your six coffee filters. You will have 16 light pink ones and 8 dark pink ones. Remember, you can make your roses all one color, or add more shades to yours by dying your coffee filters different colors.

How to assemble your coffee filter roses:
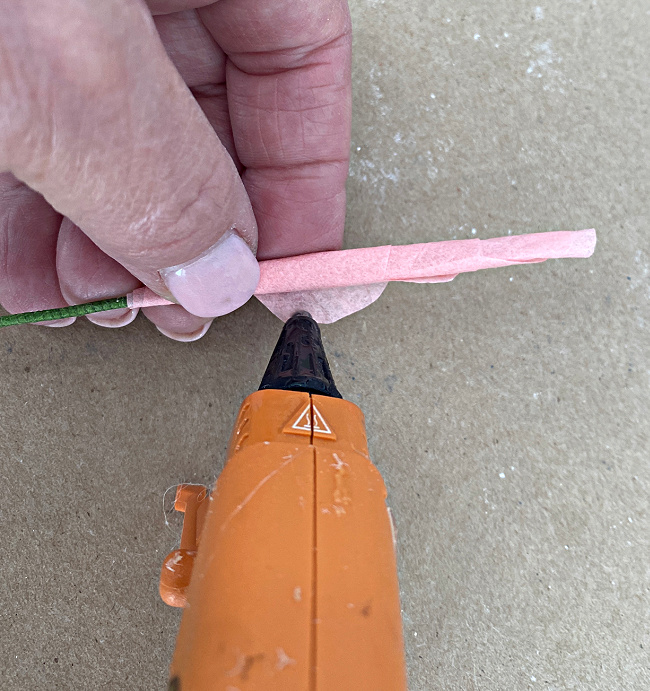
Begin with one piece of the darker pink coffee filter. Use a glue gun to put a thin line of glue down the edge of a piece of paper wrapped floral wire. Lay it down on one of the darker petals.
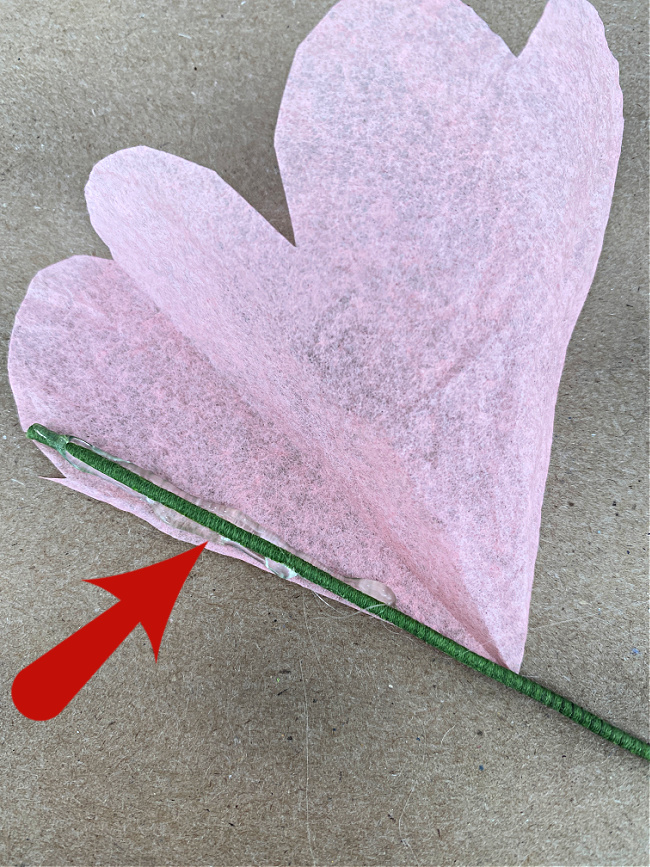
Lay this down upon one piece of wire and begin rolling the paper fairly snugly around the wire for your first layer. Alternatively you can use wooden skewers (or wooden dowel) for a more rigid stem.
When you get to the end of your petal, put a dab of hot glue (low temp hot glue or white glue) onto the paper and push it down to secure it.
For the second layer, take a piece of the darker pink paper and repeat the process, sticking it to the piece you already have. At this point I like to squeeze the coffee filters tight around the wire at the base of each flower and add one layer of floral tape to secure the base.
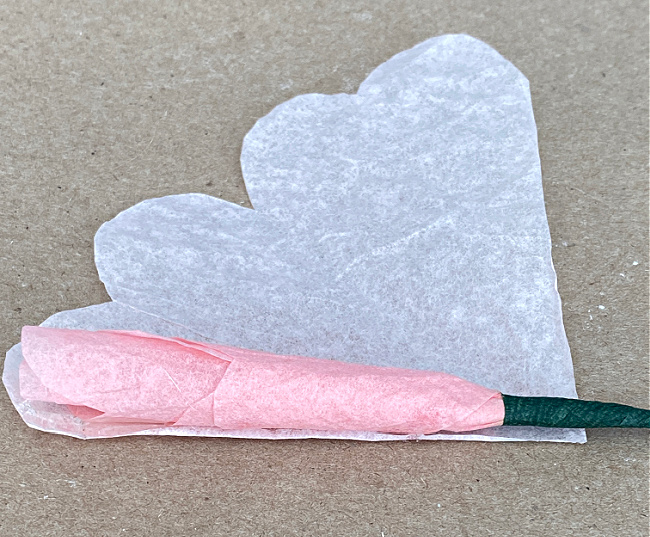
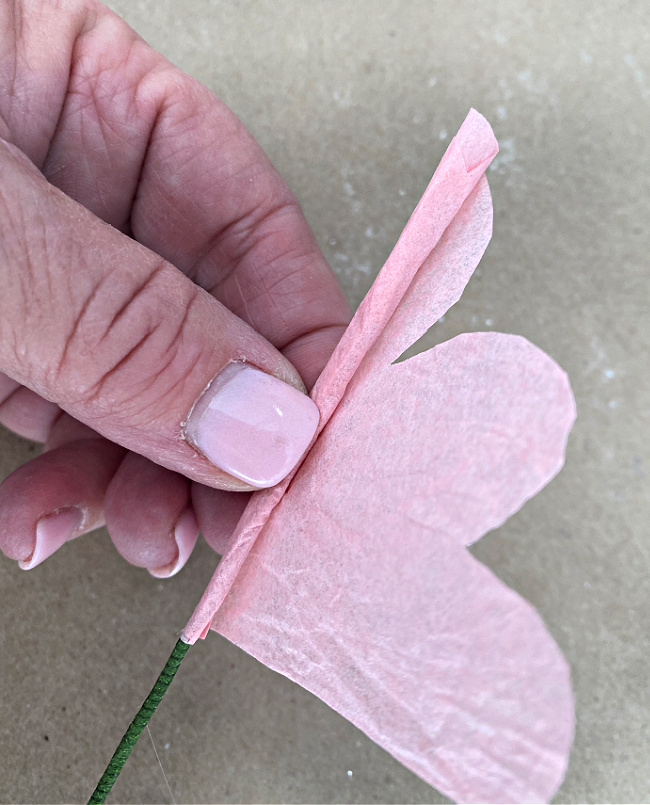
Then repeat the process with one of the lighter shades of pink. As you add each additional petal, you will not wrap it quite as tightly. Each additional petal gets attached a little more loosely to allow the rose to open up. Your center of the rose is taking shape and should look something like this:

Now you will continue adding petals. Alternate one light pink with one dark pink until all you have left is the lighter ones. Below you can see how to add the additional petals.
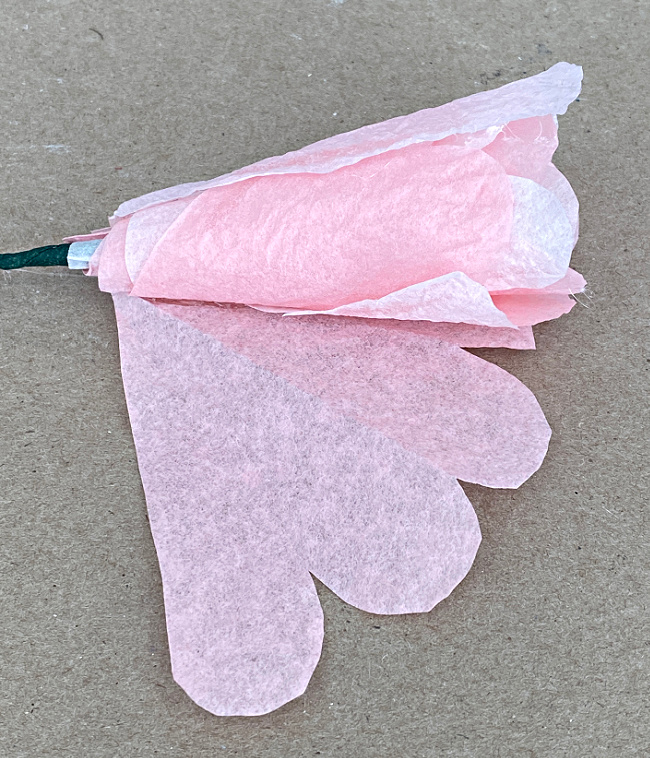
As you get to the outer layers you will want to start adding glue to the petals as shown below in a ‘V’ pattern near the bottom. You can always add more glue if they flop around too much, but you want to be able to curl the top of your petals when you are finished with your rose. You won’t be able to do that if you have glue toward the top of them.

Your rose is going to be looking like this before you add the last few petals onto it. (Don’t mind the glue strings, they will all be gone.)
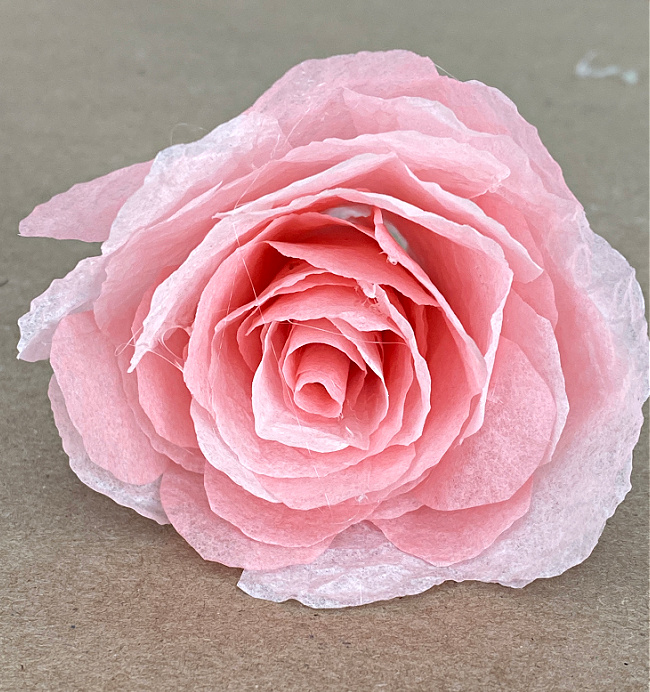
When all of your petals have been added, squeeze the bottom of the rose tightly.

Next, take some floral tape and wrap it around the squeezed base and down your wire stem. I usually cut my wires in half so they are about nine inches long, but you can make long stemmed coffee filter roses and leave the wire at 18 inches if you prefer. Wrap the floral tape down around the entire stem.
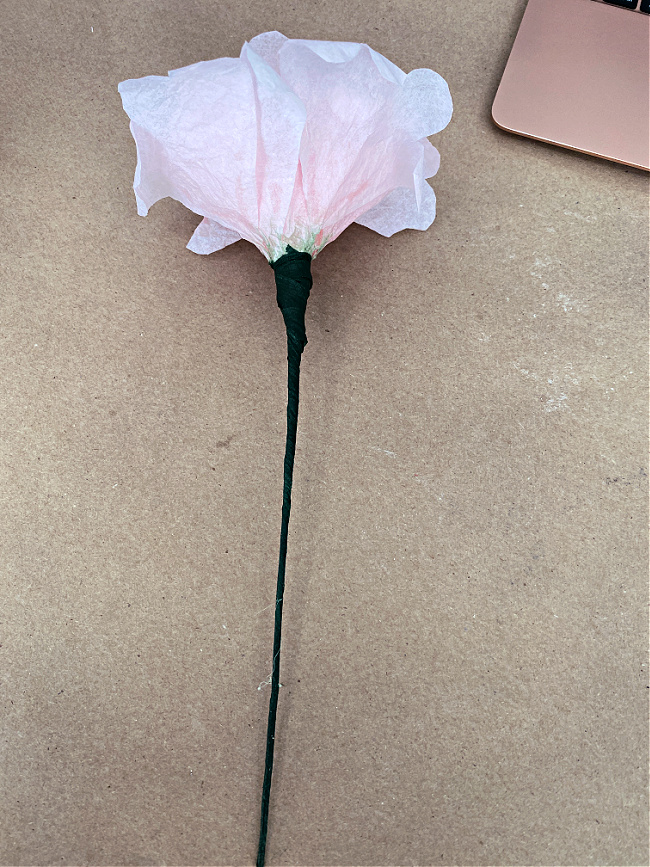
Finish off your rose by curling the outer edge of your outer petals. Simply wrap them around a pencil or a mini glue stick like I have. Hold the edge of the petal for a moment and they will take on the curled shape.

Supplies needed for making roses from coffee filters:
- basket style coffee filters
- food coloring (This assortment will give you lots of options for coloring your roses)
- sharp scissors
- wire cutters
- glue gun and glue (I recommend LOW temperature for this project)
- paper wrapped floral wire
- dark green floral tape
PIN THIS!

I hope you try these easy coffee filter flowers and experiment with different colors and sizes! It is a lot of fun to make these! I want to experiment with additional colors and making ombre coffee filter roses. I am going to try to make some different coffee filter flowers soon, too! I promise to share the projects I am going to make with these beautiful roses as soon as I can! Once you have your finished flower, go on to making more until you Have a bouquet of beautiful roses to display.
I made mostly large flowers for my rose bouquet, but you can easily vary the size you make. For an even fuller flower you can add additional petals.
They look fabulous Chloe. I love the two toned look of pink. Such a great project on a budget too.
These are beautiful! I’m looking forward to making these. Your directions are easy to follow too!
Thank you Cathy! I try to always make the directions easy so that people can follow them and recreate whatever project it is!
I can’t tell you how much I love these Chloe. I hope mine will turn out as well. I’ll be featuring this post on my weekly wrap-up on Sunday.
I have done something similar with tissue paper. The colours are much more vibrant but you can lose that softness.
Chloe, I really want to try this. Maybe we should make them while everyone is here. For the Derby party? They are just beautiful. Sorry I missed this post but saw it today on Andrea’s Design Morsels! I am so focused on roses lately..
Wow – you are amazing Chloe! These are just lovely, and a really great tutorial. Thanks for the fabulous inspiration!
Thank you so much for sharing your talents with us. I have always wanted to make coffee filter flowers. Your roses turned out beautiful.
Thank you so much Sherryl! I am thrilled with how they turned out, too!
So glad you joined us and linked up at Farmhouse Friday this week. I love these and will be featuring them this Friday. Thank you and hope you link up again.
Chloe,
These are just stunning. You are so creative and I’d love to share these on my Sunday, Dirt Road Adventures this week. Thanks for all your inspiration.
Thank you Rachel, I would be honored!!
I’ve tried making roses out of other things but I seem to lose direction but following your ste by step I can actually say I DID IT!
Thank you for making it easy for me to cause I finally made my
Brenda, THANK YOU!! It makes me so happy when someone tells me that my tutorials helped them create something! I am glad you did it!!