
Make an Ivy Topiary
I love having green plants in my home, but I do NOT have a green thumb. How about you? There are a few indoor plants I can keep alive, but I had this spot I would like to have an ivy topiary. The first thing I had to decide on was what kind of topiary. There are all kinds of topiary shapes. I didn’t want to make an ivy topiary on a grapevine wreath or a heart topiary, so I opted for this ball topiary.
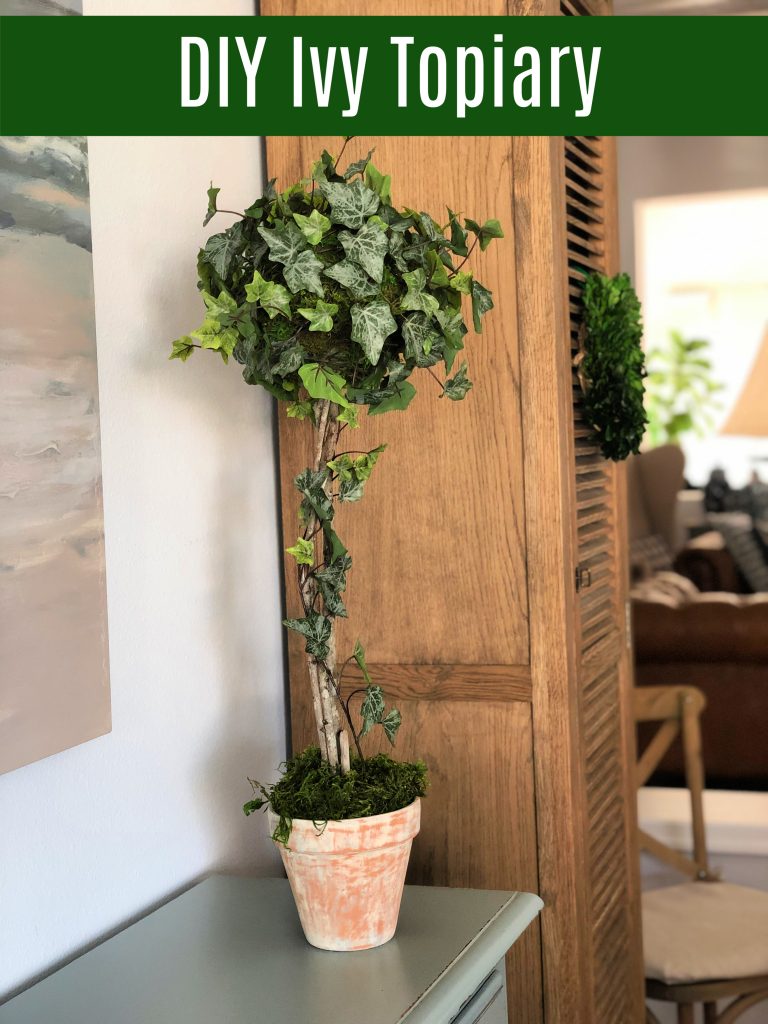
When it is time for a change in decor at home for me, it is time for me to start getting crafty. I absolutely love english ivy and thought I would try to make an ivy topiary.
This post contains some affiliate links for your convenience. If you click on any of the links in this post, I may get a small commission that will in no way affect the price of anything you might purchase. Click here to read my full disclosure policy.
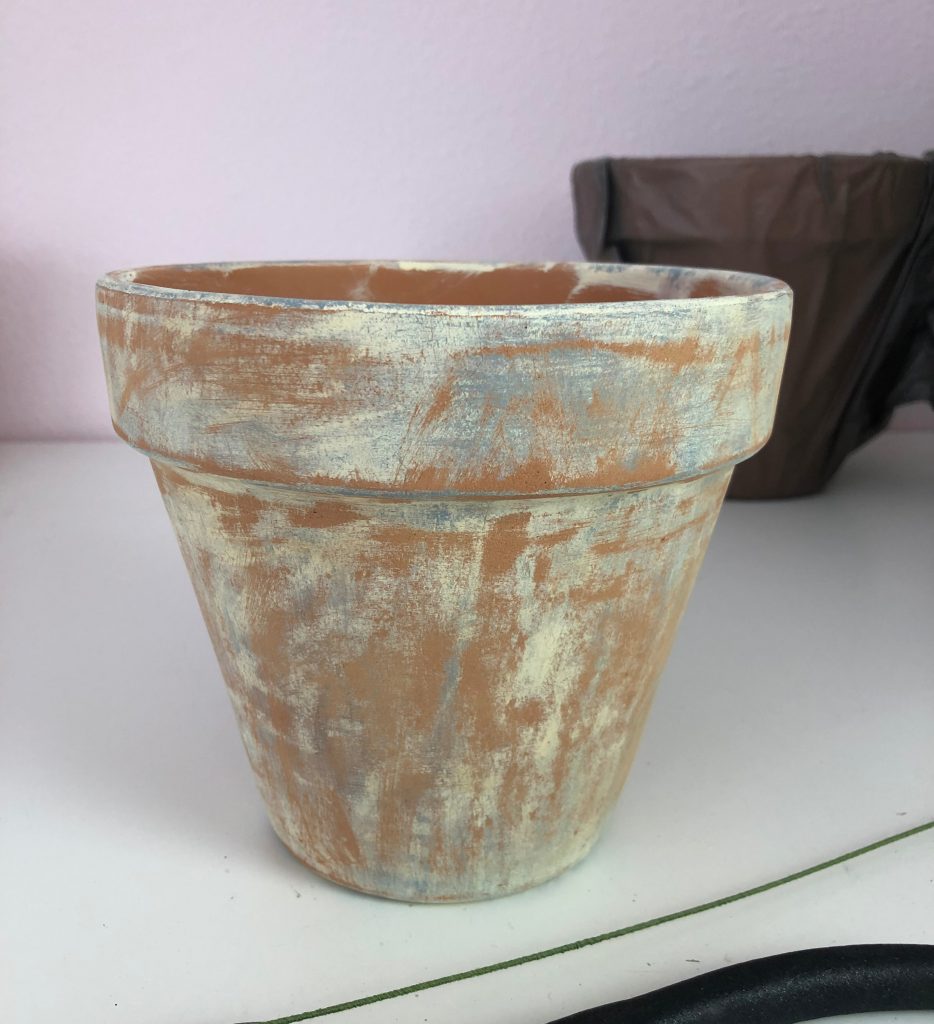
I began with one of my terra cotta pots that I had aged with paint.
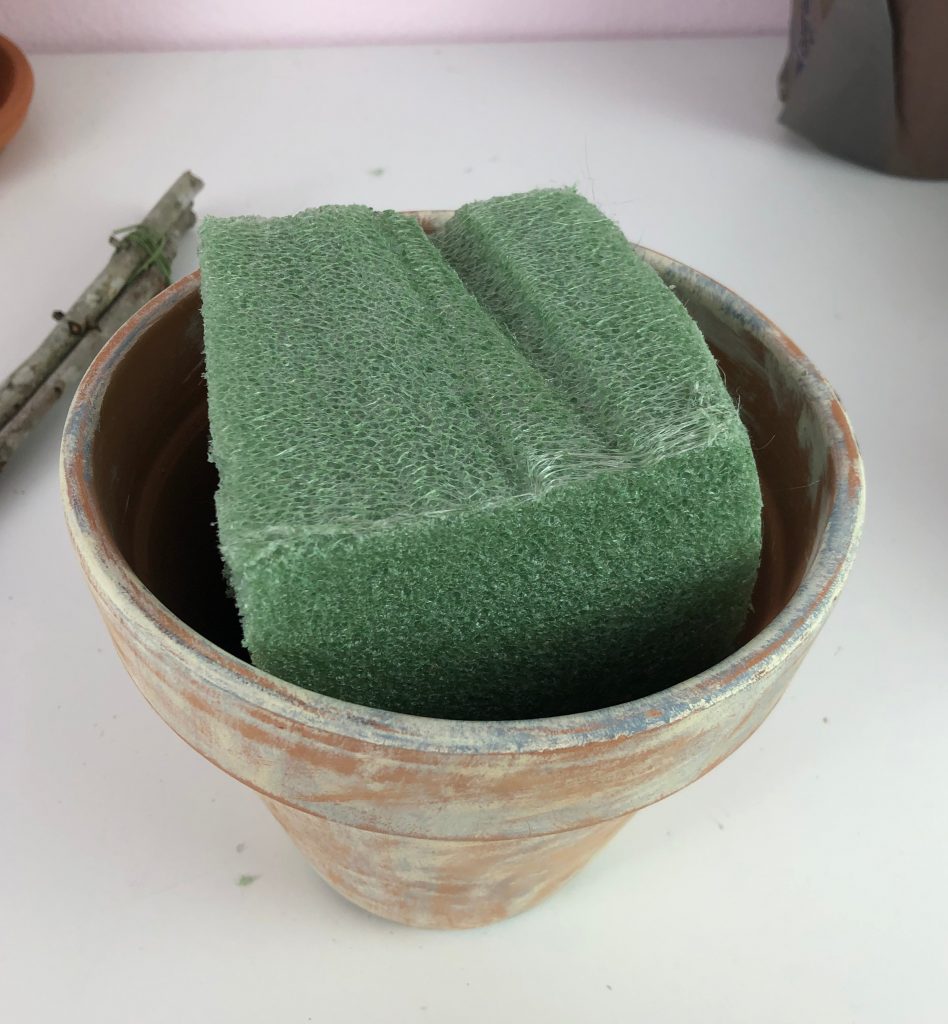
Wedging a piece of styrofoam tightly in the terra cotta pot for the base of the topiary.
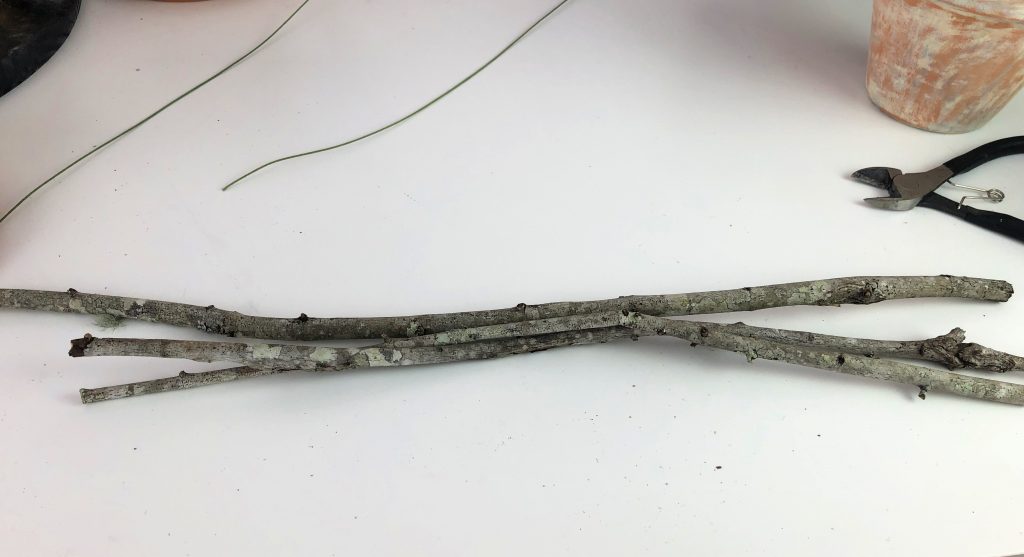
I picked up 3 branches in my yard, choosing as straight of pieces as I could find. Cutting the branches to the same length before I will secure them together.
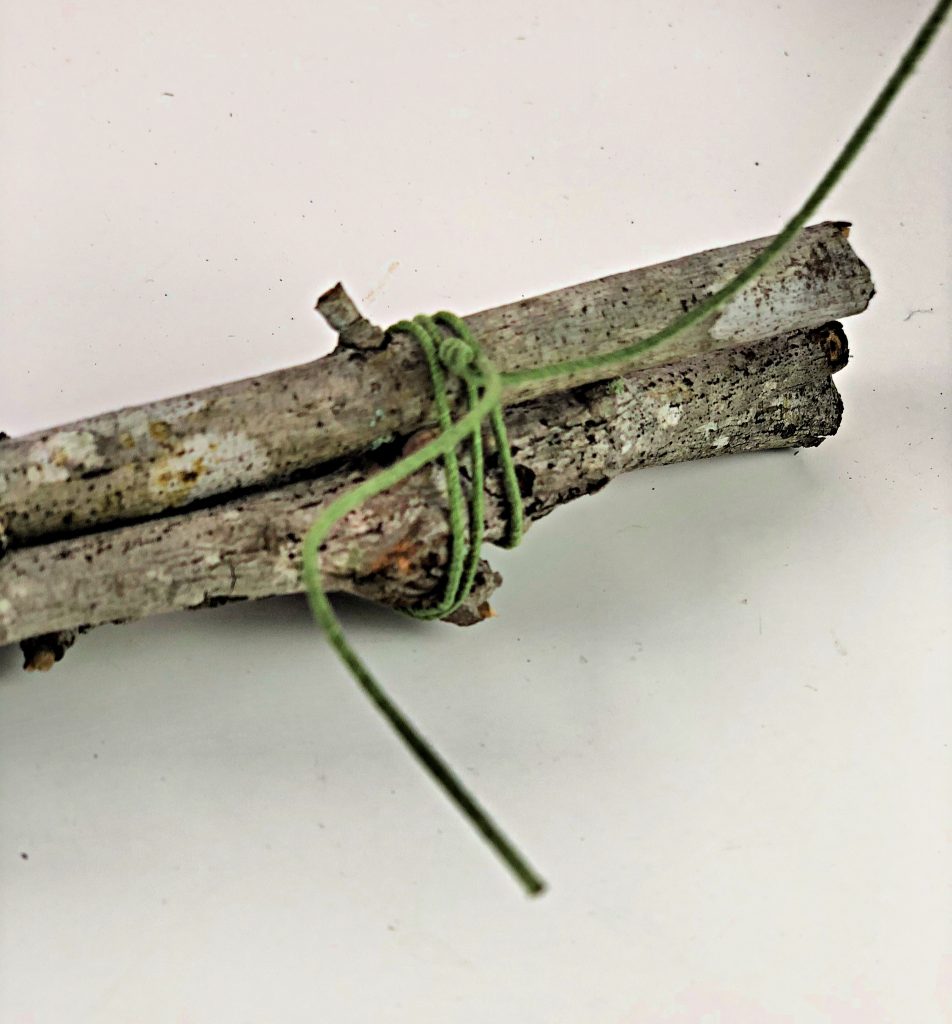
It was important to use floral wire to secure the branches as tightly together as I can to serve as my trunk for my topiary.
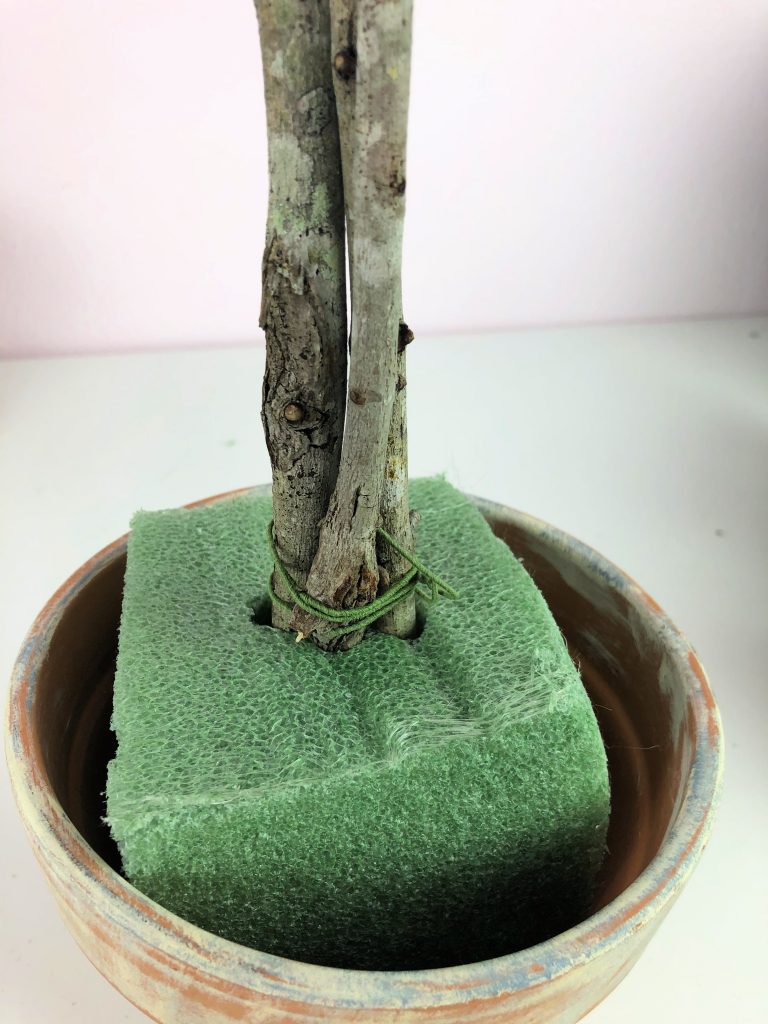
I pushed the end of the the bundled branches into the styrofoam in the flower pot.
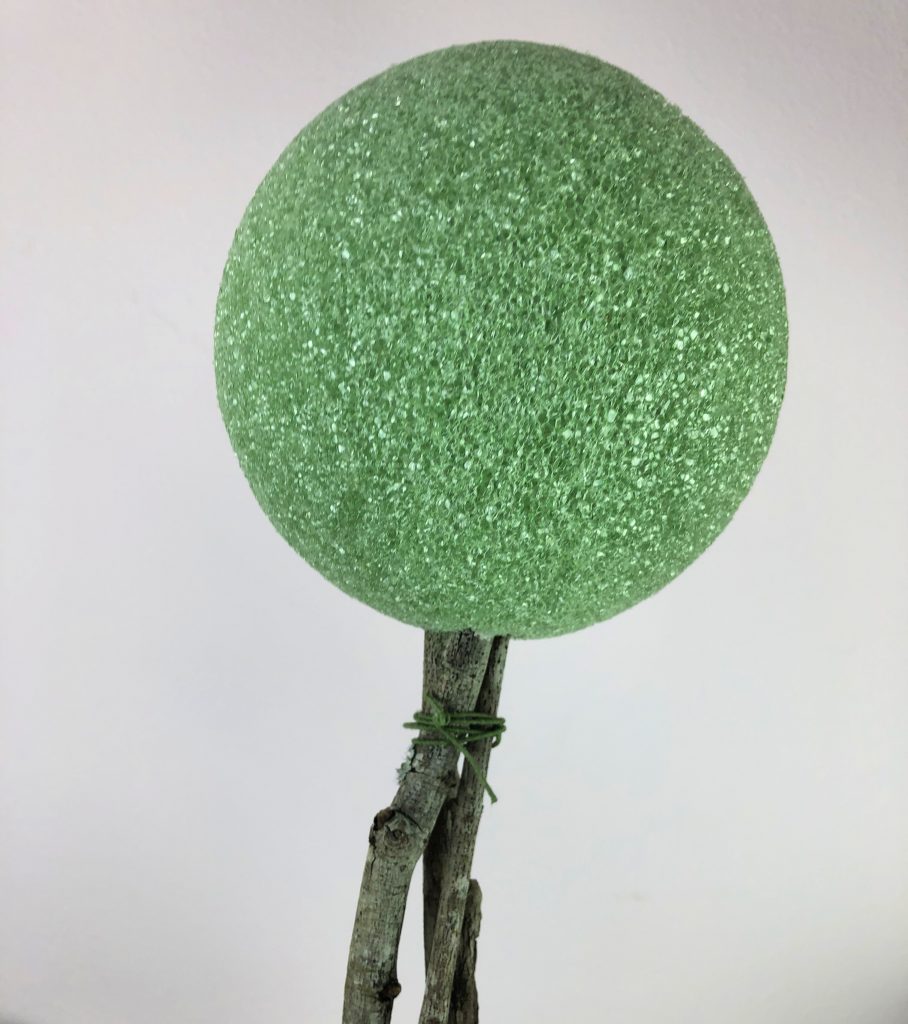
For the top of the topiary, I firmly secured a 6 inch styrofoam ball firmly onto the branches. If you don’t want to use styrofoam, you could use a round wire frame for the top of your topiary.
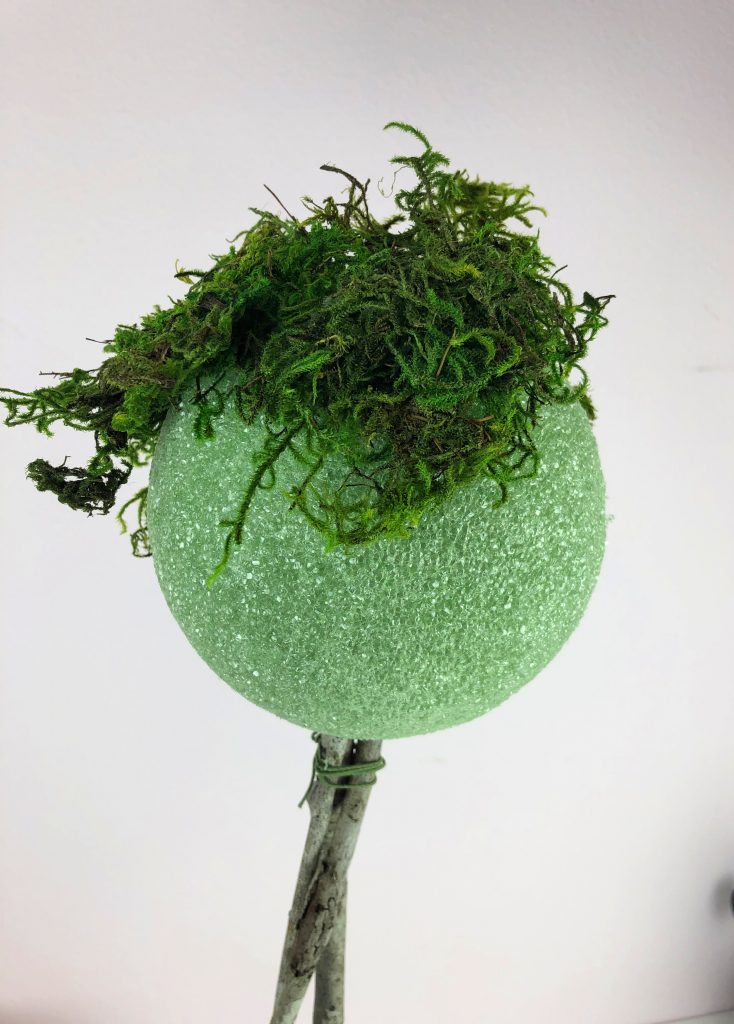
Using floral or “s” pins, I secured preserved moss onto the the ball. I continued pinning the moss onto the ball until it was completely covered.
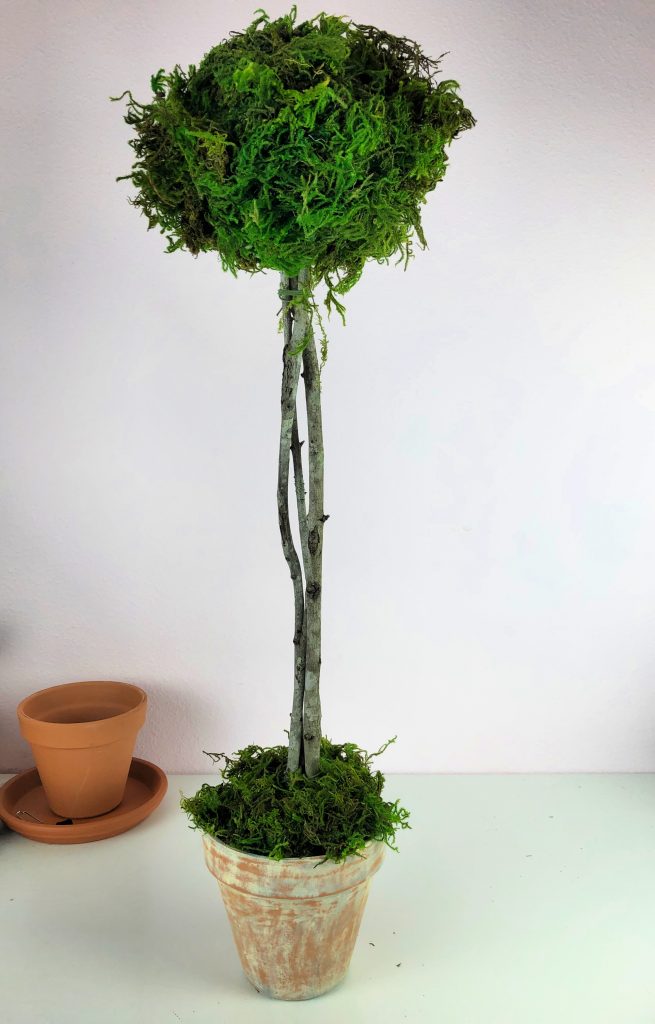
The same moss was used to cover the styrofoam at the base of the plant, also. One full faux ivy plant would serve as my greenery for the topiary.
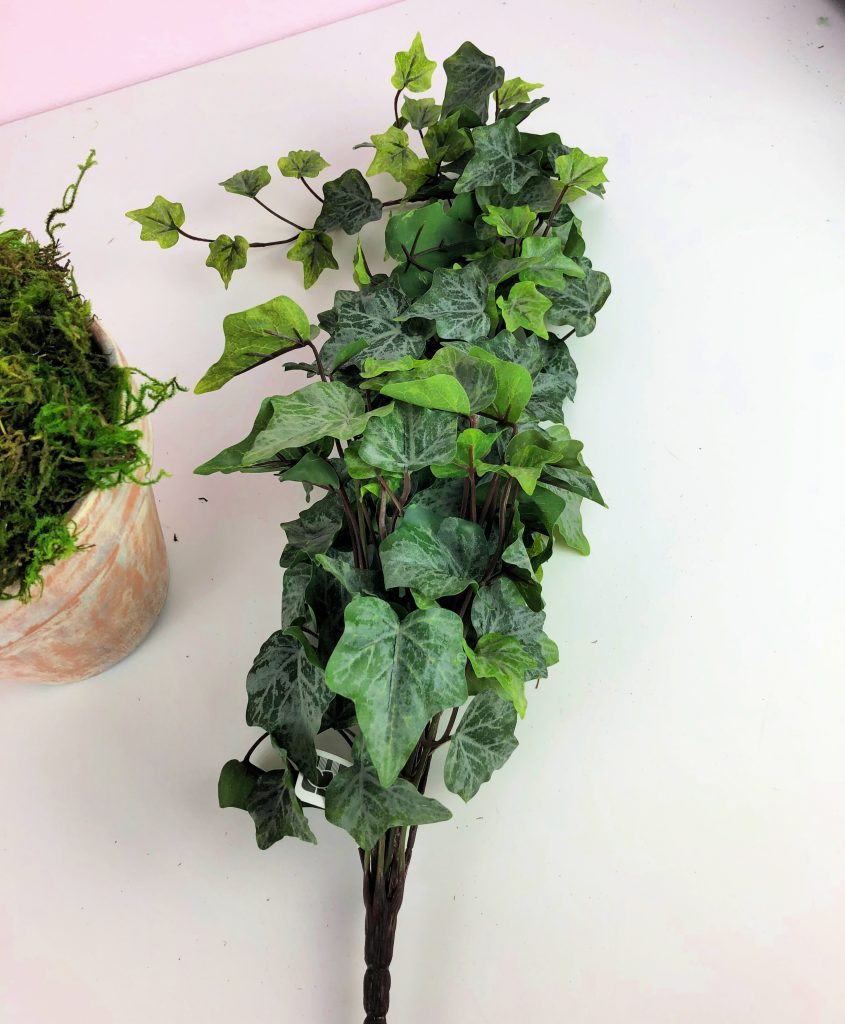
I selected a nice faux english ivy to use to create my topiary.
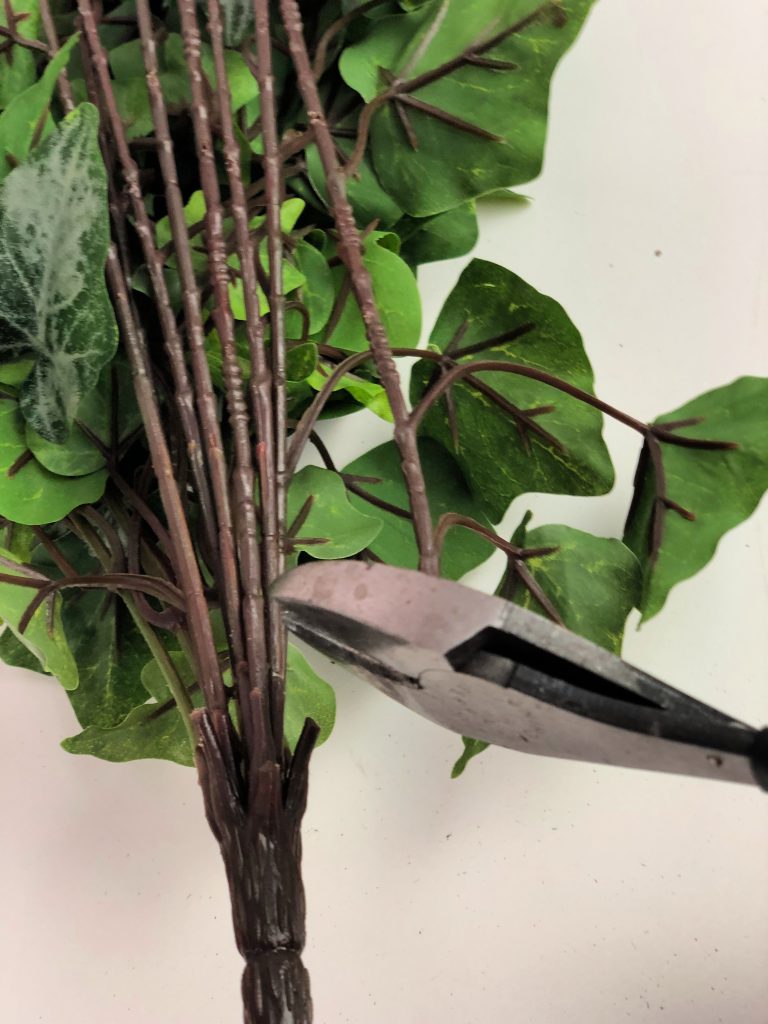
Next I used wire cutters to cut the different stems of the ivy apart.
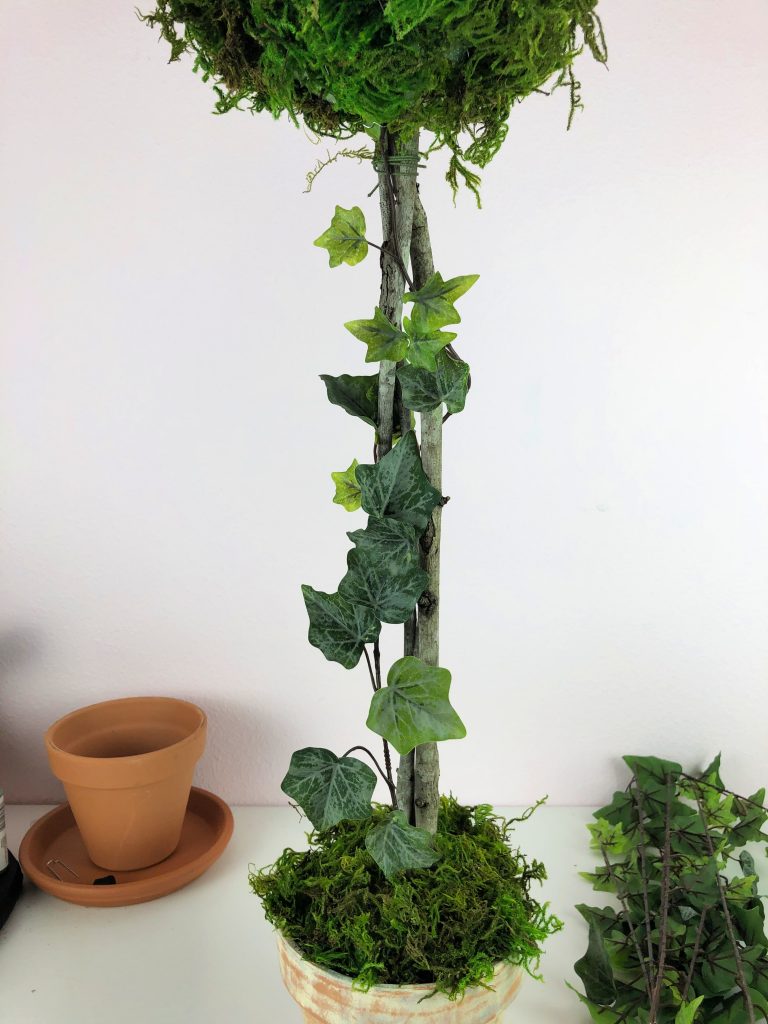
Using wire cutters, I cut each stem off of the plant. Beginning with the base, I stuck one long ivy tendril into the base and wrapped it around the branches, securing the top end into the bottom of the styrofoam ball
Time to turn it into a topiary! I began pinning each stem individually, wrapping them around the ball to cover the ball.
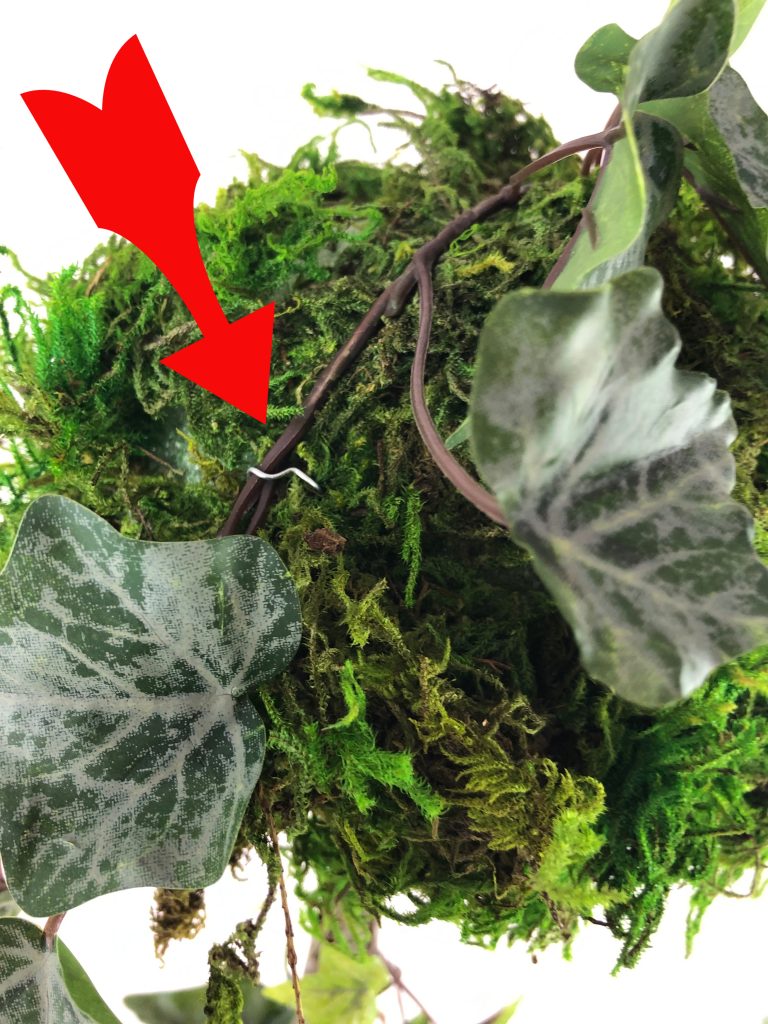
This photo shows the pins I used to secure the ivy. I had to make sure I used enough ivy to cover all of the pins, too.
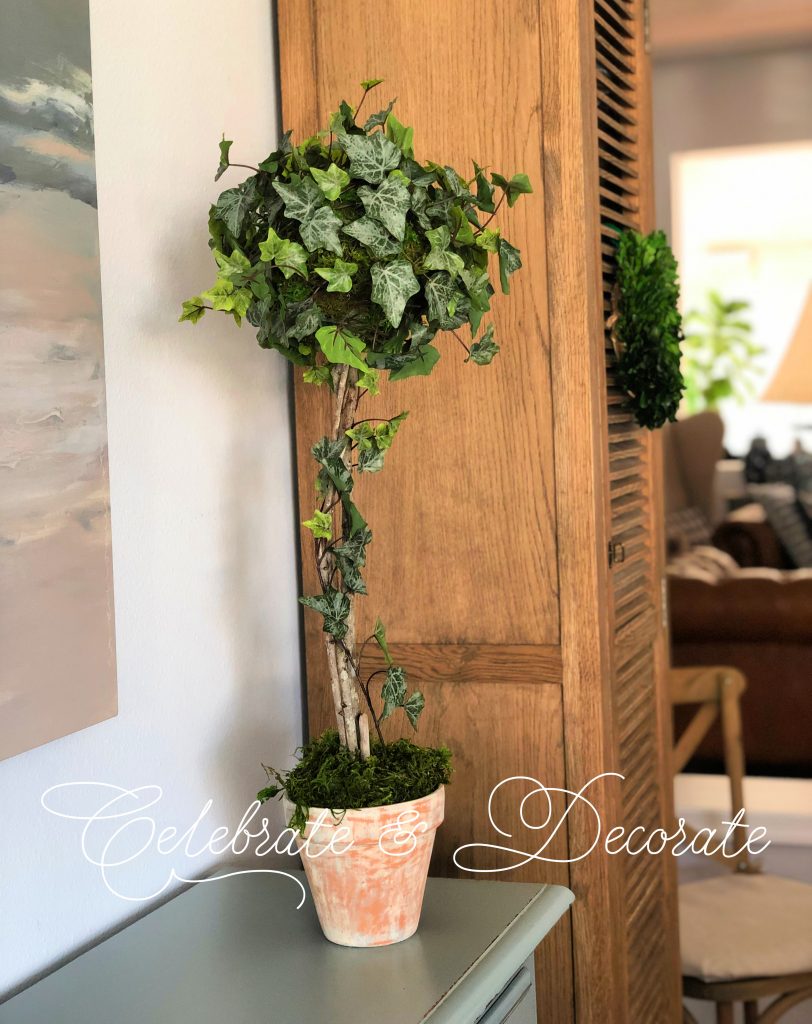
I have a beautiful new ivy topiary ready to display. I once read that every room should have one green plant and with my mediocre green thumb, that means some of them need to be artificial. This is a great addition to the top of my sideboard.
This is so very cute. Love the worn look on the terra cotta pot too. Great job. #BTL
Another gorgeous idea! Love it!
Thank you Bird!
Oh I love this Chloe, lots of possibilities here! Great tutorial, thank you!
Thanks so much Jenna!
Very professional looking — great tutorial!
Thank you Debbee!
This is one of the many things I love about you dear Chloe. You take the time to show us how it is done and this topiary is prettier than any of the expensive ones I have seen lately. great job…Hugs
Thank you Kari! I do try to show all of the steps so readers can replicate the crafts. You are so kind, thanks!
Gorgeous work and I bet you saved some serious bucks by making this yourself.
Thank you Sandra, you know that is less expensive than buying it!
Nicely done Chloe! You make everything look so easy, tutorial and all. Happy Valentine’s Day!
What a great job you did, Chloe! Better than many store-bought ones, simply because you fully covered it to make it look really real.
Thank you so much Rita, I agree, so many of these store-bought ones are kind of skimpy.
Chloe, I love this and have pinned it for future use! I am definitely making one of these and I know exactly where I’m going to put it. Do you have a tutorial on how you distress painted the flower pot? And, what size flower pot to balance out the 6″ Styrofoam ball? LOVE it! Hugs!
Your topiary looks wonderful, Chloe. It’s a beautiful decor piece. I love the step by step tutorial. Pinning to put this on my to try list.
Thank you so much Beverly. Whenever I do a tutorial, I try to provide enough instruction that anyone can re-create the project.
Perfect topiary, Chloe! I need a place where I can get sticks for free! 😉 Thanks for sharing on Homestyle Gathering!
Visiting from Serving Up Southern. Love this easy topiary idea! Definitely going to try it!
Thank you Joyce! It is so easy and adds such a lovely punch of green!
Hi Chloe! I love your topiary and was so happy to feature it over at Homestyle Gathering! Thanks so much for joining us and linking up.
Thank you Kim! I love creating decor for my home!
……love, love this idea! Thanks for sharing!!!