Make a Fantasy Pumpkin for Fall
Create an amazing faux pumpkin:
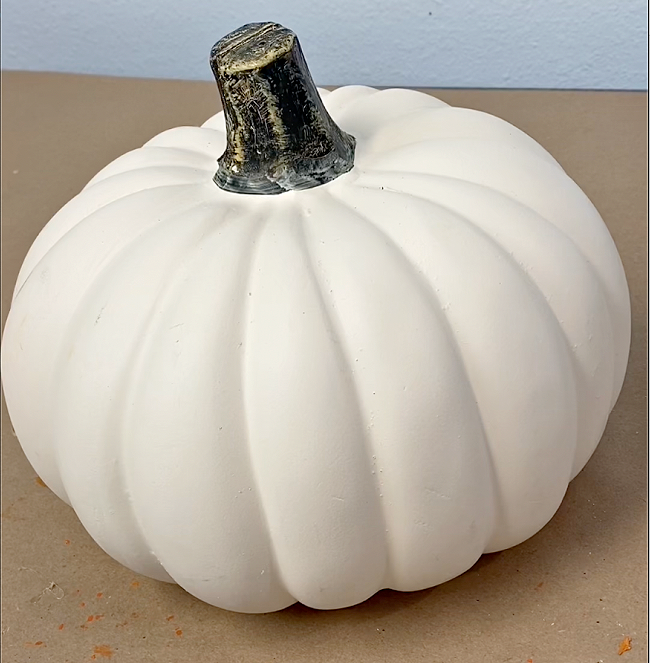
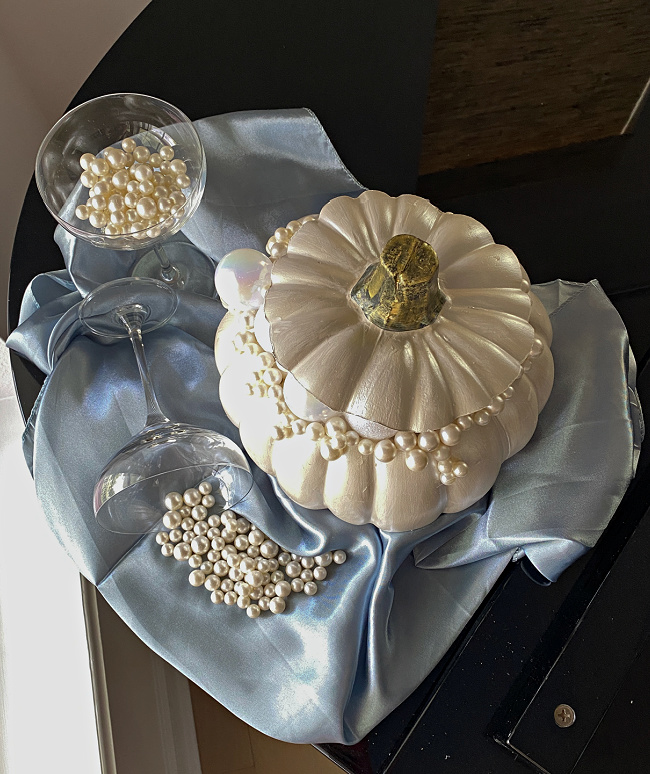
For this faux pumpkin creation, I selected one of Michael’s 9″ flat craft pumpkins. I think these look most like the Cinderella pumpkins with a flattened blossom and stem end.
Paint a faux pumpkin:
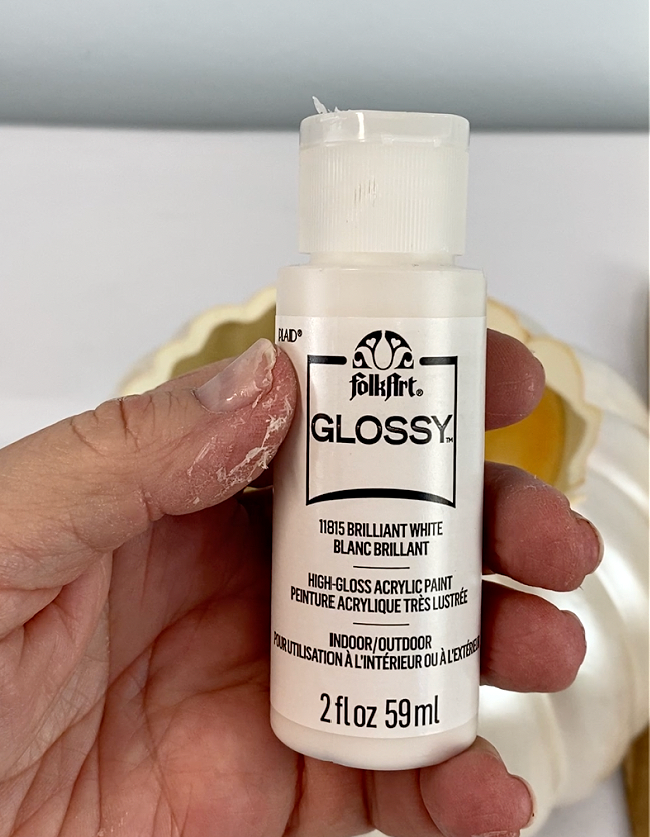
The first thing I did was to paint my pumpkin. I began with one coat of glossy brilliant white paint.
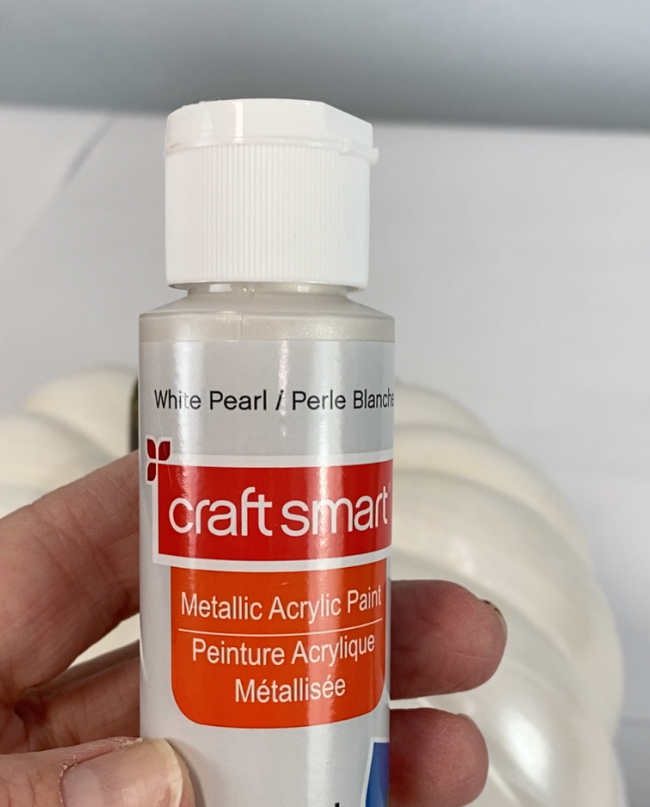
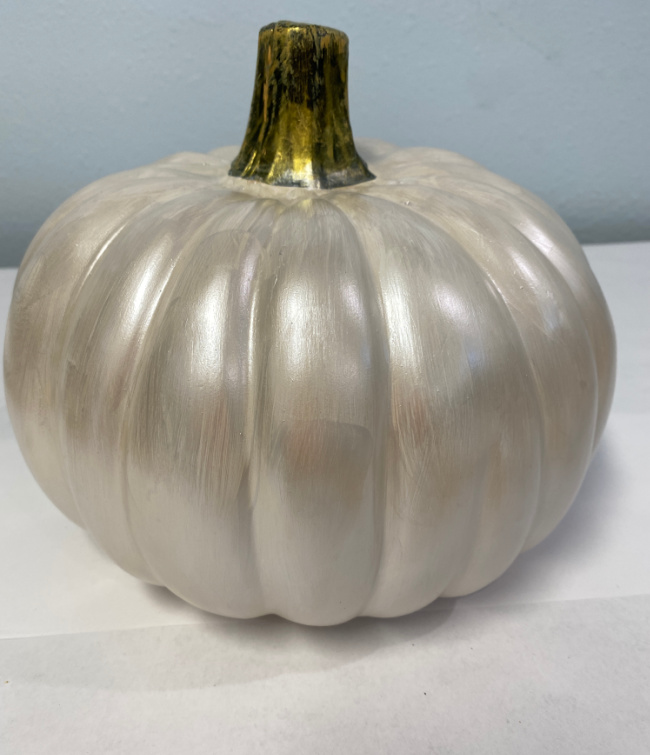
I followed that with Craft Smart White Pearl paint. I found this to be the prettiest of the pearlized paints. I painted two coats of this on the pumpkin.
This post contains some affiliate links for your convenience. Click here to read my full disclosure policy.
It looked beautiful just like this, but I had more plans for this little white pumpkin!
Cut the faux pumpkin:
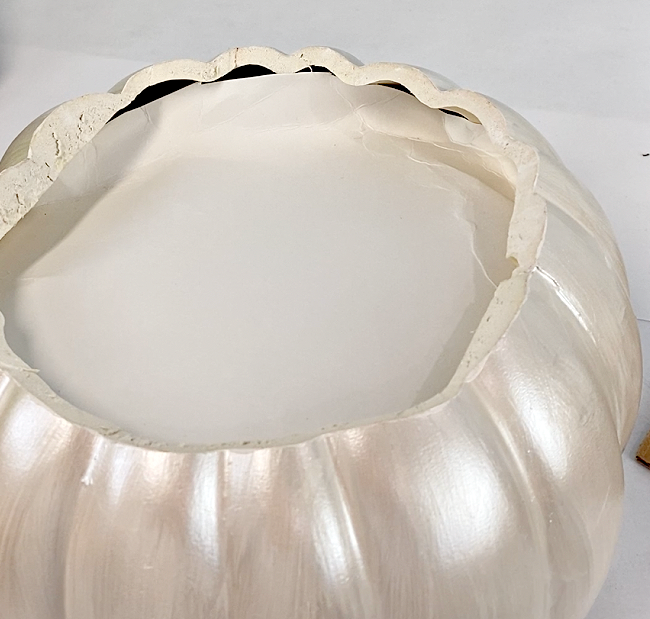
I used the hot knife attachment on my Versa Tool to cut around the pumpkin so I could take the top off.
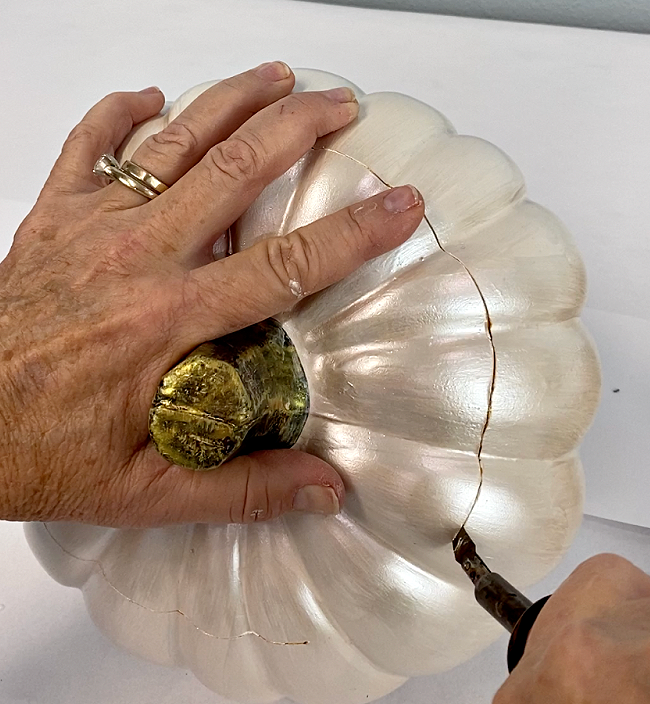
After cutting all the way around the pumpkin, I was able to lift the top right off.
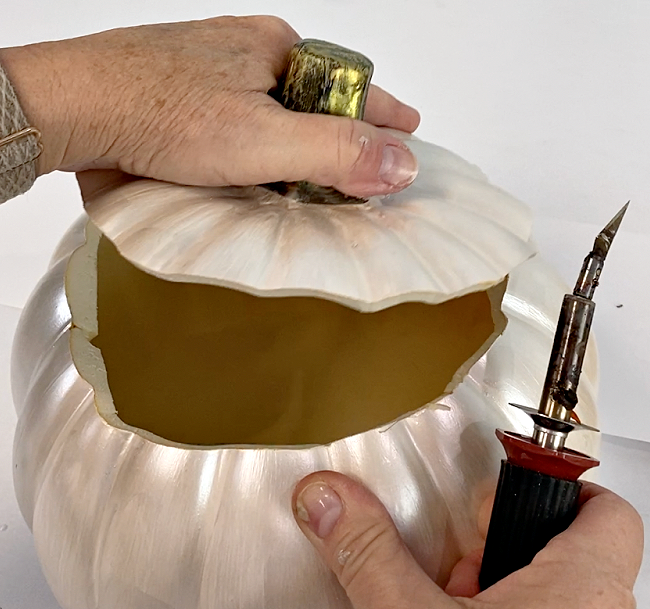
If you are trying this project, don’t be overly concerned about how much of the top to take off, just look at the photo and judge accordingly.
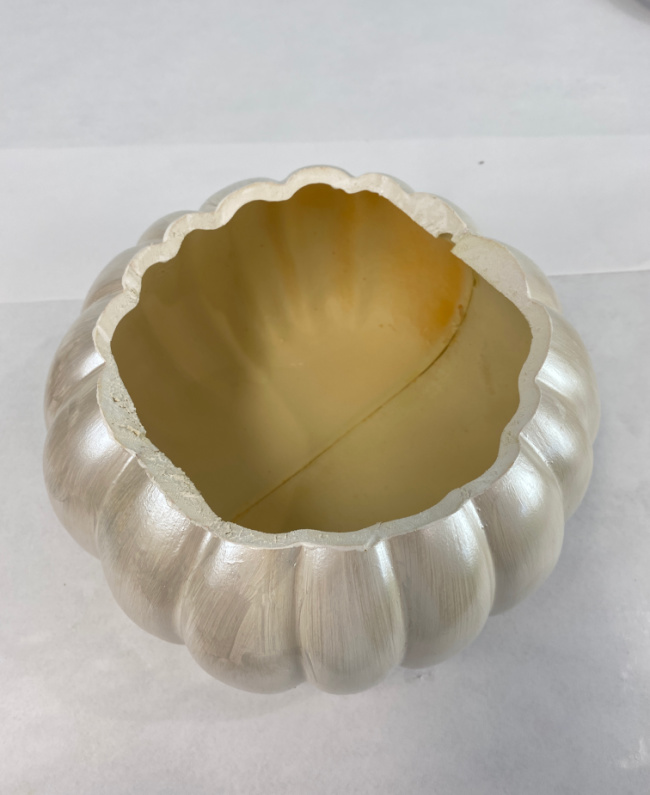
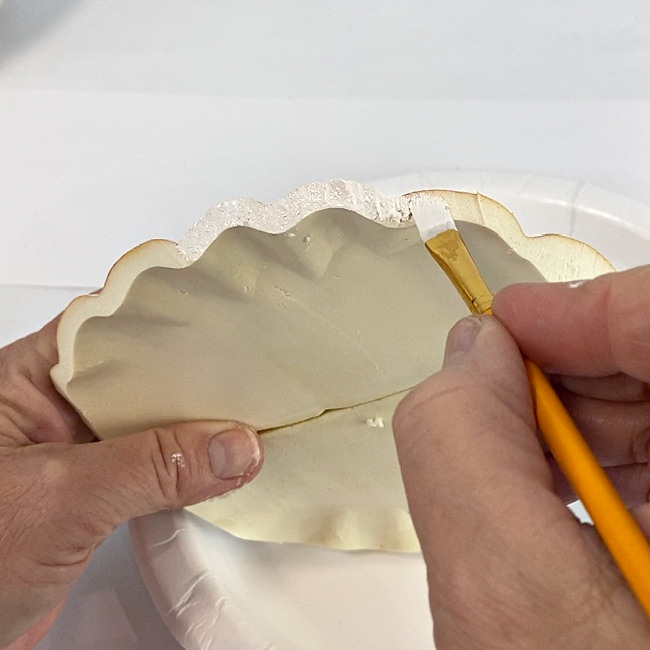
The cut edge will show some in this project, so I used the glossy white acrylic paint to paint the exposed cut edge of the pumpkin.
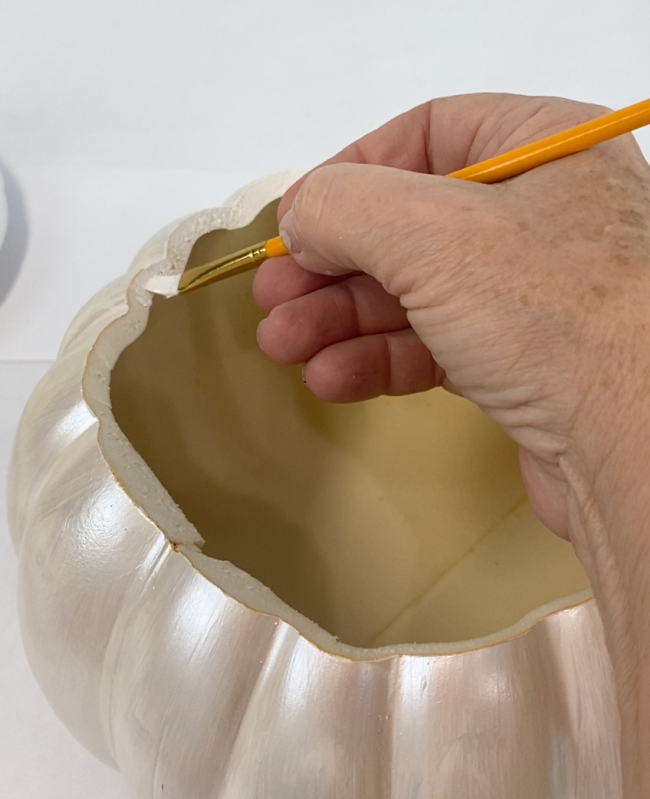
I also used the same glossy paint on the edge of the cut off top of the pumpkin.
Fill the inside of the faux pumpkin:
I cut some cardboard off of one of my many Amazon deliveries and folded some shape similar to this shown below. This is nothing that has to be exact, this is just filler for this pumpkin.
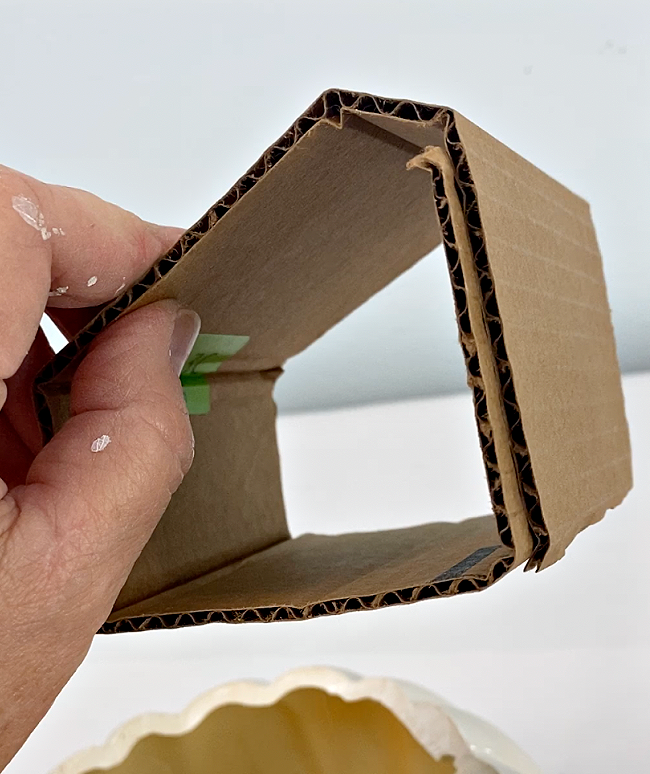
I used two of these cardboard filler pieces and used my hot glue gun to adhere them to the bottom of the pumpkin so they would not move around.
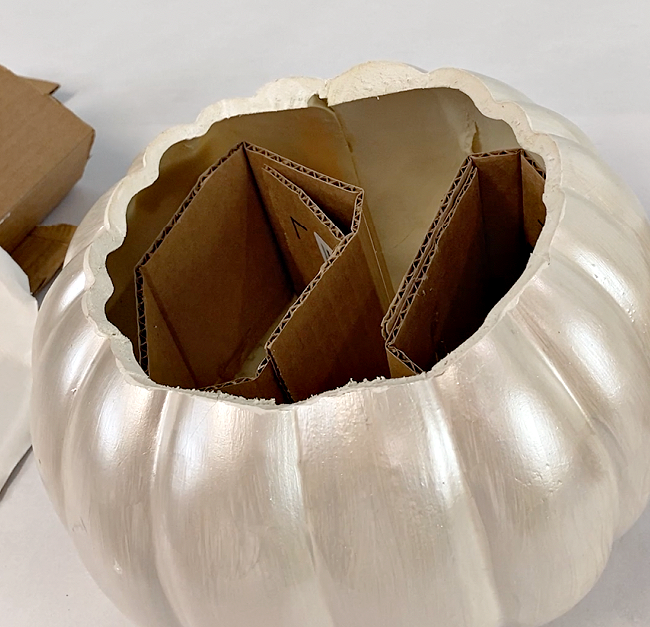
Next, I cut a white paper plate to fit it down into the pumpkin, but on top of the cardboard fillers.
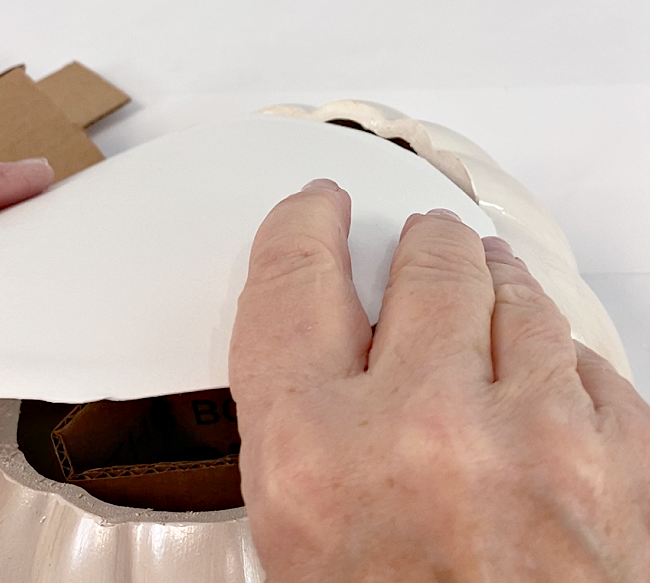
I just tucked the edges of the paper plate beneath the edges of the pumpkin. You can see I did have to bend it up just a bit to fit it in. I didn’t feel I needed to secure the paper plate with hot glue, but if you feel you need to, you can add a little bit of hot glue down inside the pumpkin to secure plate.
Adding decorations to the faux pumpkin:
Now is the fun part! I picked up a small package of mother of pearl colored Christmas ornaments and began gluing them into the pumpkin. I secured them both to the paper plate and to the edge of the pumpkin.

Anyplace there were holes between the ornaments, I added these craft pearl beads.

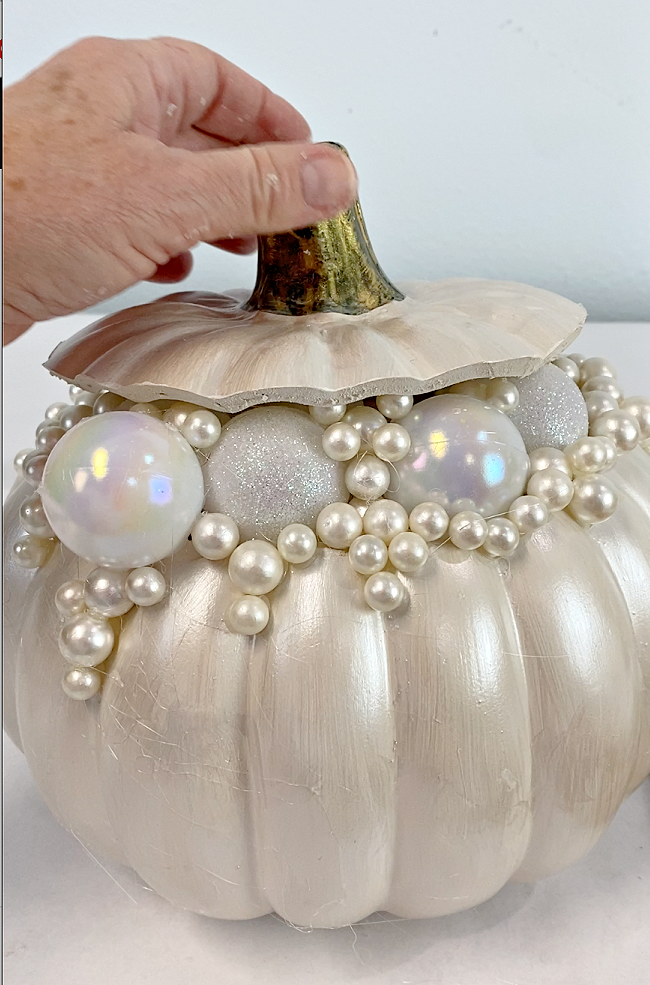
I would go back and forth between having the the top on the pumpkin and taking it off to work, to see how the pumpkin would look with the top on.

You can see all of the glue strings in this photo, but I wanted you to be able to see how I added the pearls to the ornaments. I eventually added at least two rows of the pearls all of the way around the top cut edge of the pumpkin.
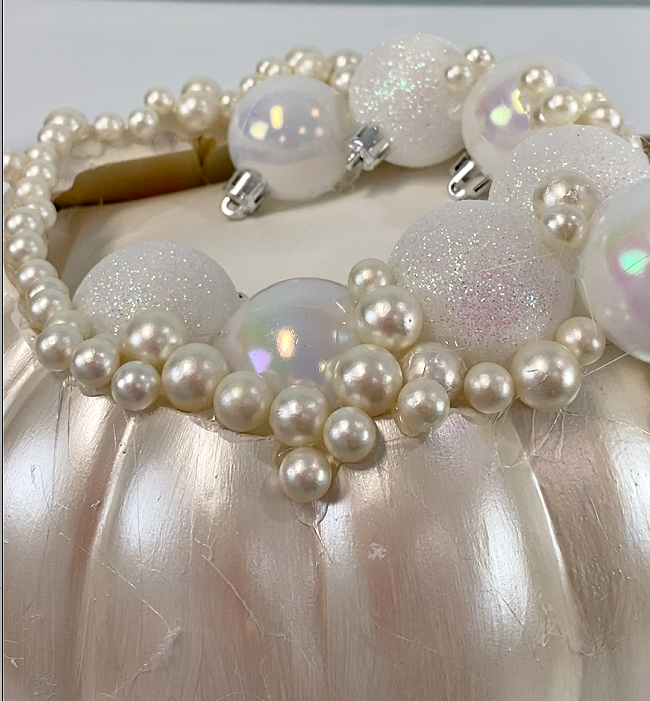
I wanted this to look as if the pearls were bubbling out of the pumpkin and down over the sides.
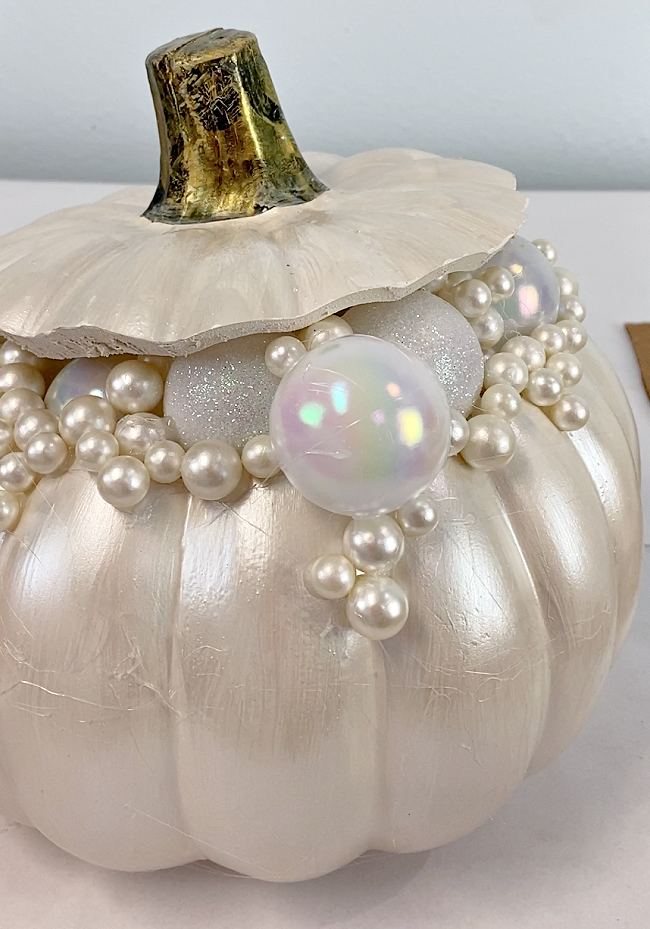
I took a couple of different photos of different sides of the pumpkin so you could get an idea of how I did this.
PIN THIS PLEASE!
The reveal!
After cleaning off all of the glue strings, it was time to display my beautiful pearl encrusted pumpkin!

A special addition to your faux pumpkin:
You can get even more creative with a pumpkin by adding some battery powered fairy lights inside so that it offers up a warm glow in the evening.
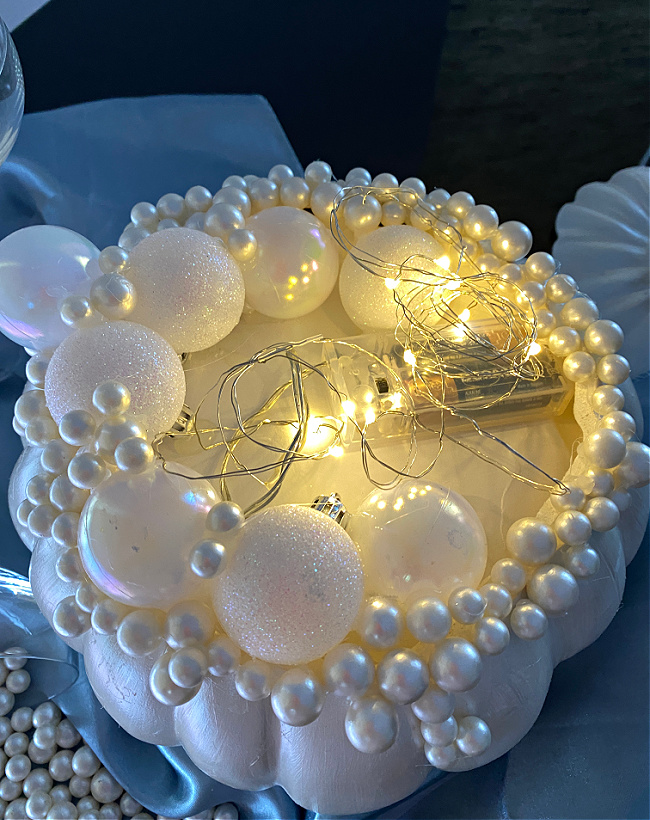
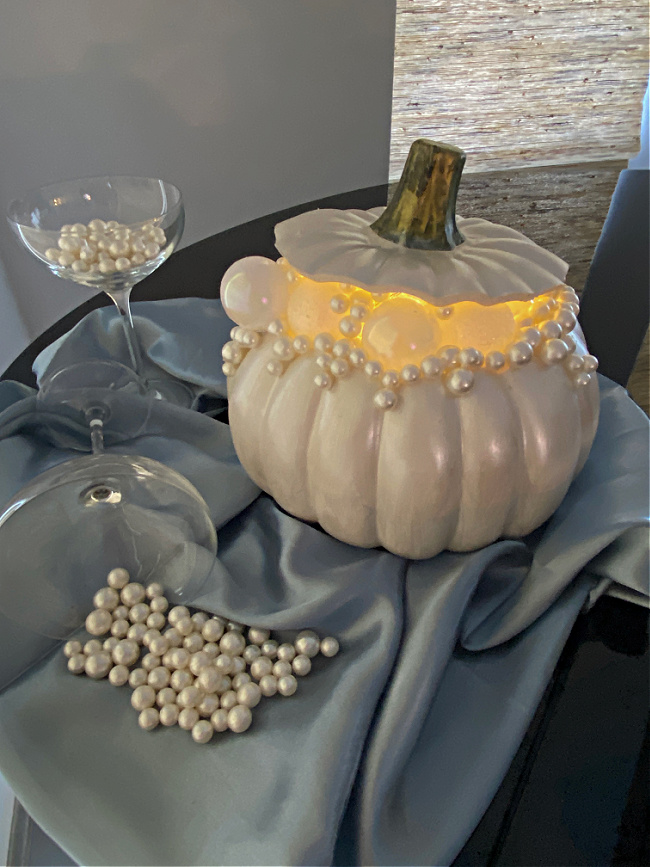
Here is one more shot of it lit up at night. I tried to find some white lights, not the warm yellow ones I had on hand.
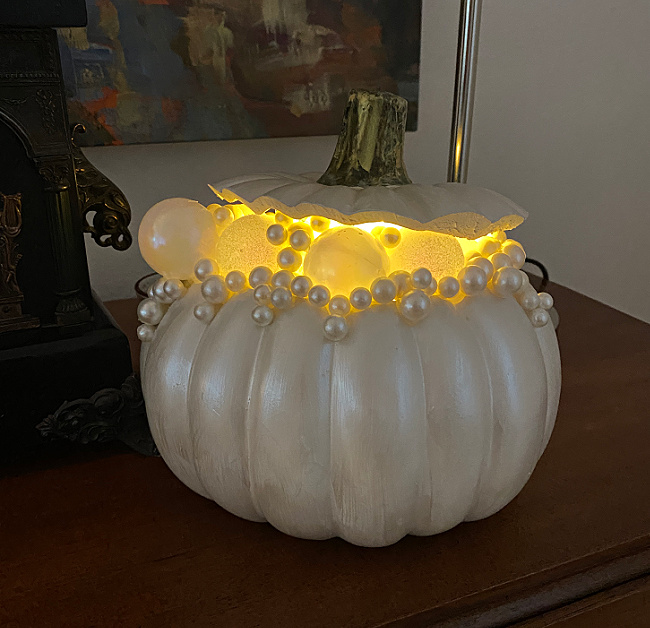
Maybe your fantasy pumpkin will be encrusted with gold beads, or perhaps you want to try a MacKenzie Childs Courtly check on yours. The craft pumpkins are on sale and make a great pallette to get creative with! I hope I have inspired you to make your own custom pumpkin this season.
Supplies for this project:
Michael’s ‘cinderella’ style pumpkin
Pearl acrylic paint
Glossy white acrylic paint
Christmas ornaments
Christmas ornaments
Pearl beads
Sharing at: Between Naps on the Porch
Oh Chloe I LOVE this! So pretty, such fun and I’ve not seen a bubbling pearl pumpkin before!! Thanks for sharing, great tutorial!
This is so clever, well done!! Might be wonderful in black for a halloween witch’s caldron too.
Absolutely Beautiful!!! Love your idea, thank you for sharing
Thank you so much.
I absolutely love this pumpkin! I have made lots of pumpkins but this one could be my favorite so far. Thanks for sharing
Love love this! Hopefully I can find the needed material and make it this Memorial Day weekend.
Thank you for sharing. My wheels are spinning for sure,
Very creative and pretty.
Thank you so much Debra!
This is so pretty! What did you use on the stem? Thanks!
Thank you so much! I just used a little bit of gold metallic paint. Otherwise, it is just the original faux stem.
WOW! This is so beautiful. Just imagine using these pumpkins as decoration for wedding or proms. You are so talented.
So Love This….!
I love this idea! Especially when you have the pumpkin lit from the inside! Great tutorial.
Beautiful, Chloe! Pinned!
It’s beautiful!! I will make it for this fall!! Thank you for sharing.
just gorgeous!
This is beautiful. I can imagine small ones at each table setting and a large one for the center of the table. Lovely for a bridal luncheon, or any fall occasion. I can’t wait to try this. Thanks for good directions.
Thank you so very much Carole! I am going to try one in different colors this year!
Gorgeous!
Thanks so much Tricia!
Love this, very creative! 🙂
Thank you so much Jacqueline! I really enjoy just hanging out in my studio and getting creative. This was a fun project!
This is one of the best projects I’ve ever seen on Pinterest. Thank you so very much for sharing! Your vision with this project is amazing. I appreciate your instructions and especially the shopping links for the items. I’m so excited to make this pumpkin! Thanks again!!!
Thank you so much for the Fantasy Pumpkin instructions!
I made one this weekend and I love it!
Your instructions were amazing!
Thank you so much Denise! I REALLY try to make sure that I offer easy to follow instructions! I am glad you made one for yourself!