
This Jaw-Dropping Decor for Fall will Wow Passersby This Fall
Decorate your front door for fall with these diy decorations! Did you see the lovely piece I made for over the front door? I shared it at Decorate Your Front Door for Fall.

This post contains some affiliate links for your convenience. Click here to read my full disclosure policy.
Not Inspiring:
I bought a pair of fall garlands on sale and hung them from Command hooks to show you how they look. They are “okay”, but not nearly the look I was going for. You know when they show you these garlands in catalogs you know they are not showing you a single garland. Let me show you how to “build” an impressive seasonal decor for your entryway.
The Foundation:
First for this project, pick up two pieces of wood. Select something that is as lightweight as possible. I chose two pieces of molding at my local big box store. You will find that these are quite inexpensive. Since you are not going to be using them for actual trim or molding, if there are damaged pieces, you may get them at a discount. Buy two pieces that are six feet long.
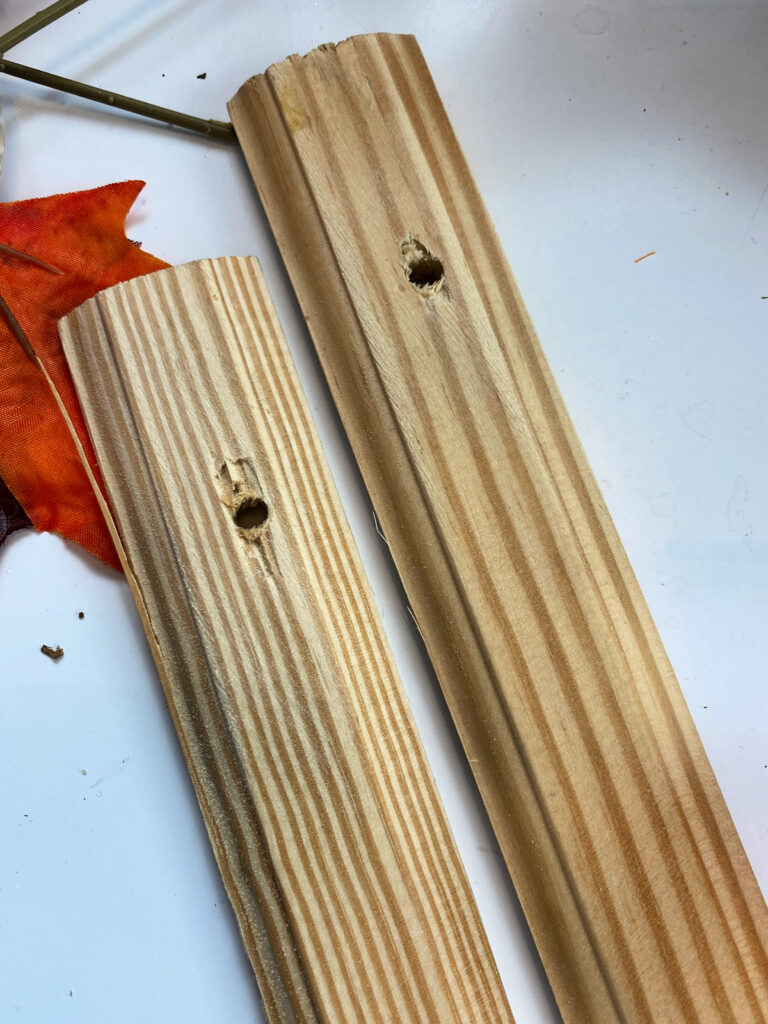
Drill holes in the wood, approximately two and a half inches from the one end of each of the boards.
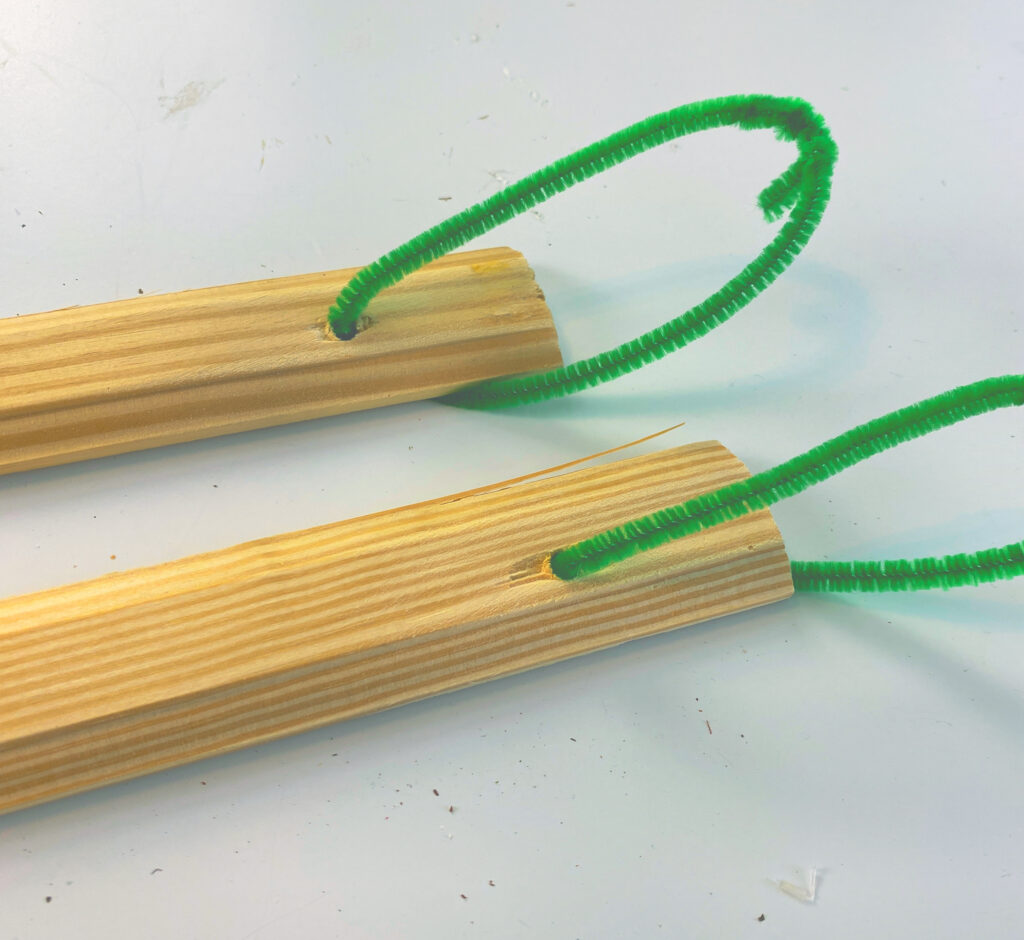
Feed a pipe cleaner through each of the holes. Twist the ends securely together to make loops. You will use these loops to hang your decor later, so make sure they are secure.
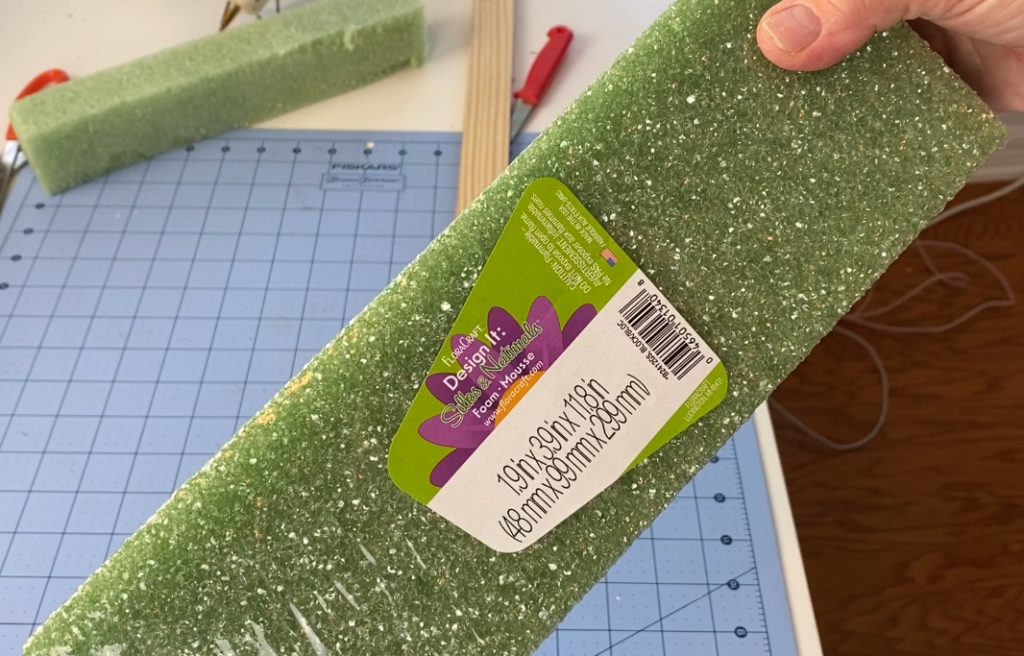
For the pair of decorations beside the front door use three pieces of styrofoam approximately 2″ x 4″ by 12″ as shown above. Cut each of these blocks of styrofoam vertically into two pieces. You will use 3 of the halves per side of the door.
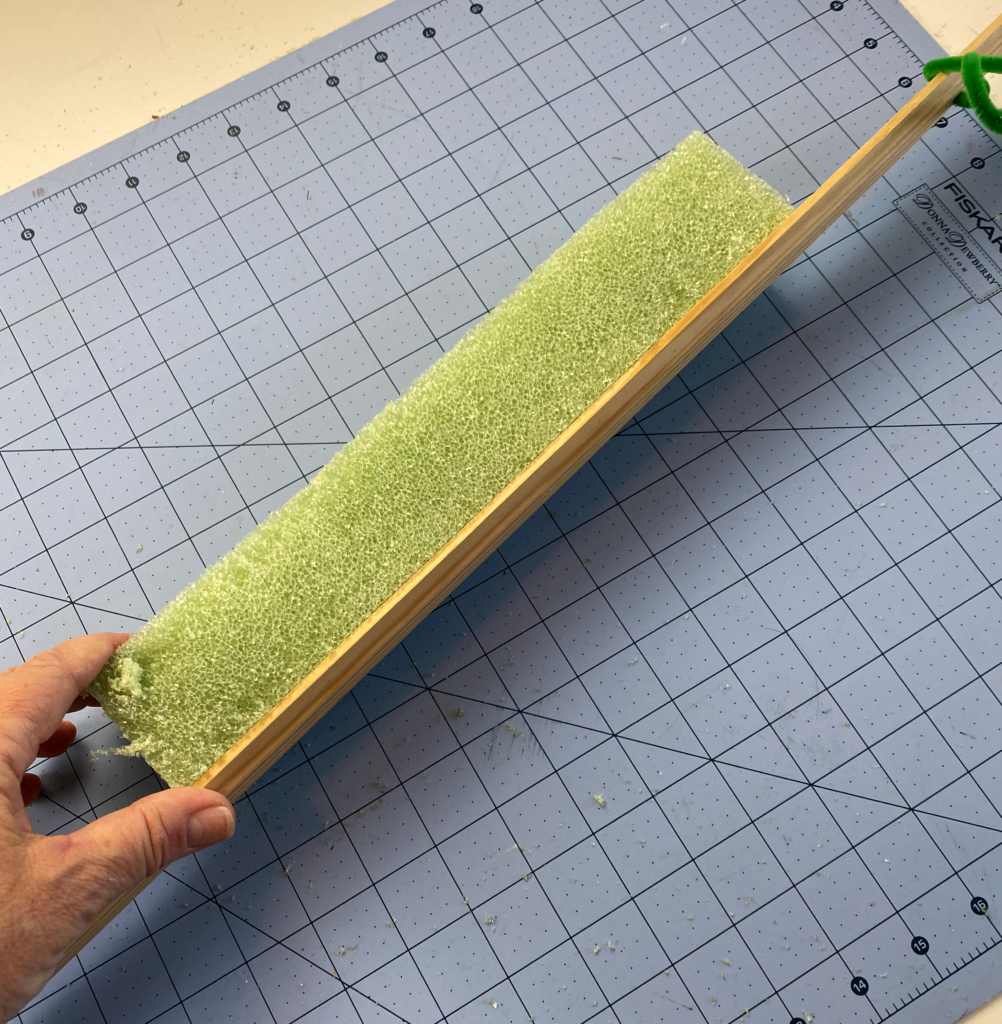
Using LOW TEMP hot glue, add a little bit to each board and stick the pieces of styrofoam onto it. Space them evenly down the board, leaving about 10″ in between each piece of foam.
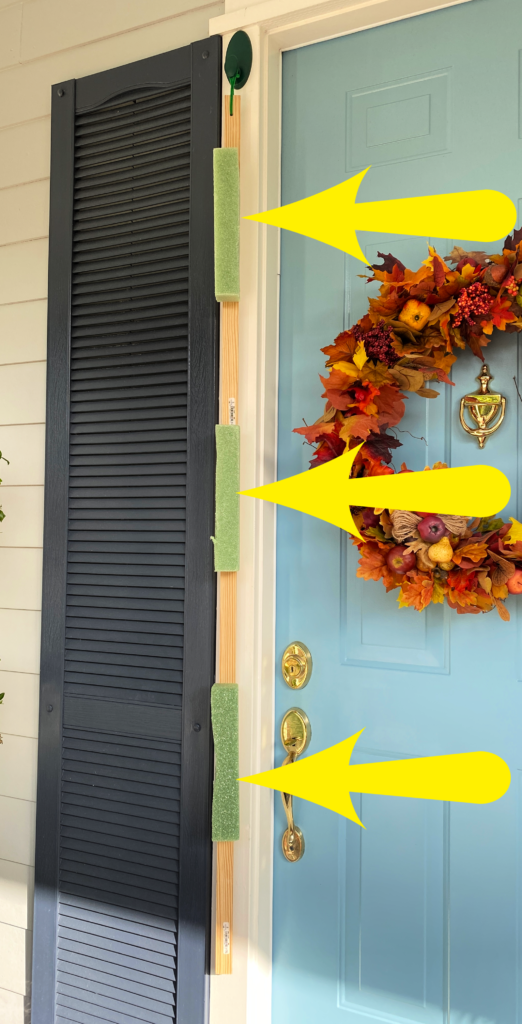
You should now have something like this you can hang up next to your door. You can build your decor right there if you would like.
Add florals to your piece:
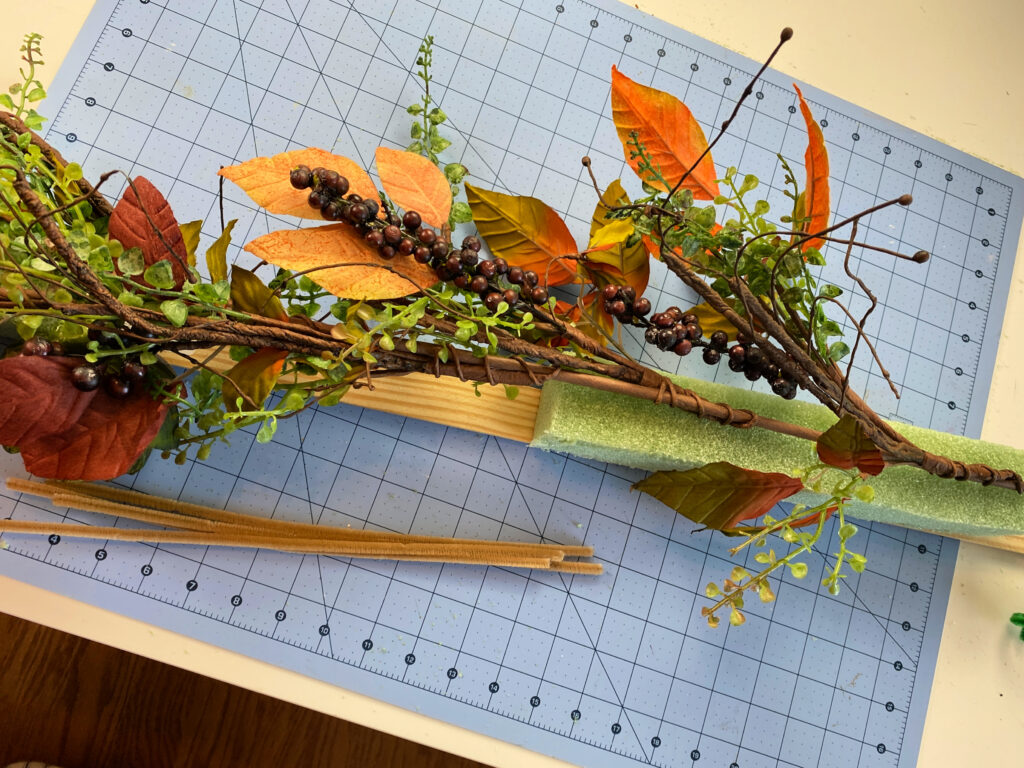
Instead of working on a step ladder, bring your piece back indoors and lay it down on a table to build it out. Lay down the pieces of wood with the styrofoam pieces on the top.
If you want to begin with a garland, as I did, lay it down on top of the piece of wood and the styrofoam pieces. Use some pipe cleaners to secure the garland to the styrofoam. Use at least two pipe cleaners around the garland and the styrofoam and the piece of wood. Make sure your pipe cleaners are around all three things. That will keep the wire in the pipe cleaner from cutting through the styrofoam.
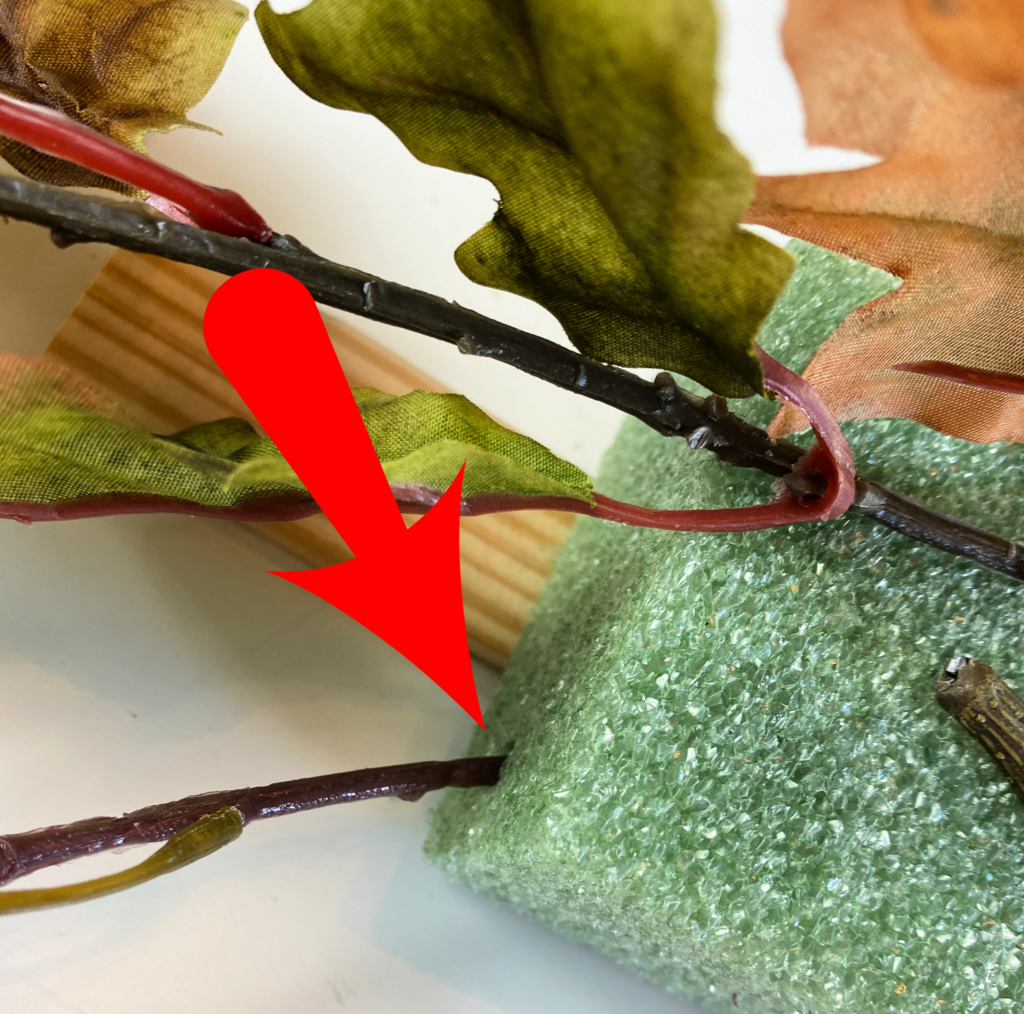
You can see below how the wire is cutting into the foam. By wrapping the wire around all of those three, the wire cannot cut all the way through.
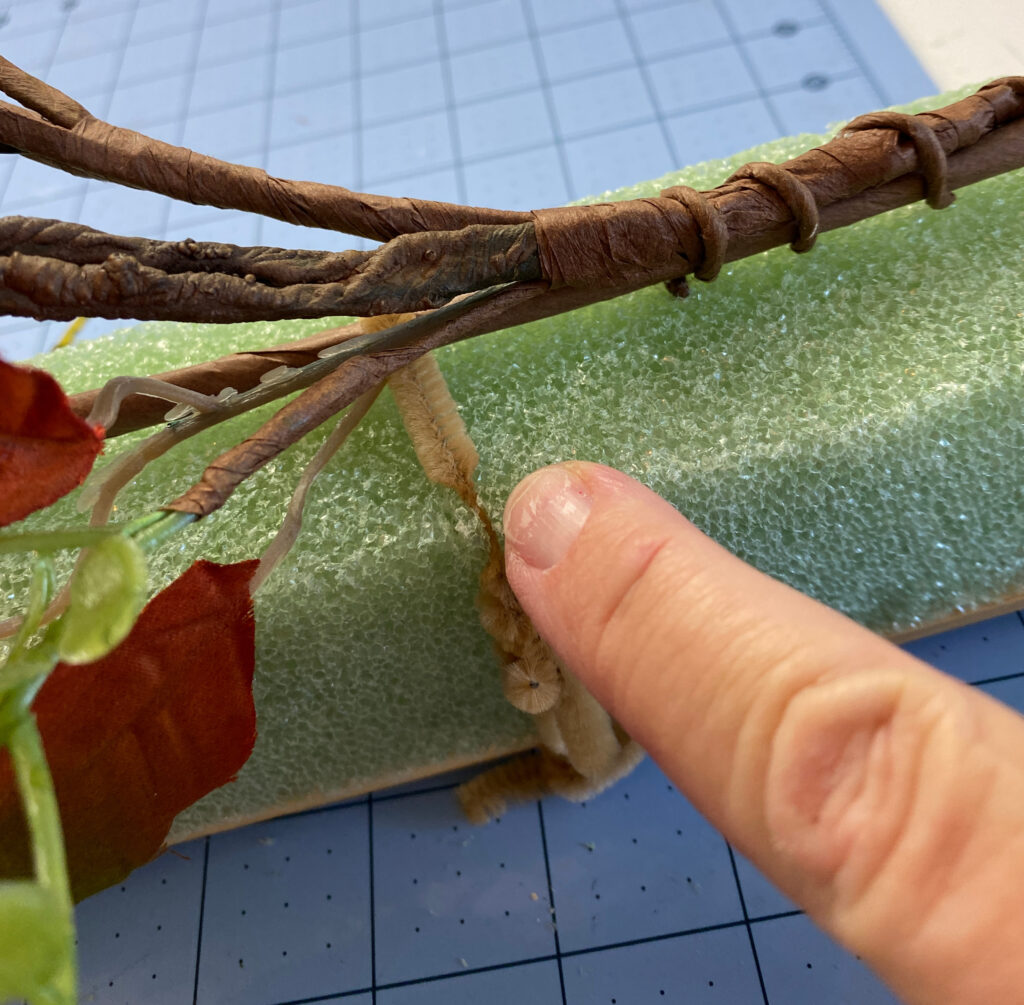
This will help secure the styrofoam to the wood. I added two pipe cleaner wraps to the top piece of foam and one to each of the lower ones.
Time to get creative:
Get creative with fall leaves, fall picks, fruits, nuts and fall florals. Find pieces you like, or items that are on sale. Don’t overlook your local dollar store. You can use the less expensive picks and florals as the base and the more luxurious pieces to top dress.

As long as the stems of your leaves or other picks have stiff enough stems, your can push them right into the pieces of styrofoam.
I do a lot of this kind of work, so I use a steel pick machine that puts one sharp barbed steel pick on a stem to secure it into the styrofoam. If you make items like this to sell, you may want to invest in one of these for yourself.
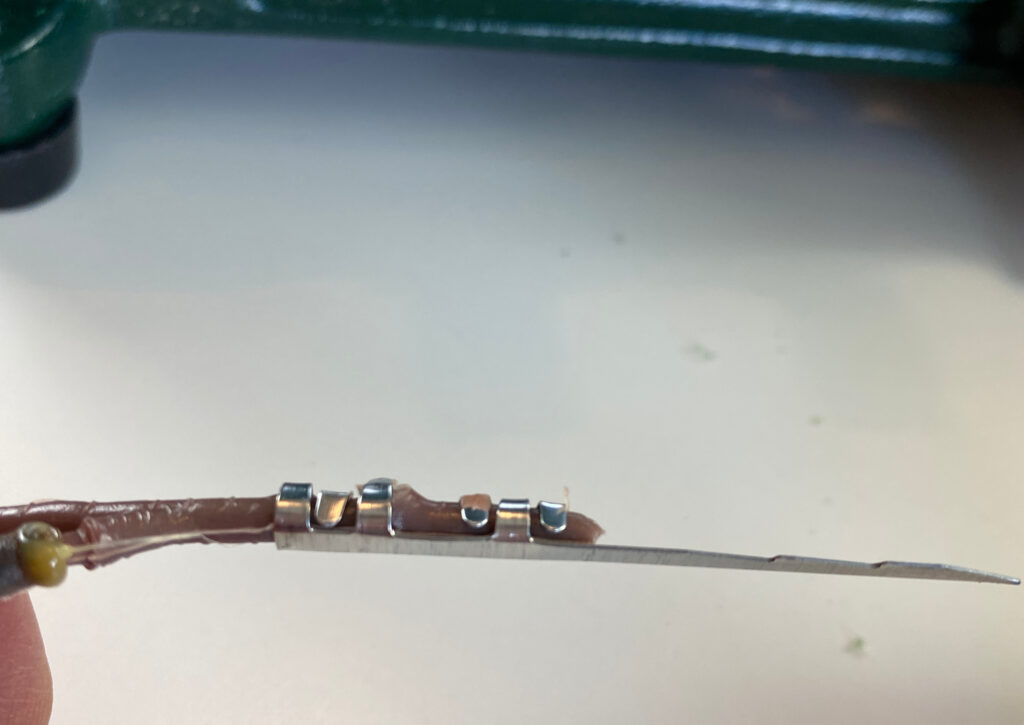
Be VERY careful when using these. The picks are very sharp and can easily cut you.
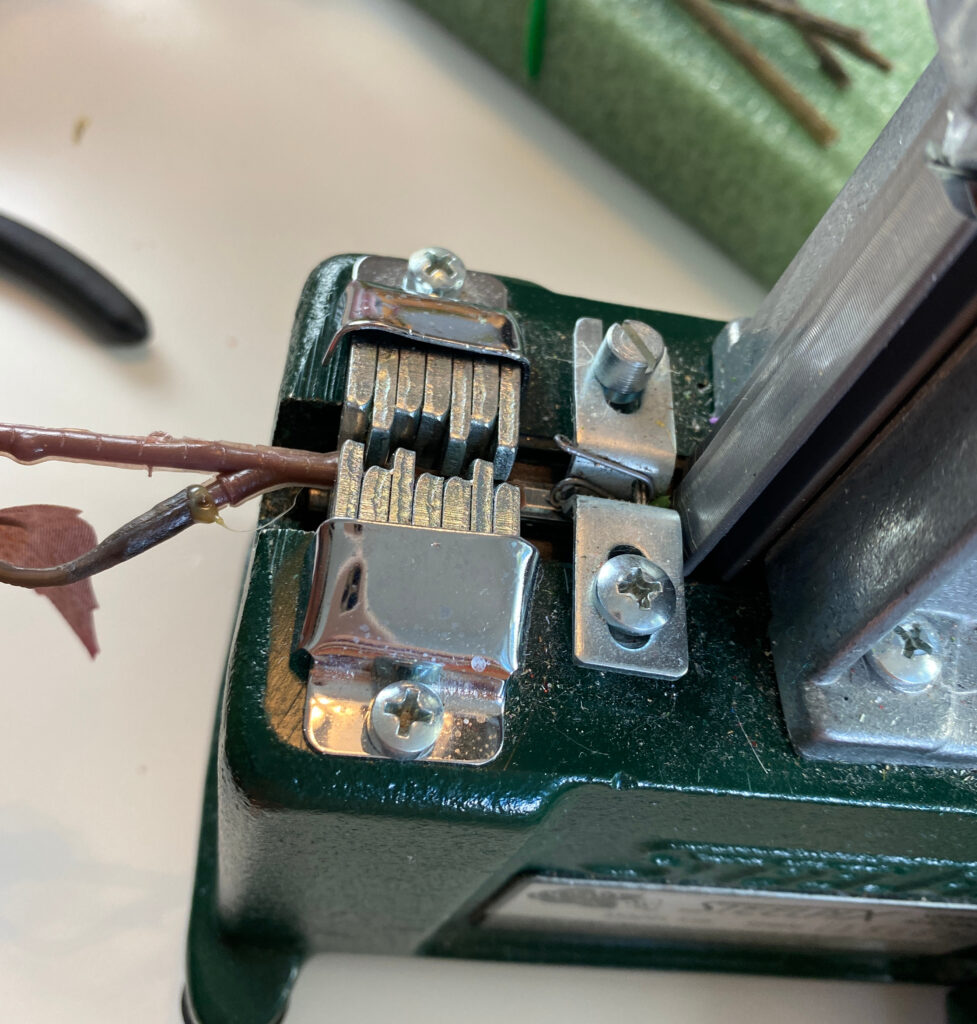
If you are using one of these steel pick machines, you will want to press down firmly to make sure the pick is crimped tightly onto your stem. You would use this if the stems on your florals are not stiff enough to push into the styrofoam.

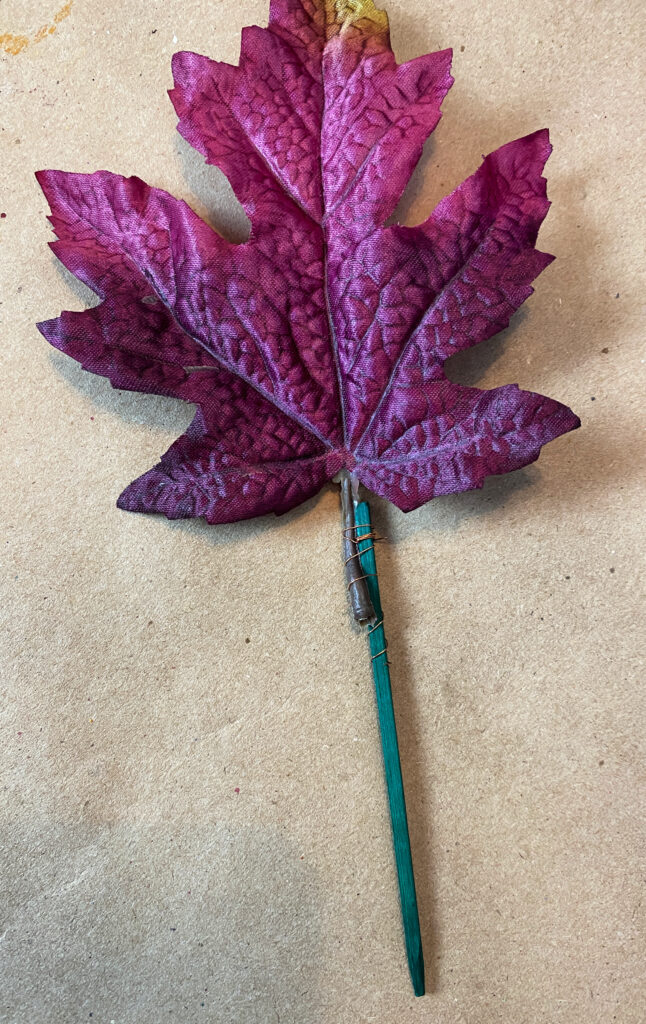
An alternative is to use a wood wired stick to add the foliage to your foam. If you find the wood sticks slipping out of the foam, you can use a dab of low temp hot glue on the end of the foliage or the end of the wood stick to secure it.
Continue to build up your piece by adding your foliage and fruits. Make sure you add your materials in both the top and the bottom of your pieces of foam to fill the space in between three pieces of styrofoam.

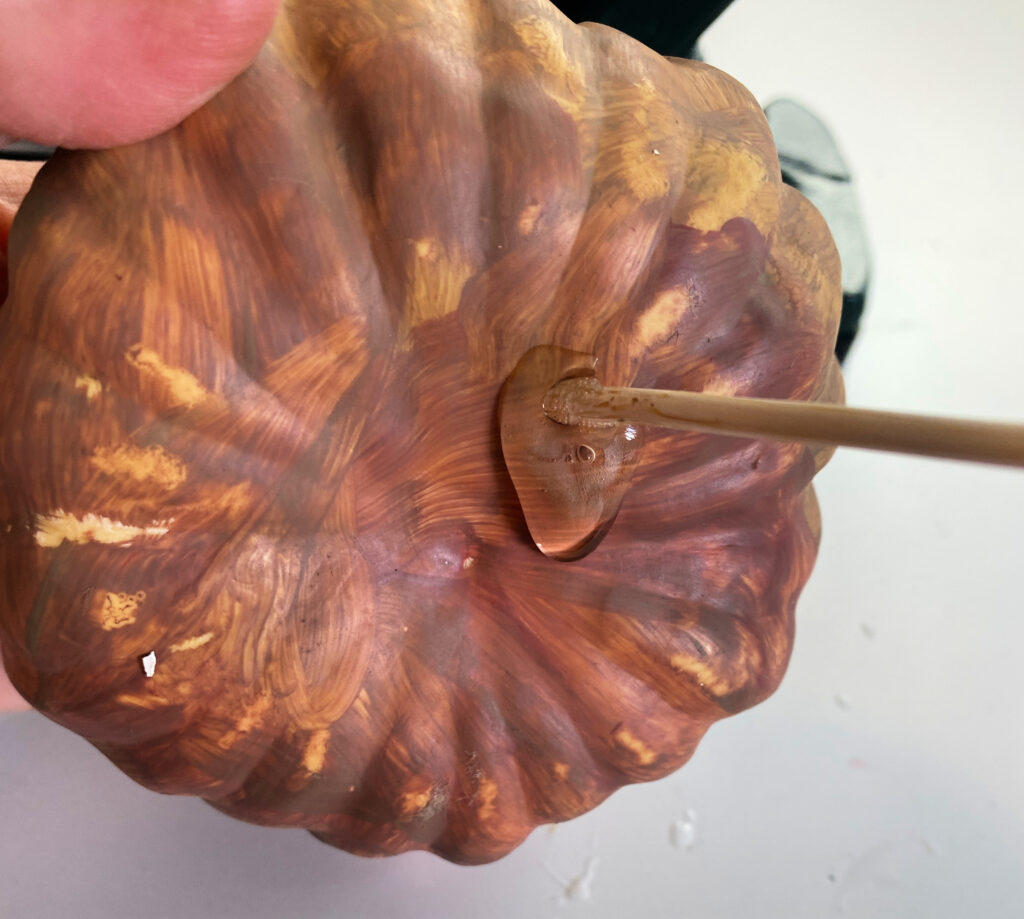
To add faux fruits to your piece, stick a bamboo skewer into the fruit. Add a little hot glue to secure the skewer in the fruit. This will keep the skewer from coming out the top of your fruit, and will keep your fruit from falling off the skewer.
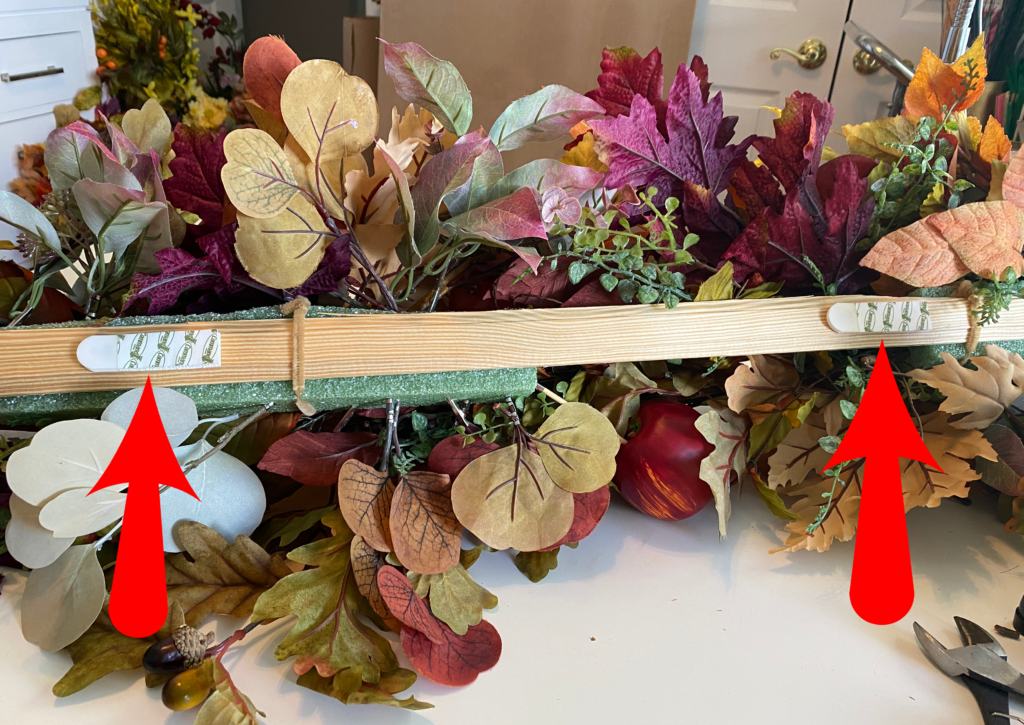
When you have added all of the fruits and foliage you want and filled all of the space between the pieces of foam to hide the wood, turn your piece over and add pieces of Command hooks to the wood. You will use those to secure the length of the wood to the door frame. When you get your piece outdoors, peel off the protective paper when you hang your piece, you will push firmly to secure the boards to your door frame. In addition to your pipe cleaner loop at the top, this will keep your piece from blowing in the wind.
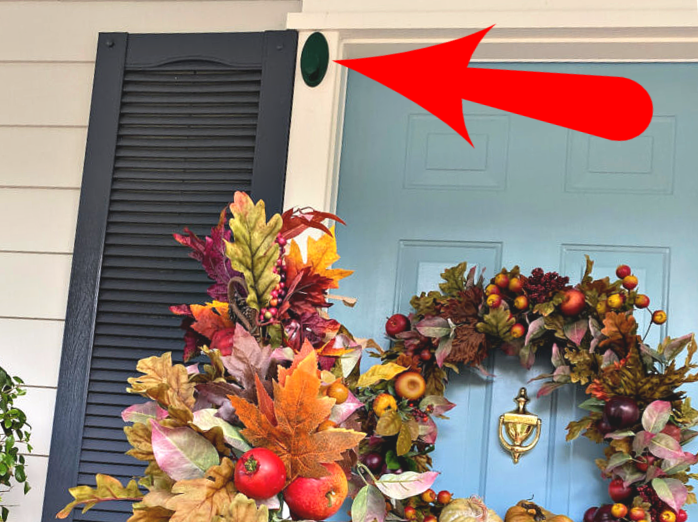
Time to hang it up! I previously hung Command outdoor hooks that can support seven pounds on each side. The loops of pipe cleaner we put on when we started, will be hung on those hooks. If you have too much trouble getting the Command velcro to stick to your door trim, you can add a second loop to the bottom of your board and secure it to a second Command hook.
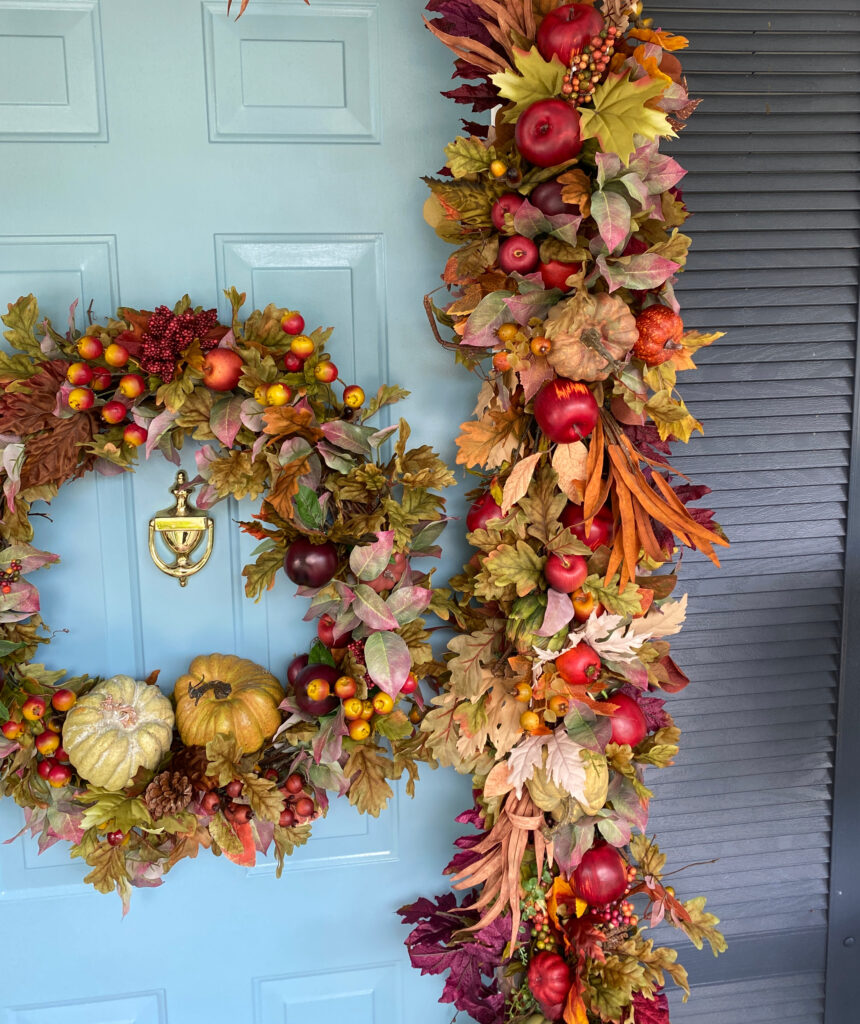
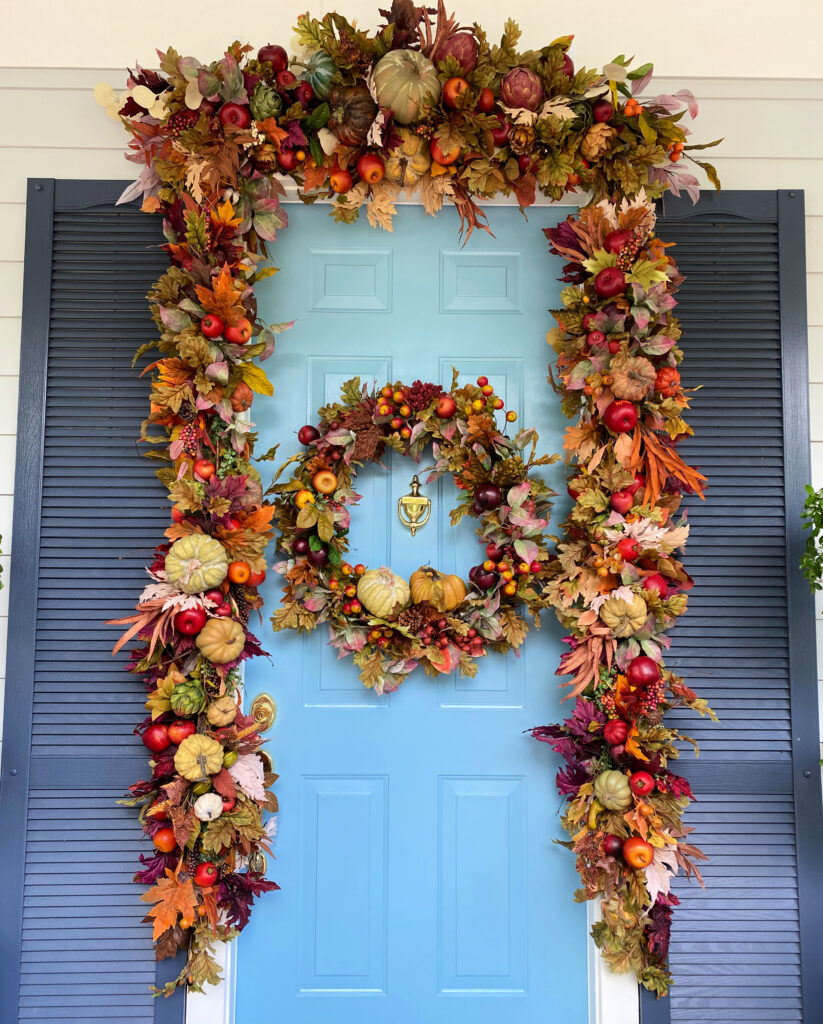
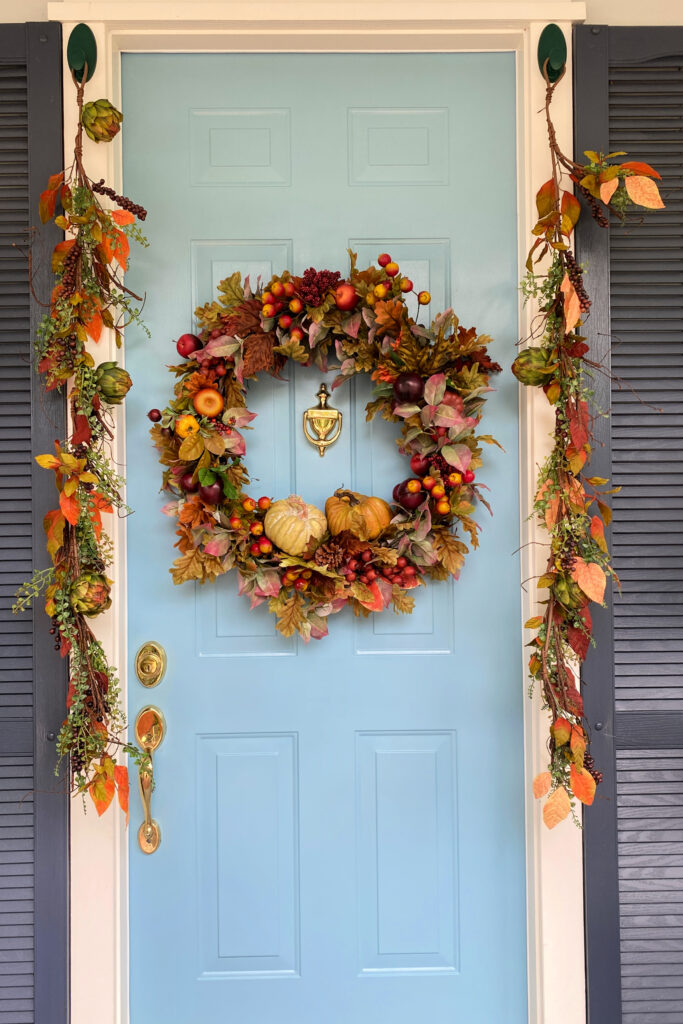
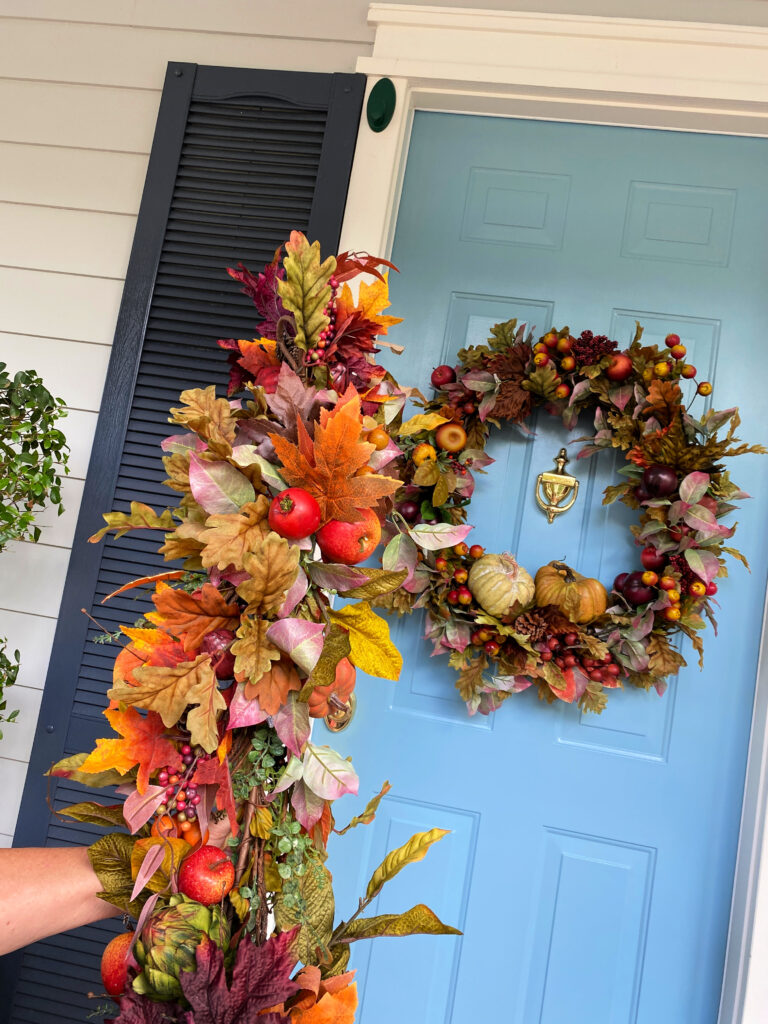
Doesn’t this provide a lovely and lush look along the sides of your door? Combine these side pieces with a wreath and the swag over the top of the door for the ultimate lush front door decor for fall. I know mine will be displayed up through Thanksgiving!
I just love this, so gorgeous! I’m sure you smile every time you walk in your front door. Thanks for sharing.
Thanks so much Chas, I am loving it!
This is absolutely gorgeous, my friend. I’m going to have to try this. Hugs to you.
Thank you so much Renae! I have to say, a lot of folks stop and comment!