Make a scarecrow from a Dollar Tree wastebasket!
I was working on a totally different diy fall decoration with this Dollar Tree wastebasket sitting on my worktable when it just kind of hit me that I could pop a hat on it and it would become a scarecrow! Okay, it did need a little more than just a hat for this diy scarecrow craft, but not much!
Get started
Follow along my step by step instructions and make your own diy scarecrow decoration!
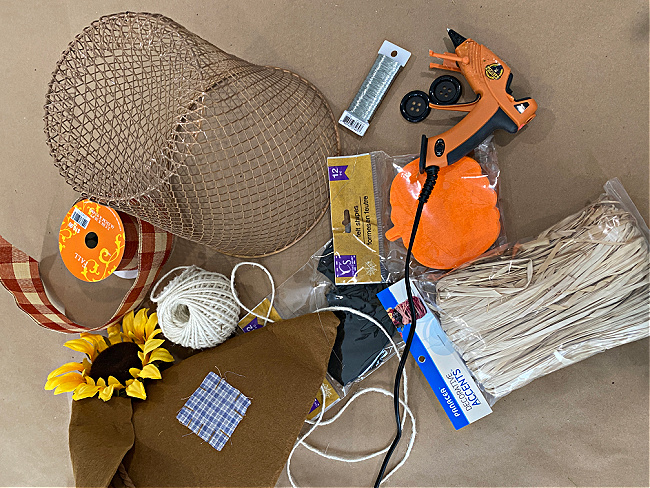
I had a few things on hand, but most of these items came from my local Dollar Tree!
Supplies:
Dollar Tree Waste paper basket
Dollar Tree large black buttons (came in a pack of six)
Dollar Tree Black Felt bat shapes
Dollar Tree Orange jack o’lantern shapes
florist wire (I ended up using pipe cleaners instead, they are always gentler to my fingers.)
raffia
Scarecrow hat
Fall Ribbon (I had some on hand but you can find this at Dollar Tree, too.)
Spray paint
Your glue gun and some hot glue!

These little waste paper paper baskets at Dollar tree come in both black and white. It doesn’t matter which color you get.

I have already made a couple of these, one of them is more orange, one a light brown, more of a straw color. Just spray paint them whatever color you want to go with fall decorations.
Give your scarecrow a face:
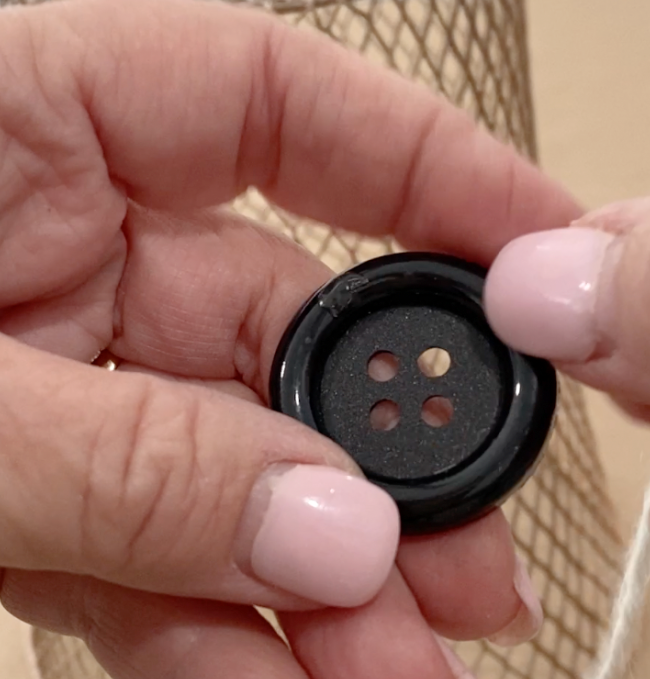
Dollar Tree sells a package of six of these large buttons for $1.25. They also sell packages of googly eyes if you prefer those for your own scarecrow.
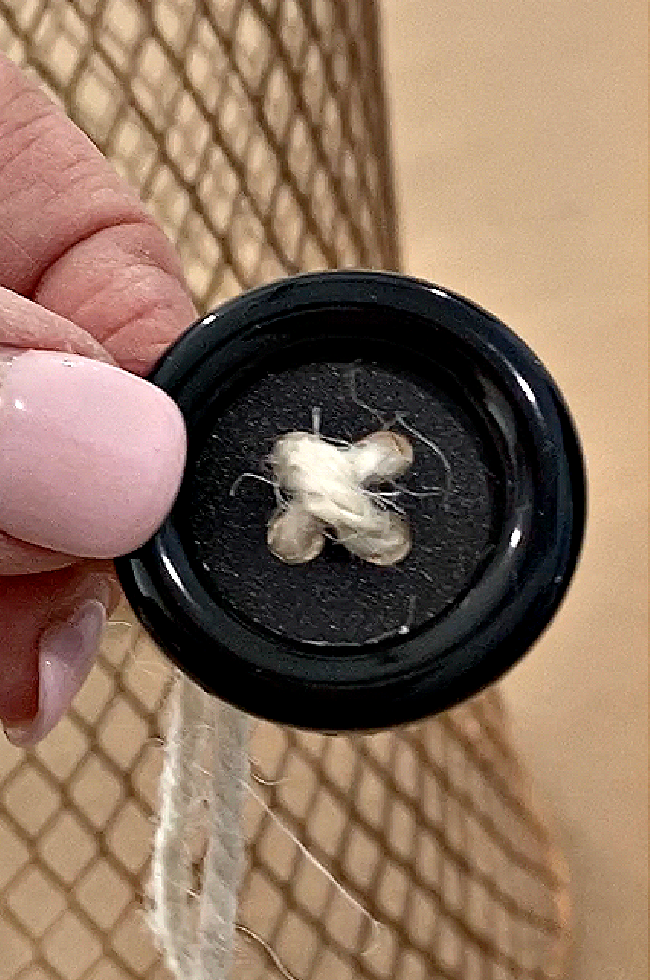
Use twine or a thick string to thread the buttons so that you get an “X” pattern on the face of the buttons.
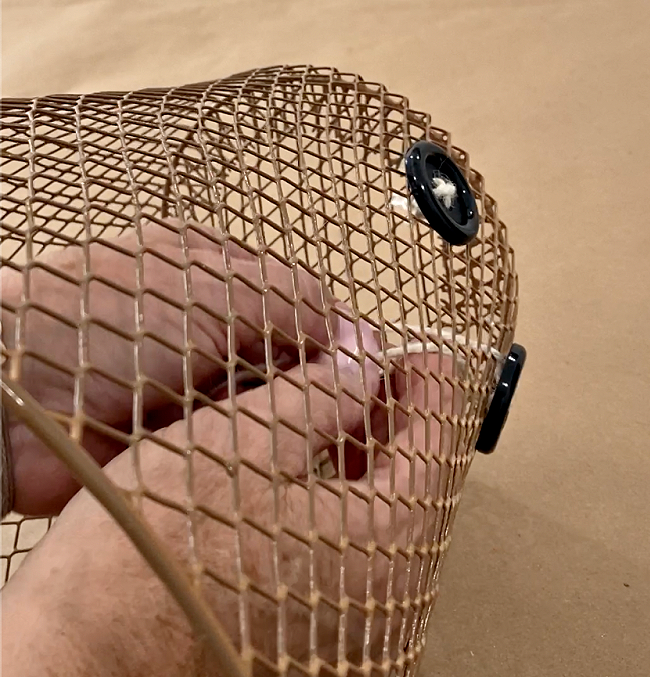
Reach through the wastebasket and tie the strings through the wire mesh, knotting the strings to hold your button eyes on snugly.

Grab a package of Jack O’ Lantern felt cut outs from Dollar Tree. (or any piece of stiff orange felt)
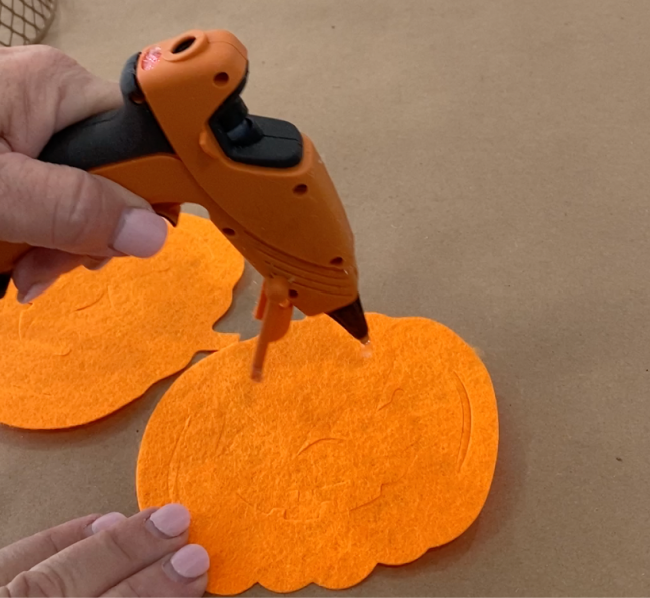
Without punching out the Jack O’Lantern faces, glue two of the pumpkin faces to one another. Use a generous amount of hot glue so that none of the pieces come out.
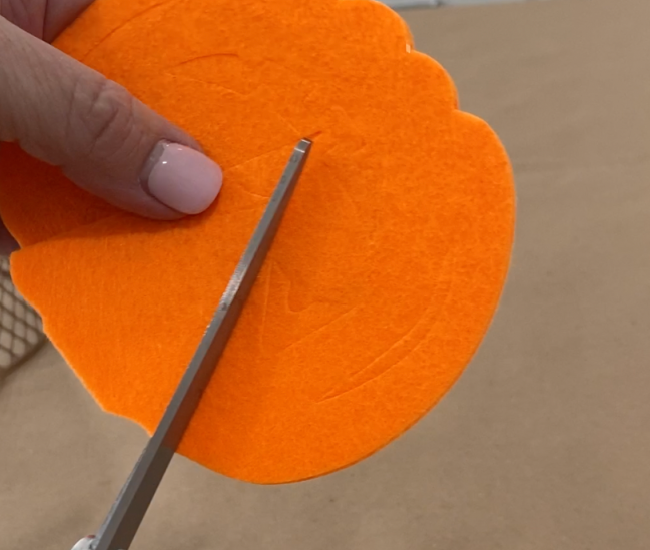
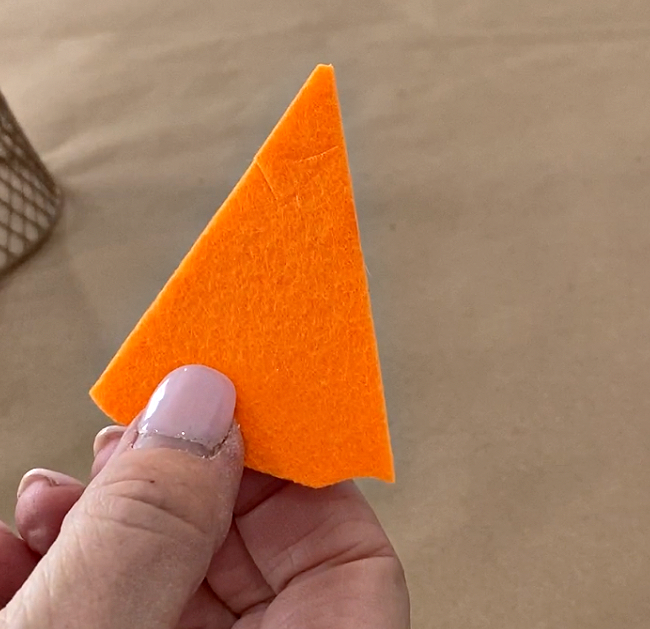
Cut out a triangle shape from the double layer of stiff orange felt after the glue has dried and cooled completely.
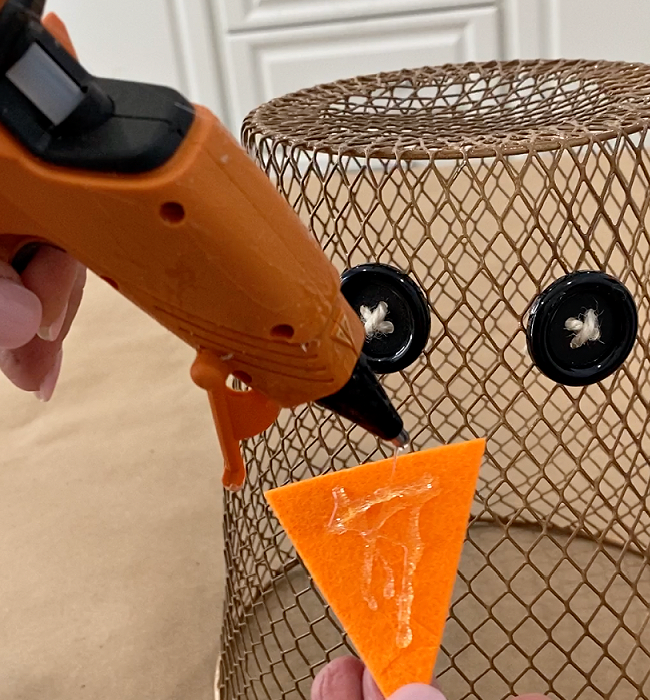
Apply a generous amount of hot glue to the trimmed triangle of felt. You only have the open weave of the wastebasket for the felt to stick to, so make sure you have enough glue that it will stick.
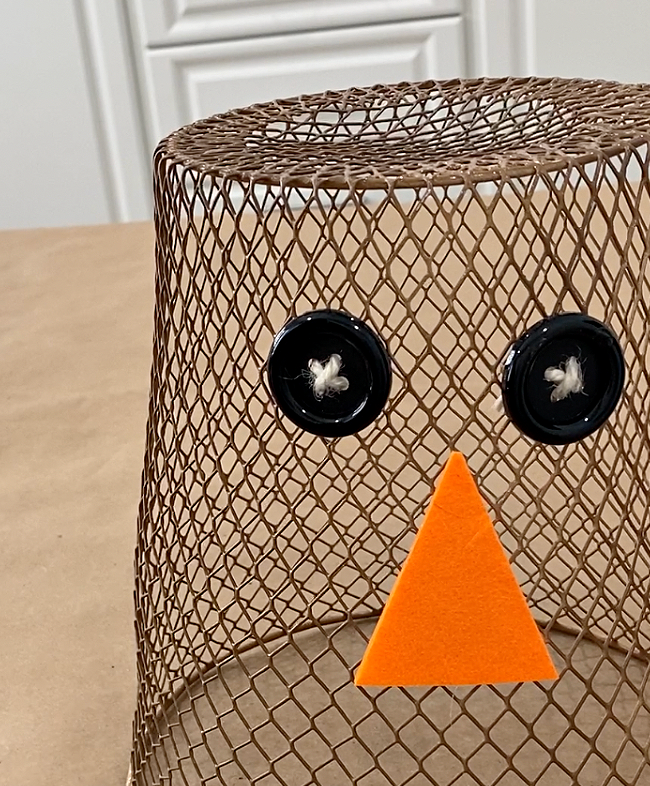
He is starting to get some personality and turn into an adorable craft now!
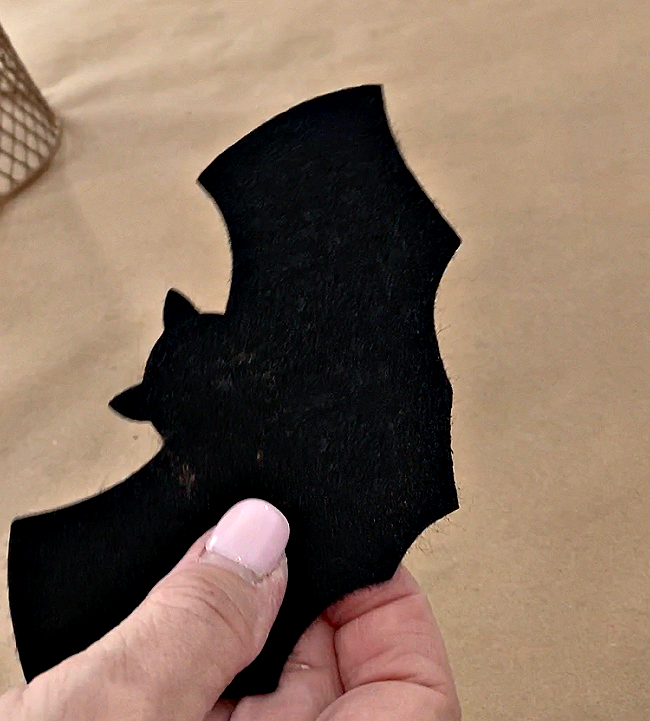
Take one of the felt bats from a package of bat shapes from Dollar Tree.
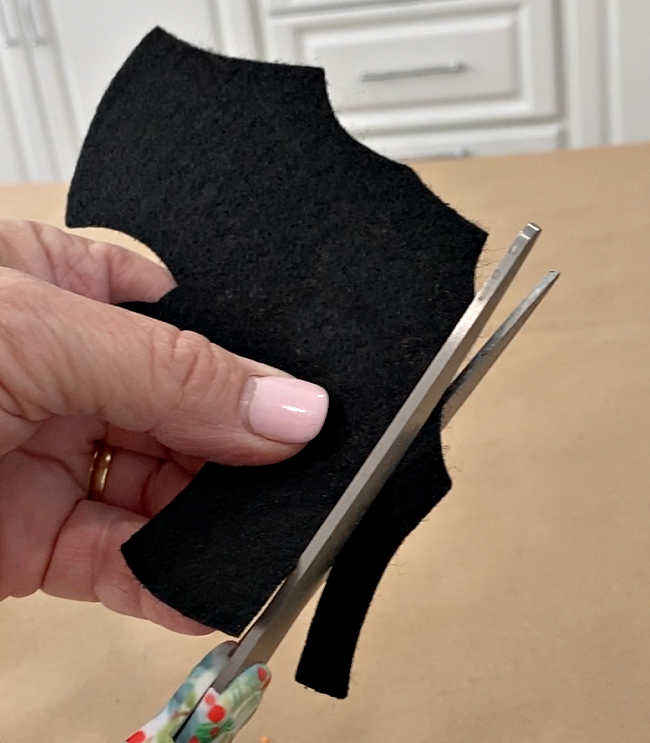
With your scissors trim a 1/2″ piece all along the edge of the bottom the bat following the shape of the bat wings.
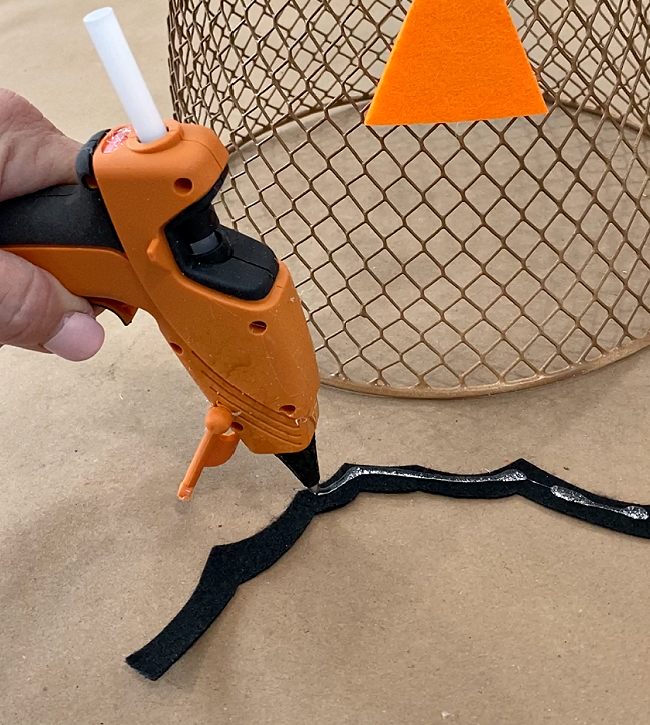
Add a generous amount of hot glue to that strip of felt.
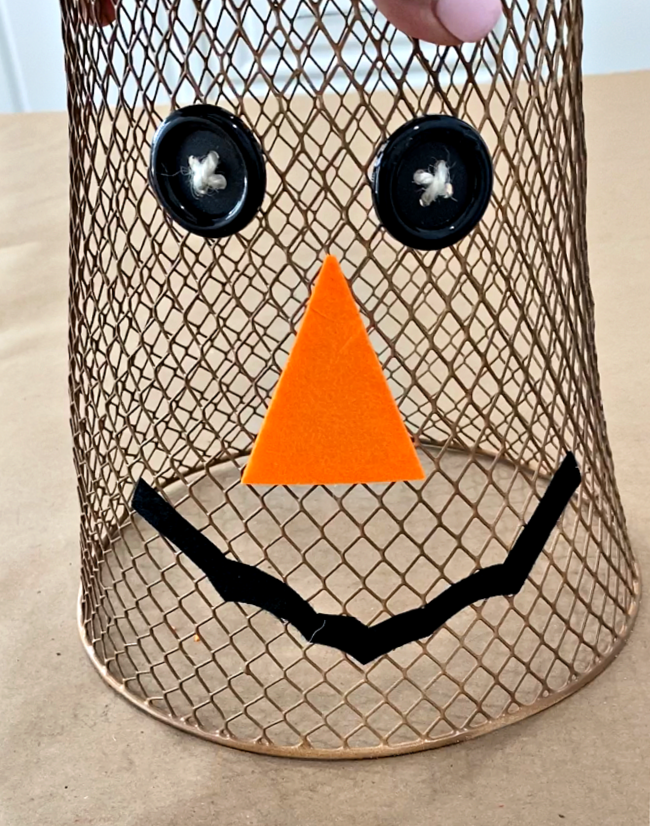
Stick your smile on the wastebasket and your scarecrow has all of his facial features!
Give your scarecrow some “straw”
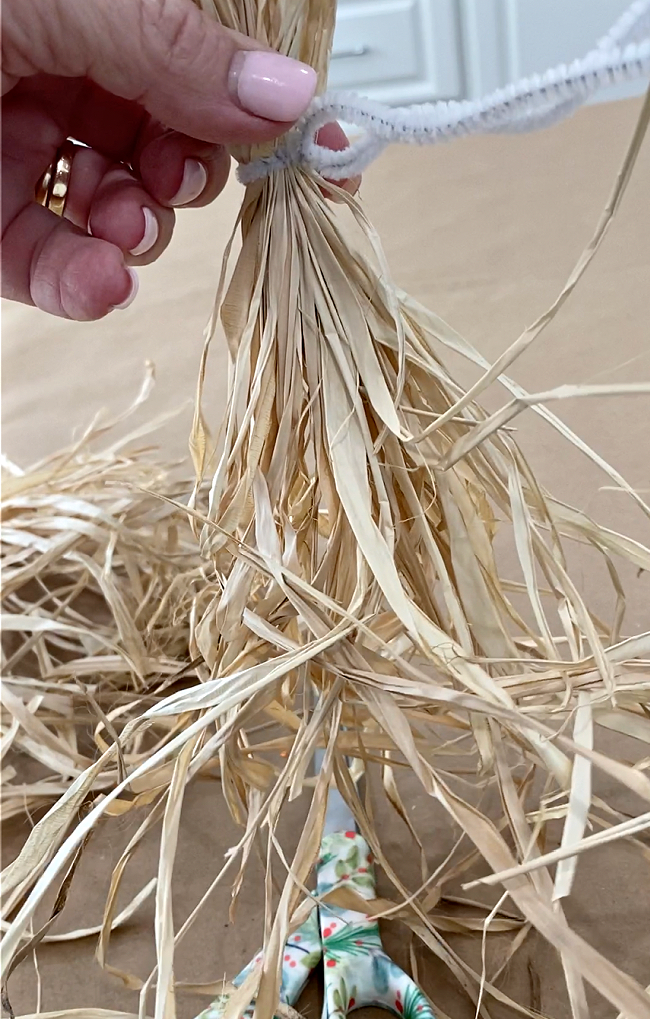
A small package of raffia is all that is needed to add a straw look to your scarecrow. Sort it out and secure five bundles of the raffia with pipe cleaners. You can also secure each bundle with a little floral wire if you prefer.
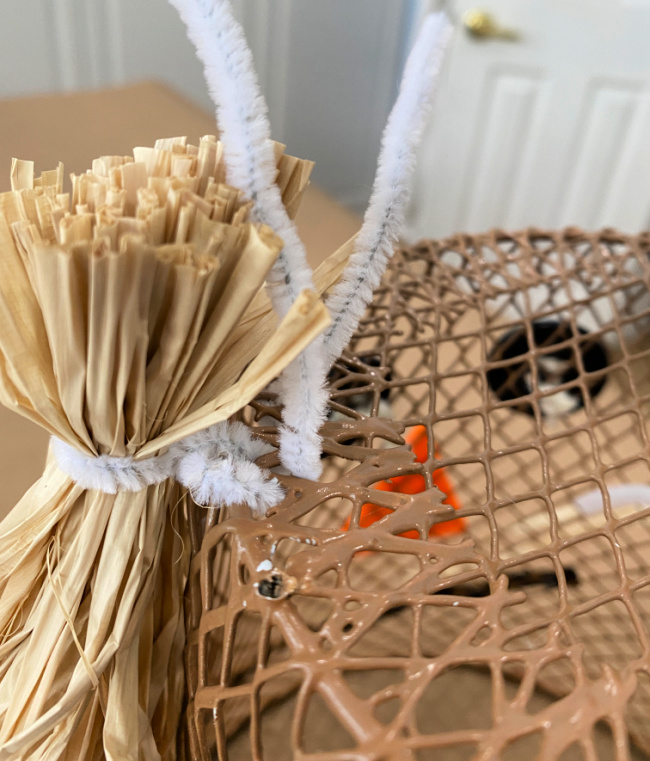
Use the wire to attach a bundle of raffia to each side of the head of the scarecrow as shown above and below.
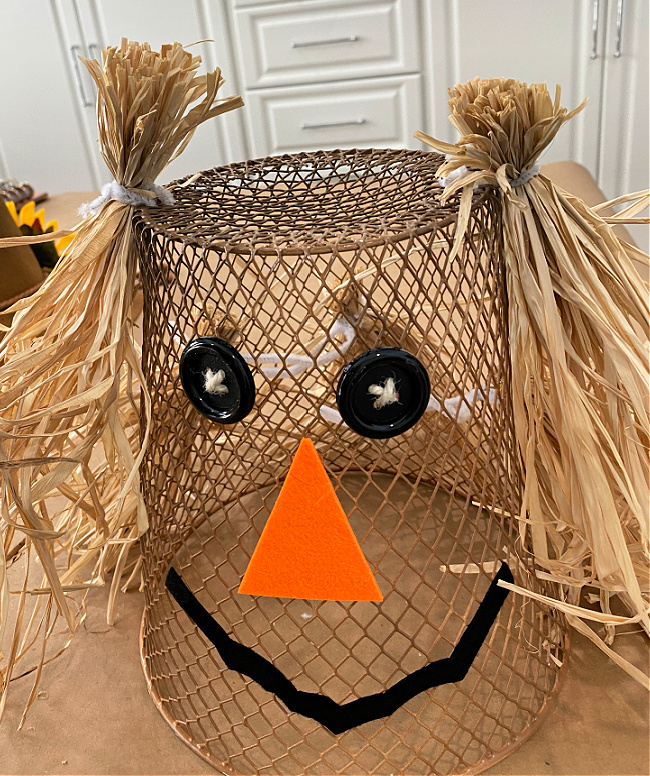
Add the additional three bundles of raffia around the back of your scarecrow’s head.
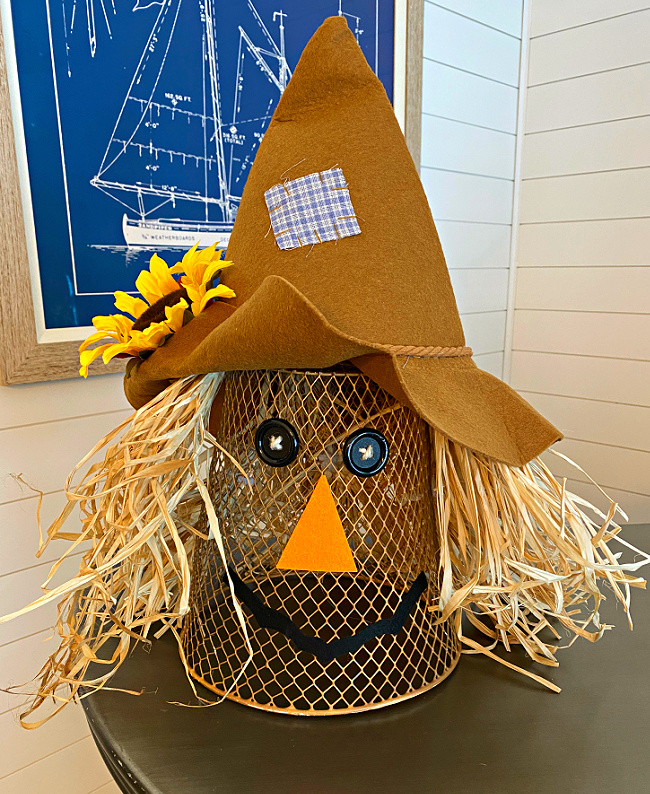
I hope you are liking your adorable scarecrow at this point, and he isn’t yet, quite finished! You may use your hot glue gun to turn up the edge of his hat and add a sunflower like I did. I didn’t know if I wanted to make that permanent, so I simply used a safety pin to turn up the edge and add the bloom.
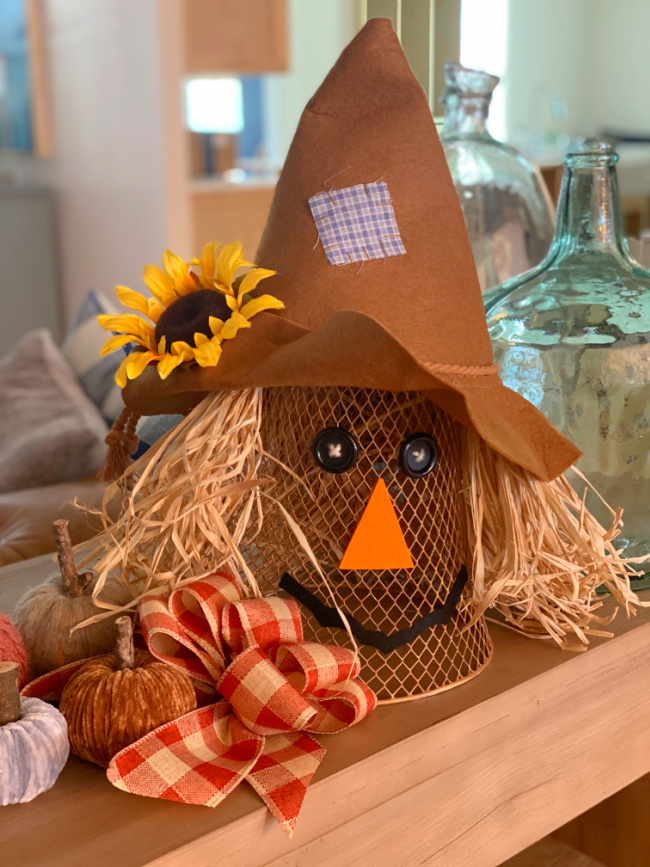
This is a great way to get ready for the fall season with some cute scarecrow home decor! I added a small bow of fall ribbon and some yarn pumpkins for the finishing touches to my little fellow!
I have a couple more diy scarecrow crafts I will be sharing yet this fall. If you missed it, check out out my Scarecrow Pizza Pan Clothespin Wreath that I published last week. Let me know if you have some great diy scarecrow ideas that you would like to share and perhaps I will share them in my weekly newsletter!
Autumn in August Blog Hop

Now for some more great ideas and different ways to bring the fall season into your home, visit my blogging friends who are also celebrating Autumn in August today and see what perfect way they plan to delight in the season.
Chas Crazy Creations – Super Easy Dollar Tree Pumpkin Crafts on a Budget
Celebrate And Decorate – Dollar Tree Home Decor
Life At Bella Terra – Fall Wreath Ideas and Inspiration
Mantel & Table – A Simply Beautiful and Bright Copper Tablescape for Fall
Blue Sky At Home – How To Make a DIY Pumpkin Wreath
Ship Lap and Shells – 6 Home Décor and DIY Project Ideas to Get You Ready for Autumn
Happily Ever After Etc – Easy Fall Home Decor Paper Acorns With Your Cricut
Design Morsels – An Easy Fall Leaf Napkin Ring
Oh is he the cutest thing Chloe?! That little smile had me smiling back! 🙂 Thanks for the tutorial. It’s so clear and helpful. This is pinned for when I can track down my glue gun. It’s always so nice hopping with you!
What a cute idea! And so simple. Would be a fun project for kids, too. Love the idea of using raffia for scarecrow hair.
This turned out so cute! How did you ever think to use the bottom of the bat as the mouth? I love it. I wonder if you could do the whole body.
What a cute idea for fall Chloe. I wish I had the type of brain that can come up with such creative ideas as you do. Thank you for sharing your tutorial so I can now copy you and make one of my own. Happy almost fall, my friend!
Chloe, this is just too cute! So clever and it represents a character in my favorite movie~The Wizard of Oz! What fun to use a wastebasket….truly amazing.
This turned out sooooo cute! had no idea where you were going at the beginning but I can’t believe how he turned out. He’s very creative… I really liked how you used pieces of the felt shapes to make your little face. The bat turned smile was genius.
This is such a super cute project Chloe, just love your creativity and so wonderful hopping with you.
Chloe,
I love this cute idea. It would a great kids project as well. So fun. I’m sharing a link on Sunday’s Dirt Road Adventures.