
26 Craft Ideas to Try Now
26 Craft Ideas to Try Now
![]()
We are all tired of being home, what to watch on Netflix now, what to cook for dinner tonight, how about 26 craft ideas to get you crafting? I have gathered 25 additional bloggers for them each to share a craft for you to try now!
This post contains some affiliate links for your convenience. Click here to read my full disclosure policy.
Let’s start crafting! Today I am showing you how to make a tiny Adirondack chair!
Supplies:
17 craft (popsicle) sticks
wire snips
glue gun and hot glue
paint (optional)
Prep your “lumber”:
You will need the following:
1 – 3 1/4″ (chairback)
2 – 3 ” (chairback)
2 – 2 3/4″ (chairback)
1 – 1 3/4 (crossboard for back of chair – cut this one straight on each end)
1 – 2 3/4″ (lower crossboard for back of chair – cut this one straight on each end)
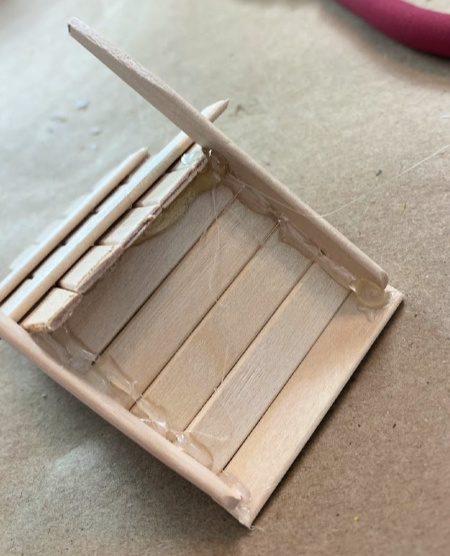
2 – 3″ (legs of chair – you will cut approx. 1″ of this off at an angle as shown in this photo)

2 – 3″ (chair arms)
1 – 1 1/4″ (front chair legs- cut this in two as shown below and cut a slight slant on one end)
5 – 1 7/8″ (chair seat piece – cut straight on each end)
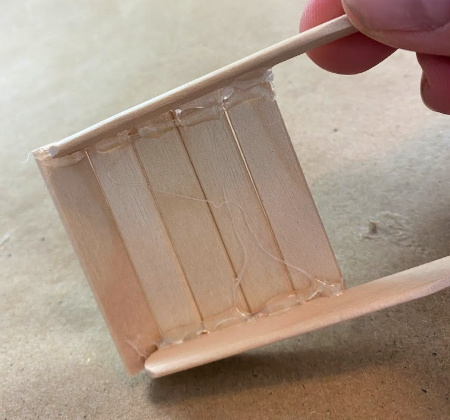
Assemble your chair:
Lay the 5 back pieces side by side and use hot glue to attach the crossboards to the back. The top crossboard should be about 1 1/4″ down from the top of the longest (middle) back piece. Then the second, longer crossboard should be about 3/4″ below the top one. (see photos) 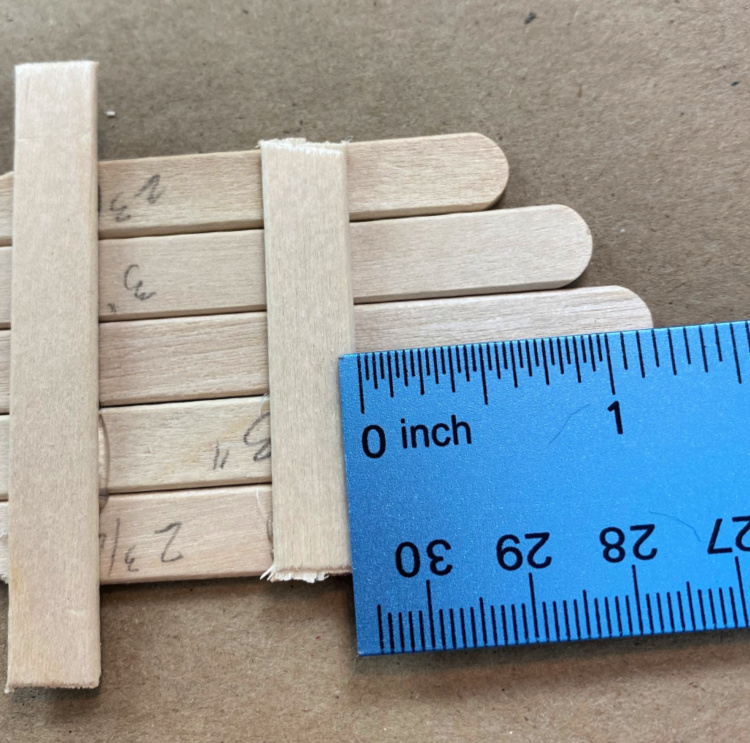
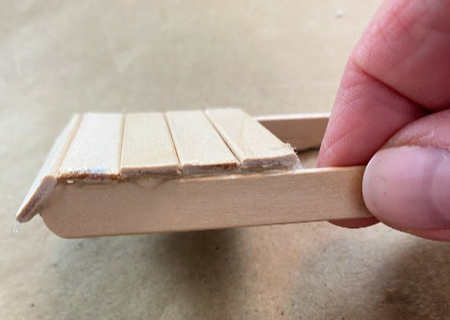
 Now go to work on the seat. Glue all 5 of the seat pieces across the two long legs. The first seat piece should wrap down around the curve of the sticks as shown.
Attach the back to the seat as shown gluing it from underneath. 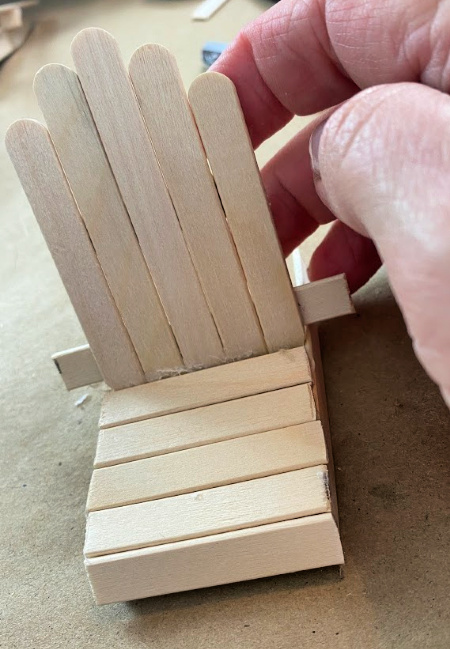
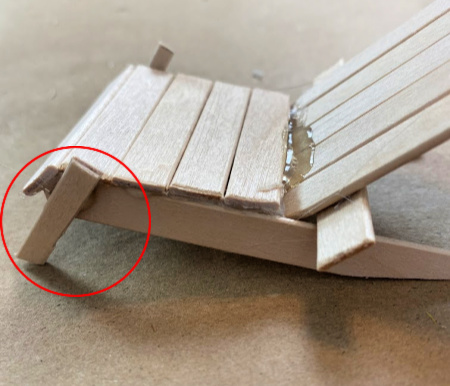 Add the front legs on each side…almost done!
Glue on the long arms by attaching them to the top of the front leg and the large crossboard on the back.  You did it! You have a cute little Adirondack chair. So…what are you going to do with yours? I might make more and use them to hold place cards for a casual summer dinner party! But for now…
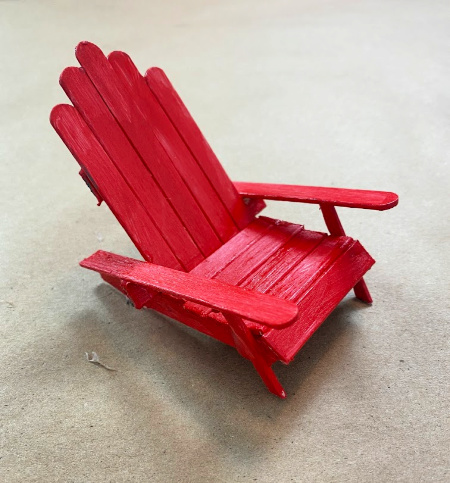 I painted mine red, and…
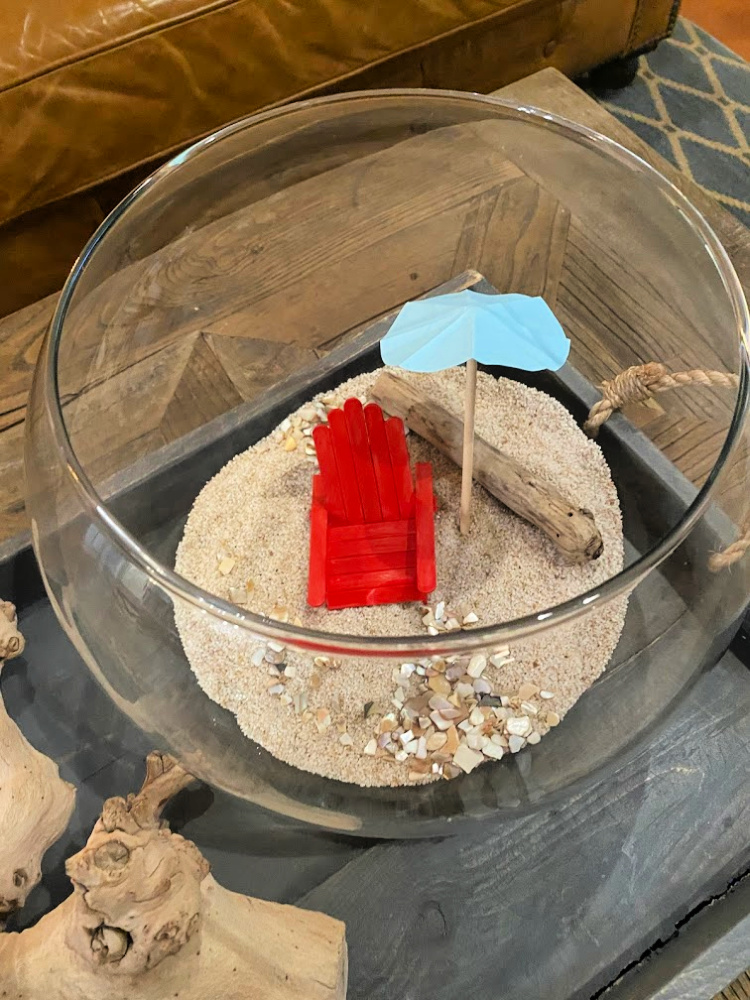 I filled a bowl with sand and added my little chair, a paper umbrella, some driftwood and tiny shells. Even if I can’t be at the beach I can imagine, it, right?

Time to check out the rest of these craft ideas to try now!
Start with At Home With Jemma! She will show you how adorn a sweet hat for gardening OR make it to hang on your wall or your door!
Celebrate & Decorate
At Home With Jemma
Hearth and Vine
My Hubbard Home
My Thrift Store Addiction
Home is Where the Boat Is
The Painted Apron
Chas’ Crazy Creations
Harbour Breeze Home
My Family Thyme
Sustain My Craft Habit
Birdz of a Feather
Decorate and More with Tip
Our Crafty Mom
Design Morsels
White Arrows Home
Create With Cynthia
Debbee’s Buzz
Calypso in the Country
B4 and Afters
Purple Hues and Me
Bluesky at Home
Raggedy Bits
Faeries & Fauna Craft Co.
Elle Marie Home
Zucchini Sisters
Brilliant, Chloe, not just this craft, but the blog hop. Great ideas, and I’m having fun seeing them all.
Hi great to be here. I made the skep and am so happy with it. I plan on making the bee wreath next. Thank you!
I love it! Going to make TODAY and put on my mantel. Thanks so much for hosting, can’t wait to see all the creative ideas.
This is adorable and so clever Chloe! Love your setting in your glass bowl with your sandy beach! Thanks so much for organizing us and get us crafting. Happy Thursday ♥
Chloe, this is so cute and I’m excited to say I have a bunch of popsicle sticks so I can make this too. I even have a fairy garden where I can place it. Thanks for the great idea.
Fantastic Patti! Get going!
Good Morning Chloe,
Oh goodness this is so clever, cute and adorable! I love miniatures.
I am thinking this would be perfect for a Fairy Garden too.
Thank you so very much for organizing this delightful, fun, and happy Crafting Blog hop!
Hugs,
jemma
This is a real cute idea for a summer vignette!
Thanks again for hosting this blog hop:)
Now I’m off to visit the others
Thank you so much Rachelle!
This is too cute Chloe!!! Great tutorial too, I have a bunch of popsicle sticks I use to stir paint, hmmmm…Thanks for putting this fun hop together!
I keep looking for things I have around the house to craft with and this is what I came up with!
This is so cute Chloe! I love how it turned out and brings summertime into the home! Thanks for sharing.
This craft could be used in so many ways. I can see it used on a themed cake topper and even to give to little girls for their barbies. I love your idea about a summer themed tablescape. Can’t wait to see that!
It amazes me what you can make out of those craft sticks or Popsicle sticks. Love how creative we can get.
Thanks for gathering us all up and hosting this fun craft blog hop.
Thank you Terrie, there are so many fun things you can do with them, aren’t there!
I love that you’ve wisked us away to the beach; great tutorial. I’m off to look for popsicle sticks!
Thanks so much for gathering all these inspiring ideas together. I’m looking forward to visiting each and every one 🙂
Thanks so much Sara! I wish I was sitting on that beach with my toes in the water right now!
Chloe, this is a very cute idea for a little beach scene. Thanks for hosting.
What an adorable idea, Chloe – and I love the vibrant color you chose! This is definitely a good time to be creative. Not only is it fun but it takes our minds off everything going on in the world. Thanks so much for hosting this fun hop! Stay well!
Shelley
Thanks so much Shelley! I do think we need to distract ourselves, don’t we?
I love all things miniature and that little red chair is so super cute is such a small size! Great job on the math used to cut that so accurately btw, I doubt mine would look that spot on, lol.
I am kind of getting motivated to make little miniature things…I think a tiny book on a tiny table and a tiny tropical drink would make this look even more appealing!
What a fun way to craft and keep busy, especially if you have kids to entertain! Love how the chair turned out! Perfect for fairy gardens, too! Thanks for organizing this awesome blog hop! Lots of wonderful inspirations and ideas!
Thank you so much for joining us Gail! I think people need some inspiration right now, don’t you?
Love your title and your craft is adorable. Love hopping with you again and again, Sweet Friend. Those sweet chairs are perfect for some many things!
Thanks so much Cynthia!! I think they will make adorable place card holders for a casual picnic on the front porch!
This is such a cute idea and would be so perfect here at the lake house!
These WOULD be adorable up there!
So cute Chloe! Thinking they’d make cleaver place card holders for a beach-theme party table too. Thanks for getting us all together for the hop.
So cute and clever Chloe! Thinking these would be great place card holders for a beach theme party or table cape, Thanks for getting us all together for the hop.
Thanks so much Debbee, I see more “furniture making” in my future!
Your tiny red chairs are adorable, Chloe! I just love how you created the beach vignette in the glass bowl! Thanks for hosting this fun hop!
Thanks so much Rebecca!
What a cute little chair! Thanks for including me in this craft blog hop!
Liberty
Thank you Liberty!
seriously so cute!
Thanks so much Pamela!
I adore miniatures and this is absolutely adorable, Chloe! Thanks for organizing this creative hop! Blessings, Cecilia @My Thrift Store Addiction
Thanks so much Cecilia!
This chair is so adorable!!! It’s look cute on a wreath too.
Thank you Pamela! That is such a cute idea…I see another craft coming!!
Chloe, this is so cute and clever! This would be a perfect decoration for my porch. I off to order craft sticks. Pinned!