How to Make This Stunning Illuminated Topiary for Fall
If you are looking for a fall diy, you have come to the right place! It is no secret that this fall is my favorite season! I have been busy making three different topiaries for fall. This is just the first one! You can make this project just like I have shown you, or you can add your own twist to them! That is what I always like about a diy project over buying my holiday decorations. I like that I can customize items exactly the way I want them. You can do the same thing!

This post contains some affiliate links for your convenience. Click here to read my full disclosure policy.
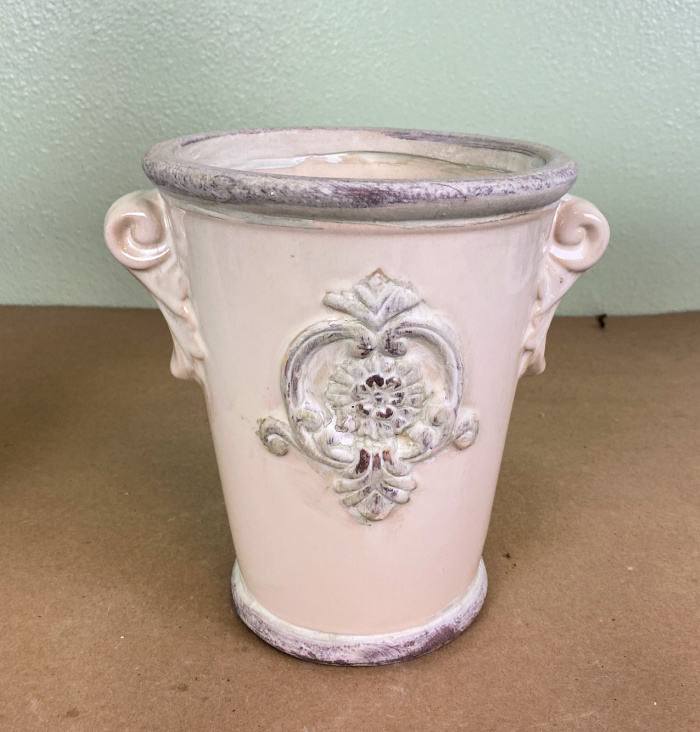
Select a container:
You will need to find a container that will accommodate the styrofoam cone you will use for the base for your topiary. I selected this cream colored traditional pot. You may have to do a little shopping to find something that is the right size and the style that you are looking for.
For this particular container, you will want to put a piece of styrofoam into the bottom of the container to raise up the cone you are using for your base. Wedge that in securely.
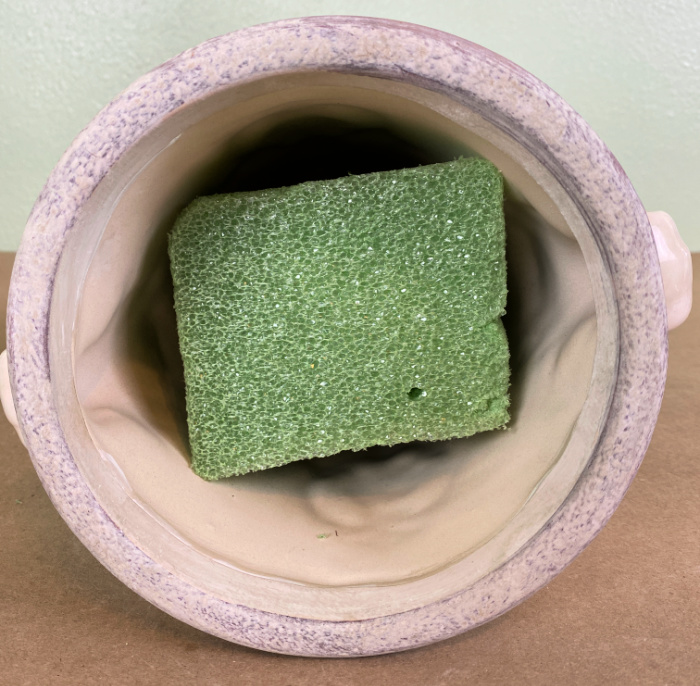
You can select whatever size styrofoam cone you want to build your topiary. I used a 17.9″ cone for my topiary. You might need a piece of floral foam or styrofoam in the bottom of your container to support the bottom of your cone.

When you set your cone into your container, if it is not wedged in securely, you will need to do something to secure it. You can see from the photo below that there is space between the cone and the edge of the container.
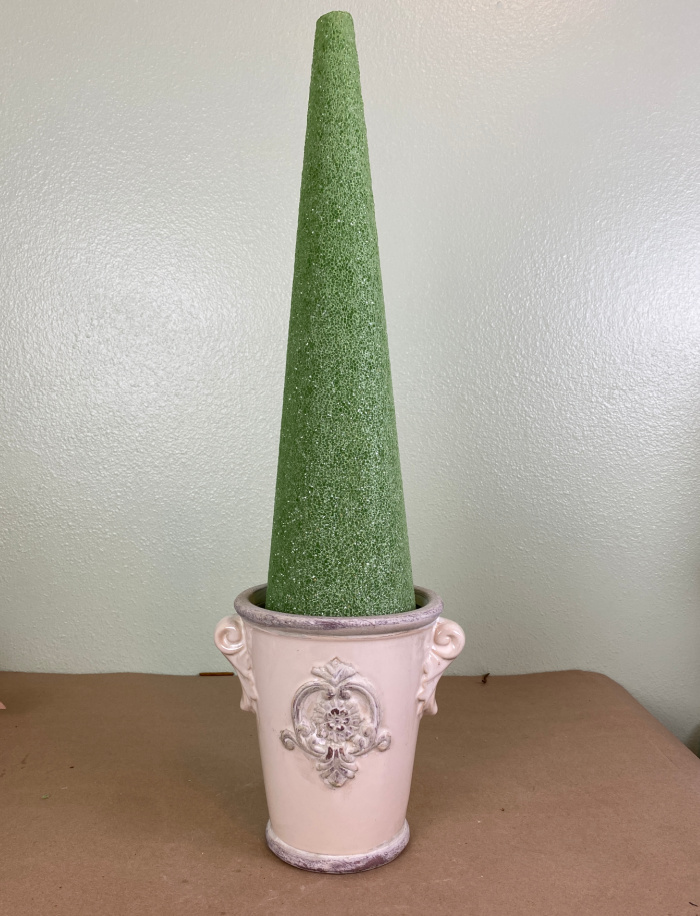
One way to make the cone more secure is to wedge come pieces of styrofoam between the foam and the edge of the container. Another option is to use a wooden skewer and push it through the edge of the cone and down into the foam that is wedged in the bottom of the container. You may want to use a bit of hot glue to secure the cone to the lip of the urn.

Build your topiary on your base:
One of the things I always pick up this time of year to have on hand all year long is these 15′ garlands from the Dollar Tree. If you are a regular crafter, you will find many uses for these one dollar garlands.
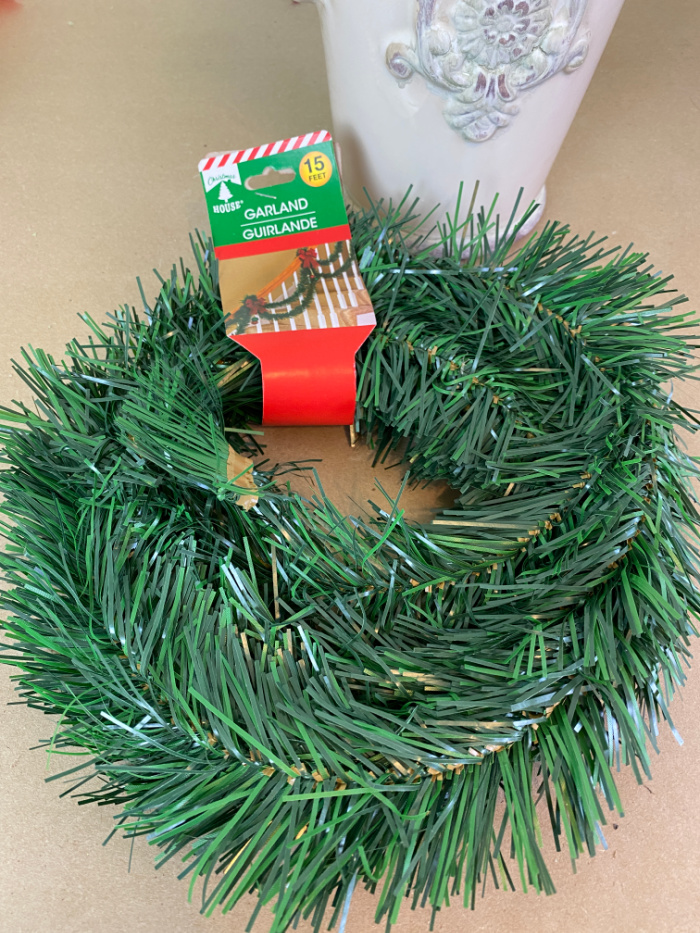
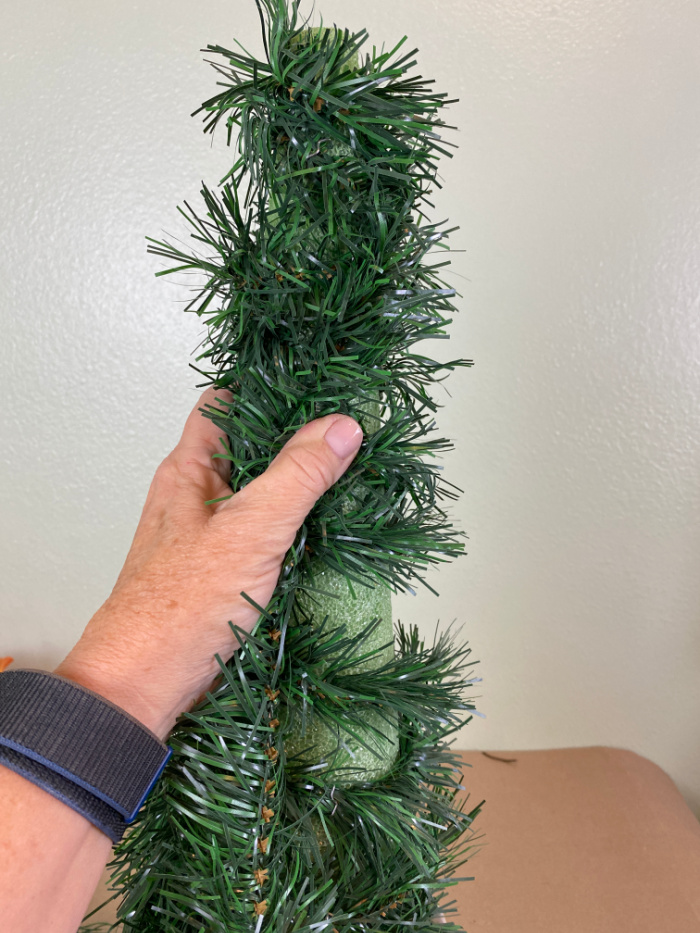
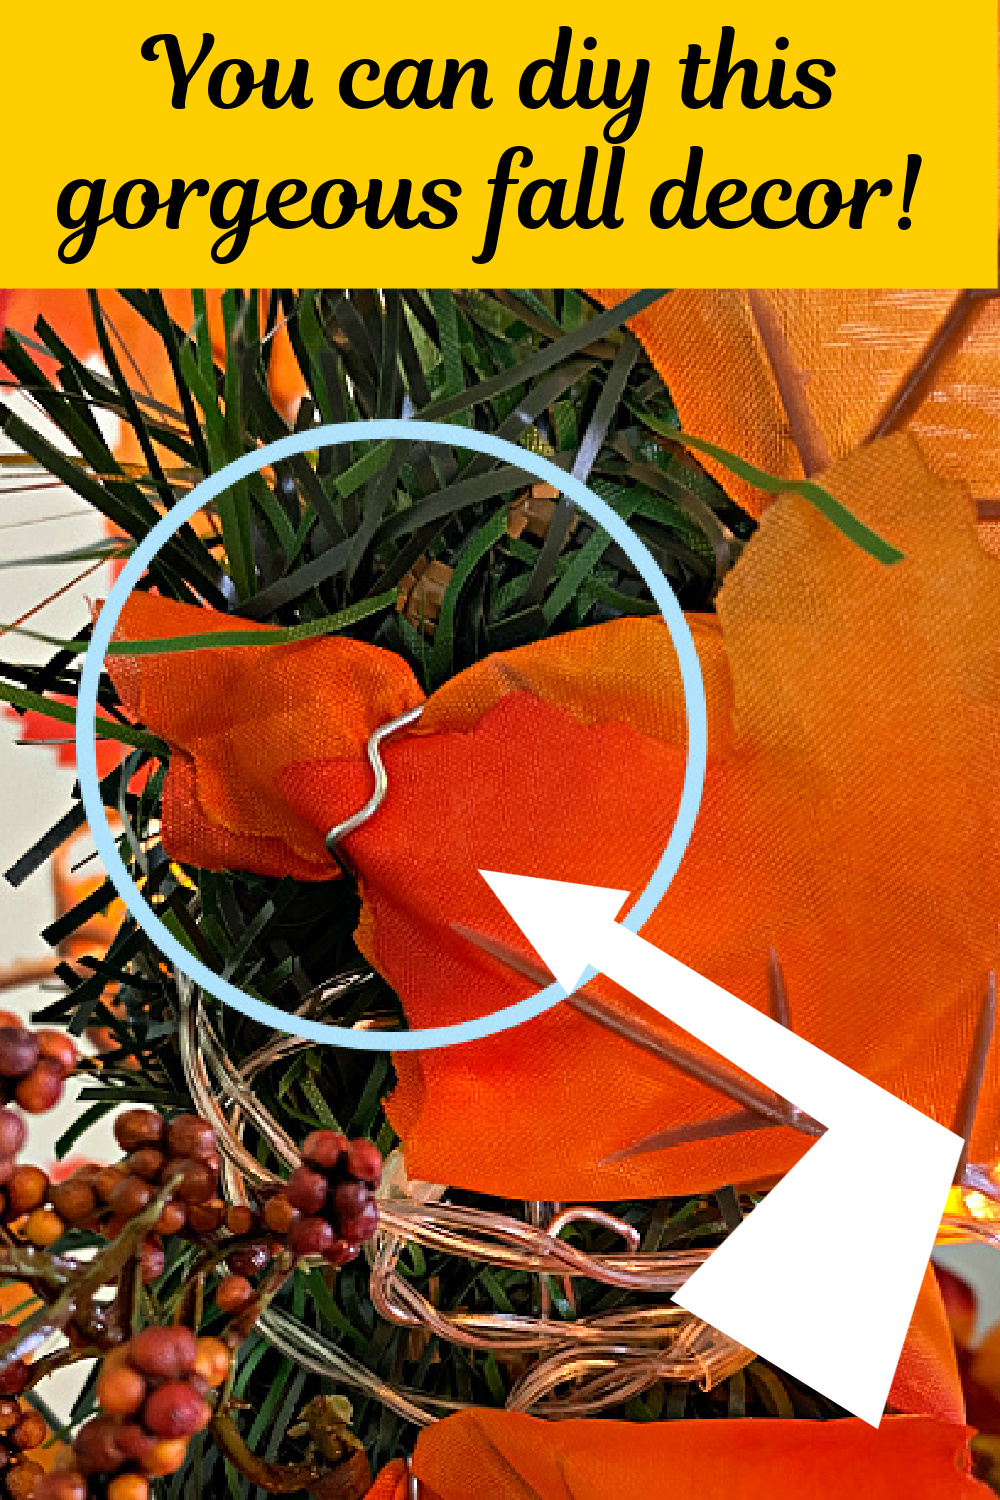
Unwind your garland and wrap it loosely around the cone. Secure the garland into the cone with greening pins. If you can’t find or don’t have these garlands, you can use floral moss to disguise your styrofoam cone.
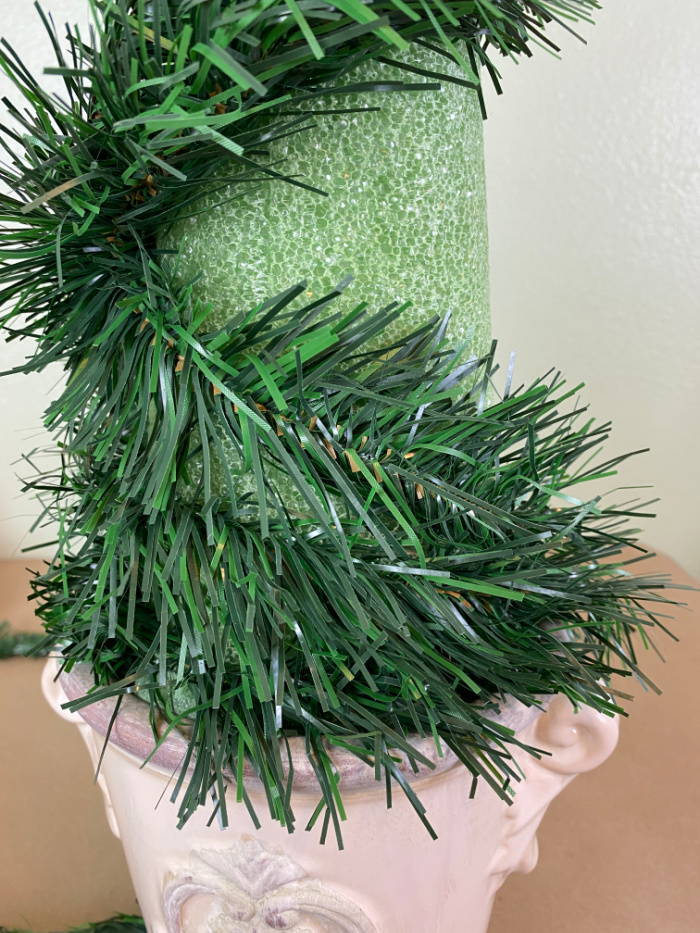
Wind the garland up to the top of the cone and then back down to the bottom. If there are places where it is particularly loose, just squeeze it to the styrofoam and secure it with the pins. You should not need to use more than eight or ten greening pins to attach the garland to your cone.
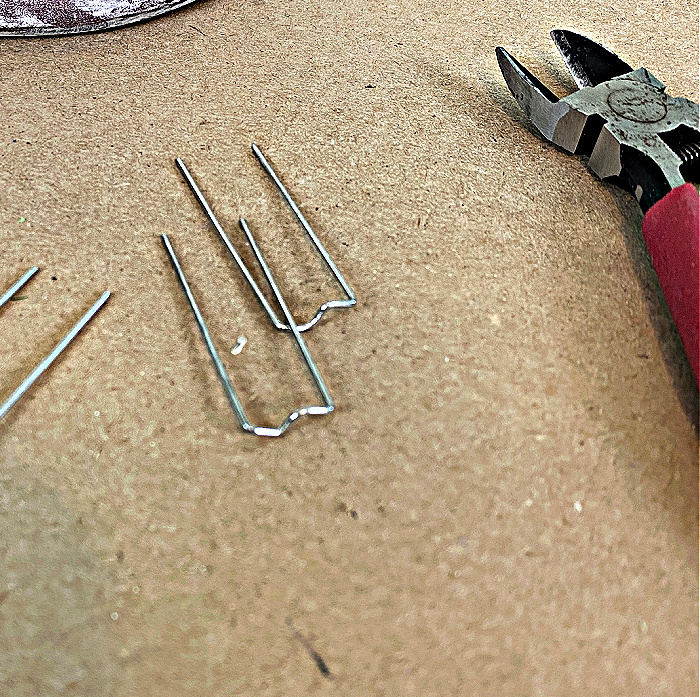
These are the greening pins you will want to have on hand to attach the garland and to use to attach some of the other things to your cone.
The easy way to make a light up topiary is to use a colorful maple leaf fall garland that light up! I selected these garlands of traditional fall colors.

The next step is to use those greening pins to attach those garlands to the styrofoam cone.

Make sure that you allow enough cord to let the battery pack to set down on the tabletop. Attach the garlands distributing them evenly around the cone.

When you have both of the garlands on your cone, it should looks something like this pictured below. Yes, it does not exactly look like a topiary shape. It looks a little shapeless at this point. Not to worry, we are going to fix this. Using battery operated lights means there is no need for an extension cord to keep your topiary lit!

Make sure that you do not puncture one of the cords with one of the greening pins. Now you can begin to fill in the rest of your topiary with additional fall decor. The easiest way to add further decorations is to use florals with stiff stems that can be easily pushed into the styrofoam.

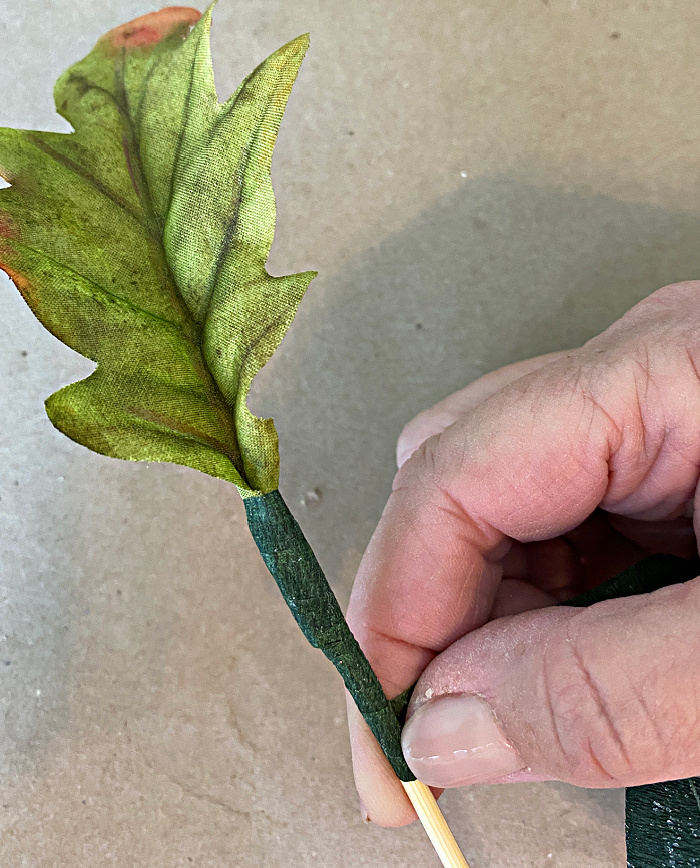
Something you want to add that does not have a stiff stem can easily be added by using a piece of a wooden skewer. Cut the leaf from the branch that it is on and lay it up next to the piece of the skewer. (Alternatively you can use a very stiff piece of floral wire, but you may have trouble getting it into your foam.)
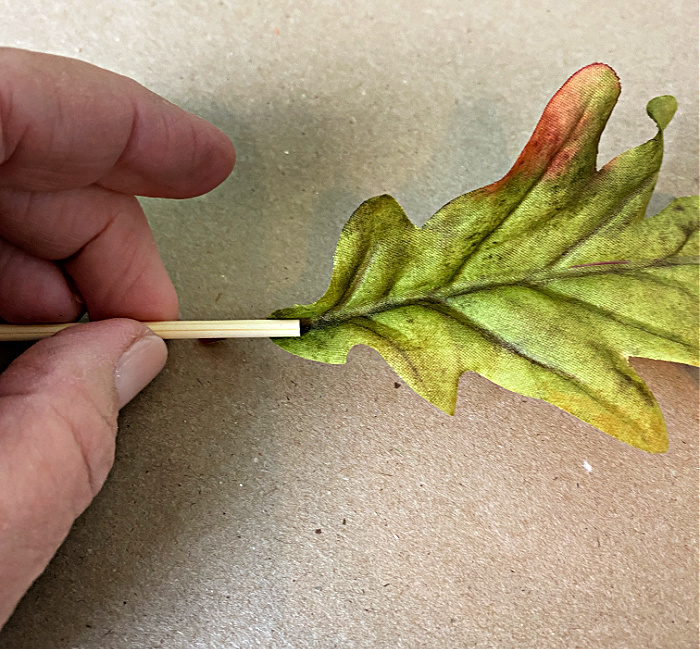
Use floral tape to secure the leaf to the skewer as shown below.
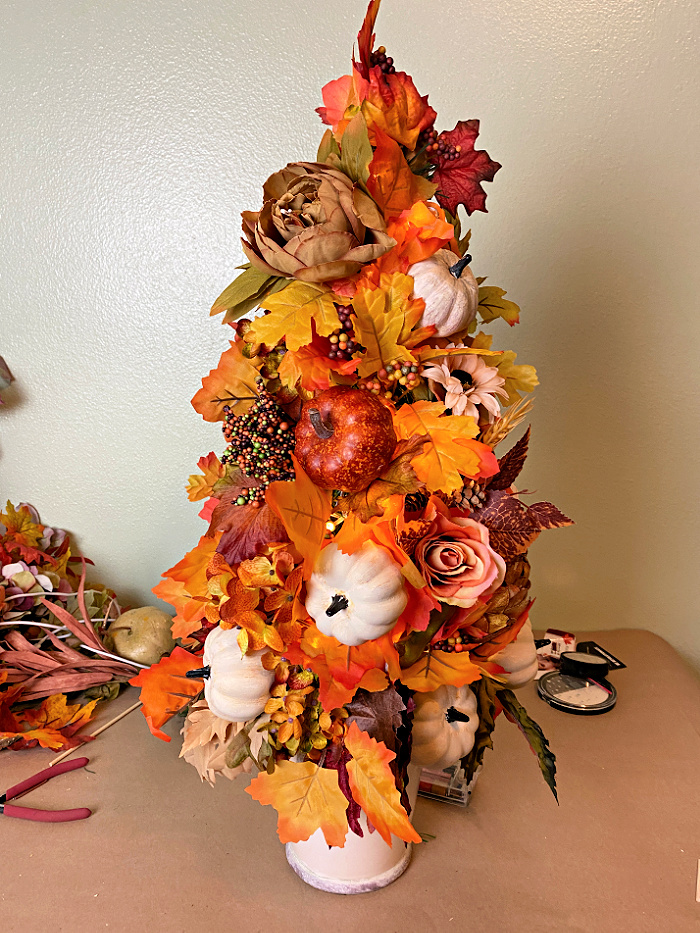
Begin adding additional fall leaves and florals from the bottom and moving up from there.

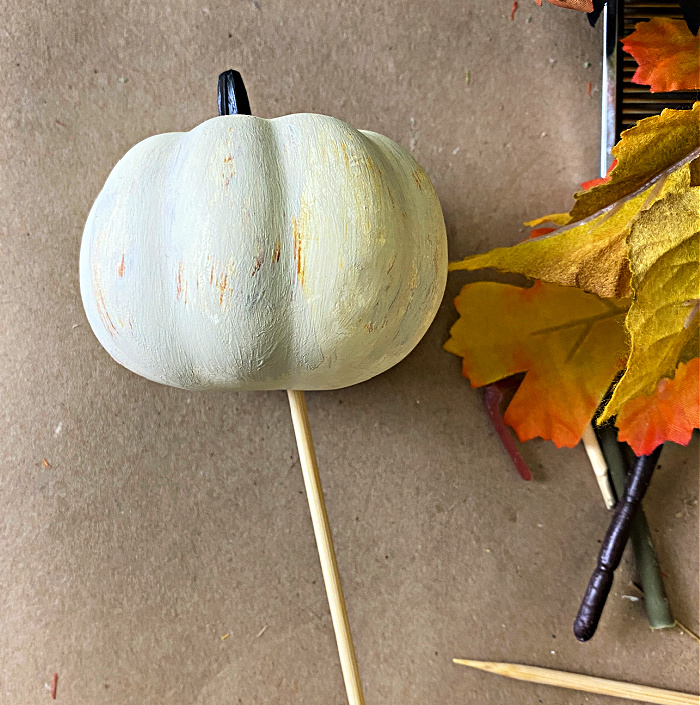
To add pumpkins to your topiary, simply stick a skewer into the bottom of your pumpkin. You can use wire cutters to cut the skewer short and then stick it into the styrofoam where you want it.
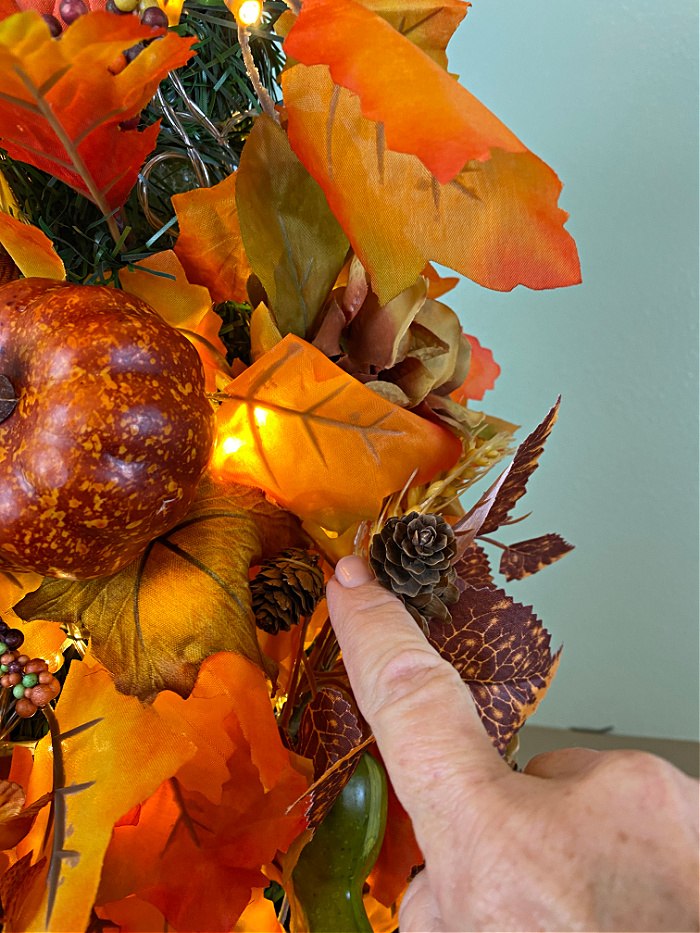
When you have added most everything you want to add to your topiary, it will be time to make sure you have shaped your topiary. One way to do that is to tuck some of the leaves of the illuminated garland behind some of the items like the pumpkins or other picks on your topiary.
Towards the top of your topiary you may need to fold some of your leaves and secure the leaves that you have folded to the cone like shown below.
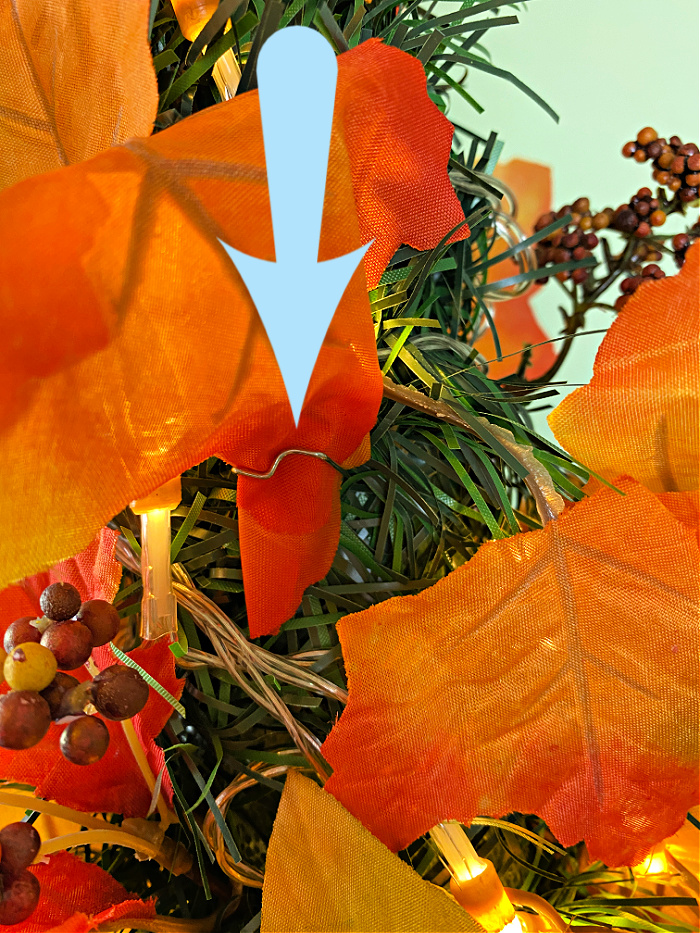
The reason to do this is to make sure your topiary does not have leaves sticking out in all directions up at the top of your topiary. This is one way to give it a proper shape.
When you have the shape you want, make sure you add some leaves, pumpkins or other florals to cover up the wires. Once again, make sure you do not stick anything through the wires of your light up garlands. Fortunately, they are battery operated and not electric, but you don’t want to ruin them.
Here is my finished topiary on my mantel. Now I have decided I need to order a couple more of the light up garlands to add to my mantel. They will add a lovely glow in the evenings.
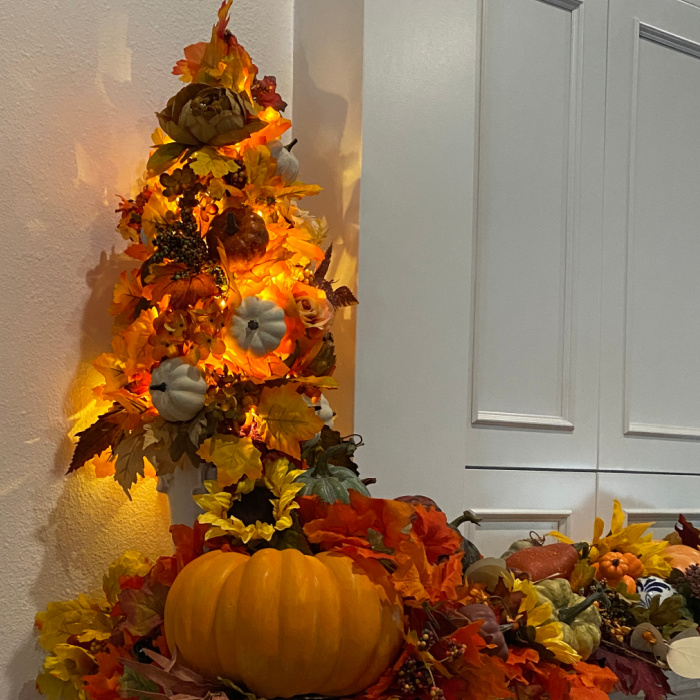
I chose to display my lit topiary on my mantel, but a pair of these would look great on a dining room table. You can display them throughout the season and use them as your centerpieces for your Thanksgiving table.
Supplies for making this topiary:
- Cream Floral Medallion Flower Pot
- Maple Leaf Lighted Garland
- Greening Pins
- Small white pumpkins
- Styrofoam cones
Pin This:
This has all of the elements you need for an autumn season display in your home!
Other fall topiaries:
Fall Topiary you can make in an hour! – This is perfect fall inspiration!
Amazing DIY pumpkin topiary! – This one makes a perfect front porch decoration!
A Halloween Topiary! – This one makes a fun addition to your Halloween decorations!
It looks amazing as always my friend! I love the lights, gives such a warm glow as we move into the colder weather. Oh I want the cotton ball wreath 😉 I would put it at our mountain Condo.
Chloe, hi! My sister in laws best friend has terminal cancer and was just put in a nursing home, the kicker is..the friends wonderful special Ed teacher husband has Alzheimer’s and dementia and was admitted to the nursing home three weeks ago! By the grace of the lord they are able to be in the same room. If I were to win the wreath it would be put on their door
Your topiary turned out so cute!
I also would love to win your cotton bole wreath. My laundry room is off my dining room so I keep the door shut and decorate it with seasonal wreaths and signs. Your wreath would be the perfect embellishment for fall!
I love your idea of using wreaths etc for the door going from the dining area to laundry. My set up is the same and I am definitely going to steal your idea. Love it
I have always been so fond of topiaries. There is just something magical about a tiny tree in a pot! ha ha! The one with the apples is my favorite! I’d love to win the cotton boll wreath, too, by the way! If I won I’d use it in my kitchen, for sure!
What a great topiary – you are an inspiration Chloe! I would hang the cotton boll wreath on our beautiful antique armoire in the master bedroom. It will look awesome!!
Chloe, you really know how to put together many grand topiaries that look like ones we’ve seen in Grandinroad and other high quality venues.
Did you know we are moving back to a house in our old neighborhood? Yes, we are, and I have just the place to hang a cotton boll wreath – my front door! There will also be other options for hanging wreaths, as we have a foyer, and a few short walls that I’ll be playing with as time goes by……thanks for the opportunity to celebrate and decorate! 😉
Love It, looks very easy to make. Really love the the planter that you used.
I am making one!! Thank you for this fabulous idea!!
Love, Love, Love the Apple and Maple Leaf Topiary! We’re finally getting around to painting our house after being battered by several severe storms and your Cotton Boll Wreath would be a treasured piece to hang right out in front!
Thanks for all the great ideas!
I absolutely love this project! So perfect to celebrate the fall season. I’m sure you have plans for winter ones, too. You are so talented and I’m lucky to call you friend.
I don’t do much decorating these days, but trying to get back into it and also make myself craft. I can think of so many places for a cotton boll wreath. I have an antique tobacco basket with a big star in front against my living room wall it would go perfect in. The inside of my front and back doors are wreath-less. I have two sets of double windows in my living room and dining room that would be perfect spots. I have bare walls in my remodeled bathroom (and it would look so cool on my bathroom barn door). You always inspire me so much. ❤️
Hi Chloe,
How nice of you to give away a Cotton Boll Wreath after all your hard work. I have seen them and they’re so beautiful and different. If you choose me I would definitely hang it in our big tv room, it would look precious with the paint color and I have a perfect spot I can hang it because I don’t have anything on that side of the wall. Thank you so much for your time and kindness.
Thank you so much Dalia! I will be reading all of the comments and making my pick over the weekend!! Thanks for following along!
Chloe,
I started following your page last Christmas when I found instructions for a beautiful star wreath. I followed your directions and got many compliments. You inspired my crafty bone once again. Just may have to try my hand at a topiary.
We just purchased a fixer-upper on a lake in the Deep South and a beautiful cotton boll wreath would go perfect in my foyer. I hadn’t thought of what I would hang there yet, so even if you don’t send me yours, I may just have to find one myself.
Stay Crafty!
Thanks so much Gina! I am so happy to hear from you! Oh how I would love to have a lake house! I don’t know about in the deep South! I am not a fan of alligators and snakes!
Hi ! Your work is so pretty ! I like the one in the middle blue and white glass, it reminds me of my dutch,delft heritage. I don’t have anything like that .I would put it in my living room and also fall is my favorite time of year. Thank you for sharing your crafts with us …. Diane
Love how you made the topiary. I’m going to share with my crafting friends I would love the cotton boll wreath. Keep on crafting.
I wood hang the wreath on my front door.
If I would win the wreath, I would proudly display it in my living room in our new home that we will be moving into in just a few more weeks! My home will be decorated in a “farmhouse” style, & that wreath would be absolutely perfect!!
Thank you!
Wow, Chloe, this Cotton Boll wreath is AWESOME!!! and so easy to make. Thanks, for the info.
I would put it on my kitchen table as a centerpiece for everyone to enjoy. Enjoy your weekend & stay safe.
Chloe, thank you again for another beautiful idea. I am going to make this and put it on my front porch with some pumpkins and gourds. The gourds I dried and I have a pumpkin I made with fake fall leaves and a battery powered mini lights. I can visualize your project joining the group.
The cotton boll wreath would be a great add on for above the fireplace with other fall pieces on the mantle. There are so many places where I could display it, but above the fireplace would be an eye catcher. Keeping my figures crossed.
Keep up with your ideas so we all can enjoy them
Stay safe and healthy.
Chloe,
These look so good. Thanks for sharing your talents with us.
Chloe you are such an inspiration! Your Fall topiary is gorgeous! With your helpful directions I think I can actually make one! If I were to win your cotton boll wreath it would be displayed prominently in my living room. Have a wonderful day!
This fall arrangement is gorgeous! I definitely want to make one!
I would love to win you cotton wreath! I have wanted one for a while now and think it would look special in our 1929 farmhouse.
Thank you for your exciting projects!
Now that’s how you put a topiary together! Loving it so much! I guess I’m getting too old but I get irritated when things aren’t done to perfection. Well I really can’t blame that on age because I’ve always been a perfectionist…lol. Anyway….I’m loving that tablecloth you want and even though I’m loving the dishes too, they don’t have very good reviews….better check that out! I don’t need another beautiful wreath and thank you for the offer! I hope someone that truly deserves it is the recipient!
I would hang that cotton wreath in my half bathroom, I live in NC and I once had a cotton wreath and I lived with my parents while mom was going through chemo and my dad smoked and it totally turned from the smoke. I since never found another. I also would like to thank you for sharing all your amazing ideas. So inspirational
Your topiary is Fall Fabulous Chloe! Your tutorials are always so thorough, much appreciated! I love to decorate with little white lights all year round, we even have two trees flanking our patio that are covered in white lights that come on every night all year long. You are so sweet to be giving away a wonderful wreath, I adore decorating with cotton boles, I actually have a magnolia and cotton bole wreath that I hang on the inside of my front door so I can see it and enjoy it…so I guess I better not participate in the giveaway. Thanks for the great Fall inspiration!
I love the topiary I’m going to make me one. I would put the cotton bole wreath on my front door. That way when someone drives up they will see it.
I’ve been watching your videos for a while now. Everything you make is beautiful and professional. I wish you were my mom! LOL I hope to win the cotton boll wreath, hang it on my door proudly and say I got it from Chloe Crabtree!
Beautiful Chloe….as usual!!! I may try to make this topiary, you make it look so easy.
btw, we will be in your area around the Thanksgiving holiday to attend a 3 day Basketball tourney and if you have a free minute or two, maybe we could have lunch or something unless you are going to be with family.
Hugs and blessings always.
Kari
I love the simplicity of your Autumn topiary. Great job! I’d hang the cotton bole wreath above my fireplace to match my farmhouse design. Thanks for sharing it!!
I am definitely going to make that topiary! Thank you for the tutorial!
I would love the cotton bole wreath! I have a group that meets with me the first Saturday in every month to crop (scrapbook) at my cabin. I would put that wreath on the cabin door to welcome all my croppy friends!
Love all of your creations
Hi chloe really adorable topiaries the white pumpkins really stand out! Adorable! Would like the wreath to brighten up room where a new window was put in thanks so much luv the posts
Hi, I love your topiaries! If you pick me , I would hang the cotton boll wreath on the wall by my stairs, along with my other cotton displays. It would go with my picture of some cotton pickers, and a real canvas sack that was used to put cotton in. It belonged to my dad, for cotton picking. I was raised in the south where picking cotton was a lively hood.
I also have scales that was used to weigh the cotton!. So, the wreath would go great with these other items!!
Chloe, wow this pretty amazing. I love this lit it looks so warm for fall
Your topiary is beautiful I have put this on my list for next autumn. I’m in spring at the moment so I’m going to search your site for some spring, summer and Christmas ideas. So, so glad I found you
Oh Jane, thank you! I hope you find some things you will enjoy making!