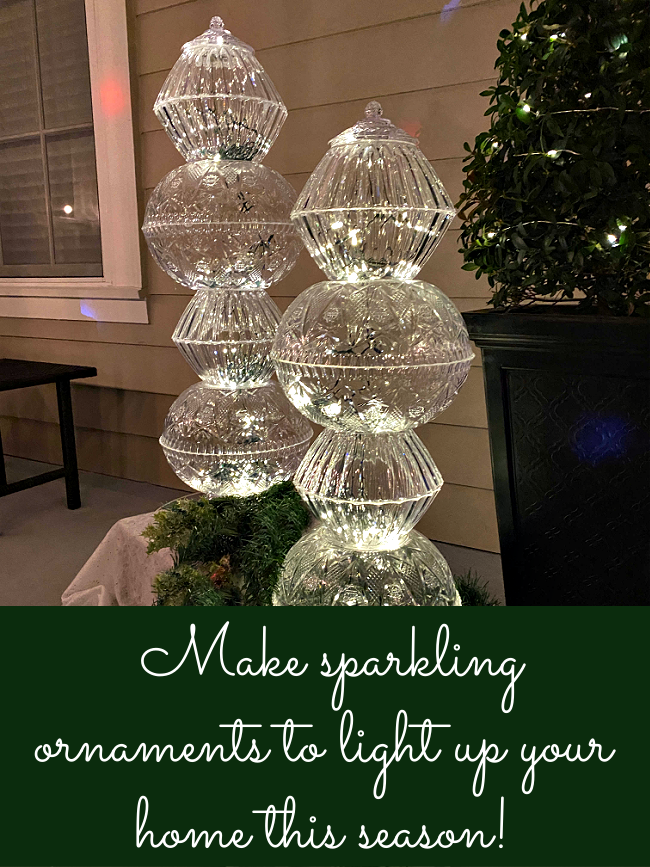
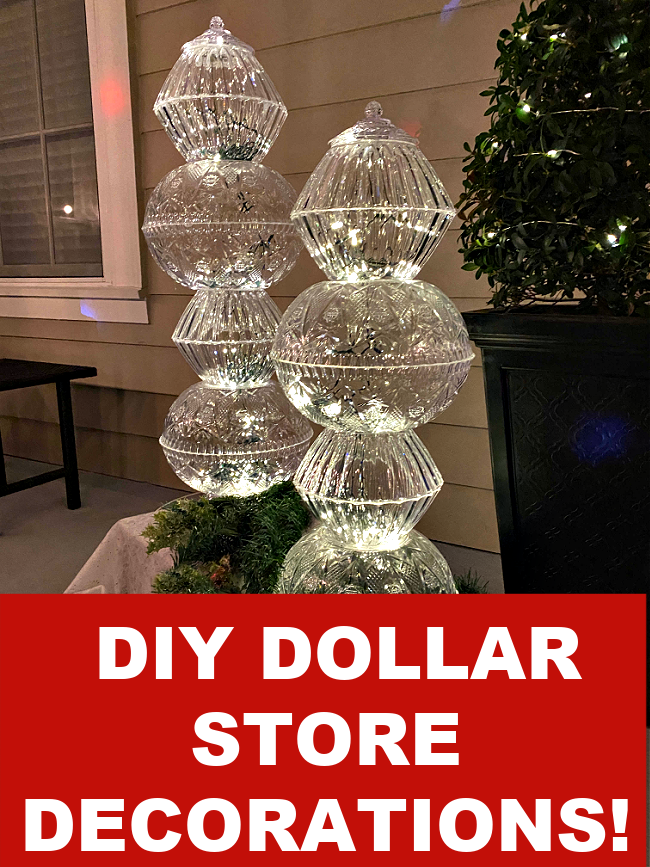
Make this Stunning Light Up Christmas Display from Dollar Store Bowls
I am always looking for creative ideas to add a festive feel to my front porch for Christmas with some outdoor Christmas decoration. This easy project will add a wonderful glow to your front door. No giant lollipops here, just excellent way to add some elegance to your home.
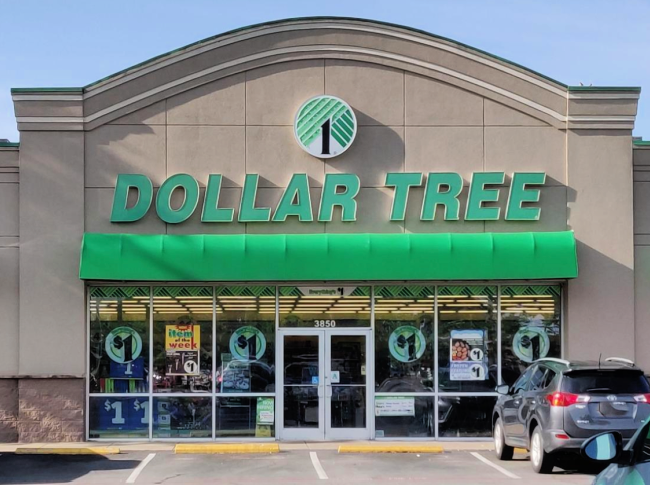
Get to the Dollar Tree and pick up some “crystal” bowls and you can have gorgeous light up decorations sparkling on your front porch this holiday season! One of the things I really love about these is that they glimmer like ice and can beautify your entryway all winter long. There is nothing particularly “Christmasy” about these, they say “WINTER” just perfectly. Let these twinkle for you all winter long!
The best part of this easy craft project is that it requires no wood dowels, no tomato cage, no styrofoam ball, plaster of paris, ryobi power tools or old tires! Just putting this together put me in the holiday spirit!
This post contains some affiliate links for your convenience. Click here to read my full disclosure policy.
Shop:
No matter if your Dollar Tree has already raised their prices to $1.25 as they are threatening, this is still a bargain project as long as you find a great bargain on the bowls. I was able to purchase these bowls for $1.00 each.
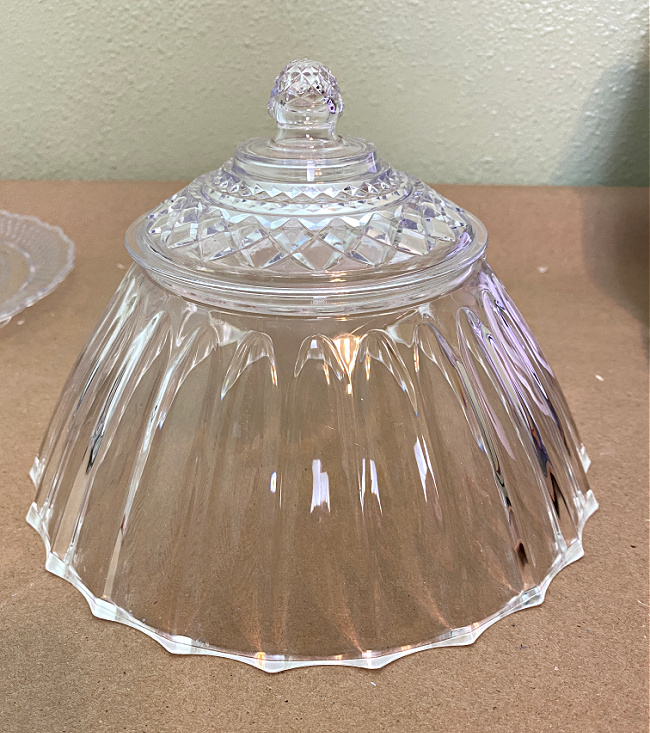
If you cannot find these exact bowls, I have some tips for you I will share at the end of this post. These are the bowls that I used to create these ornaments.
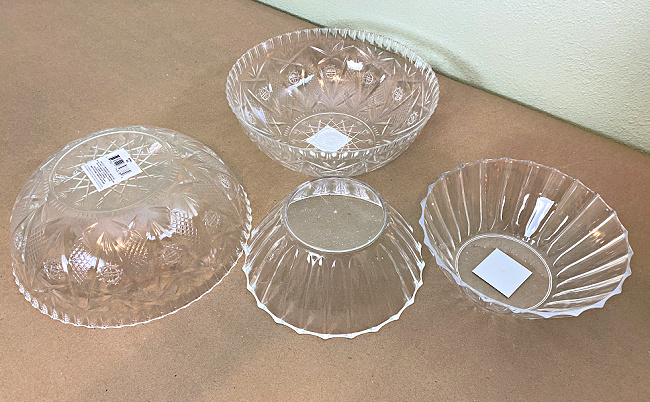
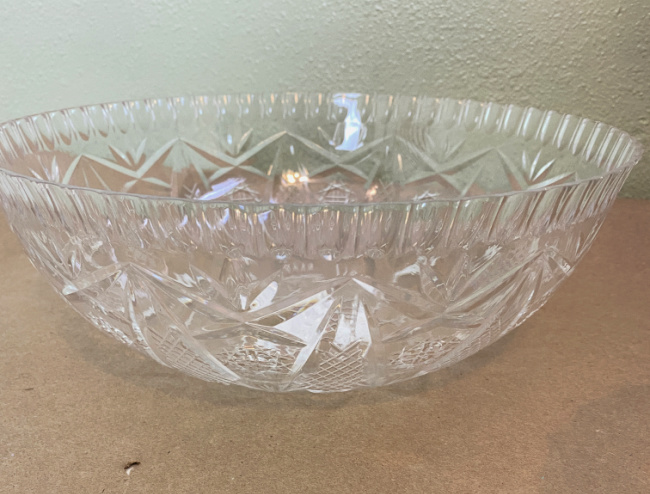
The larger of the two bowls is more ornate with designs in it. This one measures eleven inches across the top open part and is just four inches high. To recreate the same ornament that I did, you will want to buy four of this one.
The smaller bowl is simpler in design. There are just flared patterns on it. This bowl measures eight and a half inches across the top of the open bowl and is three and three quarters inches tall. You will want to buy five of these bowls.

You don’t have to have a tray for a base for your towering ornament, but I like to use one. Any dollar store tray will work. You will simply use that to hold your battery packs beneath the first bowl so you can lift and move the entire ornament without the battery packs from the lights pulling the strings back down out of your bowls.
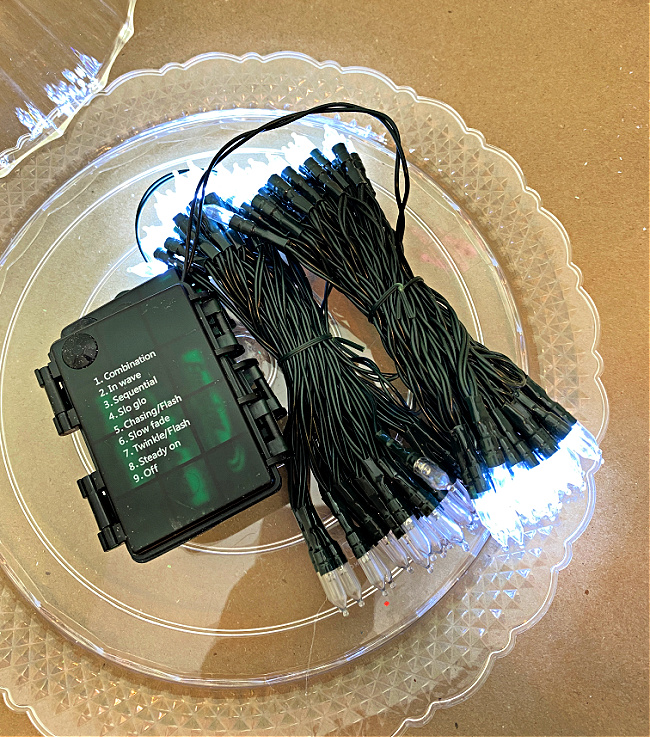
The additional items you will need to make an ornament will be adhesive, sandpaper, battery operated lights, a glue gun, and “old” glue gun and some wire cutters.

NOTE:
The battery lights I use have a timer function so they come on each night for six hours and then go off for eighteen hours. They also have eight different light functions so you can pick what you like the best. YES, you can use one string of lights, but I like to set each one to a different display (see tips below).
Time to make your ornament:
Take each of your bowls and using an “old” empty glue gun and melt a circle of holes in the bottom of each of the bowls. DO NOT apply pressure to the glue gun. Allow the the heat of the gun to melt the holes. Alternatively you might want to try to use a drill bit to drill a hole in the bowls, but I haven’t had a lot of success with that method.
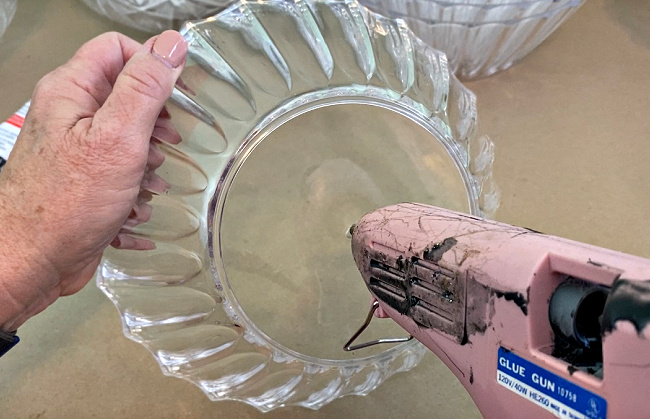
If you apply too much pressure, you will cause your plastic bowls to crack. By melting a circle of holes, you will be able to gently push out the circle of plastic.
You would like the hole to be this large to make it easy enough to push a bunch of your lights through. Go ahead and put the holes in all of your bowls.

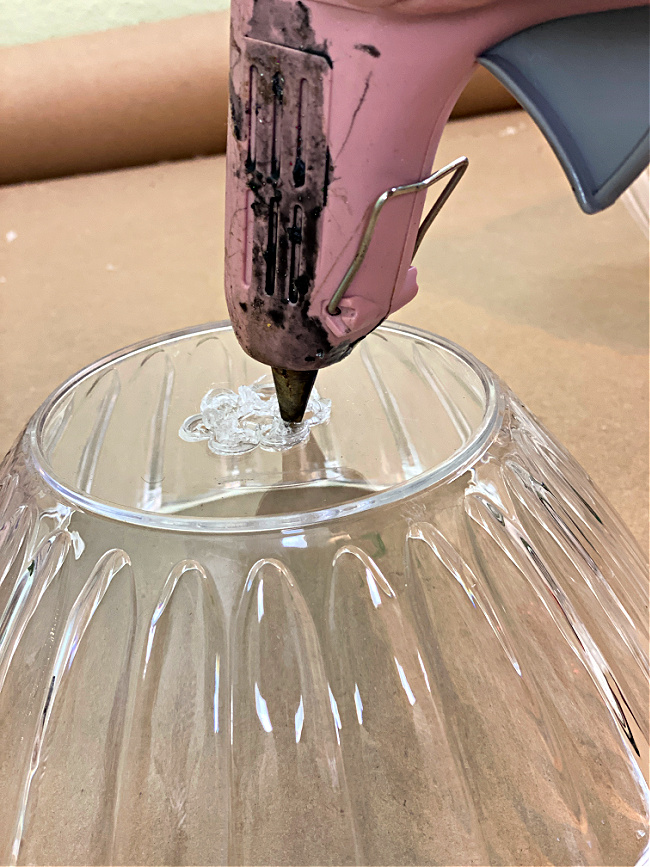
After you have melted your holes, you may have little sharp raised pieces of plastic as shown below.

Put on eye protection! Then use your wire cutters to snip off any of the excess plastic. Be careful not to get too aggressive, or you will crack your bowl. Wear eye protection, as these little bits are sharp and when you snip them off, they will fly off in any direction.
Place your first bowl upside down, set it on a tray and place your battery packs for your lights under your this bowl.
Pull your lights all up through the hole in that bowl.
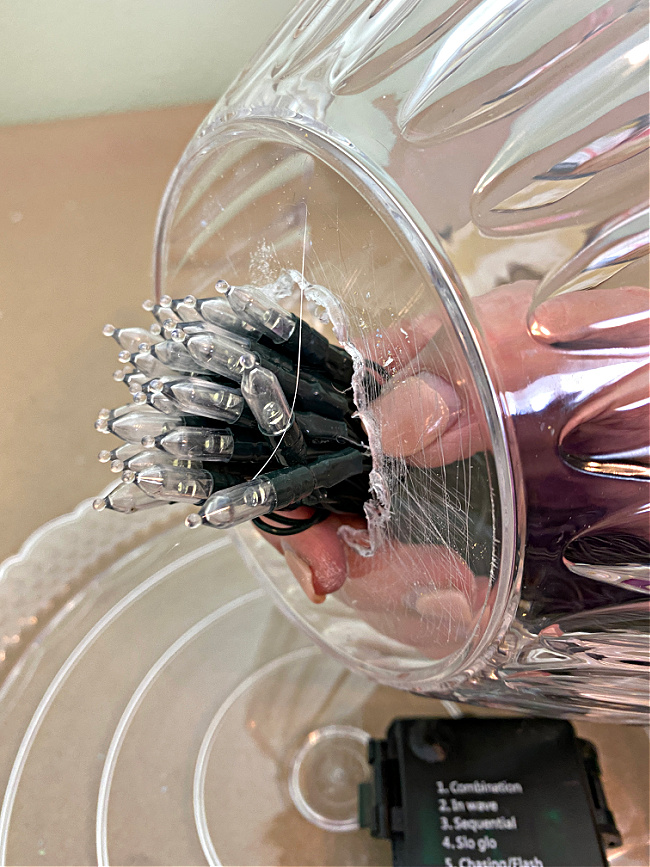
Take your first large bowl and set it on top of your upside down small one. Pull the lights up through the hole in your large bowl.
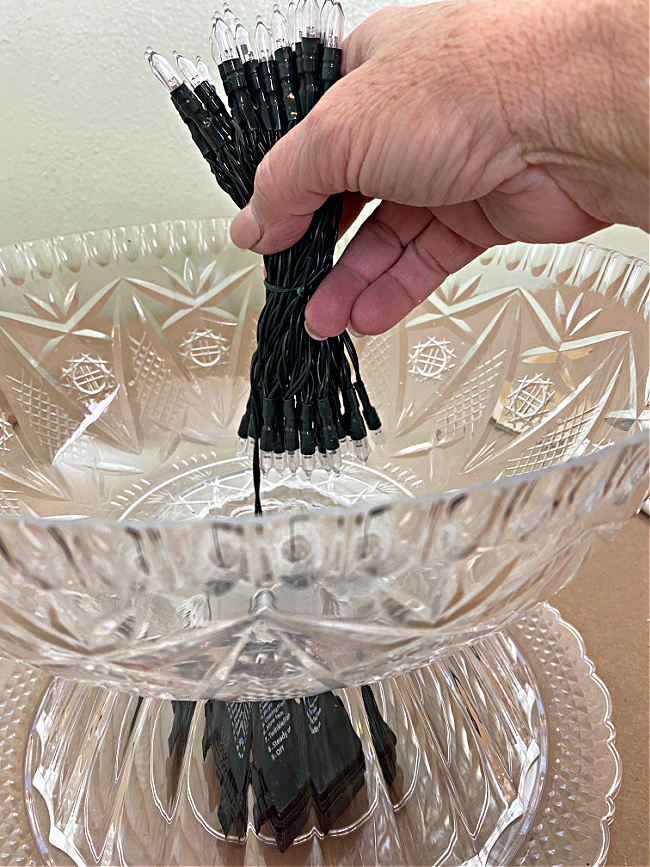

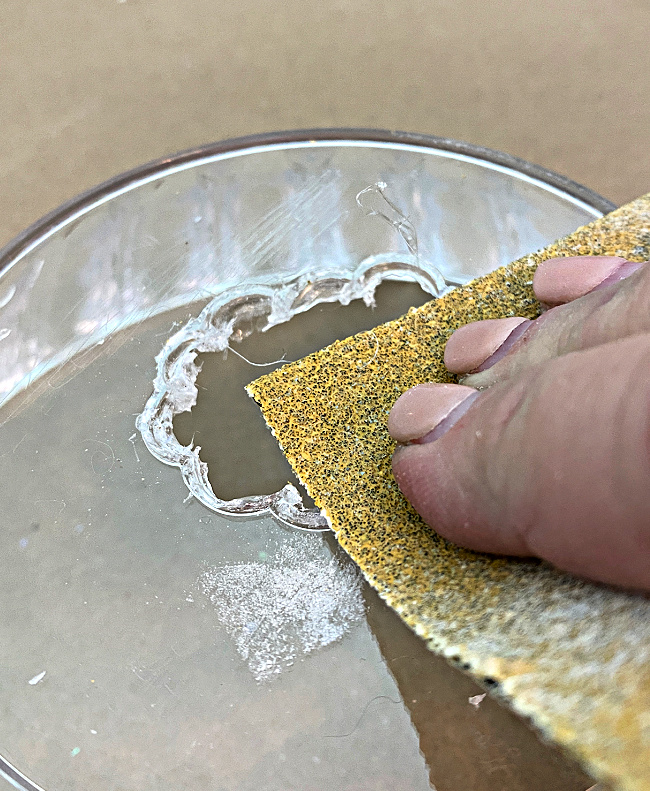
After you have pulled 3/4 of the lights through that hole, line up the edges of the two large bowls and apply adhesive to those edges to secure them to one another. Add the adhesive all around the edge as shown in the photo below. Let the bowls sit for about five minutes to make sure they are secured to one another and the adhesive is set up.

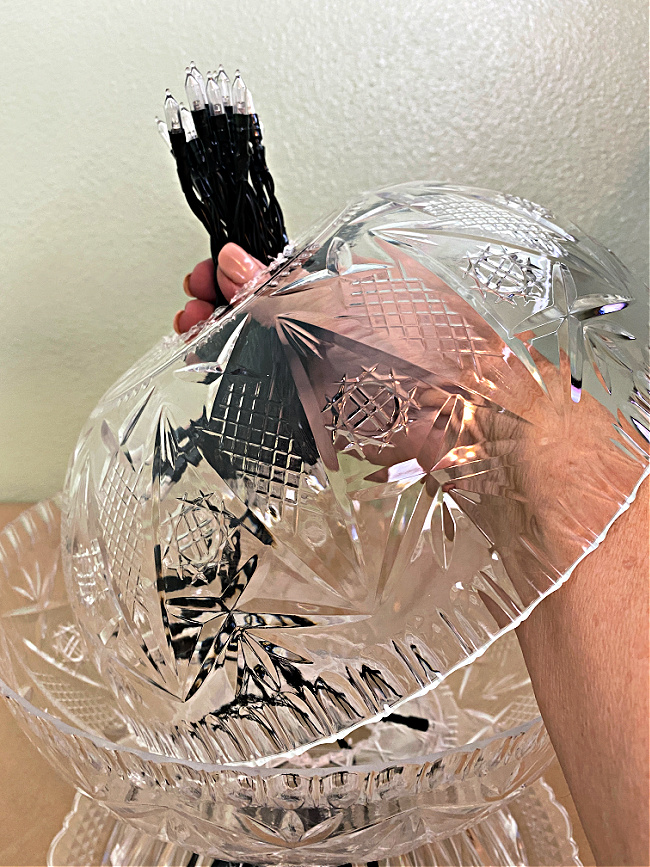
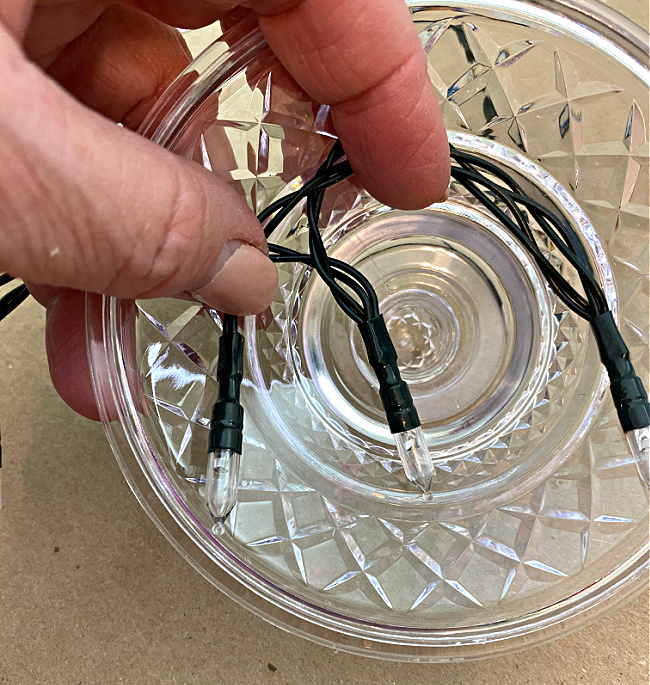
After that, you will repeat the same process alternating the different styles of bowls with one another and leaving 1/4 of the the lights in each orb you have created with two bowls. Your ornament will look like this:

When you get to the top, you will want to finish it off in some way. For this one, I selected a candy dish from Dollar Tree.

I took the top from the candy dish and used LOW TEMP hot glue to secure a couple of lights, one from each of the strings of lights I used to the inside of the top of the candy dish. That will keep your fairy lights from falling down through the tower you have created.
Then, use the same adhesive to add a cap to the top of the ornament with the lid from the candy dish with the lights secured to it. AND YOU ARE FINISHED!!!
Display:
Display your ornaments wherever you would like! Add some mini tree skirts or faux snow to the bottom of your ornaments. You can add ribbons, garlands, Christmas greens or decorative picks to style your ornaments. The different sizes of the bowls give your display depth and the Christmas lights inside offer a beautiful glow after dark!
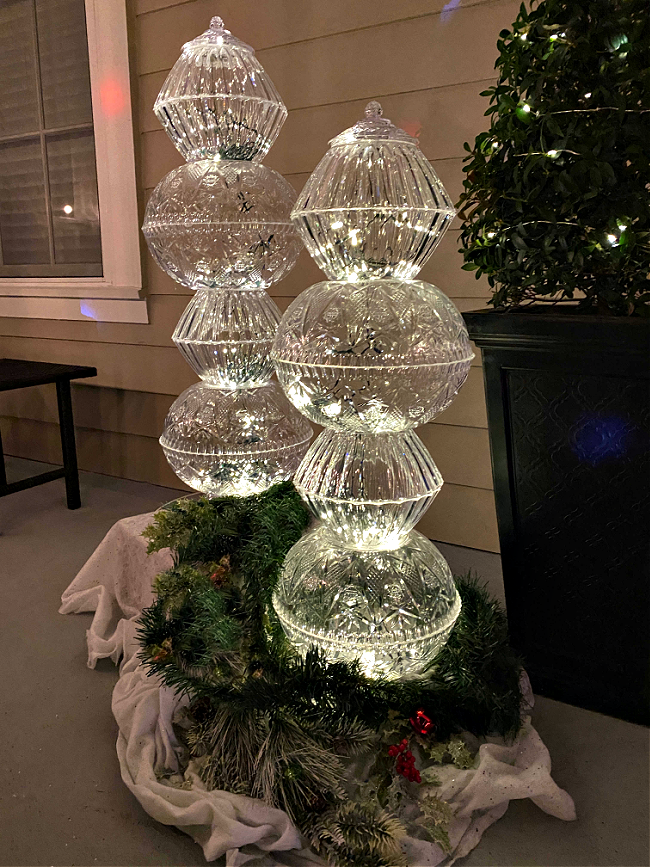
A festive way to display your crystal lights is to tuck some evergreen garlands around the base. You could also add red ribbon or bows to yours!
Tips and tricks:
- You can use different things to top off your tower (see below).
- You can enhance your bowls with snowflake ornaments (see below).
- IF you cannot find these bowls, you can use plain ones with the snowflake ornaments in them.
- Using two sets of battery lights makes it possible to have one on “steady” so your ornament is lit all of the time, and the second one can be set to flash or wave so you have some “action” inside your ornament.
Here I used a dollar store tree topper with lights glued onto it to finish off the top of my ornament. Notice the snowflake ornaments which were glued inside of the bowls on this one. Next year I think I may make larger ornaments out of these bowls. There is no reason that these can’t be displayed in your front yard for more impact! You can see the price tag is right on this beautiful decor piece.

Below shows how I glued the snowflake ornaments inside of the bowl. They have a bit of an iridescent quality to them which makes the entire ornament shine even more.

What I would do different:
The one thing I would do different is to use lights with a clear or silver cord not the green one.
Shop this project:
- Battery operated Christmas lights – green wire
- Battery operated lights – clear wire
- Aleene’s The Ultimate adhesive
- Wire cutters
PIN THIS!
IF YOU LIKE THIS PROJECT, PLEASE PIN IT AND SHARE IT WITH YOUR FRIENDS!
For more great ideas for Christmas decorations:
You might want to see how I made this ornament topiary!
Check out these diy projects:
Tall Ornament Topiary
A Christmas Tree style topiary
A Snowman Ornament Topiary
Christmas decorated mailbox
Christmas Box Display for your front porch
I am in love with this project, Chloe! I’m posting it on FB and I guarantee that my mom will be at the $ store today buying supplies to make it. I also plan to make this for my front porch urns to enjoy all winter.
Thank you so much Paula!! Isn’t it the best that you can display it all winter? If your mom has trouble finding the bowls, have her get the plain ones and glue the plastic snowflake ornaments inside them for the same (or dare I say prettier?) look!
How tall is this delightful clear ornament.
I made the a couple of different heights, you can make them whatever height you want. My tallest is 3 feet tall.
Hi Chloe, What a wonderful project to light up Christmas. Loved the use of these bowls to construct the towers. They will really make a beautiful addition to outside or inside decor. Thanks for sharing.
Lynne, Thrifting Wonderland
Thank you so much Lynne! I am so happy with how they turned out, now I want to make an entire “forest” of them!
These are such an elegant Christmas and New Year’s touch. pretty pretty!!
Great idea! I never would have thought about breaking through the bowls using the heat from a glue gun. That’s so much easier. They look very festive. It’s fun hopping with you.
These are so cool, Chloe! I can’t believe they were so easy to make and from the dollar tree too. You are always coming up with the best ideas. Love these so much and your creativity too, lady! Hope your holiday season is a special one. Loving and pinning, CoCo
Chloe, I love these so very much!!! Thank you for sharing this beautiful and wonderful project that can be used in so many places and for so many occasions.
These lighted Christmas Ornaments turned out so cute. And I love things when they are economical. Thank you for blog hopping with us!
Hi Chloe, What a fun project! And who would have thought to use your glue gun to melt the plastic…..great idea. Merry Christmas, Penny
OMGosh Chloe! Those are fantastic! I imagine the light just bounces off of them! So pretty! It’s been fun Christmas Hopping with you! Toodles, Kathryn @TheDedicatedHouse
Thank you so much Kathryn! I always enjoy seeing what you are up to! Yes, these bowls do sparkle!
Now that is super cool. What a wonderful idea!
Happy Hopping 🙂
I love this – ice in Florida! Perfect! And those snowflake ornaments are such a great addition!
Wow Chloe! This is amazing! It looks like towers of beautiful ice!
You are so creative! Thank you for the inspiration!
~Nancy
I know I sound like a broken record but I am always amazed by all of your creations Chloe. So beautiful and such a great idea.
What an Awesome idea!!! I can’t wait to go shopping now.
Thanks for sharing.
My local Dollar Trees no longer carry any plastic dishes. Where can I find them?
I would ask around to see if someone you know (or try me) can pick them up for you and send them to you!
Love your brilliant idea.
These are so beautiful! I am going to use mirror spray paint and a vinegar spritz on the inside of the bowls before I glue them to make them look like old fashioned mercury glass.
Thank you Linne! I think that is a great idea! Please stop back and share a photo or two with me!!
I love this project. I tried the glue gun to make the holes then decided to go to my other craft love , stained glass, so I decided to use the soldering iron. It makes the holes in about 5 minutes with nice edges that don’t need to be sanded. They are beautiful and I made them for friends and they love to. Thanks for the great idea.
I have about 4 dollar trees close to me and they are carrying the candy bowls. I would love to get some. There’s several things I wanting make with them. Exactly, how many bowls. It appears you have 4 o5 big ones and 4 small ones. Am I correct?
I made the ornament this past Christmas, but I have been unable to find the sugar bowl top. Do you have any suggestions?
They have not been selling those for a couple of years now. I will look around and see if I can find something that would be a good substitute.
Hi I just wanted to say that I would cover the light box in the bottom of the bowl with a colored foil or just plain foil so that you didn’t see it
I adore this. I saw something for sale…$150… with this look. Couldn’t afford. I just saw this… make it myself for “dollar store money”… Yeah!!! One question. How to secure in a planter so that wind will not knock over??
Thank you so much! YES! This won’t cost you much at all to make! I think I would consider putting some heavy rocks or bricks in the bottom bow. I am not sure if that will do the trick. If not, maybe elevate it in a planter and use some fine floral wire to secure around the bowls so they don’t flip off of it.
I’m sorry, but this is freaking beautiful. I’m doing it!
Thank you so much!