
DIY Christmas Ornament Topiary
Have you seen the beautiful Christmas ornament topiaries for sale? Have you seen the outrageous prices? They do make a lovely outdoor Christmas decoration. Keep an eye out when these oversized shatterproof oversized ornaments are on sale. None of the stores seem to carry a large inventory of these for the entire holiday season, so you will want to get yours early Pick yours up and you will be ready to make your own tall ornament topiary! This is actually and easy project and creative way to add Christmas cheer to your front porch!

I seem to always be wanting to make topiaries of some kind for my outdoor Christmas decorations. I really liked the topsy turvy gift boxes that looked like giant Christmas presents that I did last year!

Someday I keep telling myself I am just going to put a slender Christmas tree on each side of the front door! I have so many great ideas, but there is only one Christmas season each year! Just wait until you see what I do next year!
I had been wanting to make a Christmas ornament topiary for a long time, and finally a couple of years ago I found the right combination of ornaments to create mine! I finally settled on these red and gold ornaments and went to work! To tell the truth, I had these ornaments for a few weeks before I began this project, but on this particular day my Mother informed me that my Dad had been feisty, and didn’t I have a project for him! This is what sometimes happens when your parents live in the apartment above your garage.
This post contains some affiliate links for your convenience. If you make a purchase, I receive a small commision. Click here to read my full disclosure policy.
Supplies:
Oversized Christmas ornaments
Peppermint Christmas ornaments
12″ Christmas ornaments
Hot glue gun
Wood dowels
Terra cotta pot or urn
Floral foam or styrofoam
Select your ornaments:
Choose a selection of at least three graduated sizes of ornaments, using shatterproof or plastic ornaments for your topiary. I selected two large round ornaments of different sizes, one red one with a gold glittered pattern on it.
Make an ornament topiary:
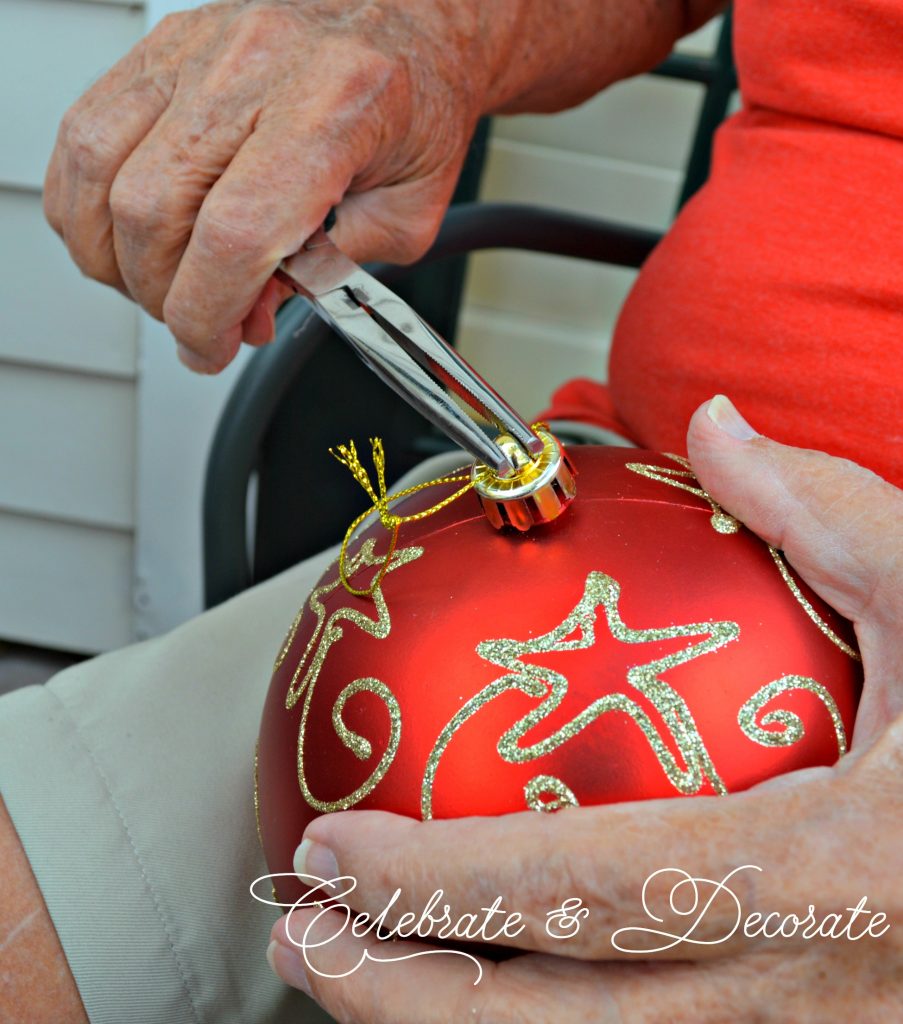
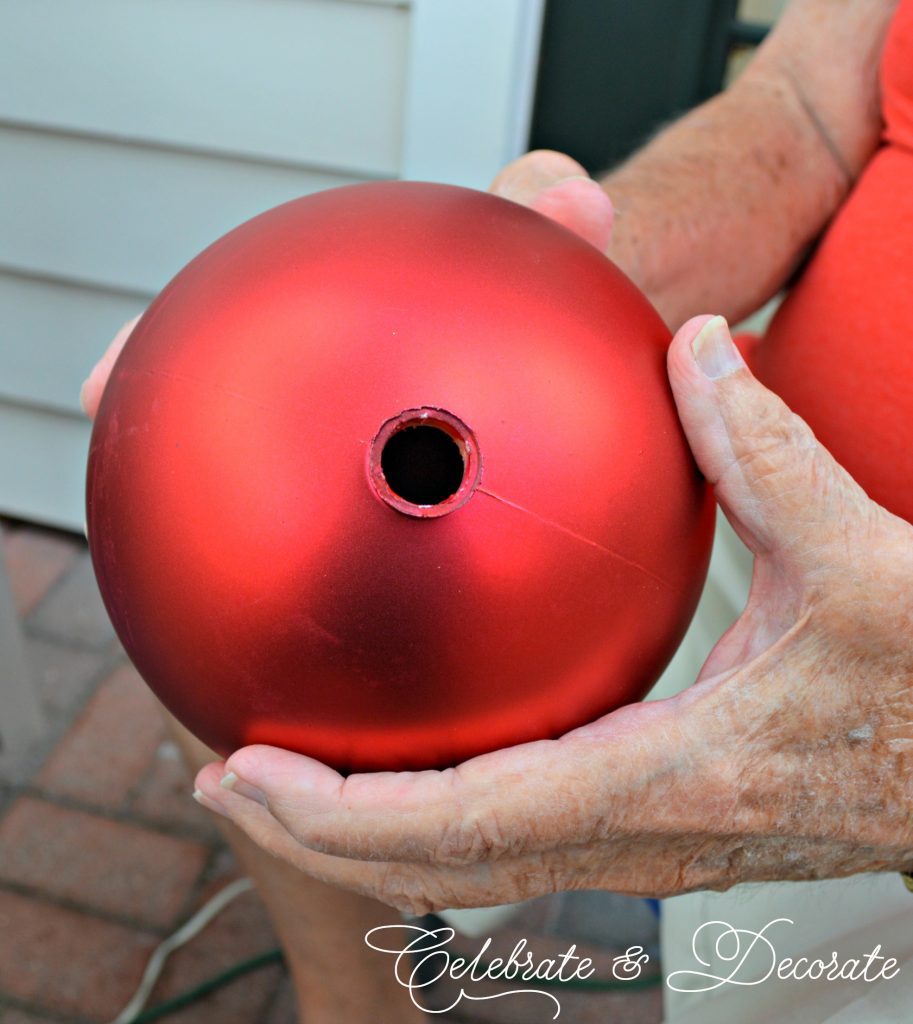
I had my dad helping me and had him pull the tops off of the ornaments. Use a pair of wire cutters to pull those off. They pop off quite easily.
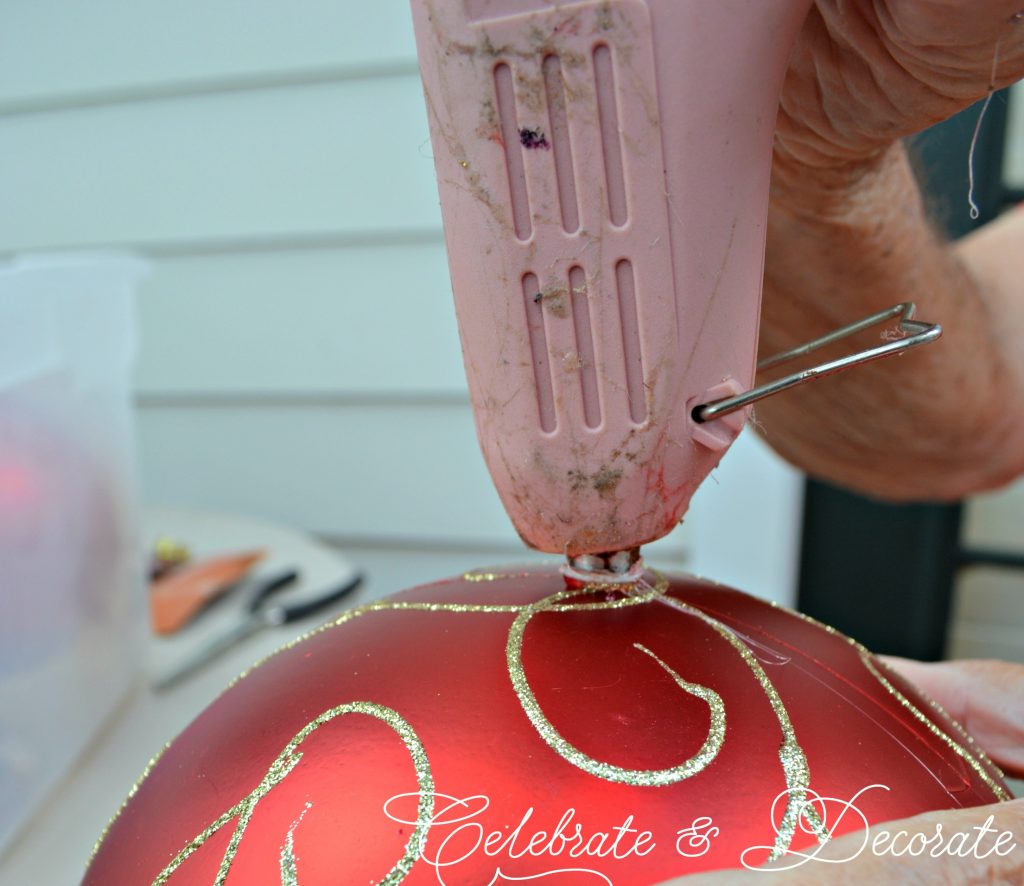
I used an old glue gun without any glue in it to make the hole a little bit larger after removing the ornament holder. You will want to use something sturdy like half inch wooden dowels to support your topiary.
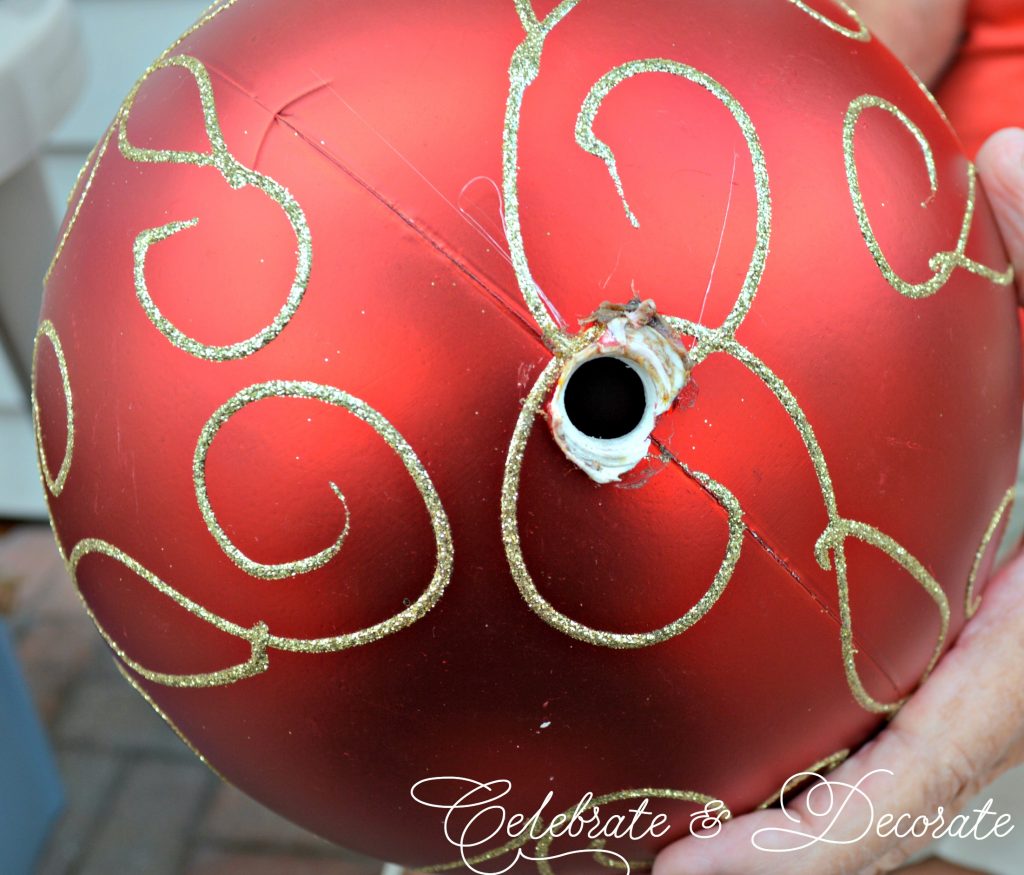
Push the wood dowel down through your ornament to determine the bottom opposite the initial hole and make another hole with your hot glue gun. Repeat that process on your second large ornament.
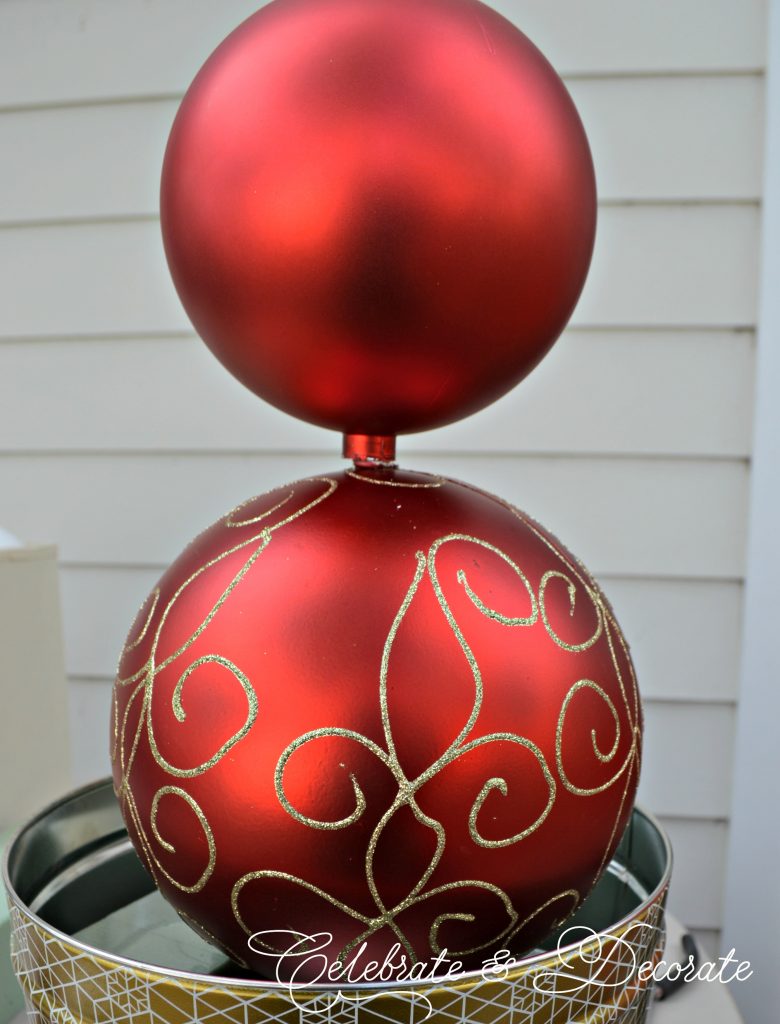
You will finish with the large Christmas ornament on the bottom of your stack on the dowel rod.
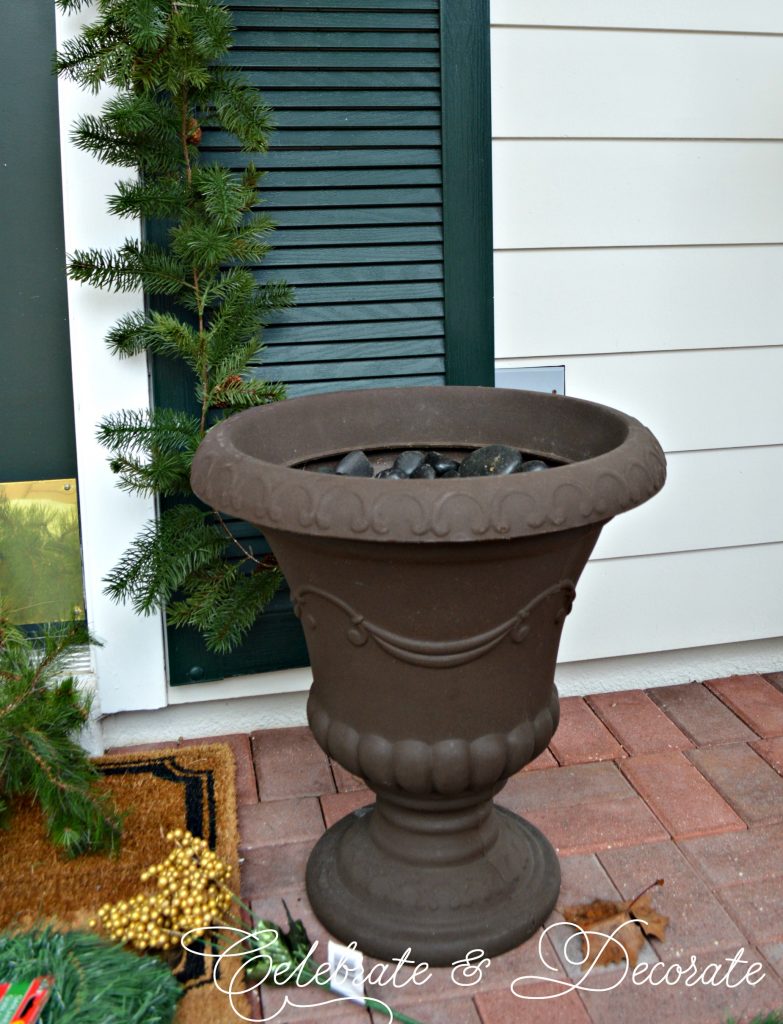
I am going to put my topiary in one of my urns by my front door. I usually have sansevieria in these pots, but I pulled them out and put them in the backyard for the holiday season.
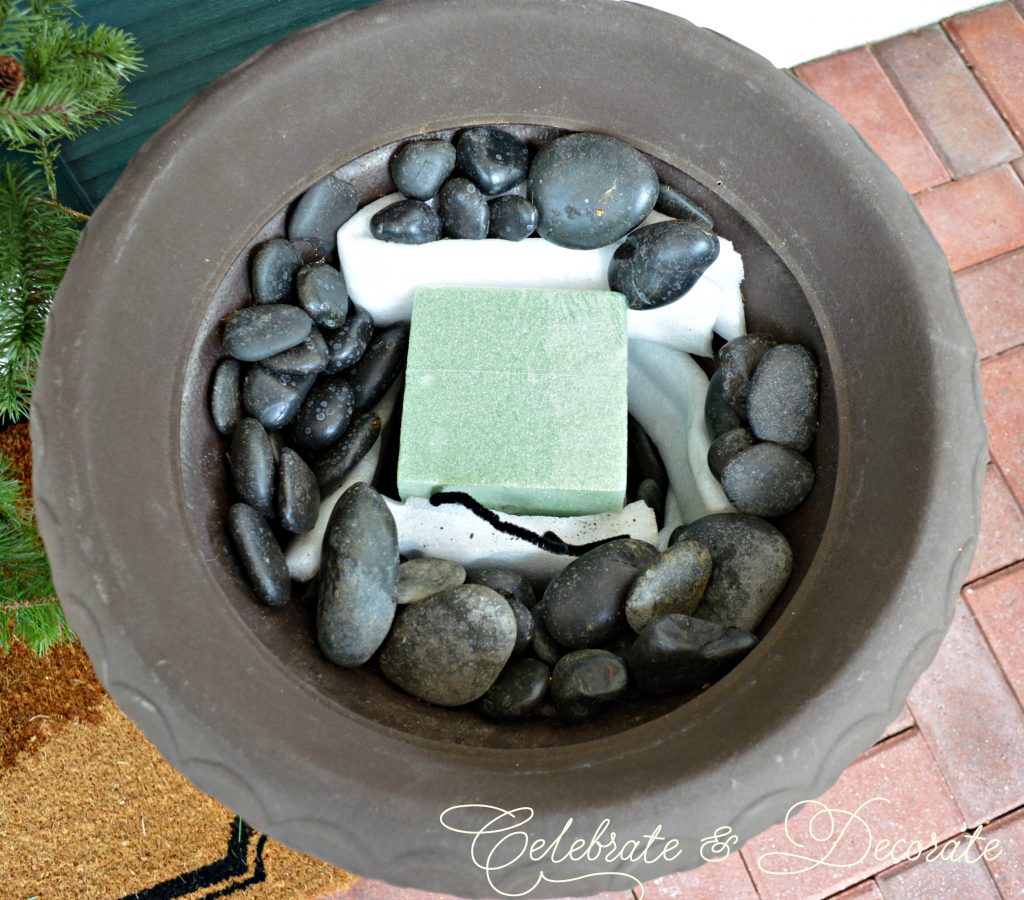
This is how the inside of my urn looks, the foam and the rocks surround my plant when it is in the urn, for this application, I wedged a square of styrofoam firmly into the urn.
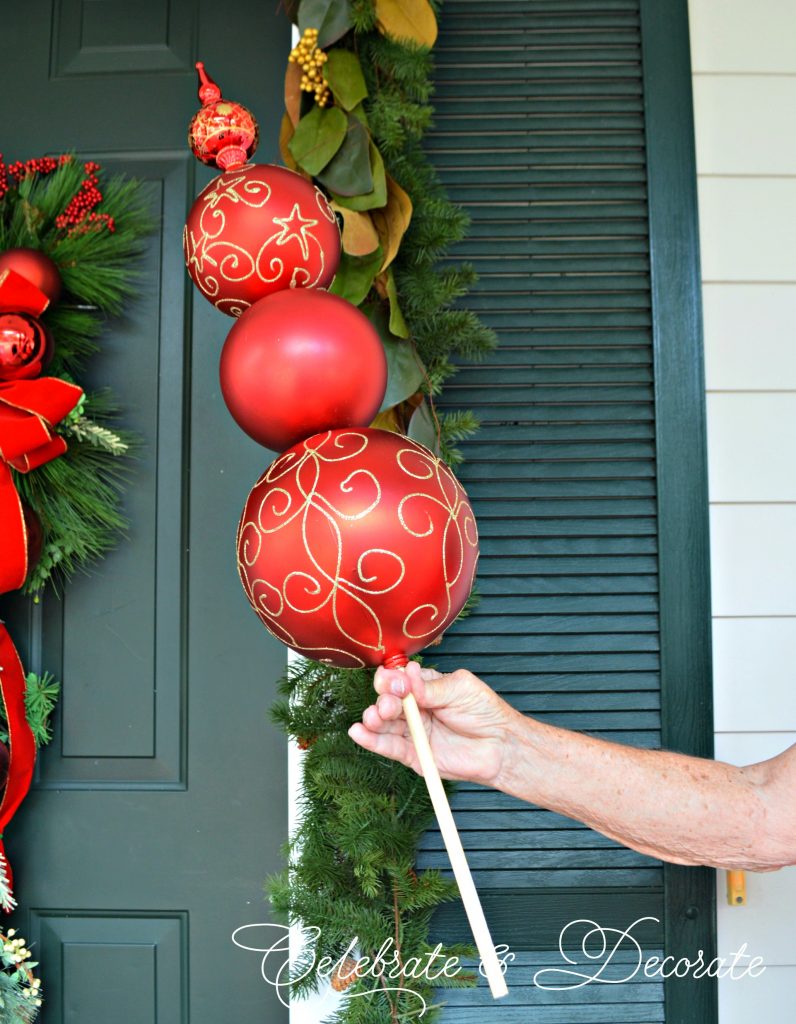
This is how my topiary looks. If not holding the bottom ornament, they would slide right down the dowel. The dowel I used is three feet long. I did not have to cut mine, but you might have to trim one down depending upon the depth of the container you are putting your topiary into.
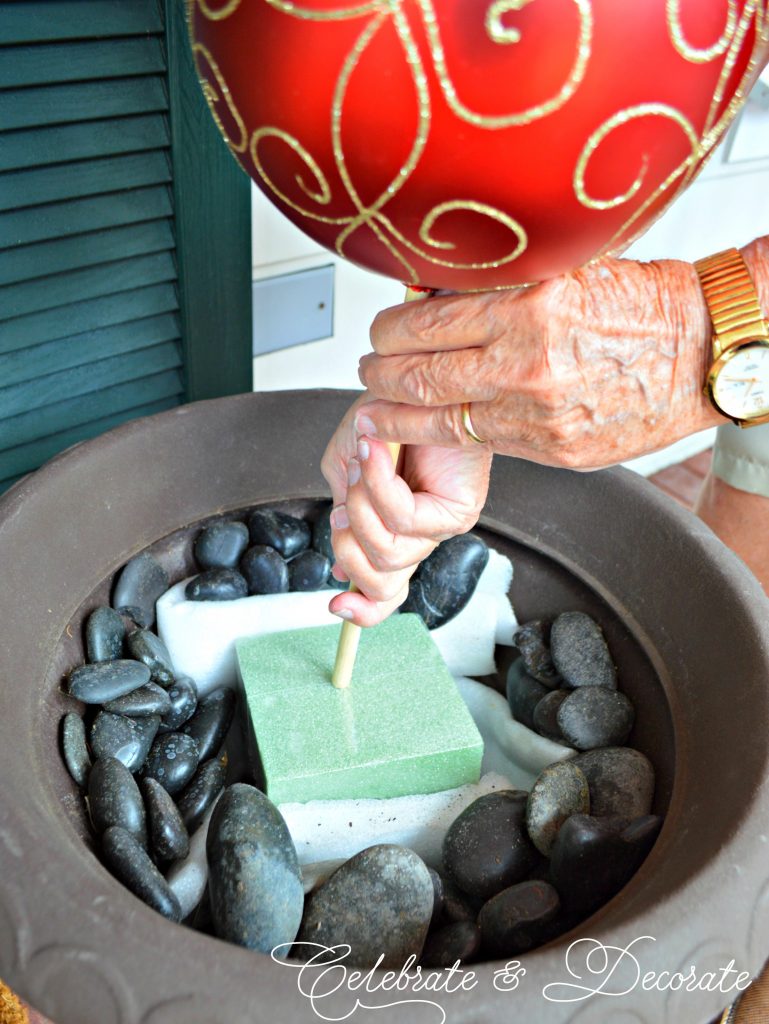
I could simply push my dowel rod down through the cube of styrofoam and down to the bottom of the urn.
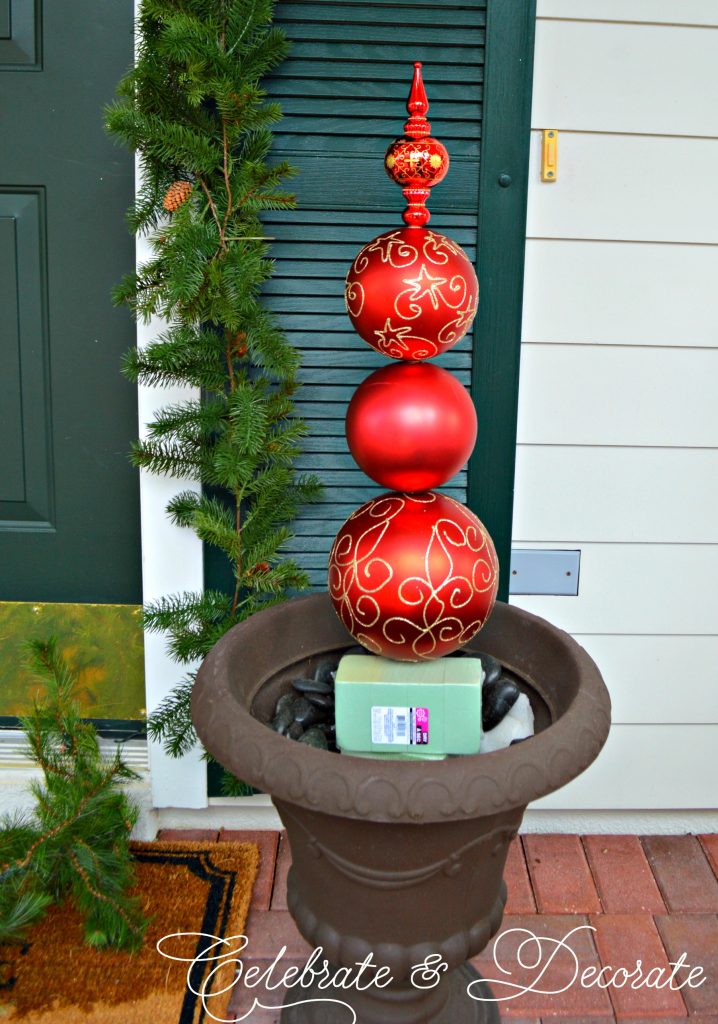
I found that my urn was not quite deep enough to support my topiary where I wanted it, so I added two small blocks of dry floral foam, one in front and one in the back of my topiary.
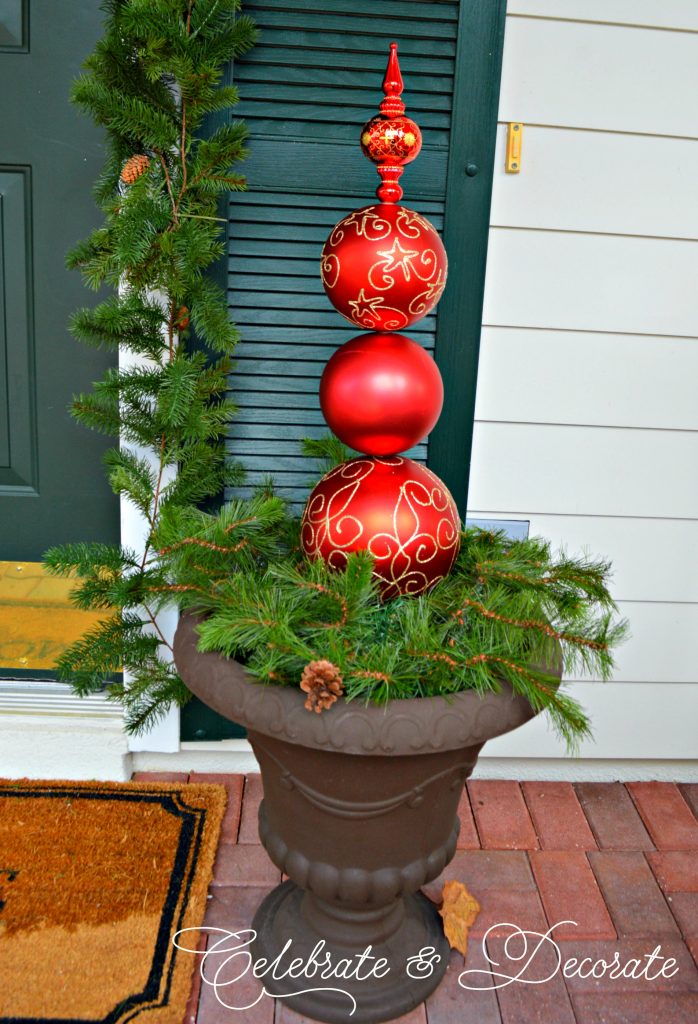
I added a garland to the base of the topiary, tucking it into the urn so it will not come loose. Then I added a pretty red ribbon for a festive holiday look!
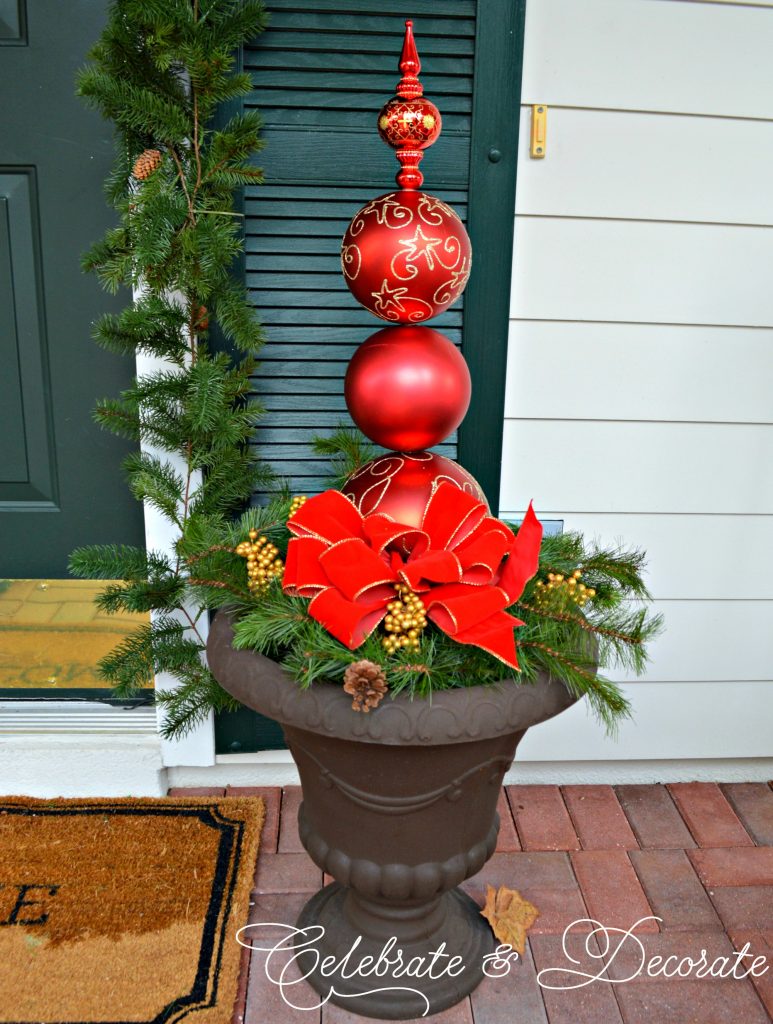
Make your own topiary for a fraction of the cost of the catalog versions, and get to pick your own colors and styles!
If you would like to see more of my Christmas diy projects, take a look at these:
Snowman Ornament Topiary
Christmas Package Topiary
Christmas Tree Topiary
Such a pretty idea and how wonderful to be able to involve your parents.
Thank you! Oh yes, Dad enjoys helping with all my DIY projects! It is a blessing!
Chloe, I love these. I just purchased some of these (completed) after lusting over them in a catalog for years. Having your dad to be able to help you make these is wonderful, and they turned out very nice, at a fraction of the cost!
Thank you Rita! I just couldn’t bring myself to pay what they are asking for them! Having my dad close by is such a blessing and he really likes having projects to work on…he keeps me hopping!
Remember last year when I said I ordered those topiaries? Well, they never came, and I eventually canceled the order. I think with your inspiration, I could make those. Thank you. Now, where did my get up and go GO??!
Happy Thanksgiving. 😉
They are beautiful.
Chloe, I have always loved the ornament topiaries in the high-end catalogs. But, yours IS just as beautiful.. and your Dad helped…love this!
Beautiful. Looks so easy and the directions you gave are so understandable. Thank you for sharing.
I love the idea your dad is there to help you. Such a bigger blessing.
Thank you so much Ann! I am so fortunate to have my dad living in the apartment above my garage!
Looks great, Chloe! Very ingenious! I am so impressed.
I could use your Dad around my house. He would never be bored there is so much to catch up on.
Thank you Bonnie! It is fun to have him close and my Mom always appreciates when I give him a chore!
Thank you Louise…The dowel is 1/2 diameter, 36 inches long. The one on the bottom is an 8″ ornament, the next two are 6″ ornaments. The ornament on the top is about 5″ tall. I hope that helps!
Thank you Chloe for your help. I can’t wait to get started!
By the way, I love the name Chloe.
I love this idea!
What a cute idea!
Beautiful! I love the big ornaments!! Looking forward to finding some!
Good luck on your hunt, this was a bargain compared to buying one!
What are the sizes of the 4 ornaments?
I so love this I hoping to make one for Christmas!
Thank you so much, I really agonized over the colors and arrangement. I hope you have fun creating your own and please share pictures of your results!
This is so beautiful that I had to go shopping right away to get all the items to make it. But I am afraid to start it as I don’t know how you stopped the top ornament from falling off. Can you share your secret please and thank you?
there is no problem with the top coming off, as it rests on the dowel. If you are concerned about it, you can simply turn the top ornament upside down, squeeze some hot glue into it and then stick the dowel into it and hold it until the glue has secured it.
Thank you. Our front porch is in a windy area and the plastic ornaments are so light in weight that I would worry the top one could take flight in the wind. So hot glue it is!
Maybe a brick inside the planter, so it wouldn’t tip over in the wind.
My urn is heavy enough, but that is a handy idea!
What a cute idea! I love that your father is hands on for things like this. I didn’t imagine that you cold get a dowel up through them but your method worked perfectly.
Love this! What size are the ornaments and where did you buy them??
Very clever and beautiful!
Loved this the last time you showed it. Hopefully, this year I will get around to making it. Competition is stiff in our neighborhood at Christmas-and they started early this year. Finding the onion type/sphere ornament on top was a challenge last year when I was making an arrangement.
I love that your dad helps out.
I just signed up and LOVE the topiary!!! Plan to make it!!!
How nice to have your Dad there to help out. You guys are an awesome team!
Where did you find ornaments that large? We can’t find them anywhere We love yours!!!
I find them at some different locations… At Home, Home Depot, Walmart, etc. Good luck!
This is so pretty! It makes me want to change my holiday planters now. LOL Pinned 🙂
Thank you Marie! I am SO ready to decorate for Christmas, myself!!
Thrilled to see you at TTA this week, Chloe… and this Christmas ornament topiary is just amazing! I’ll be featuring you this week! 😉
Chloe you are such a creative person. This is such a wonderful idea, and having your parents around is indeed such a blessing. Growing up my dad was always the one preparing for Christmas as he was very handy as well. Can’t say how much I miss him. This is a beautiful project. Keep calm and continue to be creative. Happy Holidays!
Thanks so much Edmee! Yes, I am so blessed to have my parents nearby!
Using a hot glue gun to bore the hole in the ornament is so ingenious and the finished product looks very expensive.
Thanks so much Sandra! They do look almost as good as the ones that cost over $100! Merry Christmas dear friend!
Hi these are fabulous I have been trying to purchase large christmas baubles sent away to amazon uk the were tiny they not always put size on sent them back hopefully by this year be able to get them plus tree topper. Scotland don’t do large getting a bit better hopefully this year
Good luck on your search!
These DIY are suuper cool and amazing am so happy to read it you made my day
These diy made my day ,,,,,,,,,,,,,,,,,,,,,,,,,,,,,,,,,,,,,,,,,
Thank you so much
Hi Chloe – Beautiful! Thanks for showing this. — Last year after Christmas in our Michael’s store, there were 2 large bins of the oversized plastic ornaments – on sale – steep discount! I thought “score!!”. So I bought several with a topiary in mind. I thought about it all year but still have not started. I couldn’t come up with a way to make those holes. I was afraid drilling would shatter them but I couldn’t think how to melt it. Super clever idea about using the glue gun without glue! I’m going to try that. And maybe I’ll try my dremel on some of them instead. Sooooo clever you are! Thank-you!
Thank you, and you are welcome!! I hope you have been able to build your own topiary!! I always ended up cracking my ornaments when I used a drill or a dremel. Share a picture!!